Hydrogen Embrittlement
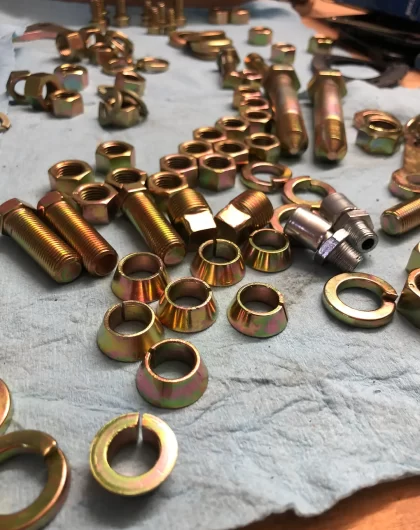
Now that I plan to routinely remove the old plate with at 20% muriatic acid solution before blasting in order to avoid contaminating my electrolyte I began to worrying about hydrogen embrittlement. This is a issue that I’ve run across a few times while researching electroplating. As I understand it, the idea is that hydrogen ions freed from the HCl solution while the metal is in the acid get trapped inside the metal and make the part brittle. This can lead to failure while in use. However, based on this summary of hydrogen embitterment (see page 11) and the Rockwell Hardness (HRC) material strength values given by Fuller, I really only need to be concerned for nuts and bolts with hardnesses above 10.9. so in possibly all cases I should be fine but I will keep an eye out for bolts and nuts above 10.9.
Updated Plating Setup Test Run
I spent quite a bit of time tinkering with the plating system this weekend and have made some progress but I still have a little work to do.
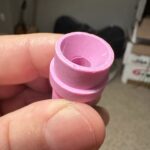
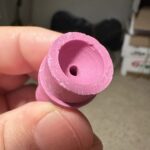
Starting with the metal prep, I upgraded my compressor to a 30 gallon Campbell Hausfeld 30 Gallon Vertical Portable Air Compressor (XC302100). This compressor is awesome! It is quieter than the Makitia and keeps up with my sandblasting air usage. It really fits the bill. I also changed out the aluminum oxide blasting media with extra fine glass beads and I replaced my 4mm blasting nozzle with newly purchased 3mm nozzles. When I first went to test the new setup only air would come out of the gun and it wouldn’t pick up any media. For a little while I was thinking I was going to have to go back to the aluminum oxide and see if it was the glass beads that was the problem but I remembered a review of the 3mm nozzles on Amazon that mentioned that the nozzles did not work in his setup because of the spherical shape of the inside of 3mm nozzle. So, I tried the 4mm nozzle with the conical intake and it worked beautifully. I’m not certain it is the shape of the nozzle intake or if it is the orifice size or the position of the hole relative to the air jet, but I wasn’t picking up any media at all with the 3mm nozzles. I imagine the 3mm nozzles work in other guns but as they are, not in mine. It may be possible to ream these nozzles out a little to get them to work but I have not tried this yet.
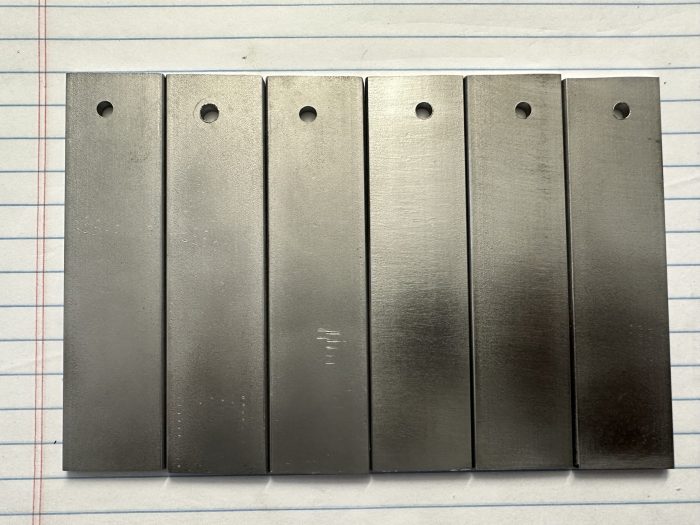
As far as the new blasting material goes. The glass beads give a beautiful finish that is nearly as shiny as wire brushing without the striations. I’ve plated steel billets wire brushed on one side and bead blasted on the other and I can’t tell which is which.
I also added a recirculating pump to the plating tank which does a nice job of keeping the fluid moving. I did have the pump choked back a bit on the pressure side and it started to cut out after an hour or so of use so I removed the restriction and it sounded better but we will have to see how long it lasts. I added in two new zinc anode strips placed in the path of the circulating electrolyte. I also added dedicated rinse tanks for each step to reduce chances of contaminating the electrolyte and chromates.
I’m pretty sure that the dark plate issue was due to a contaminated electrolyte solution. The pH of the electrolyte is supposed to be in the 5.5 to 6.0 range solution tested above was above the upper limit of 6.2 on my pH strips. When I ran a baseline test plate with this solution I could see zinc precipitating out on the billet. I made an attempt to lower the pH with muriatic acid but I over shot it and my pH end up too low. So, end I changed the solution out completely. Then I tested a billet without the brightener and one with the brighter for comparison.
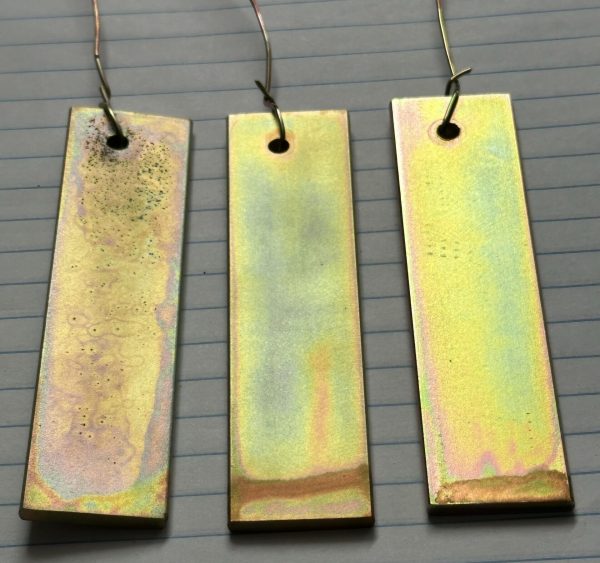
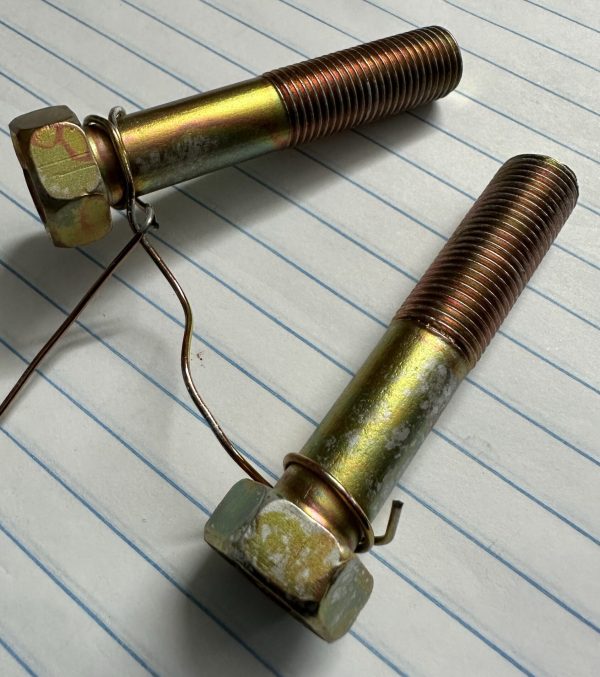
Finally, I updated my acid pickles. I’ve been a little confused on the concentration of the solution. The manual says 5% muriatic acid for the steps between degreasing and plating and plating and chromating. The muriatic acid I have from the hardware store is 20 baumé which is about 32% HCl so it makes a big difference if the solution is supposed to be 5% muriatic acid or 5% HCl. When I started plating last year I saw the 32% acid marked on the bottle and used that number in my mixture calculation. When I when back this time and reread the manual to troubleshoot my dark plating issues I noticed that the manual always states the concentration in percent muriatic acid and I though ‘Oh man! I made my original pickle too strong!’ and so I made a 5% muriatic acid pickle. Then with all of the plating upgrades made and the test billets coming out ok I when ahead and plated a series of bolts, washers and clips. Everything was coming out great and the parts looked really nice when I hung them up to dry but the next day I noticed that the chromate was flaking off. I believe that this is due to having the HCl concentration of the pickle too low for the step between plating and chromating and that the zinc plate is not sufficiently etched to bond strongly with the chromate.
Electroplating Test Billets
Procedure for test Billets
Billet A
- Sand blast both sides with glass beads and wire brush one side
- Degrease billet for 5 minutes at 190° F
- Rinse and verify water break, if test fails replace degreaser
- Dip in 5% Muriatic solution for 3 seconds
- Rinse thoroughly
- Verify pH of plating solution is between 5.5 and 6 (down to 4.7 is ok, above 6.3 will precipitate zinc)
- Plate billet in agitated 110° F solution for 25 minutes at current of 0.42 amps (0.5″ x 3″ x 2 sides * 0.14 amps/sq. in.)
- Rinse
- Dip in blue chromate for 30 seconds (note temperature of the bath)
- Rinse
- Dip in yellow chromate for 14 seconds at 80° F
- Dry with compressed air
Billet B
- As above but plate dummy billet for 30 minutes first
Billet C
- As above but add new anodes
Billet D
- As above but with new plating solution (without brightener)
Billet E
- As above but with brightener
Billet F
- As above but without blue chromate step
Sand Blasting Considerations
I have been thinking about how to update my sand blasting system….
My Goals:
- Use glass beads instead of aluminum oxide to leave a more shiny finish that can be plated directly after blasting
- Have an air source sufficient for supplying continuous air without damaging my compressor by exceeding the duty cycle
- Add better lighting to the blasting cabinet
Equipment Details:
Blasting Cabinet:
- King Benchtop Abrasive Cabinet 4004-0
- Rated to 5 to 15 cfm at 40-80 psi
- Came with one of each nozzle: 4-5-6-7 mm orifice, I ordered a set of 3mm orifice nozzles hoping to reduce the air consumption a little.
Blasting Media:
- I started out using 80 grit aluminum oxide that i order thru Amazon. It worked fine but it was quite expensive for only 8 lbs so I found a 50 lb bag of 70 grit aluminum oxide at Harbor Freight for a much better price per pound. The 70 grit worked well but aluminum oxide leaves a dull sheen that requires additional wire brushing before plating. I’ve read that glass beads leave a more shiny surface so I’m going to make this change and see if I can skip the wire brushing step.
- I bought two types to test, fine and extra fine beads. I’m going to start with the extra fine beads and keep the fine for backup.
- 8 lb box of fine beads
- 53 lb bucket of Ballotini Blast Media, Glass Beads, Extra Fine which is a significant cost savings
- If using the glass media turns out a nice finish but is not aggressive enough, I will consider getting a second blasting cabinet so I can blast with Aluminum Oxide for the rough work and then finish with the glass beads.
Air Compression:
- I’m have an nice Makita compressor (MAC2400 2.5 HP Big Bore Air Compressor) but it is really designed for the jobsite to supply multiple nailers. It has a pretty decent 4.2 SCFM @ 90 psi which almost keeps up with my blasting but its duty cycle is 50% and I’ve pushed this too hard on a few occasions.
- I would be willing to invest in a stand up compressor and I would love to have an 80 gallon two stage compressor but I don’t have 220 volt wiring available and though I don’t mind getting that done, I really don’t have the space in the garage. So my plan is to get a 30 gallon compressor that runs on 110 volts. I will get a Campbell Hausfeld 30 Gallon Vertical Portable Air Compressor (XC302100) two stage compressor that runs on 110 volts but can be rewired for 220. I’m guessing there will be a duty cycle limitation running it at 110 volts (I haven’t found one stated in the manual). If needed, I will mess around with combining the output from the Makita with the 30 gallon to boost my CFM above the sandblaster consumption. I’ve seen where running the glass beads at over 70 psi will reduce their longevity so I’m hoping that running at 60 psi with the small 3mm orifice will work with the glass beads, reduce my air consumption and help the compressor(s) keep up.
Shopping List of Parts for Updating Plating Setup
- Plating table list
- (10) Gallons of distilled water
- (1) New zinc anode from Caswell
- (1) Spray bottle
- (2) Rectangular rinse tanks
- (4) 3 gallon plastic pals with lids to store old chemicals
- (8) Heavy duty alligator clips
- 3′ of 10 gauge copper wire
- (4) Glass thermometers
- pH strips that can measure from 4.5 to 6.5 pH
- Improved agitator
- Fluid pump
- Regulator valve
- Dispersing cone
- Blast cabinet list
- 60 gallon compressor
- (1) Dryer line splitter
- (1) Dryer line extension cord
- (1) Blast cabinet light socket and bulb
- (2) Boxes of glass blasting beads (fine)
- 60 gallon compressor


