Jim at TLC performance finished the carburetor restoration in November but the USPS lost it during the return shipping. That was sad news for sure. Jim is now working on one he found on ebay.
Jim informed me that…
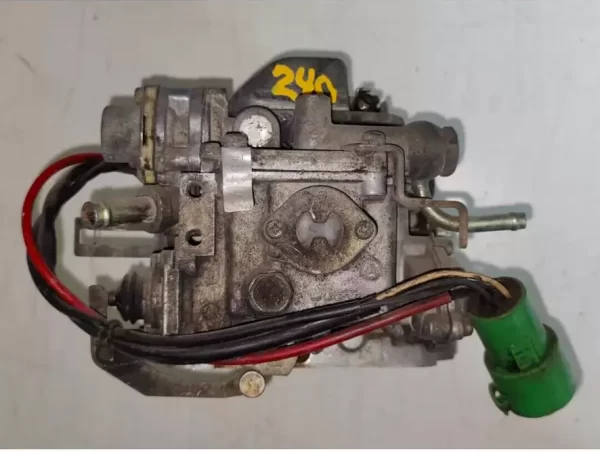
“It is a 1983 Federal carb, so has a couple of slight differences compared to the missing carb, none of which are deal breakers.
It doesn’t have a A/C idle up actuator that raises RPM when AC kicks on at idle. Temporary solution: turn up idle speed slightly so AC doesn’t lug the engine down at idle.
Doesn’t have a small vacuum pipe that connects a port on side of carb to vac hose in front. Solution: extend vacuum hose to reach port on carb, bypassing 4″ pipe.
Has extra (unnecessary) throttle return spring gizmo. Solution: remove return spring assembly.
Has 4 extra emissions vacuum fittings. Solution: cap off unneeded fittings.”
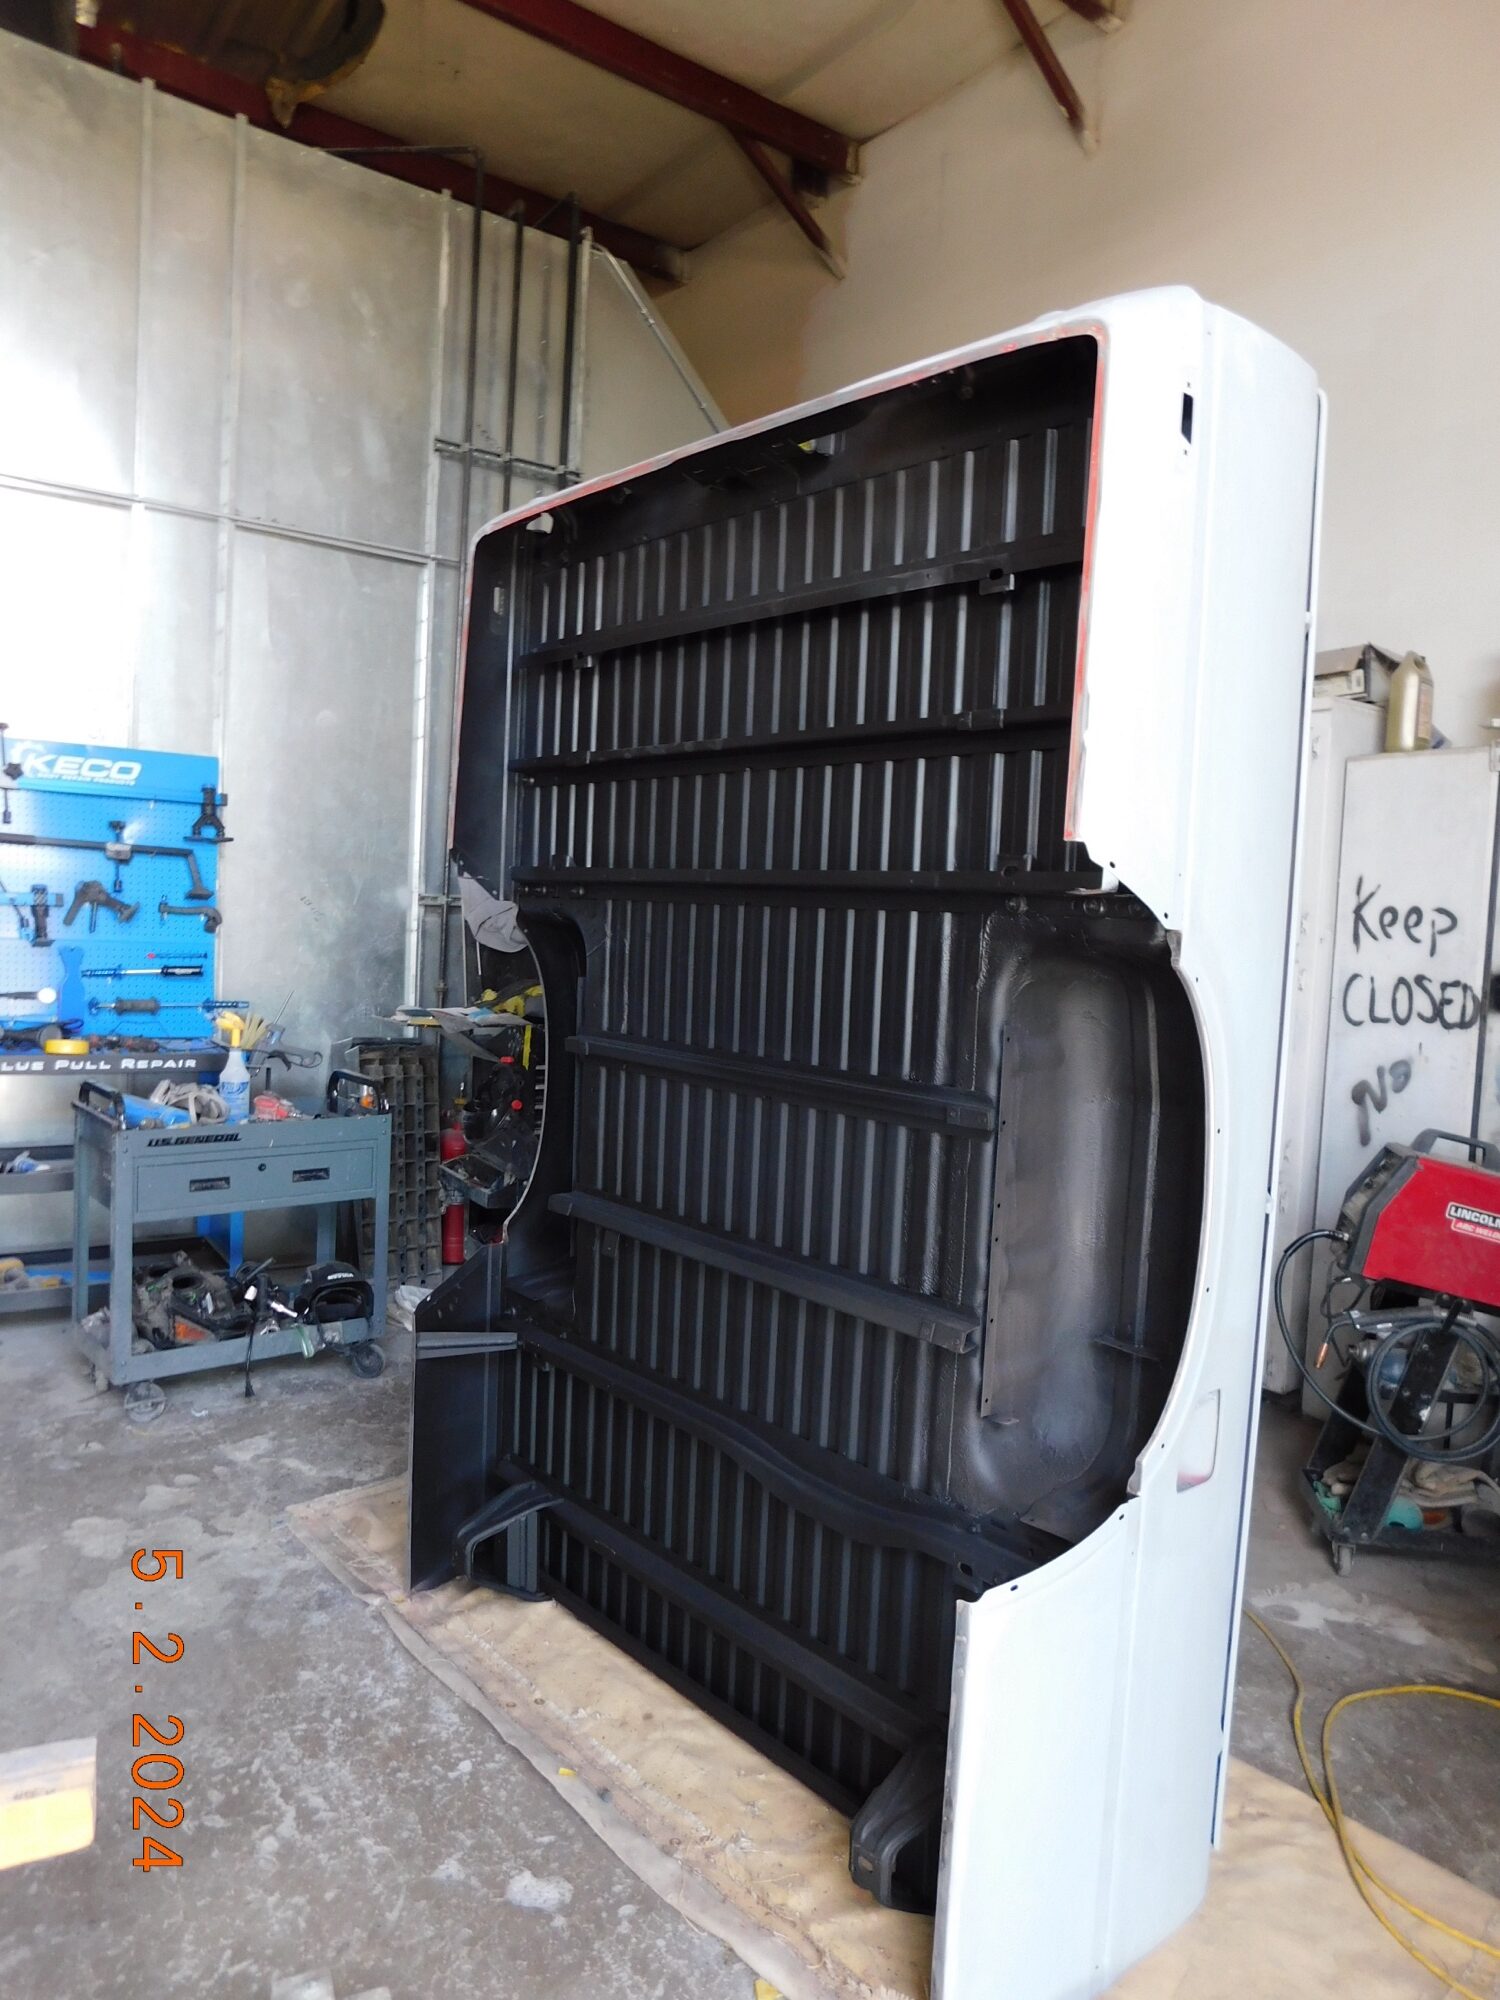
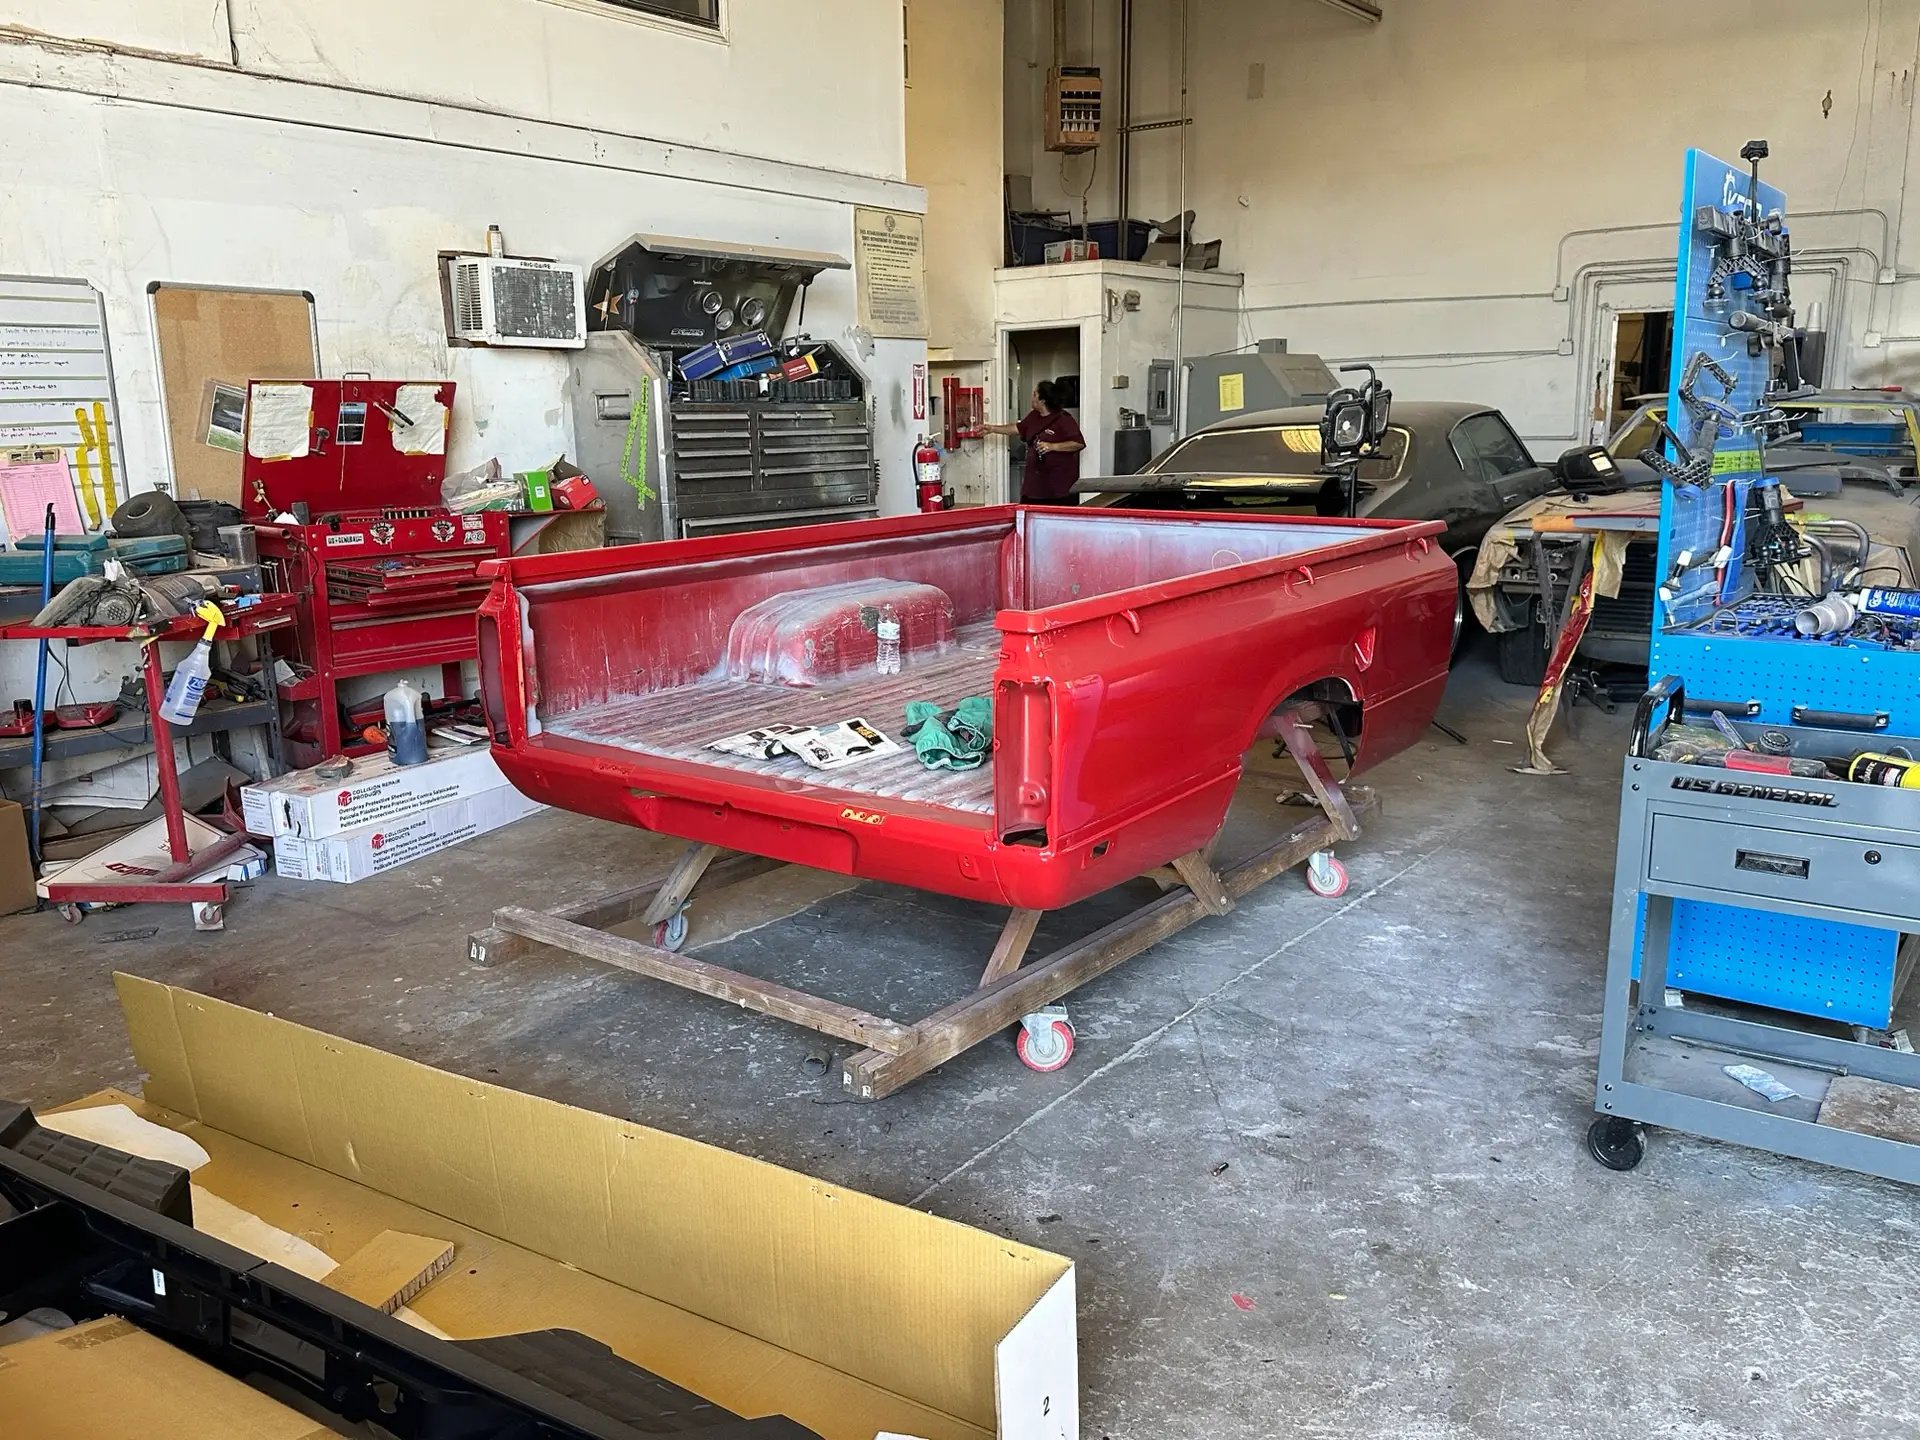
I stopped by Alex and Myra’s today and Myra had a surprise for me! The bed was pained! And it looks awesome!!! I love that color. There was no limit to the amount of anxiety about choosing the paint color but Alex did a great job matching the original color. I’m super super excited
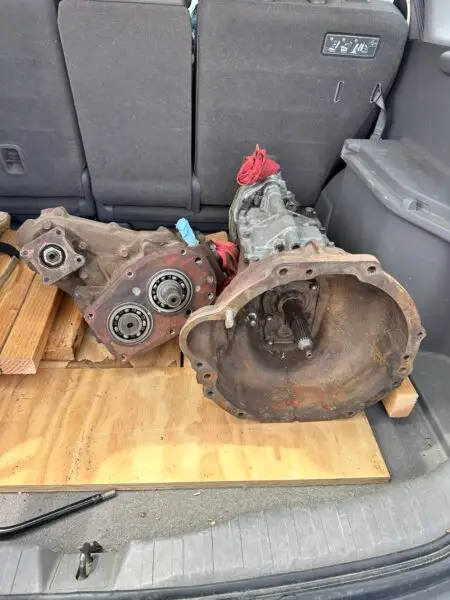
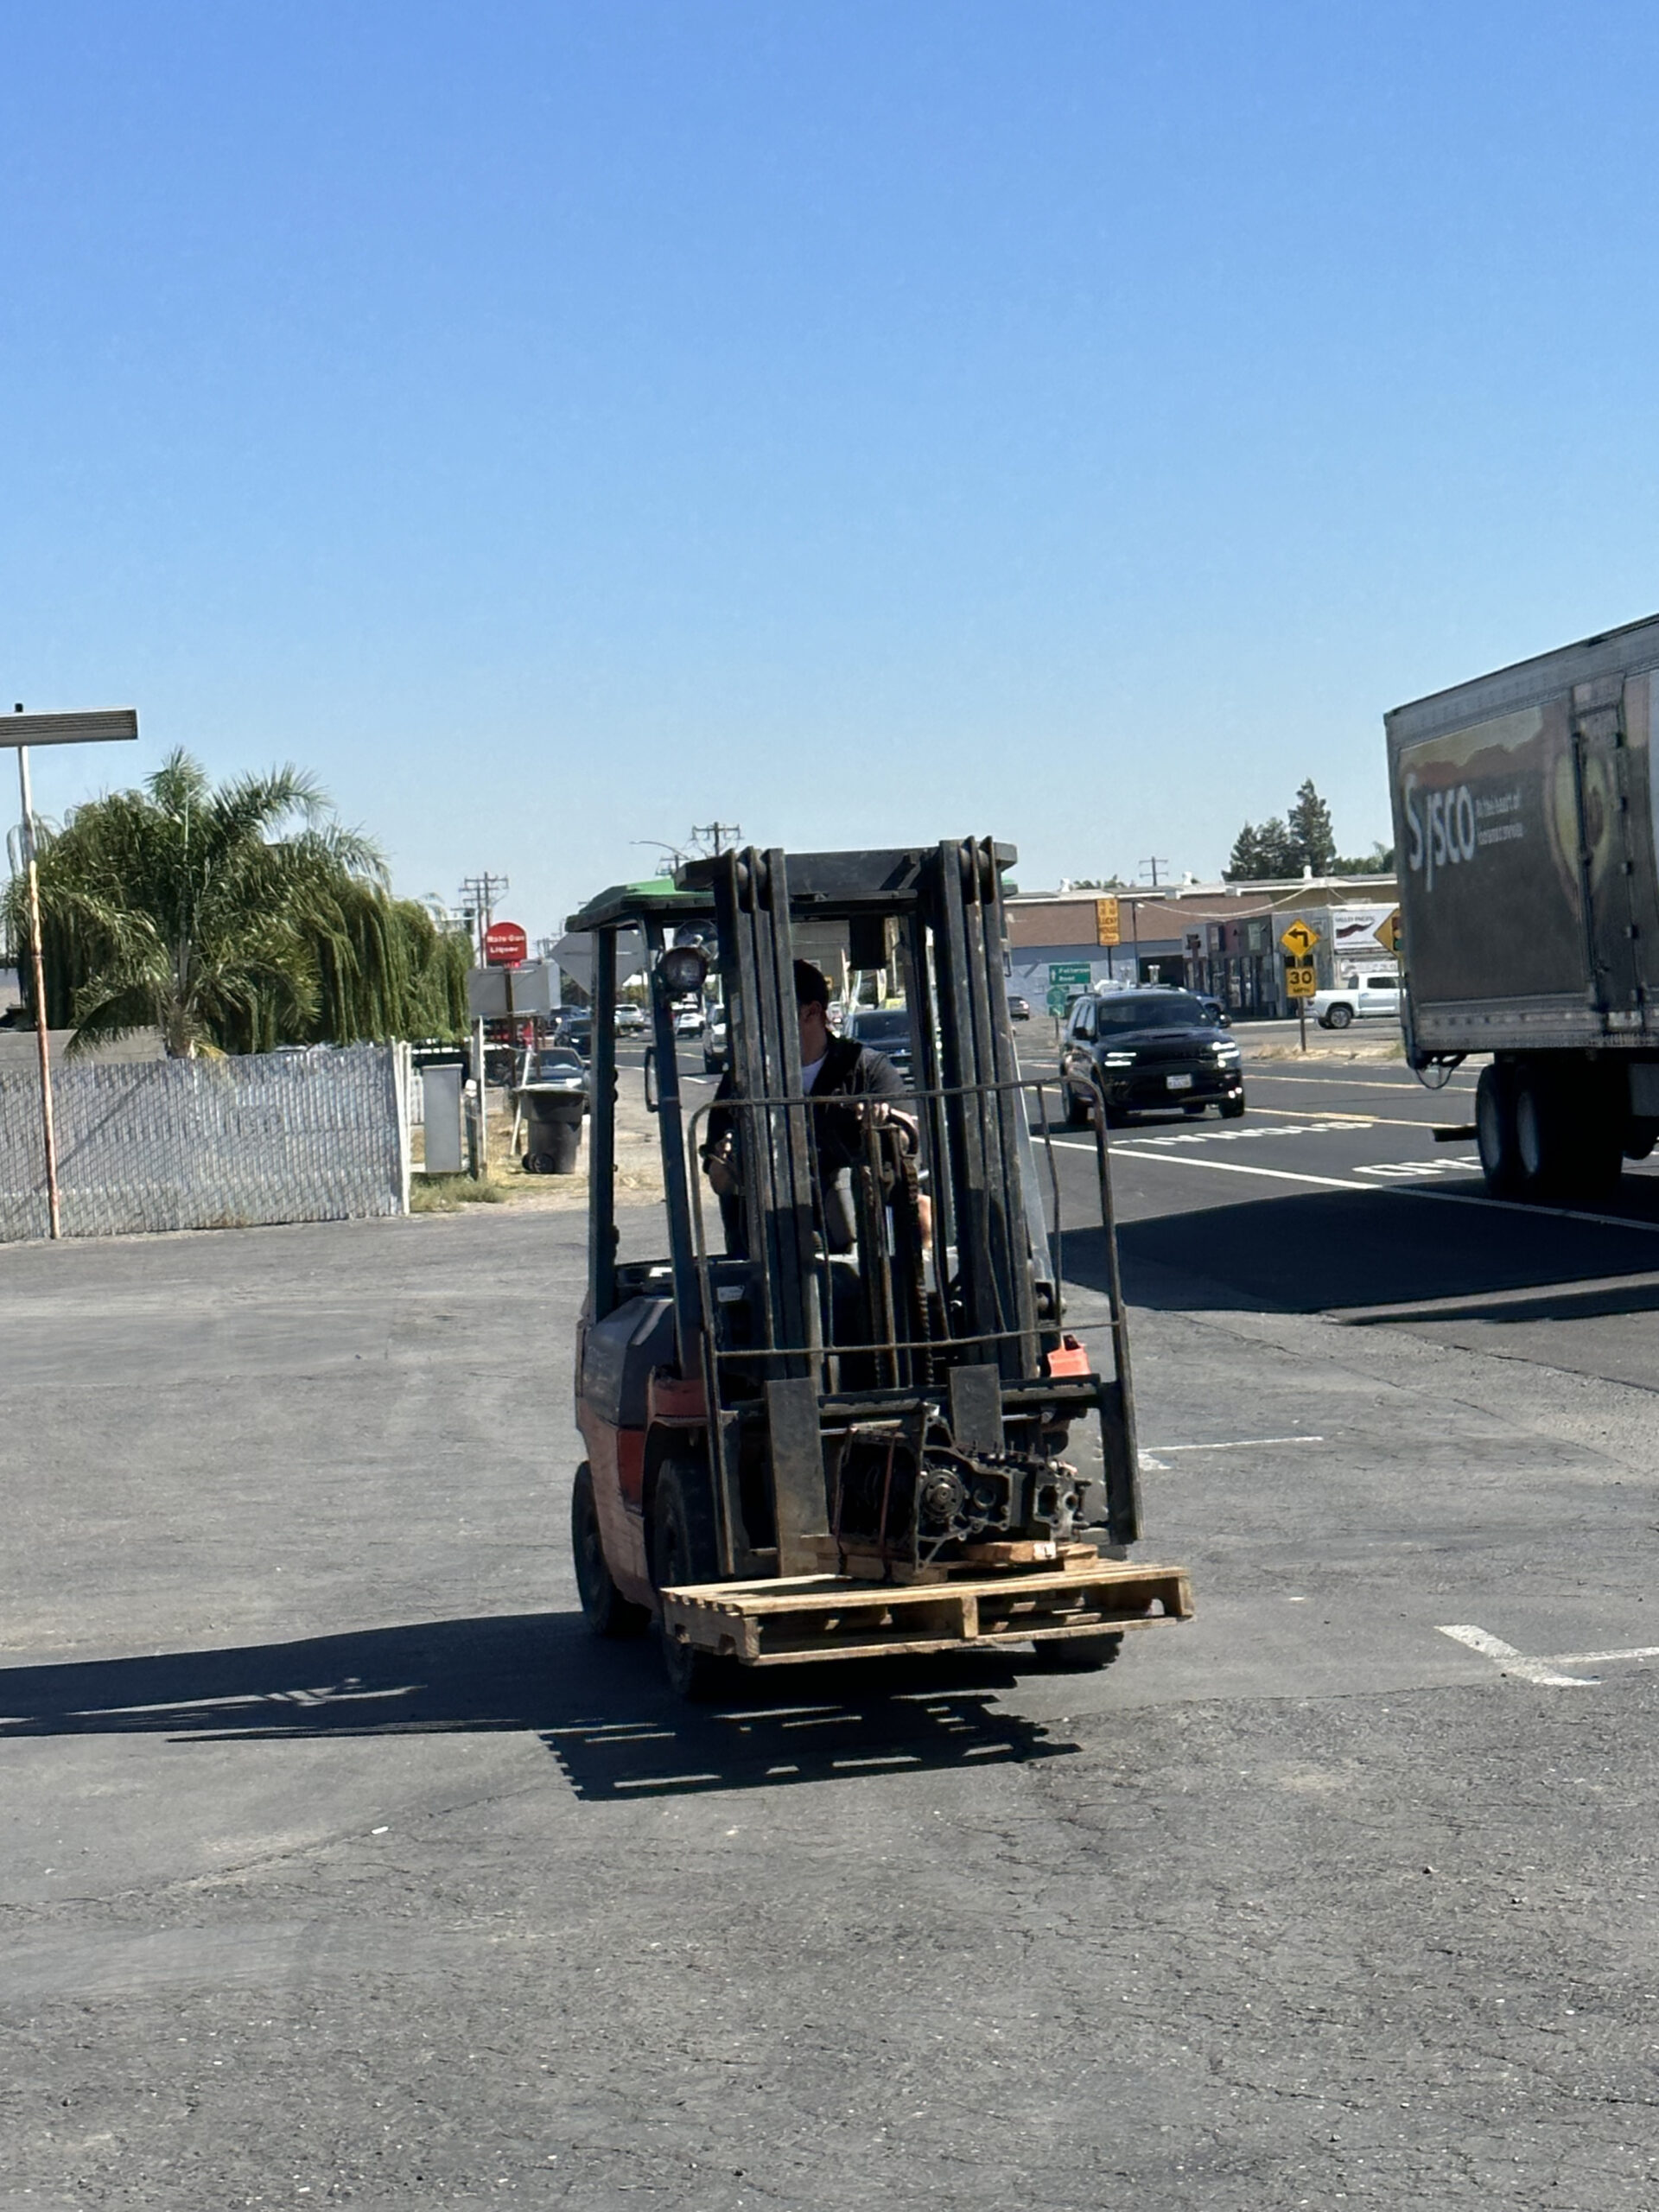
Today we took the transfer case and L52 5-speed transmission to Yota 1 to swap out for a rebuilt transmission and a transfer case. Originally, I was planning to add a crawl box from Marlin. That would require cutting out the floorboard and modifying the drive shaft. After talking to Tom down the street who always has great insights, we decided to gear down the transfer case to 1:4.7 (stock is 1:2.28). I’m super excited about this idea!
We dropped off the cores and while this post is backdated, we got screwed big time by Yota 1 on the cores. I’m pretty disappointed in those folks. In the end, if the rebuilt engine, transmission and transfer case work well it will all be good but it’s a shame when people get greedy.
I visited Alex and Mayra’s this week and the paint is here! It is really exciting. Mayra showed me the cans and the color around the edges. It looks great! The Toyota 391 red is pretty orange and this has had me worried but I’m coming around. They have also been removing a few last dents from the bed and they have applied the undercoating. It looks awesome!
Today I sent the carburetor to Jim at TLC Performance in Ohio for a rebuild. It took me a few months to get it boxed up and then another couple of months to get it to UPS but it’s finally there!
My door jam VIN plate was in pretty bad shape. Luckily, Rebecca Margraf at Machine Plates Online was able to recreate the plate. She did an excellent job.
Through car-part.com I found a windshield for the truck in Tucson Arizona. So, last Thursday after work we loaded up the truck and headed east. We got to Tucson just after 1 o’clock in the morning. Bernadett found a cool little roadside motel a few miles from the junkyard and we got a good night’s sleep. We woke up well rested to a beautiful desert morning and headed over to Jeff’s Auto Parts to pick up the windshield. The guys were really nice and they were certain that we were nuts for driving all the way from California for a 40 dollar windshield. The windshield is in good shape but it has a dark blue tint at the top which I’m not wild about. I plan to look for another and keep this one safely stored under the bed as a backup. After leaving Jeff’s we headed west through the city toward the freeway and by chance drove right by the place where Bernadett lived when she was and au pair! Leaving Tucson we did a little touristing, stopping at the curio shop at Picacho Peak and picking up mixed berry pie from the Rock Springs Cafe. We made it to Prescott that evening and spent the next couple of days with my dad.
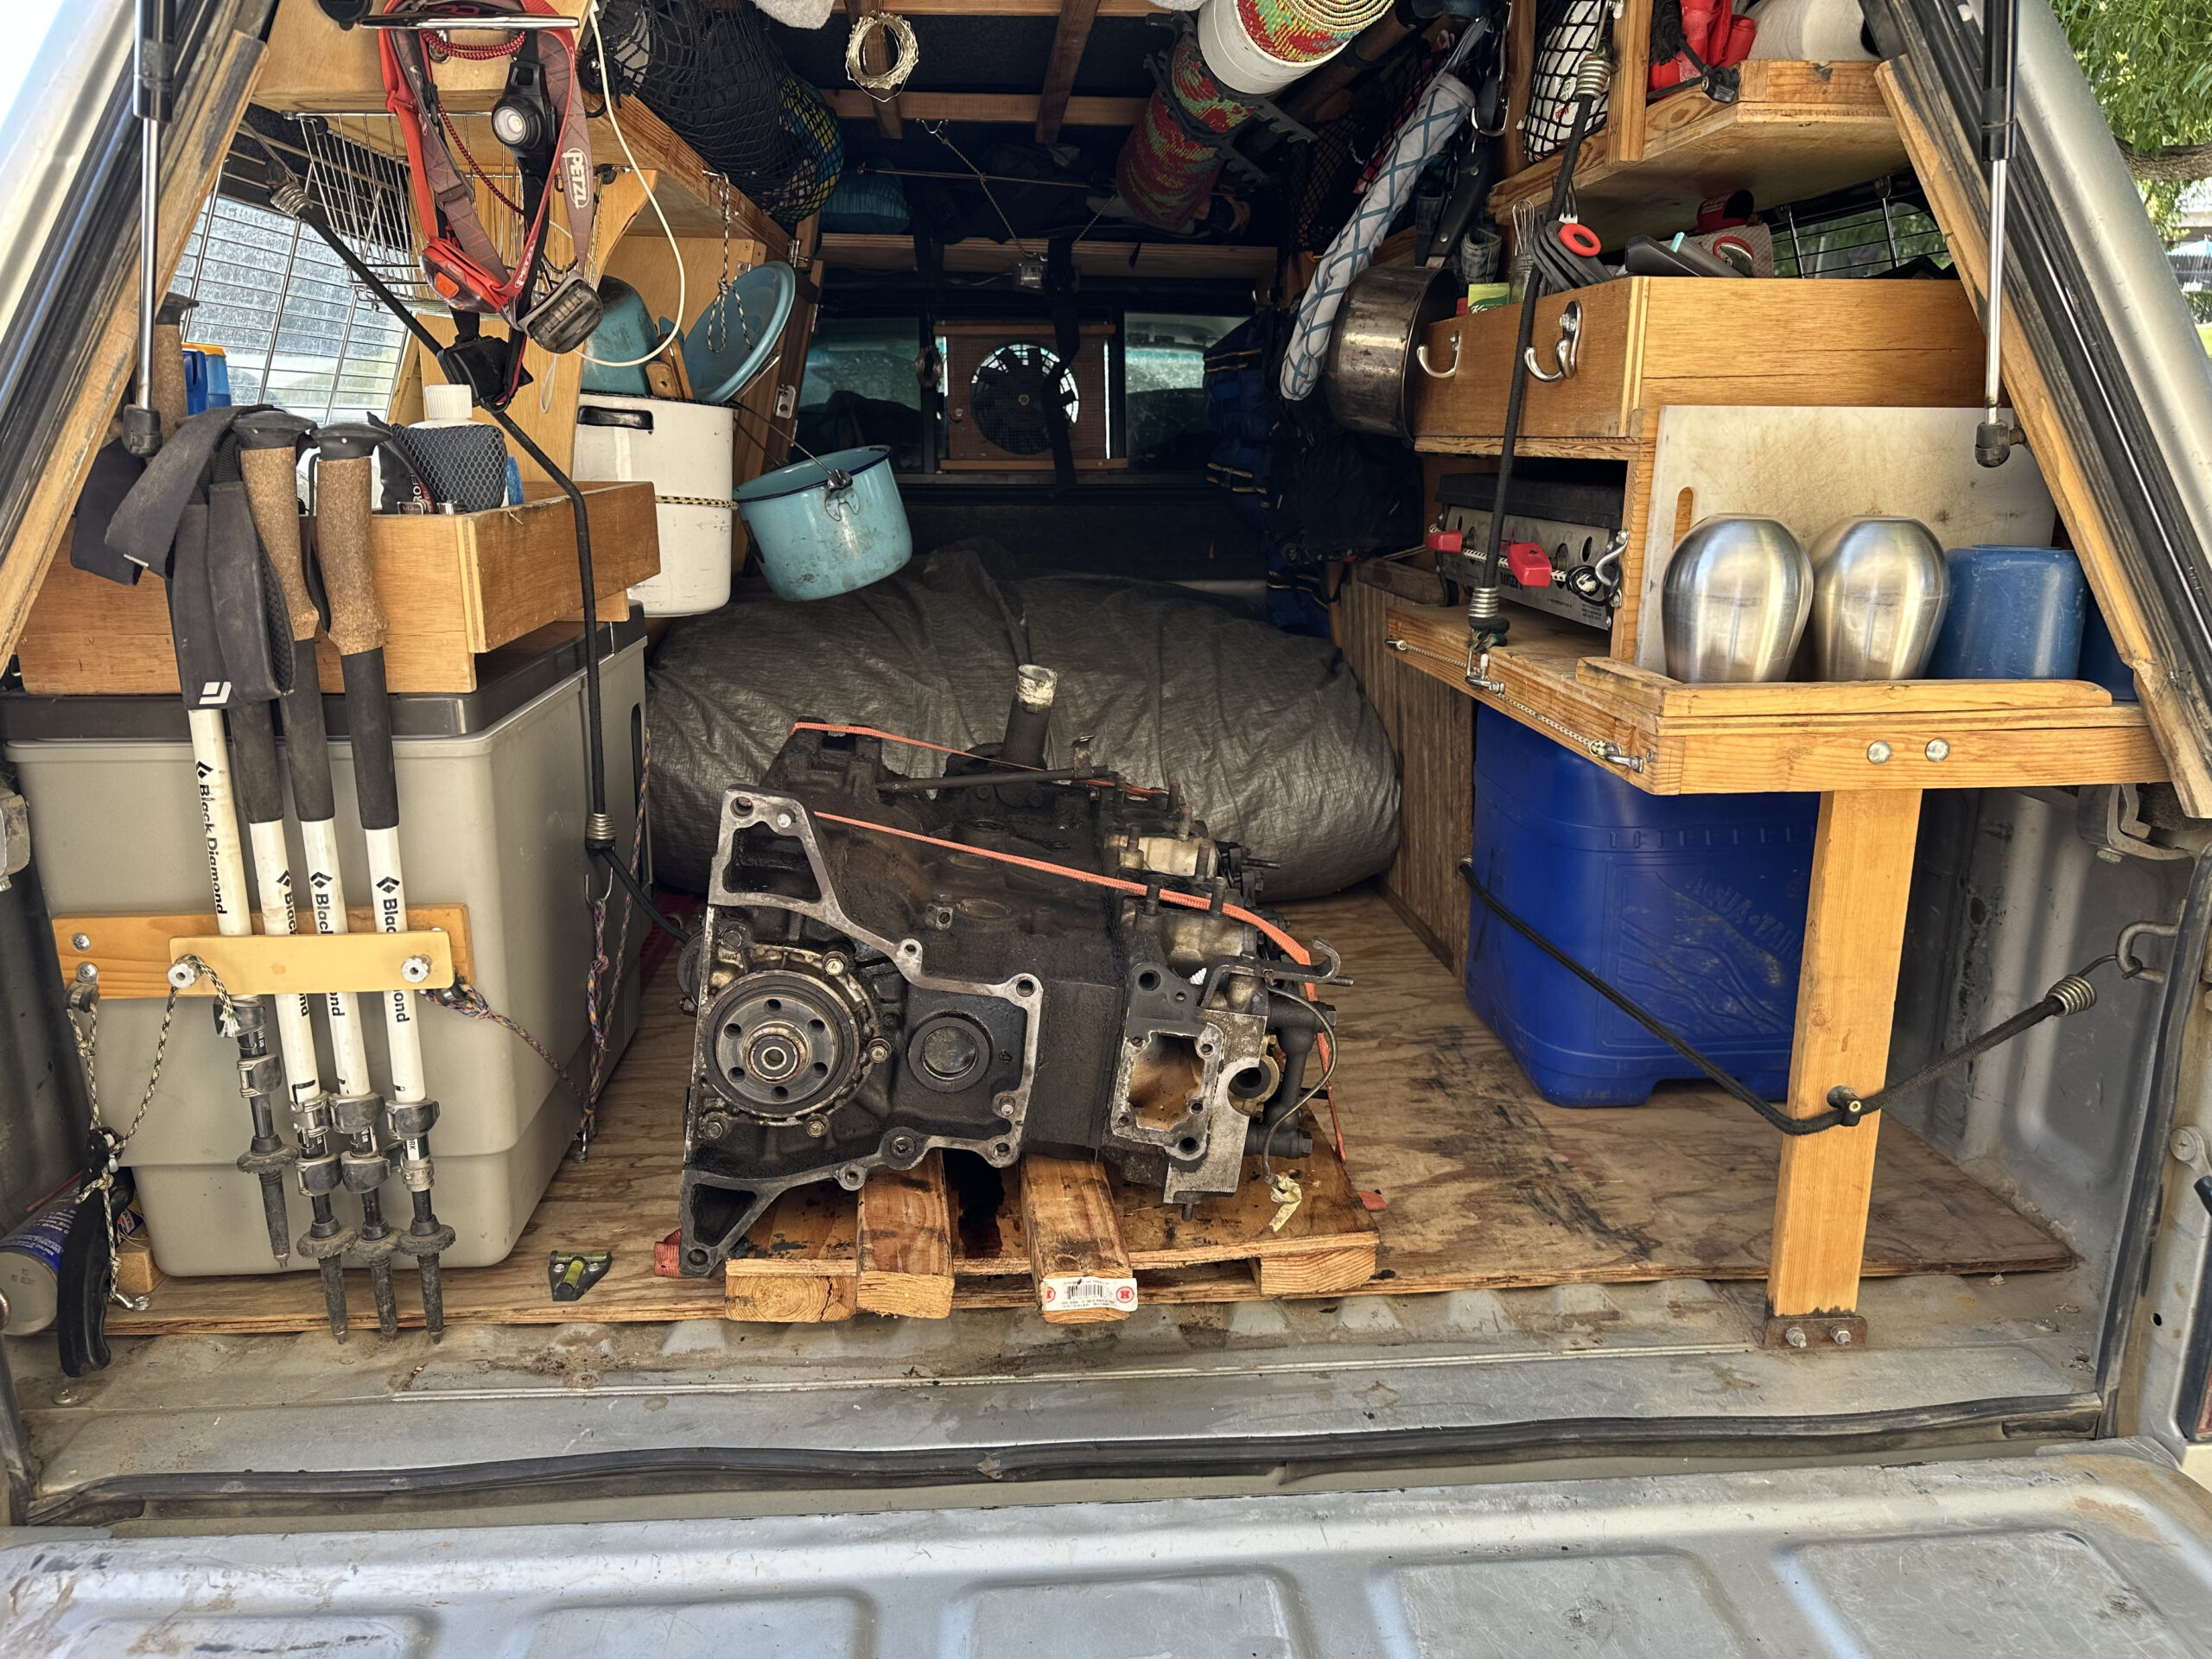
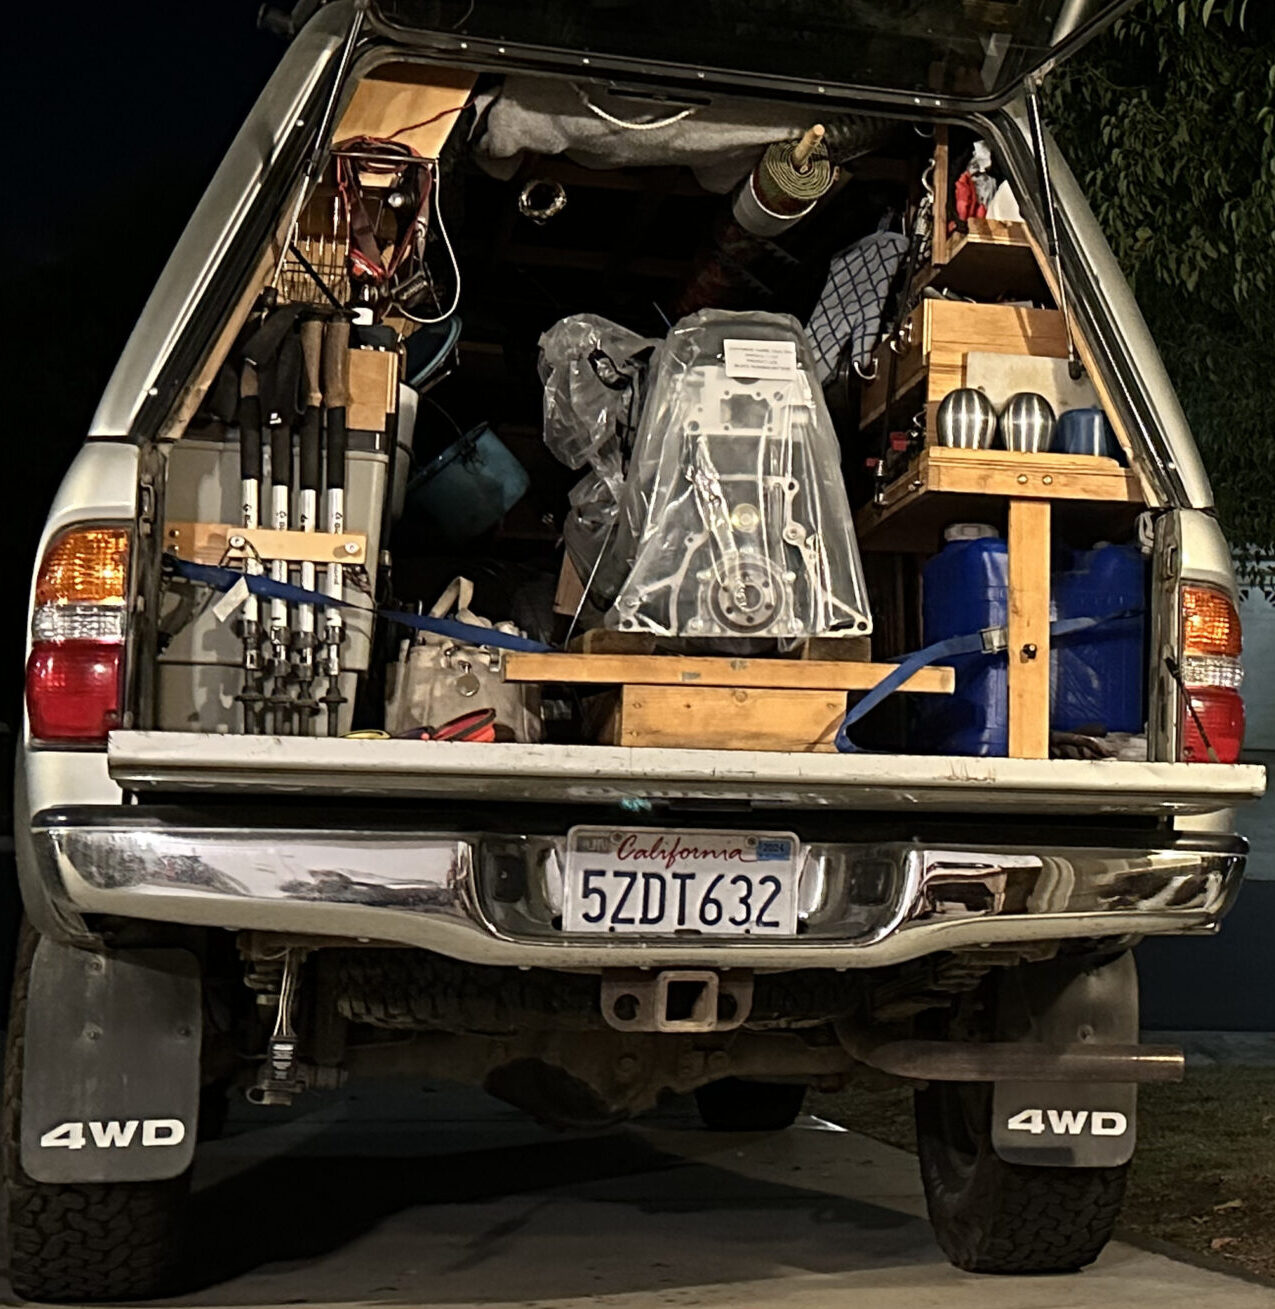
Yesterday we drove up to Riverbank near Modesto to drop of our old engine and pickup the newly rebuilt one. It was a long day. With traffic it was about 4 hours each way and with a couple of stops for meals we got home pretty late.
It was emotional saying goodbye to the old engine that has been with us for all this time. I still haven’t quite come to terms with that.
The new engine looks great! The people at Yota 1 are awesome! They walked us through the break-in procedure and were super helpful. I was really impressed. There were all kinds of Toyotas trucks there getting work done. It’s a great place!
Today we went to Alex’s shop to pick up various parts that have been removed while they are doing their work. Lately I’ve been spending quite a bit of time assessing what we have as far as body and interior parts go. I’ve been avoiding this for a long time. I didn’t want to face the reality that I may not find many of these parts. There are a lot of parts that are in pretty bad shape. Really beat up and broken pieces sell on EBay for ridiculous amounts of money. It’s nuts. So I wanted to get everything together including what is at Alex’s and figure out exactly what I need.
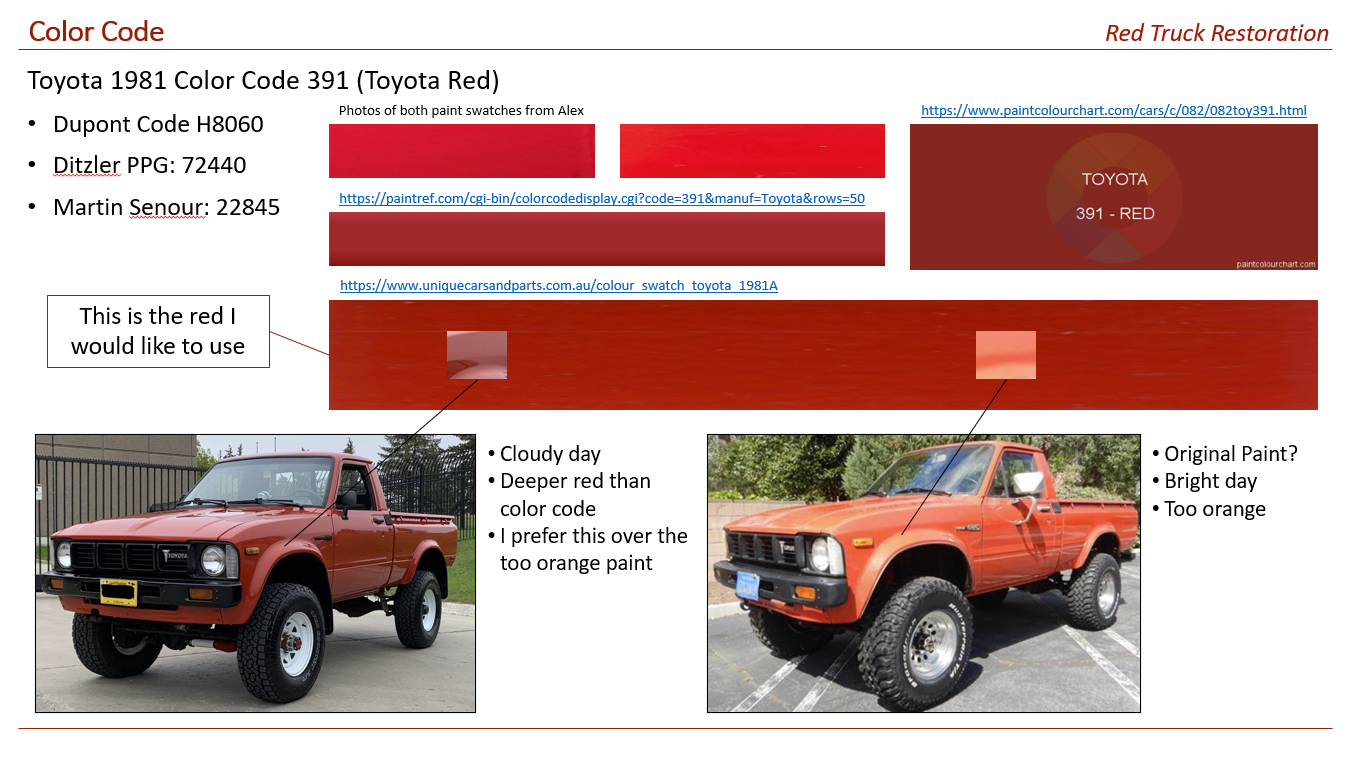
It was good to see those guys. They have been really busy and haven’t been working on the truck lately but I think they may have more times as we get into the holidays. There are two things we still need to resolve. One is the body trim. The old body trim is in really bad shape and a couple of pieces are completely unusable. So my options are either have them fill in the holes on the body where the trim mounts or try to fashion some trim on my own. I was thinking that strips of ebony might look ok but I’m not sure if that is a great idea. I need decide on this soon so they can move forward. The second thing is the paint color. Alex has shot a couple of samples for us but were still undecided on the final color. One sample is a nice deep red but maybe a little too purple for me. For the other sample, Alex matched the paint on the underside of the truck thinking it was less faded but that sample is pretty orange. There are two variants of the 391 code, one uses some yellow and the other some light yellow. The plan it to compare those and decide. The slide below compares Alex’s samples to pictures and swatches seen online but it is tough to really compare to colors this way mainly I think because the lighting is different in each case.
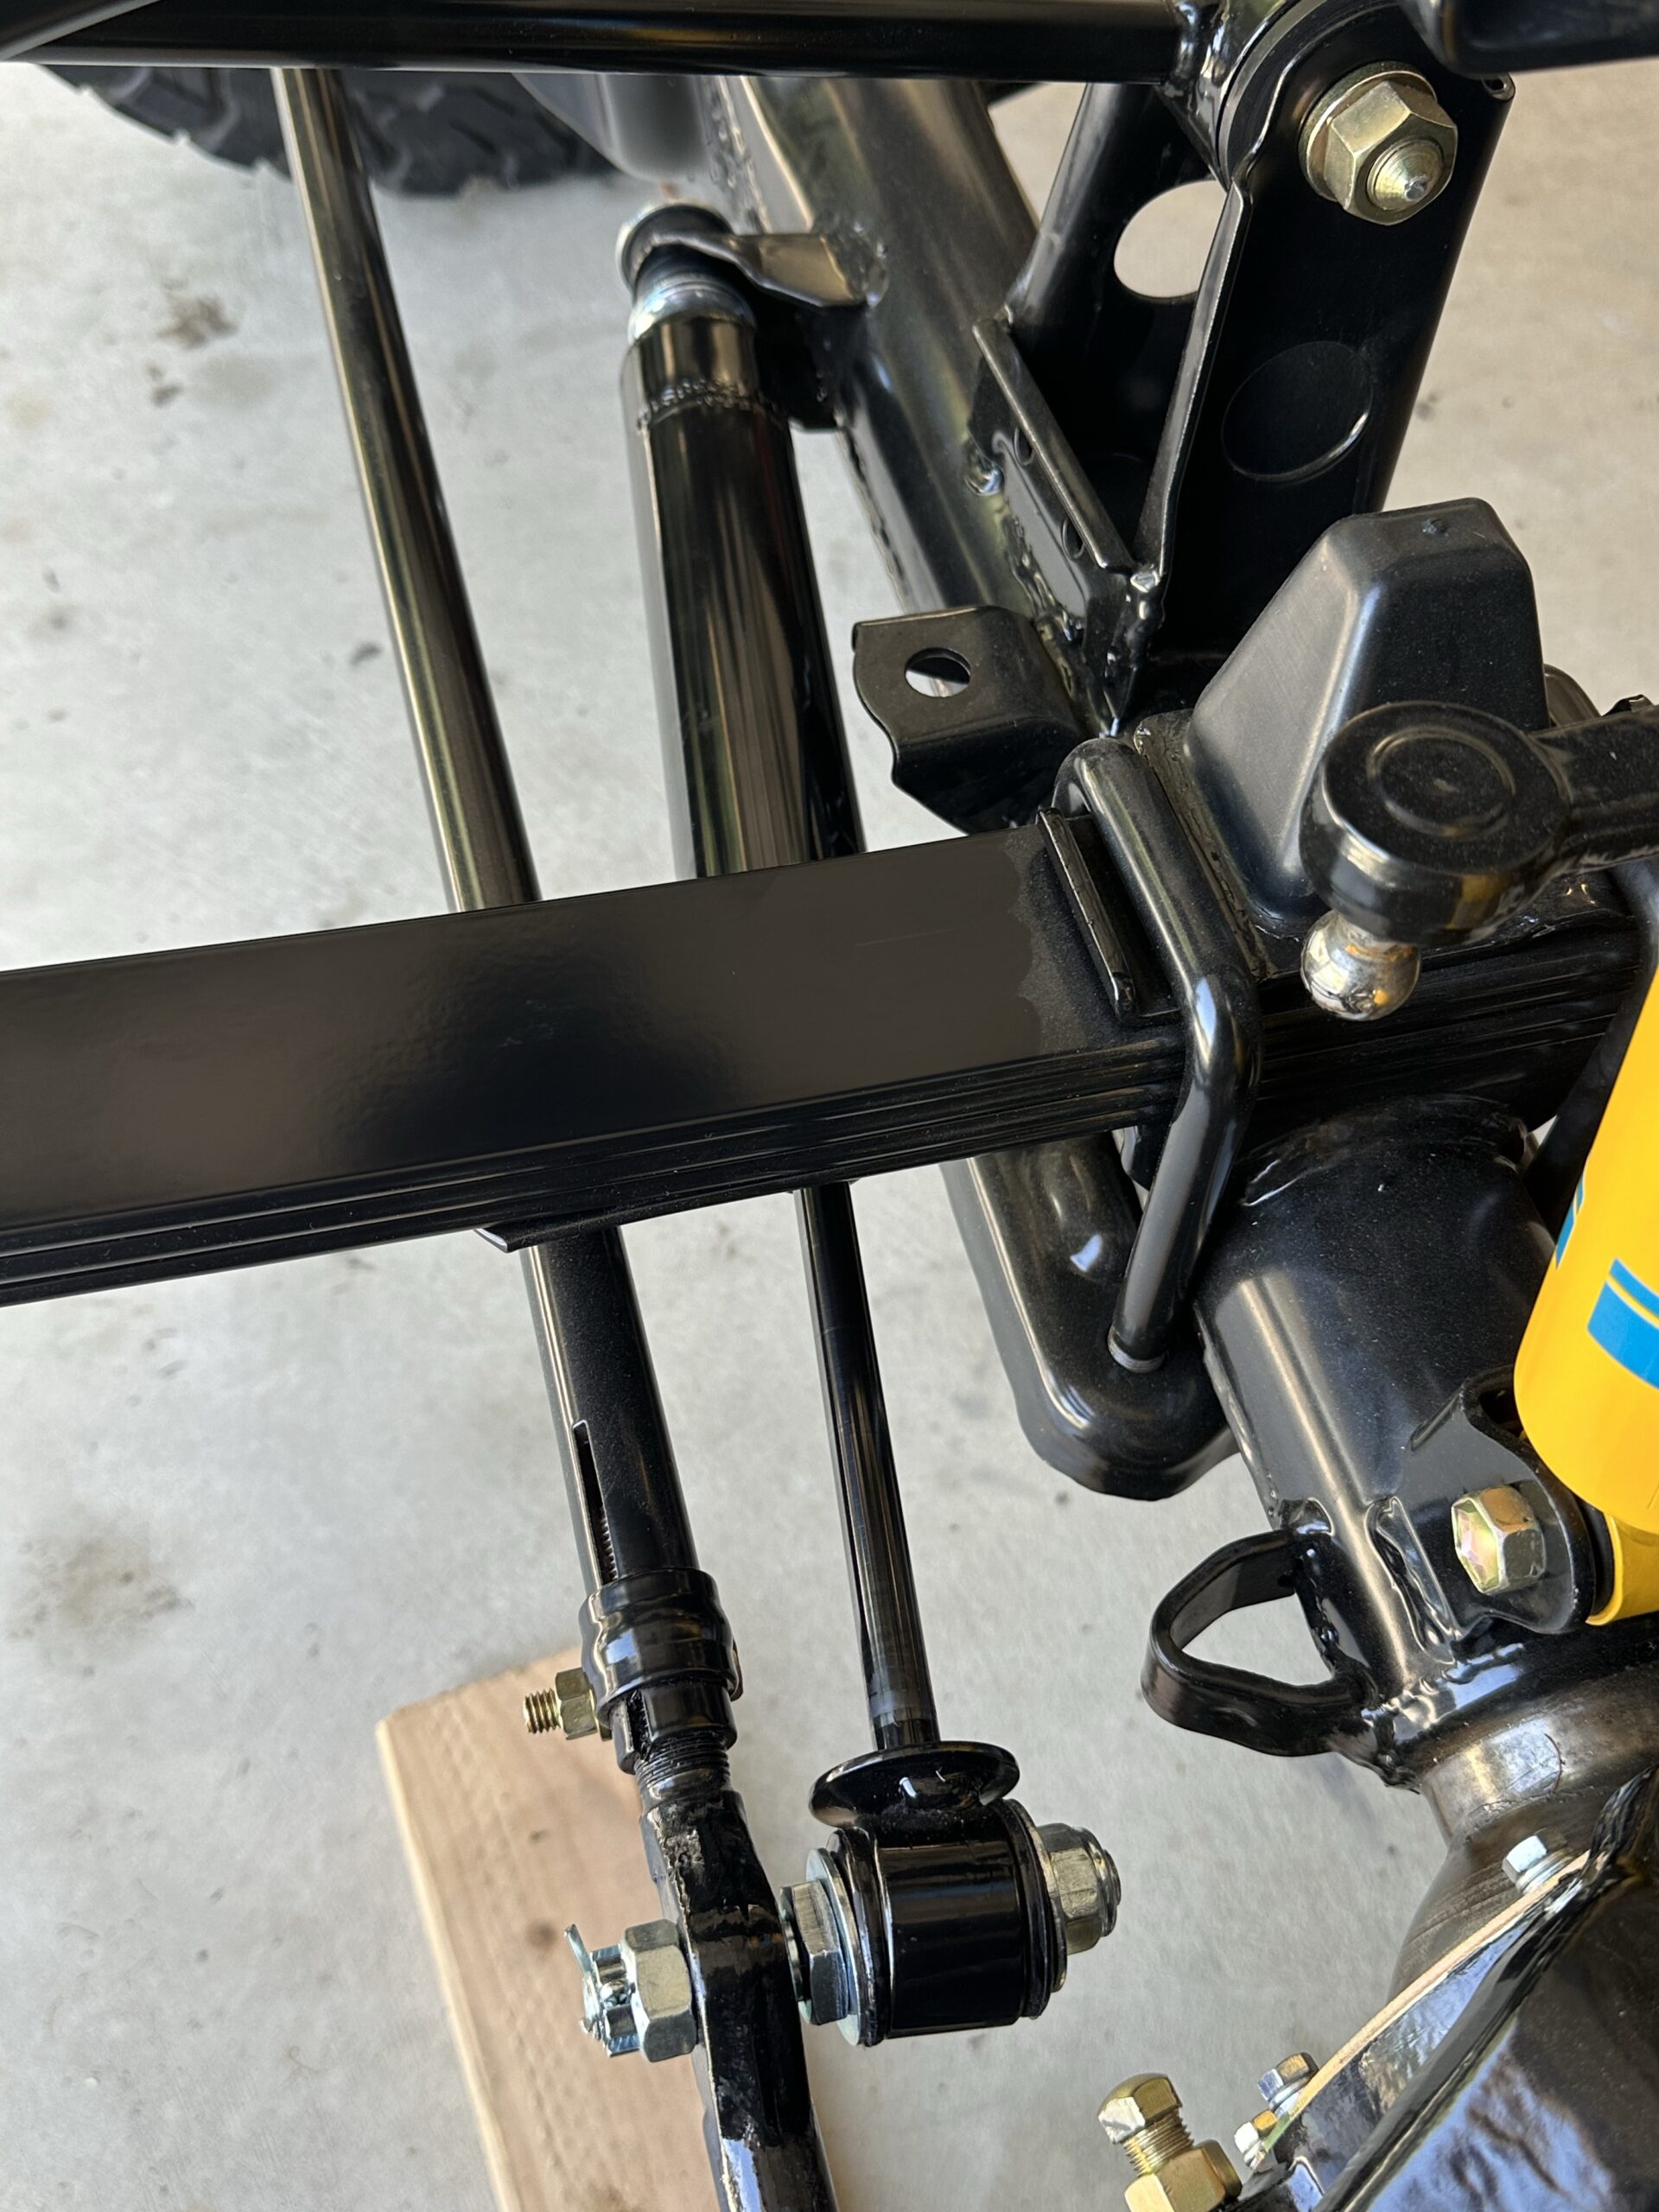
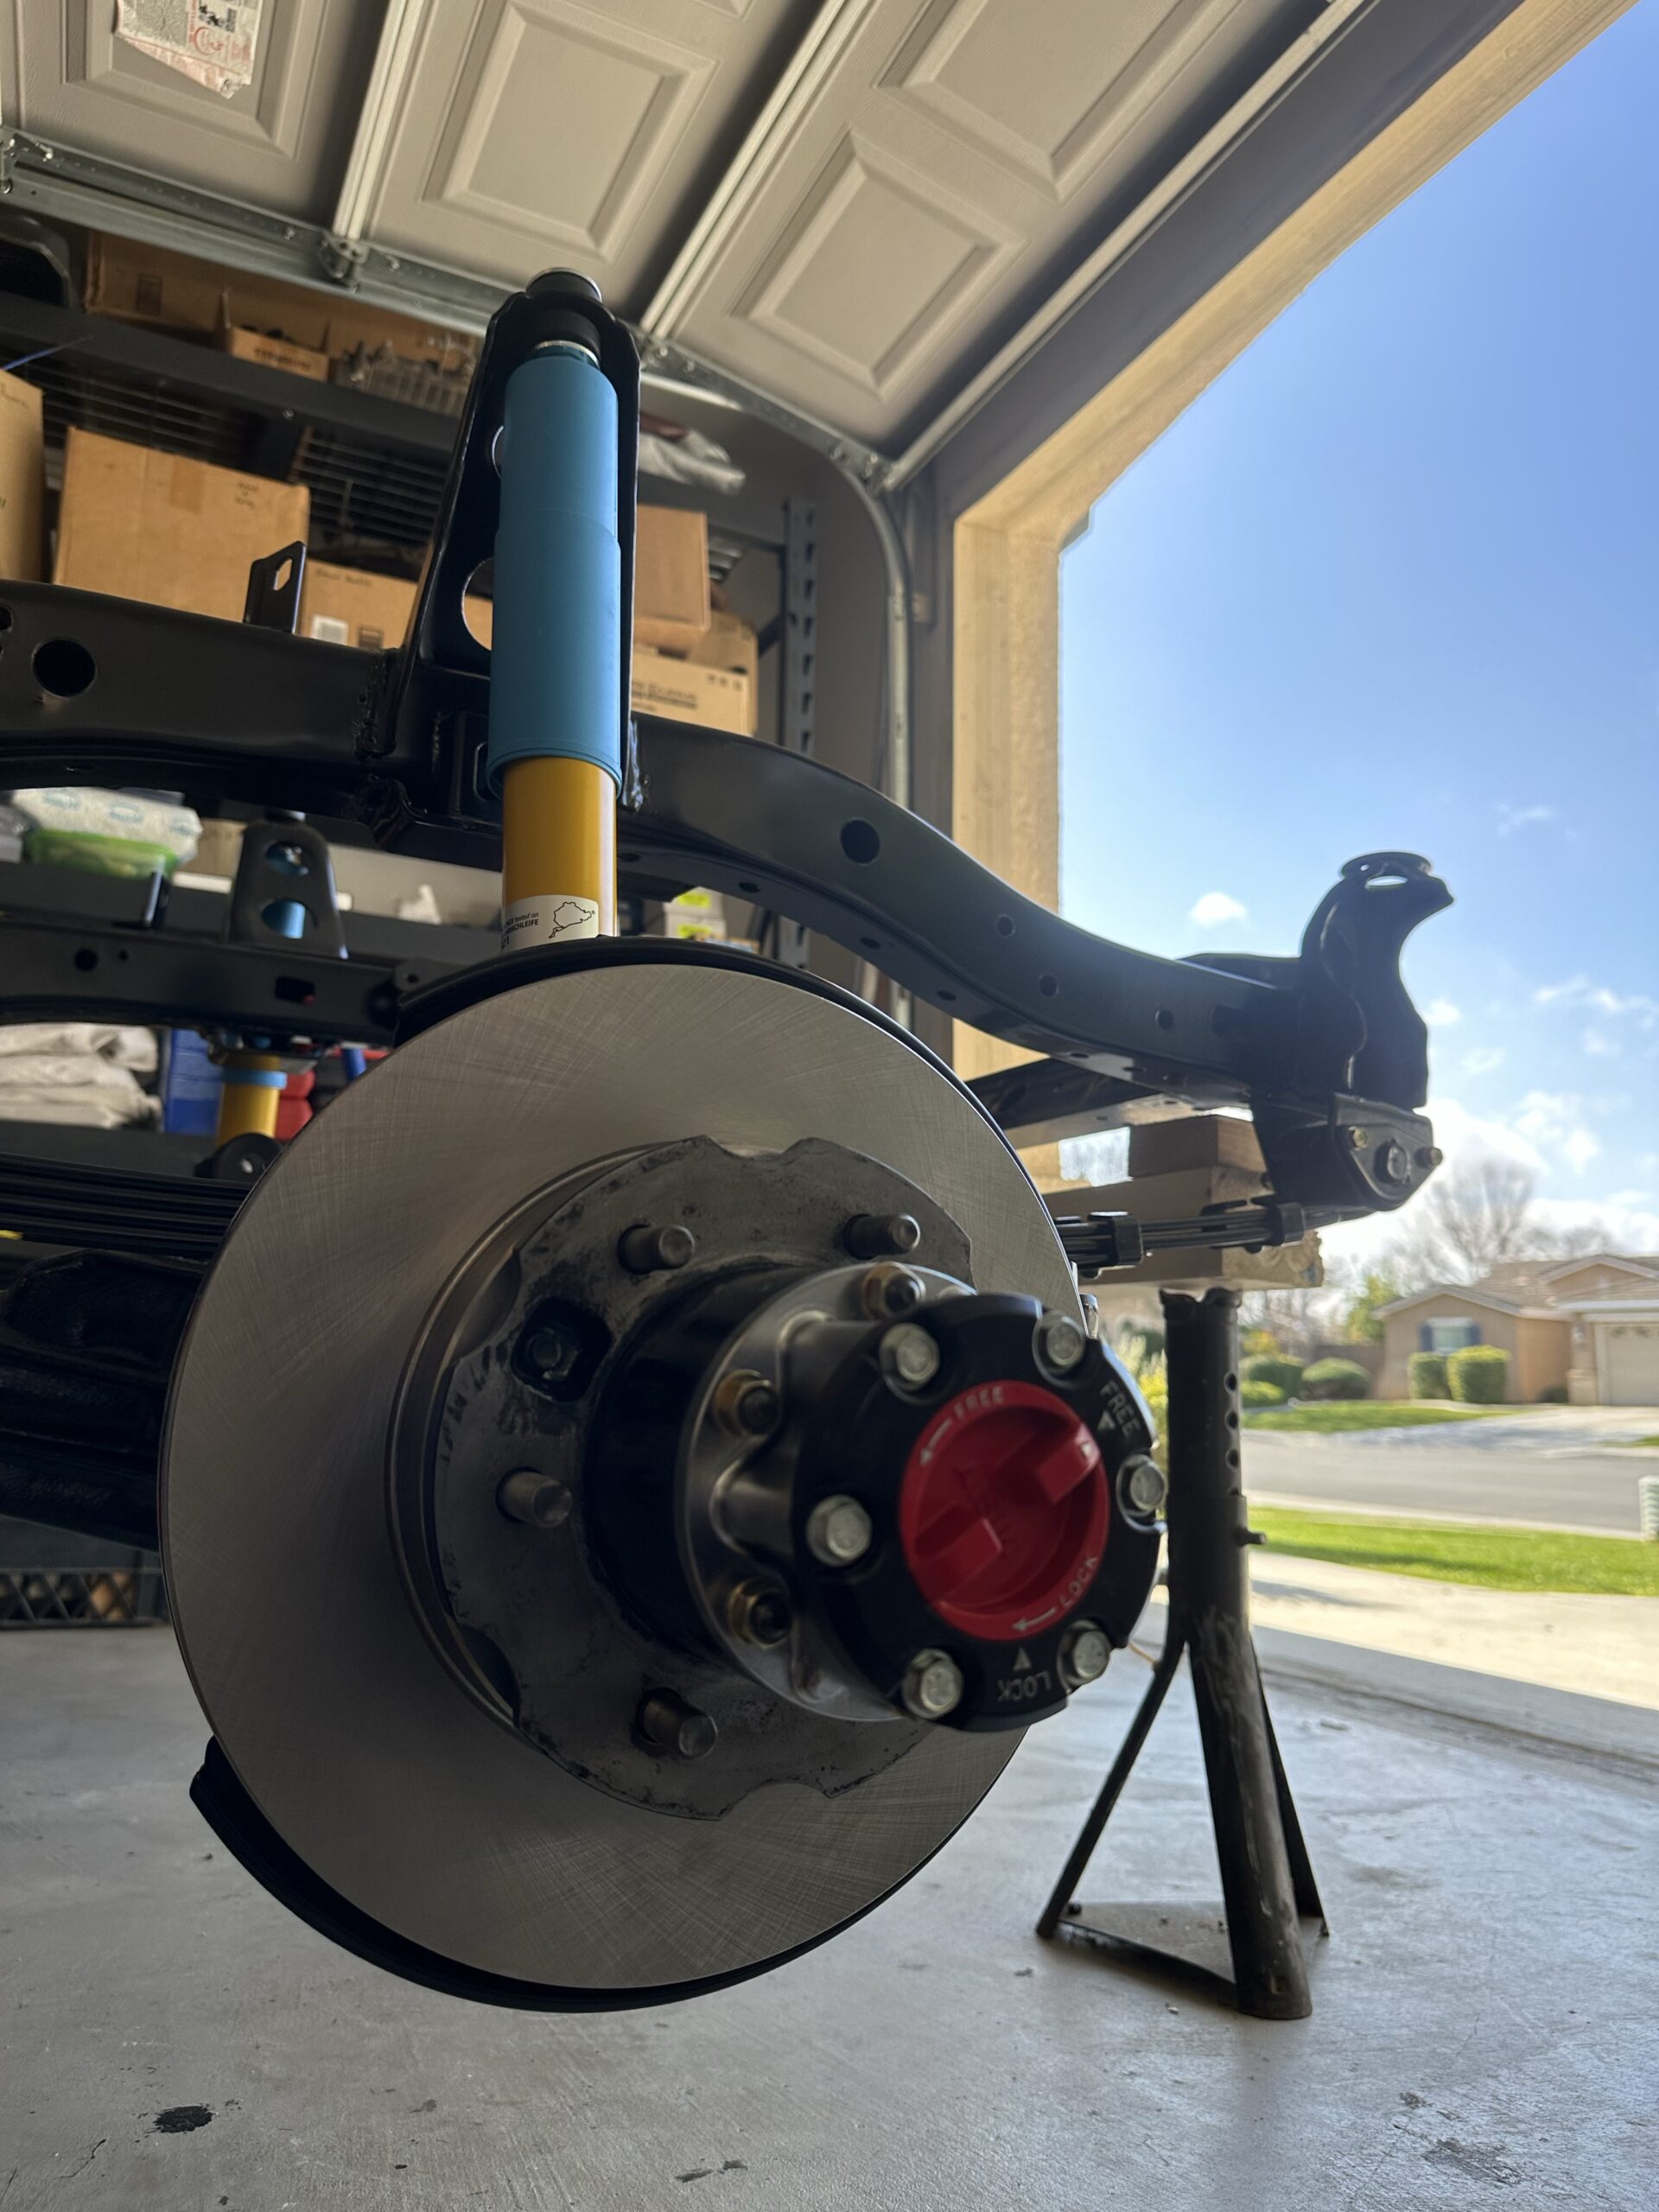
Today I installed the front stabilizer. I installed a replacement for the stock version which might be too weak for the larger tires but I will start there and then upgrade if needed down the road. I also put chrome hub covers on the wheels. I think they look pretty nice!
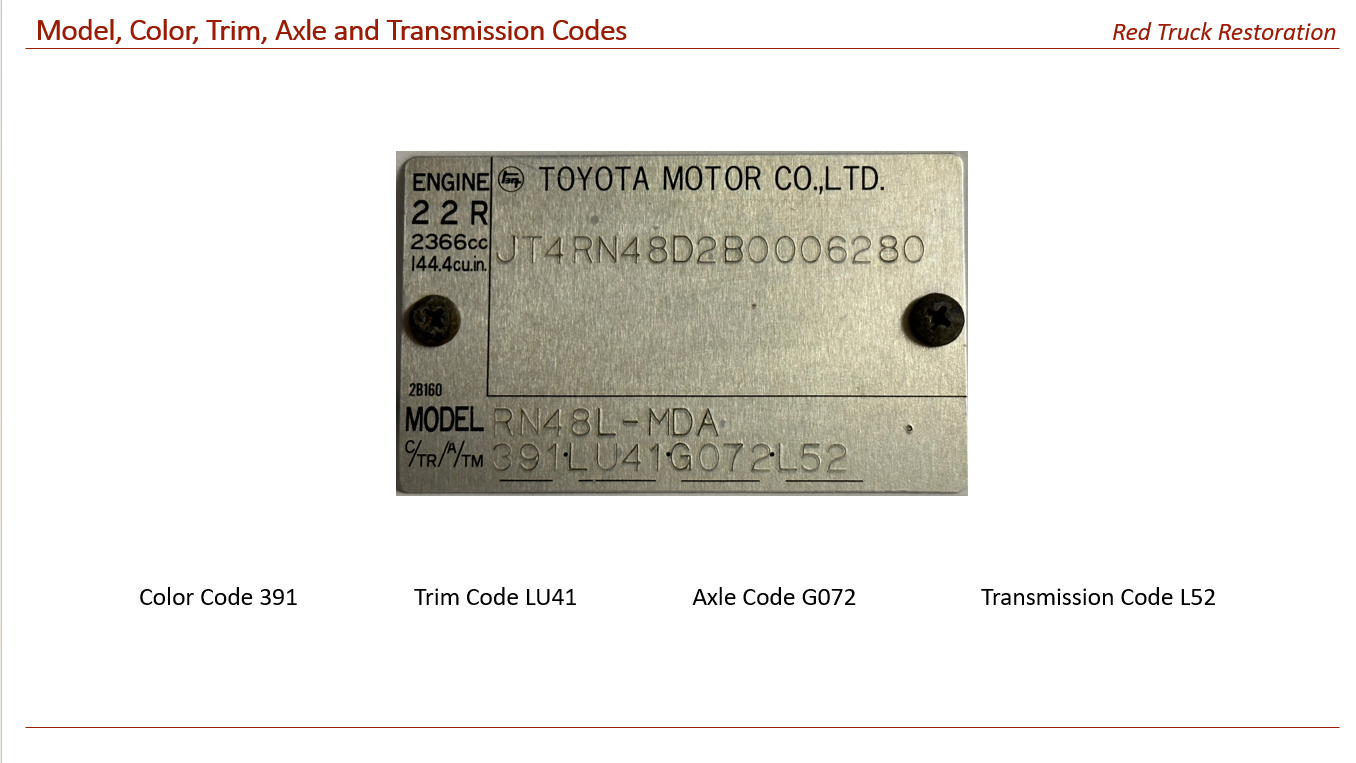
Well this weekend I had a stroke of luck. I’ve been reading about a second VIN plate located in the engine compartment with important information including the paint, trim, axle and transmission codes. I kept looking in the engine compartment but could not find it. I figured someone must have removed it at some point and that had me a little worried. Besides that, I wasn’t sure about the original gearing or the paint code. It turns out someone did remove the plate and that someone was me! I was going through all the parts and I found it! I must have removed it back when I took the engine out of the truck 10 years or so ago.
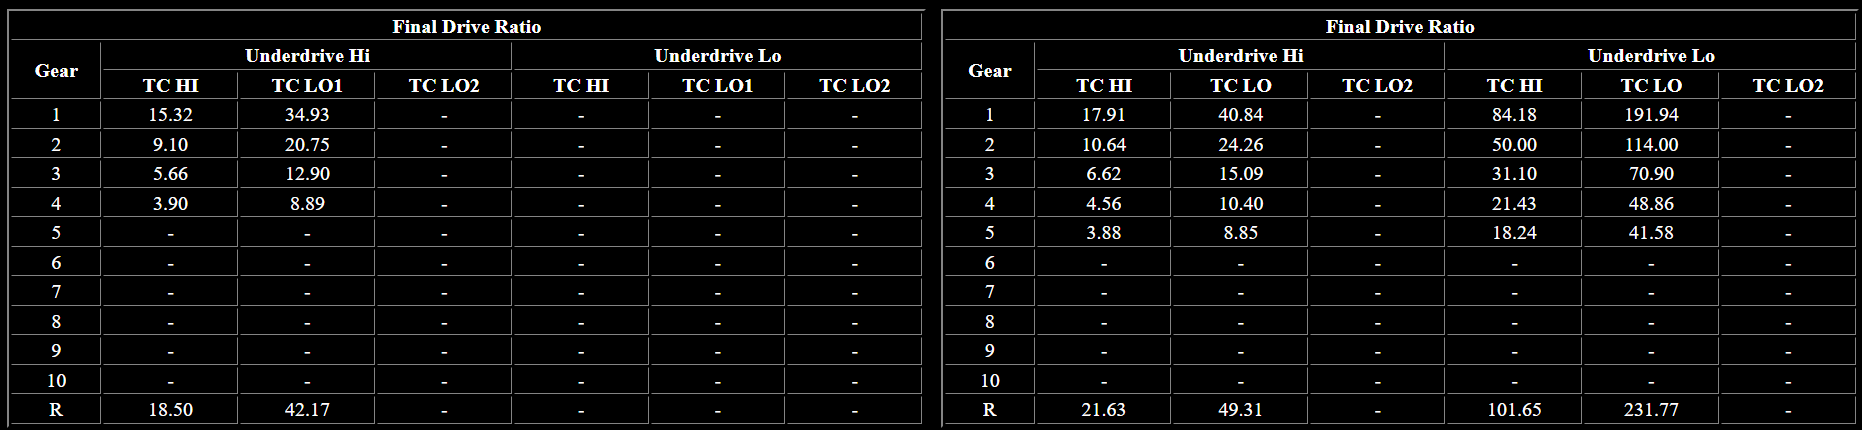
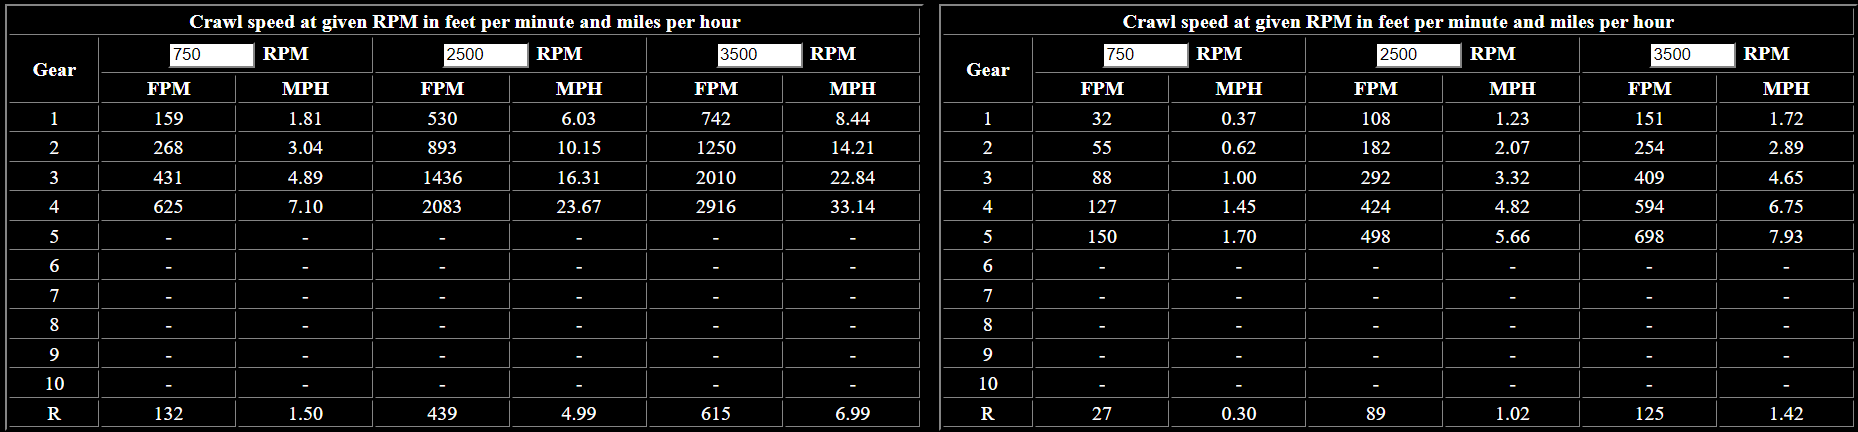
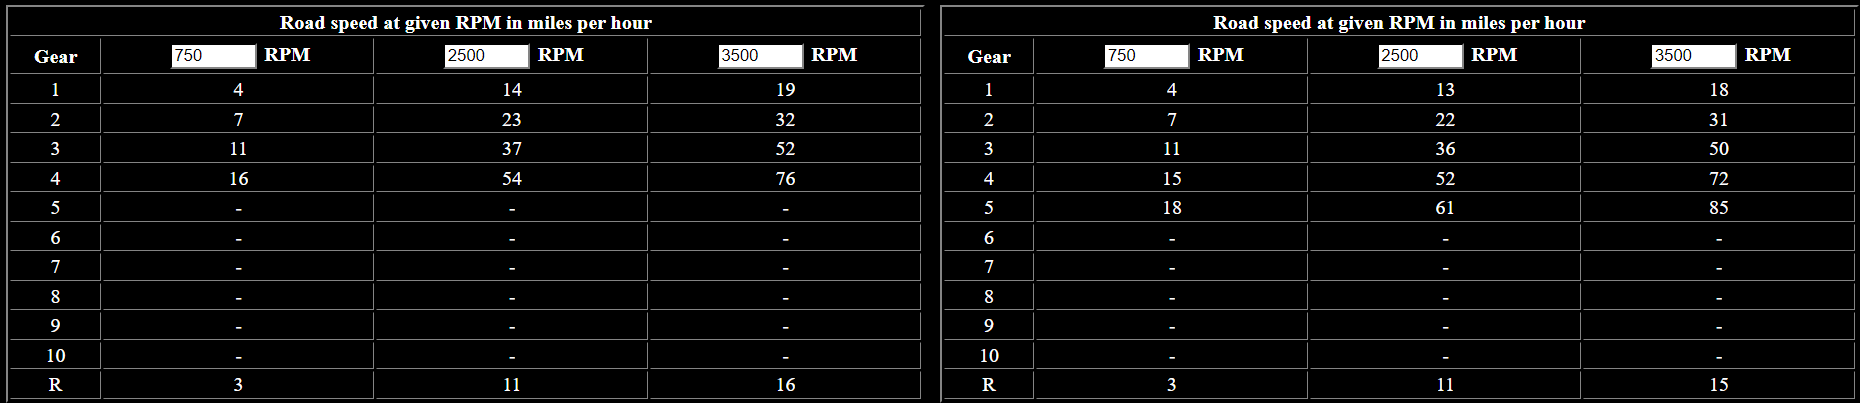
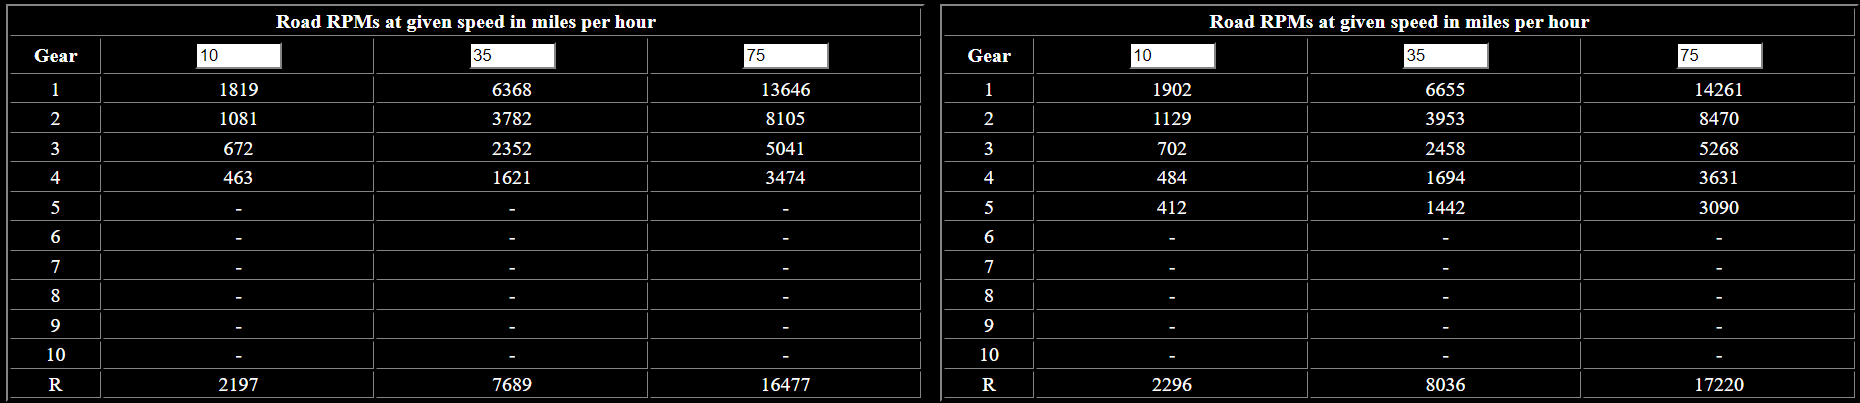
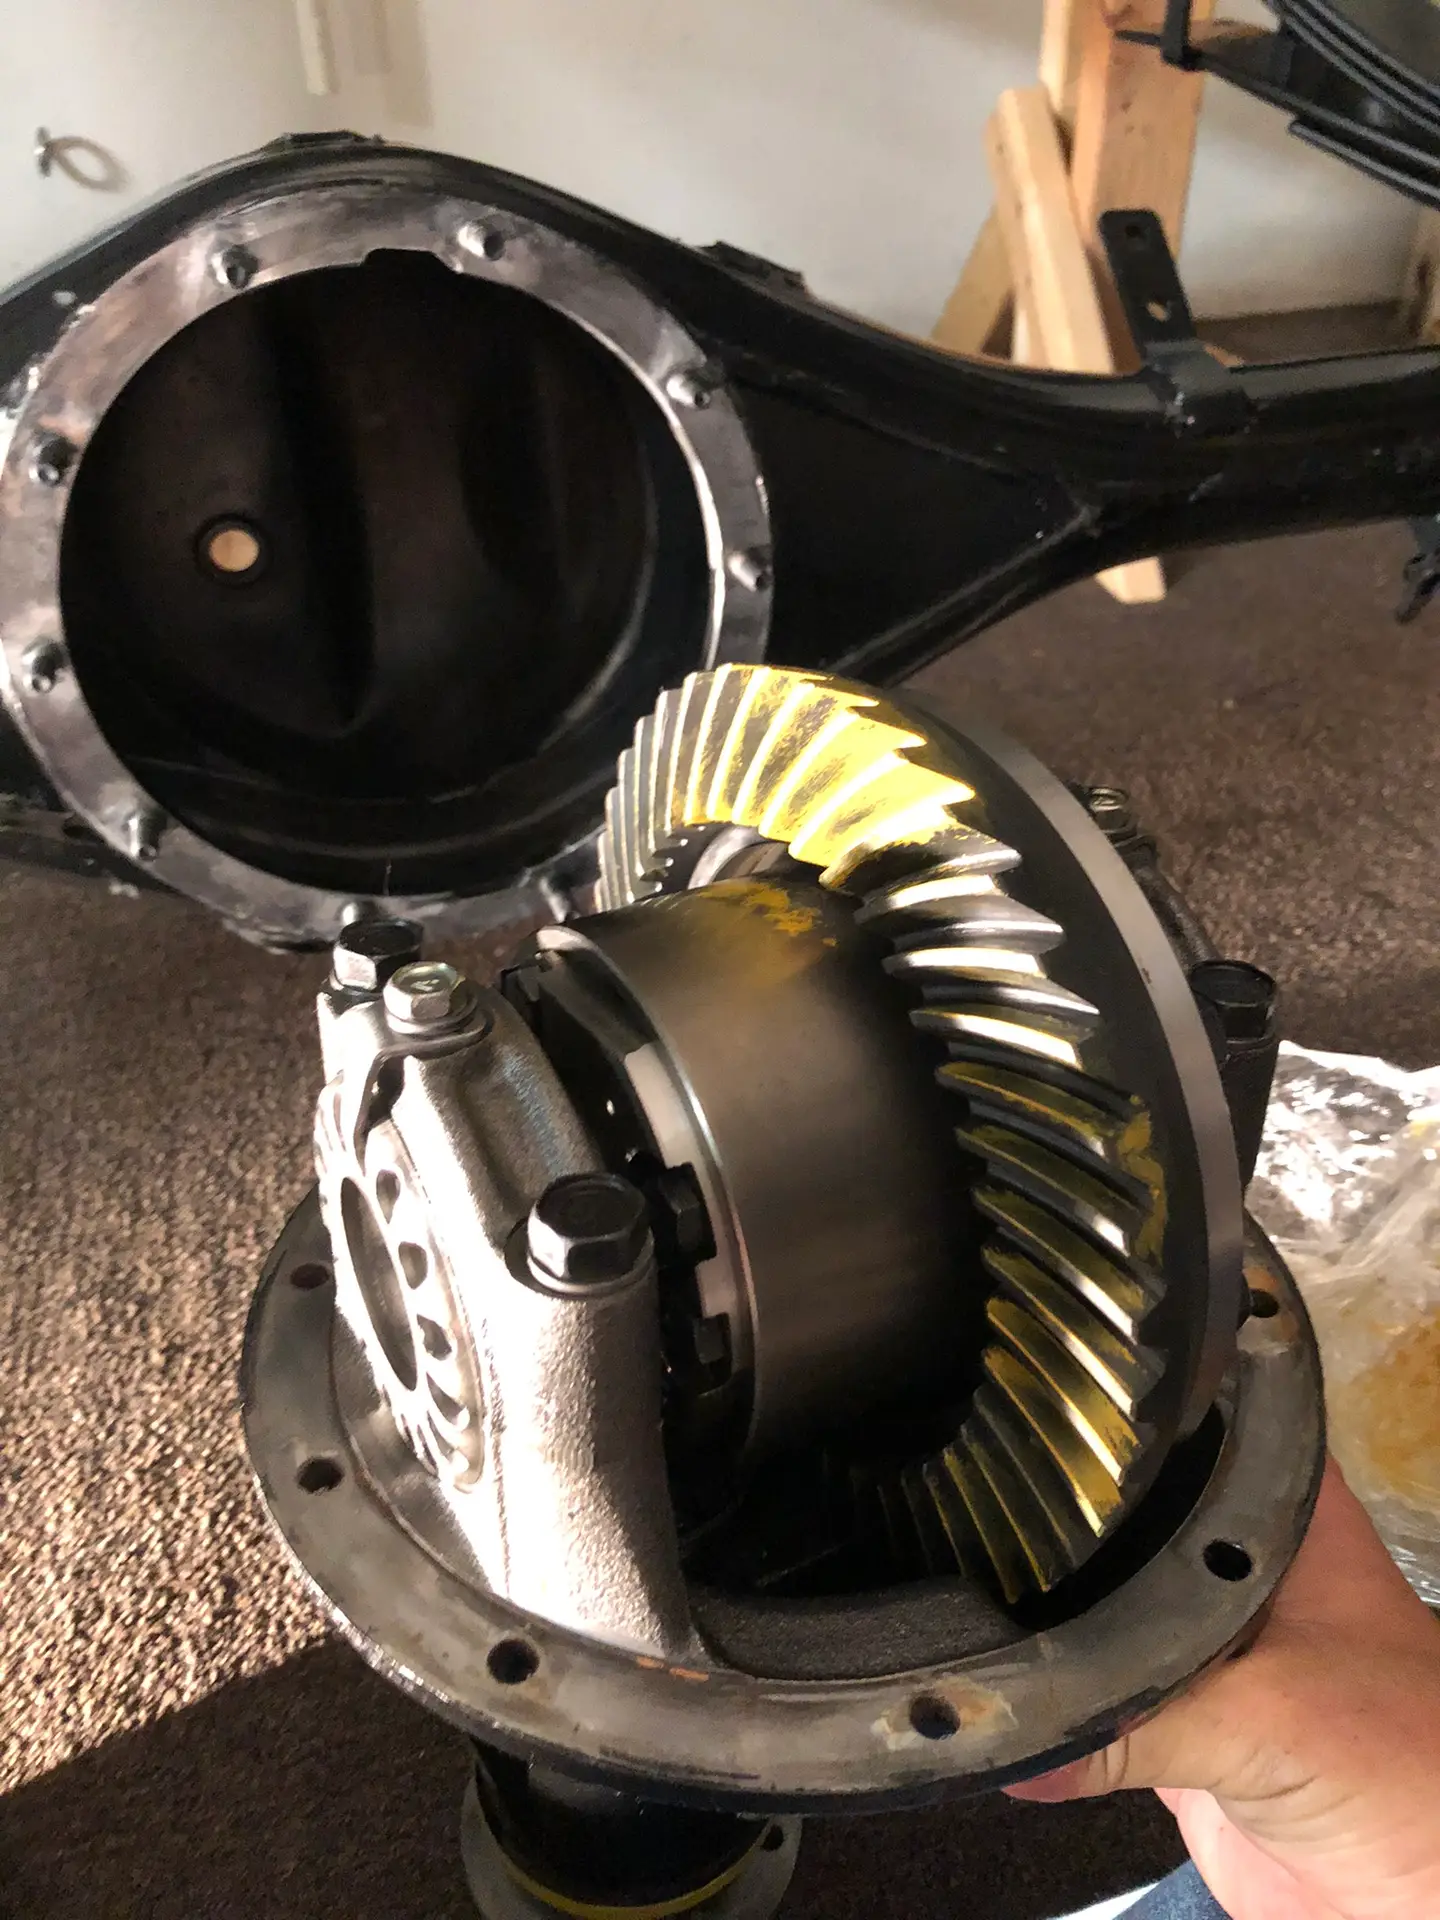
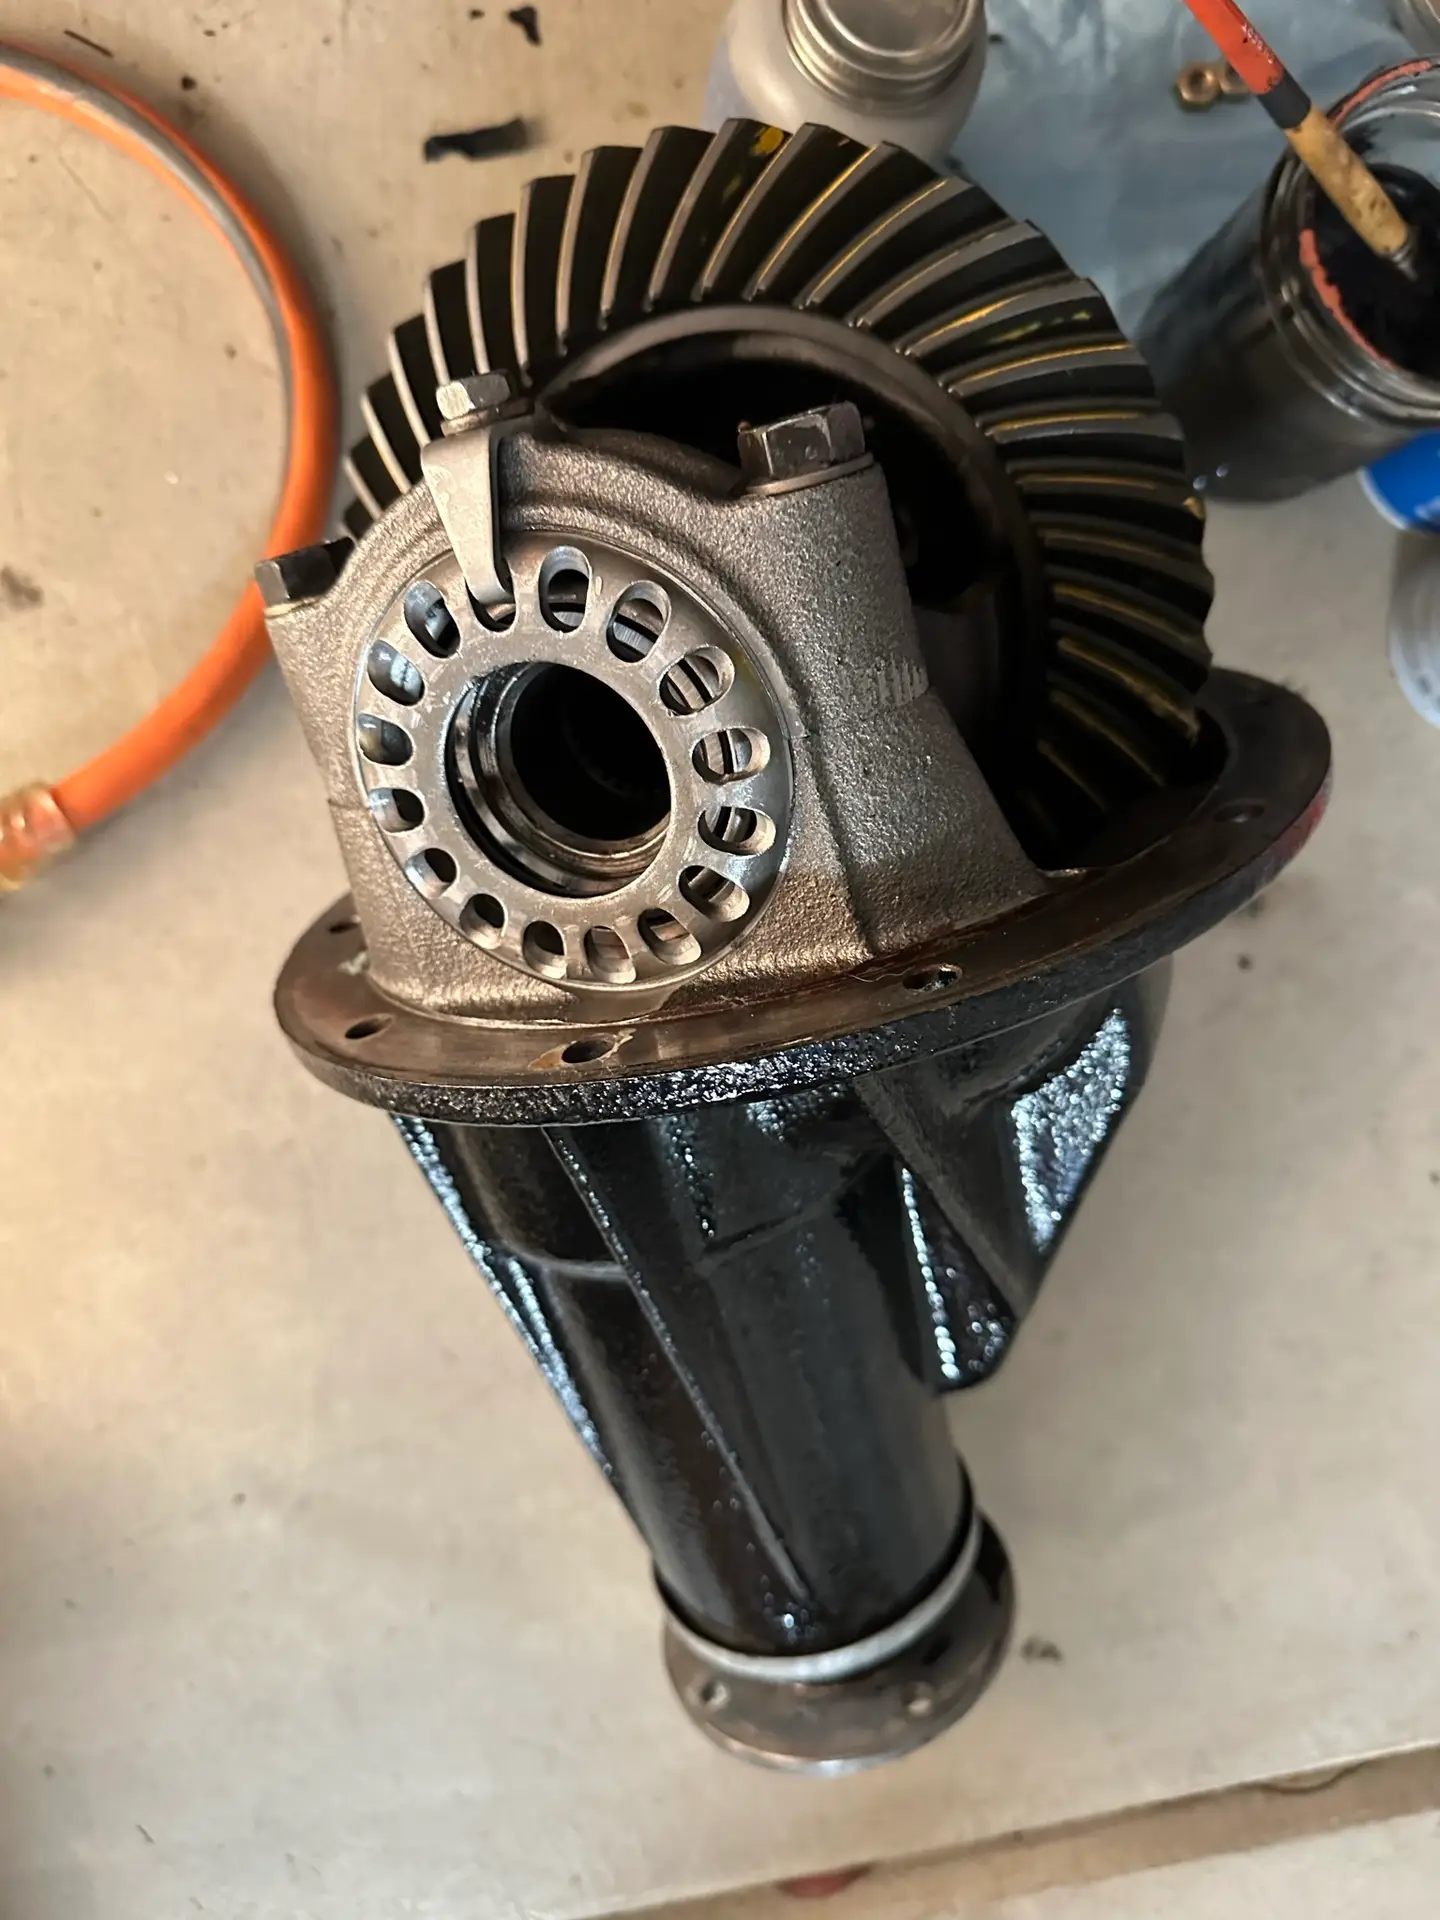
I’ve read that 1981 was the one and only year they used 3.90 differential gears but I couldn’t verify this since I didn’t keep the old gears when I had them swapped out for 4.56. The G072 axle code does verify that the gearing is 3.90 where G indicates an 8″ ring, 07 means a 3.90 gear ratio, and 2 means two pinon open differential (http://old.lcengineering.com/LCTechPages/TECHGEARJANUARY.html). Below is a comparison of the original setup and the new set up using the awseome http://www.grimmjeeper.com/gears.html tool. At some point the transmission in the truck was replaced with a four speed since the transmission code states L52 which is a five speed but when I got the truck there was a four speed (I’m assuming an L45, https://www.marlincrawler.com/tech/transmission/transmission-gear-ratio-chart) in her. It is interesting that Marlin lists L52 as a 1983 transmission while my transmission code from the engine compartment plate states that Bessie got an L52 in November of 1980. The VIN on the engine compartment plate does match the VIN on the dash. There are other case of this reported (https://www.yotatech.com/forums/f114/1981-came-l52-307798/). I’m also assuming that we put in a 4.7 Marlin Crawl Box in this scenario.
I learned this morning from Rebecca at Yota1 that Marlin Czajkowski passed away on March 9th. He was a close friend of hers and she was very upset. I wish I would have known him. He loved his red truck, a 1980 Toyota 4×4 that he bought in 1983 and had ever since. I know he would have liked Old Bessie.
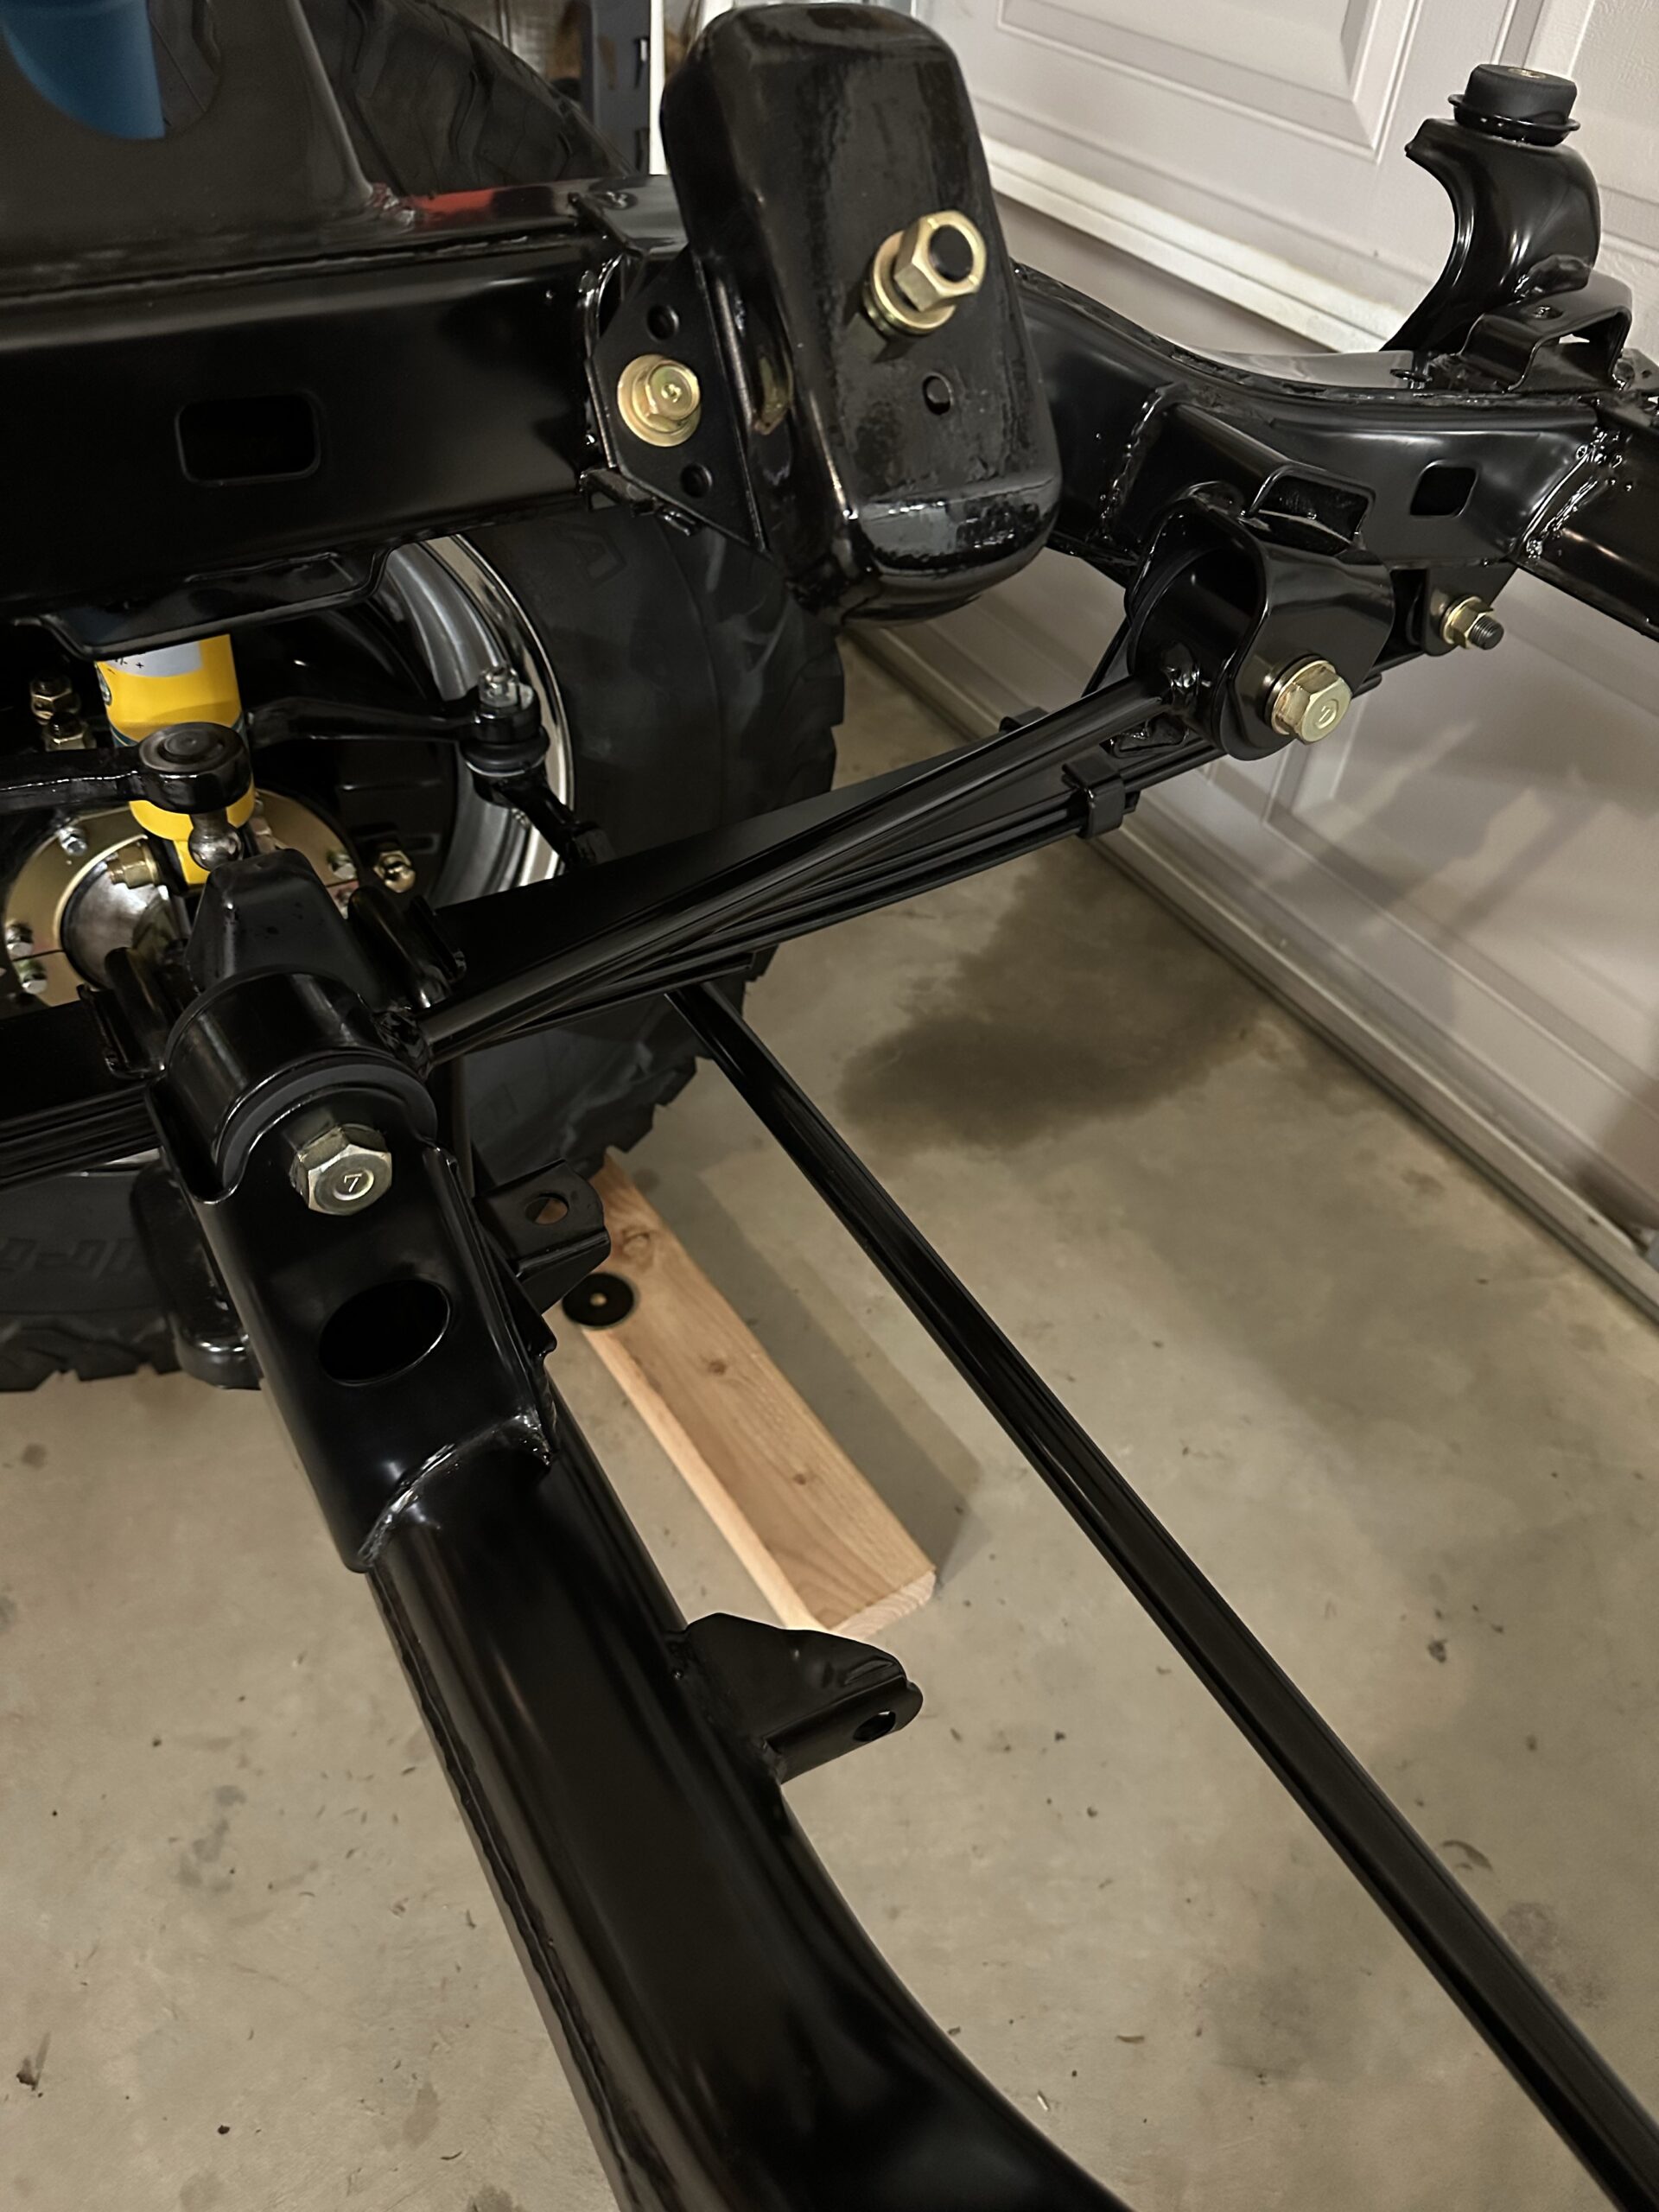
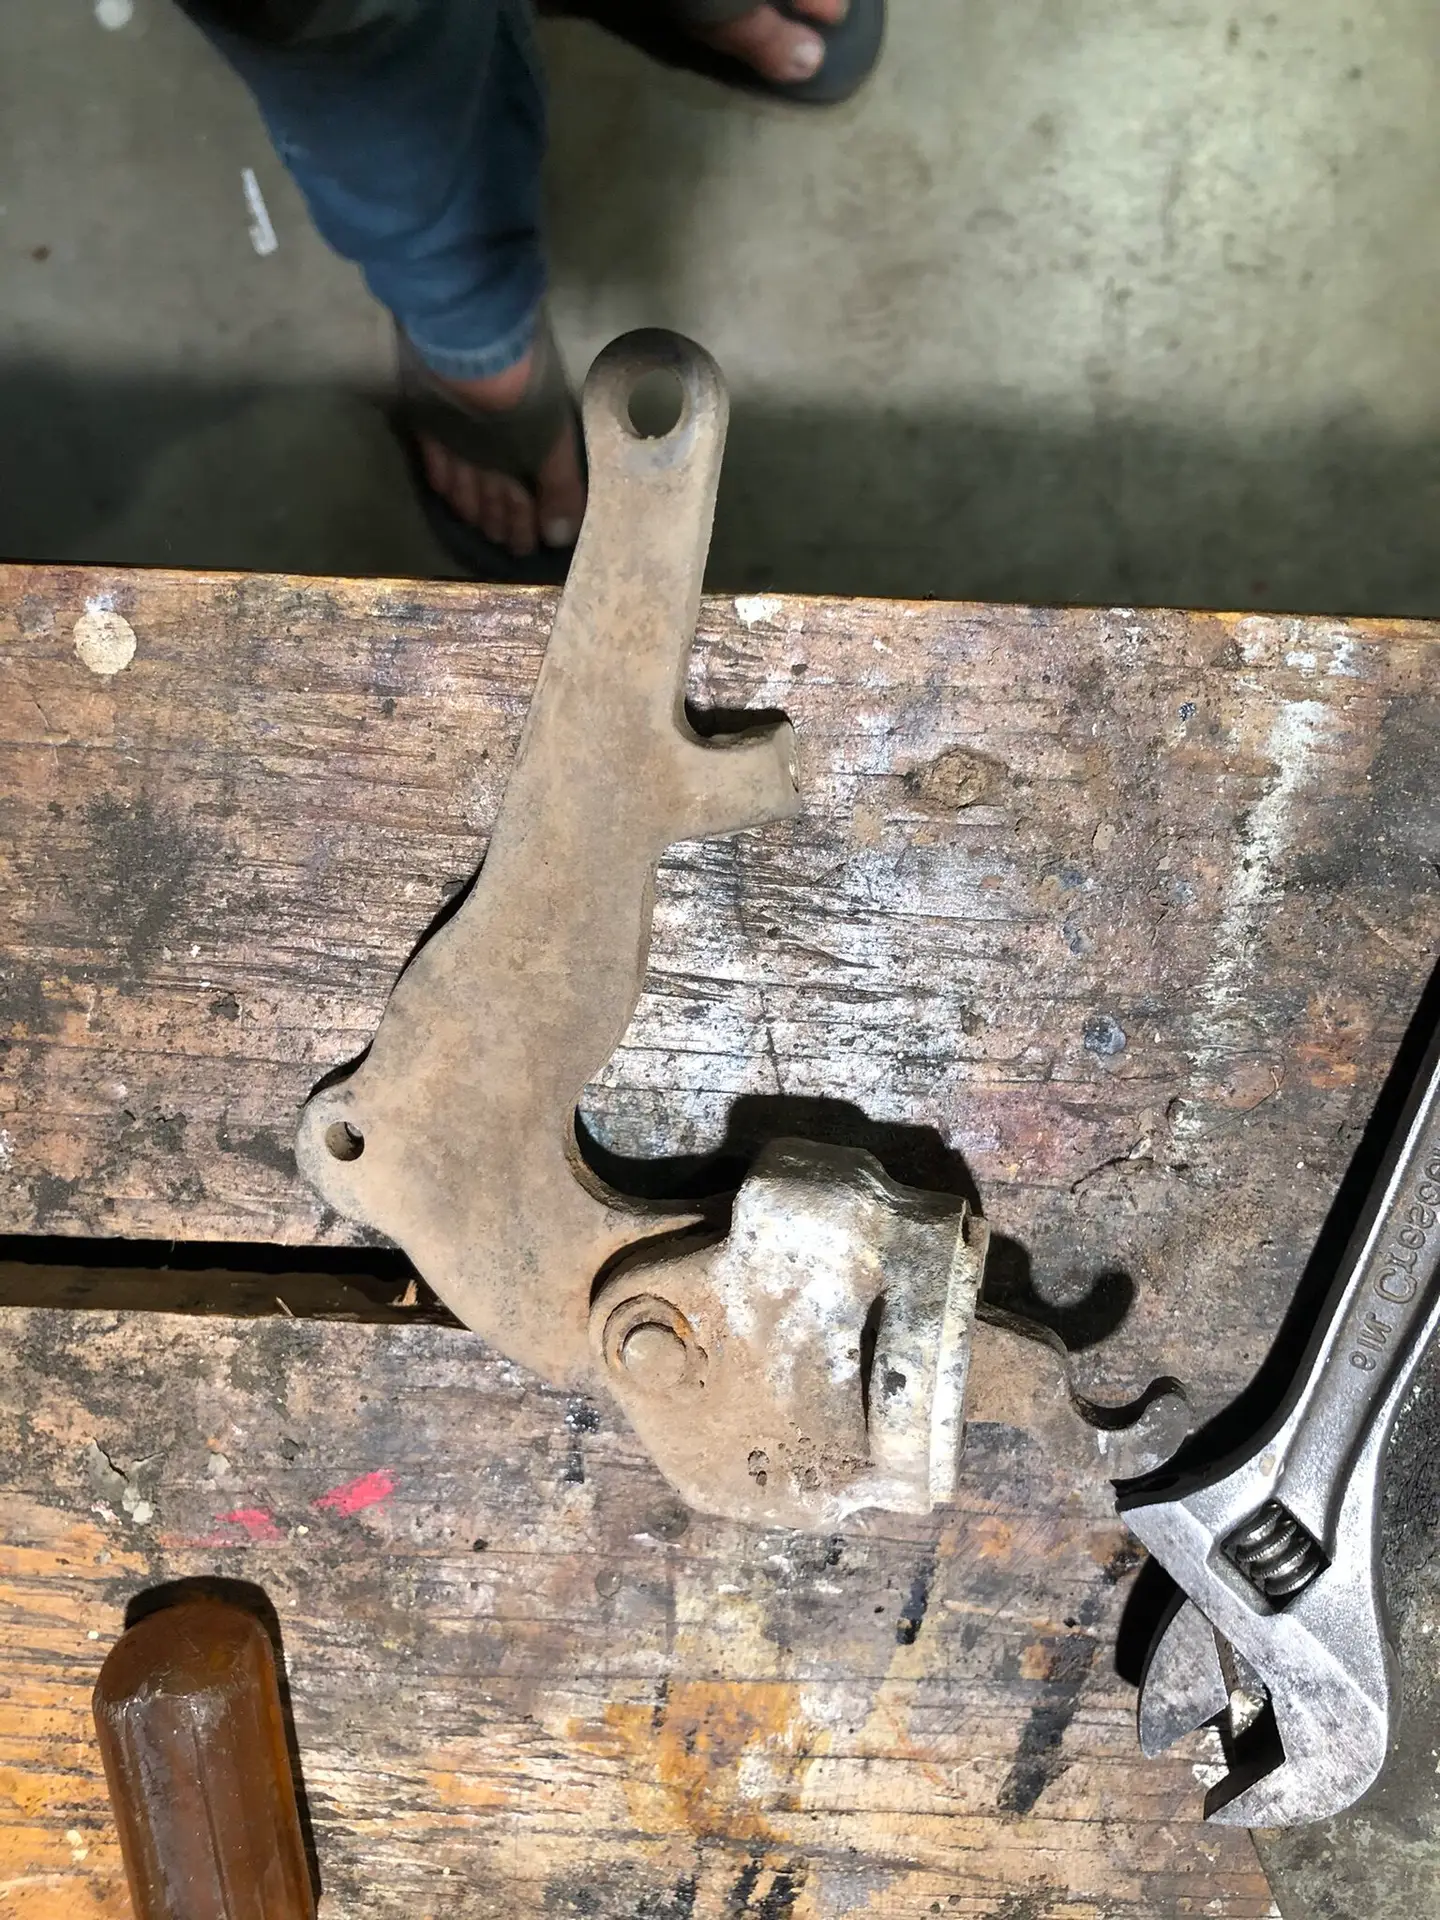
After a very nice birthday dinner for Bernadett where we ate way too much, me and Arthur weren’t quite done for the day so we decided to replace the torque arm bushings and install the torque arm. I bought a Energy Suspension bushing set a while ago for the leaf spring shackle bushings and body mount bushings but I didn’t realize it also came with bushings for the torque arm. I was a little worried about the old torque arm bushings because they had been in the oven during powder coating so I figured they were in pretty bad shape. When I pressed them out I found that they were a series of metal semi-cylinders separated by rubber. I think they may have been just fine even after the heat. I pressed the new bushings in (by hand) and mounted the torque arm on to the truck. Due to lack of space I had a little trouble getting the nut on the bolt at the frame side of the arm and also ended up having to put the lock washer on the head side of the bolt.
We also put on the new center caps on the rear wheels. They look really nice!
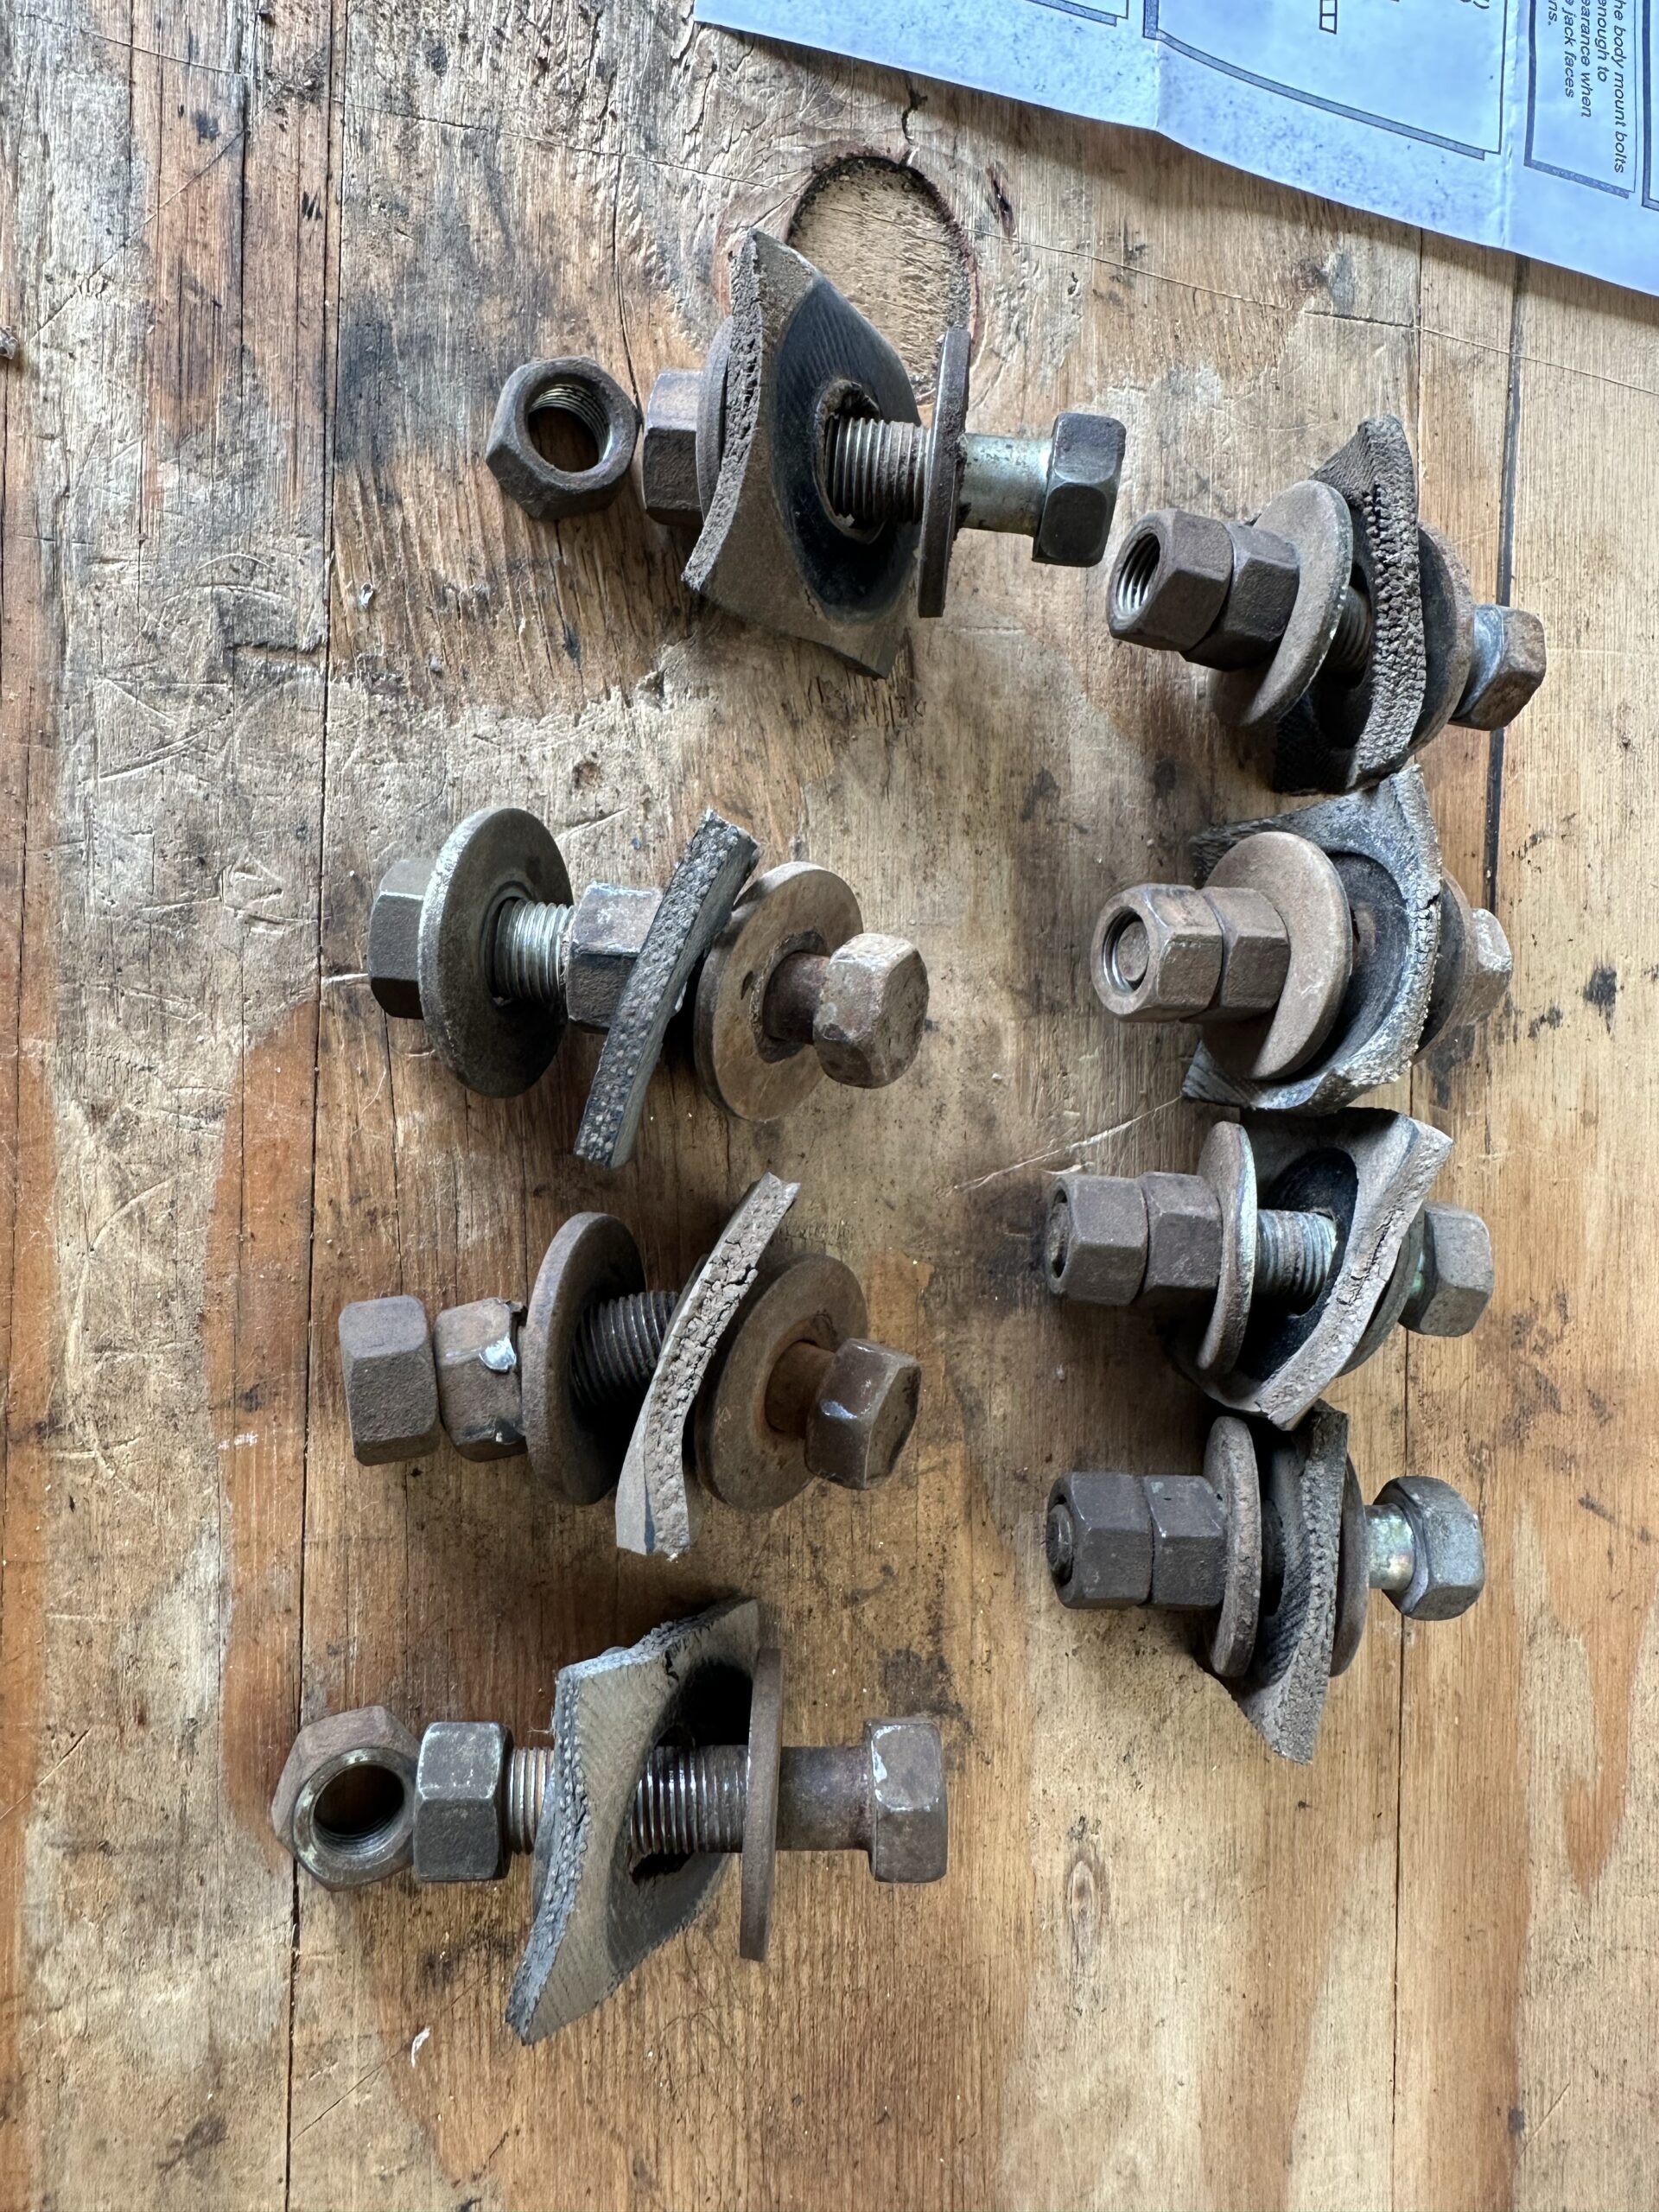
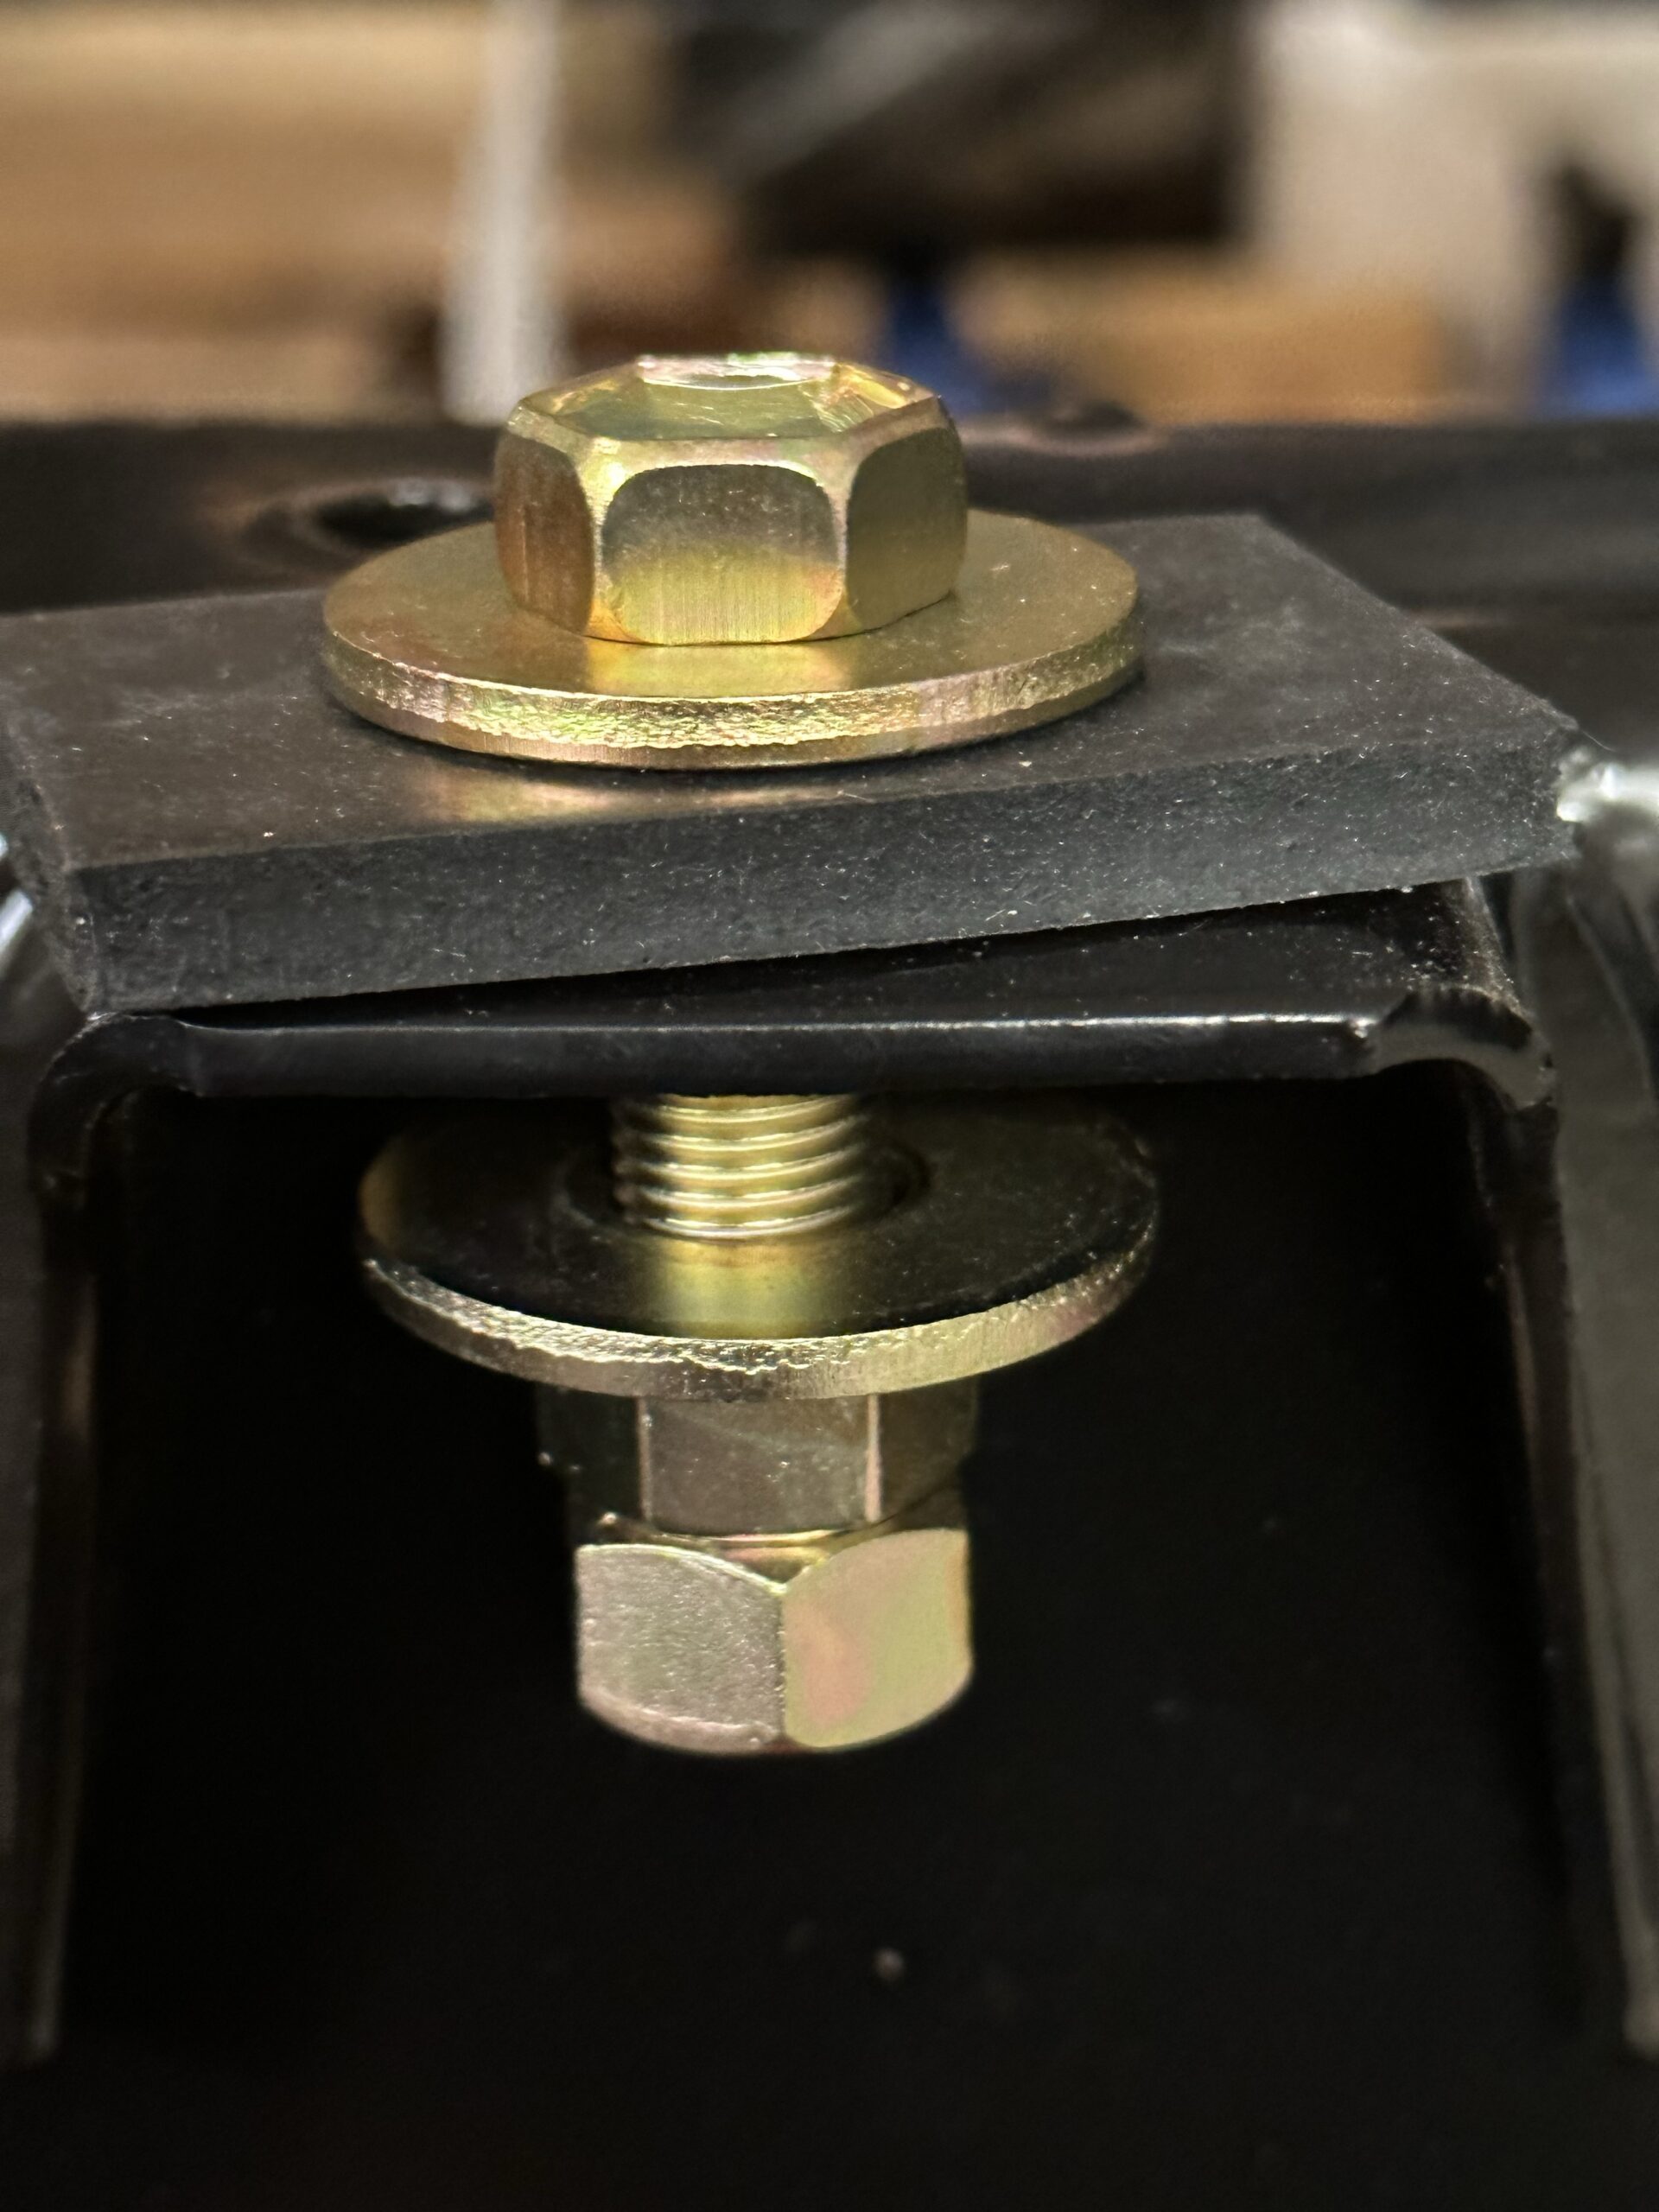
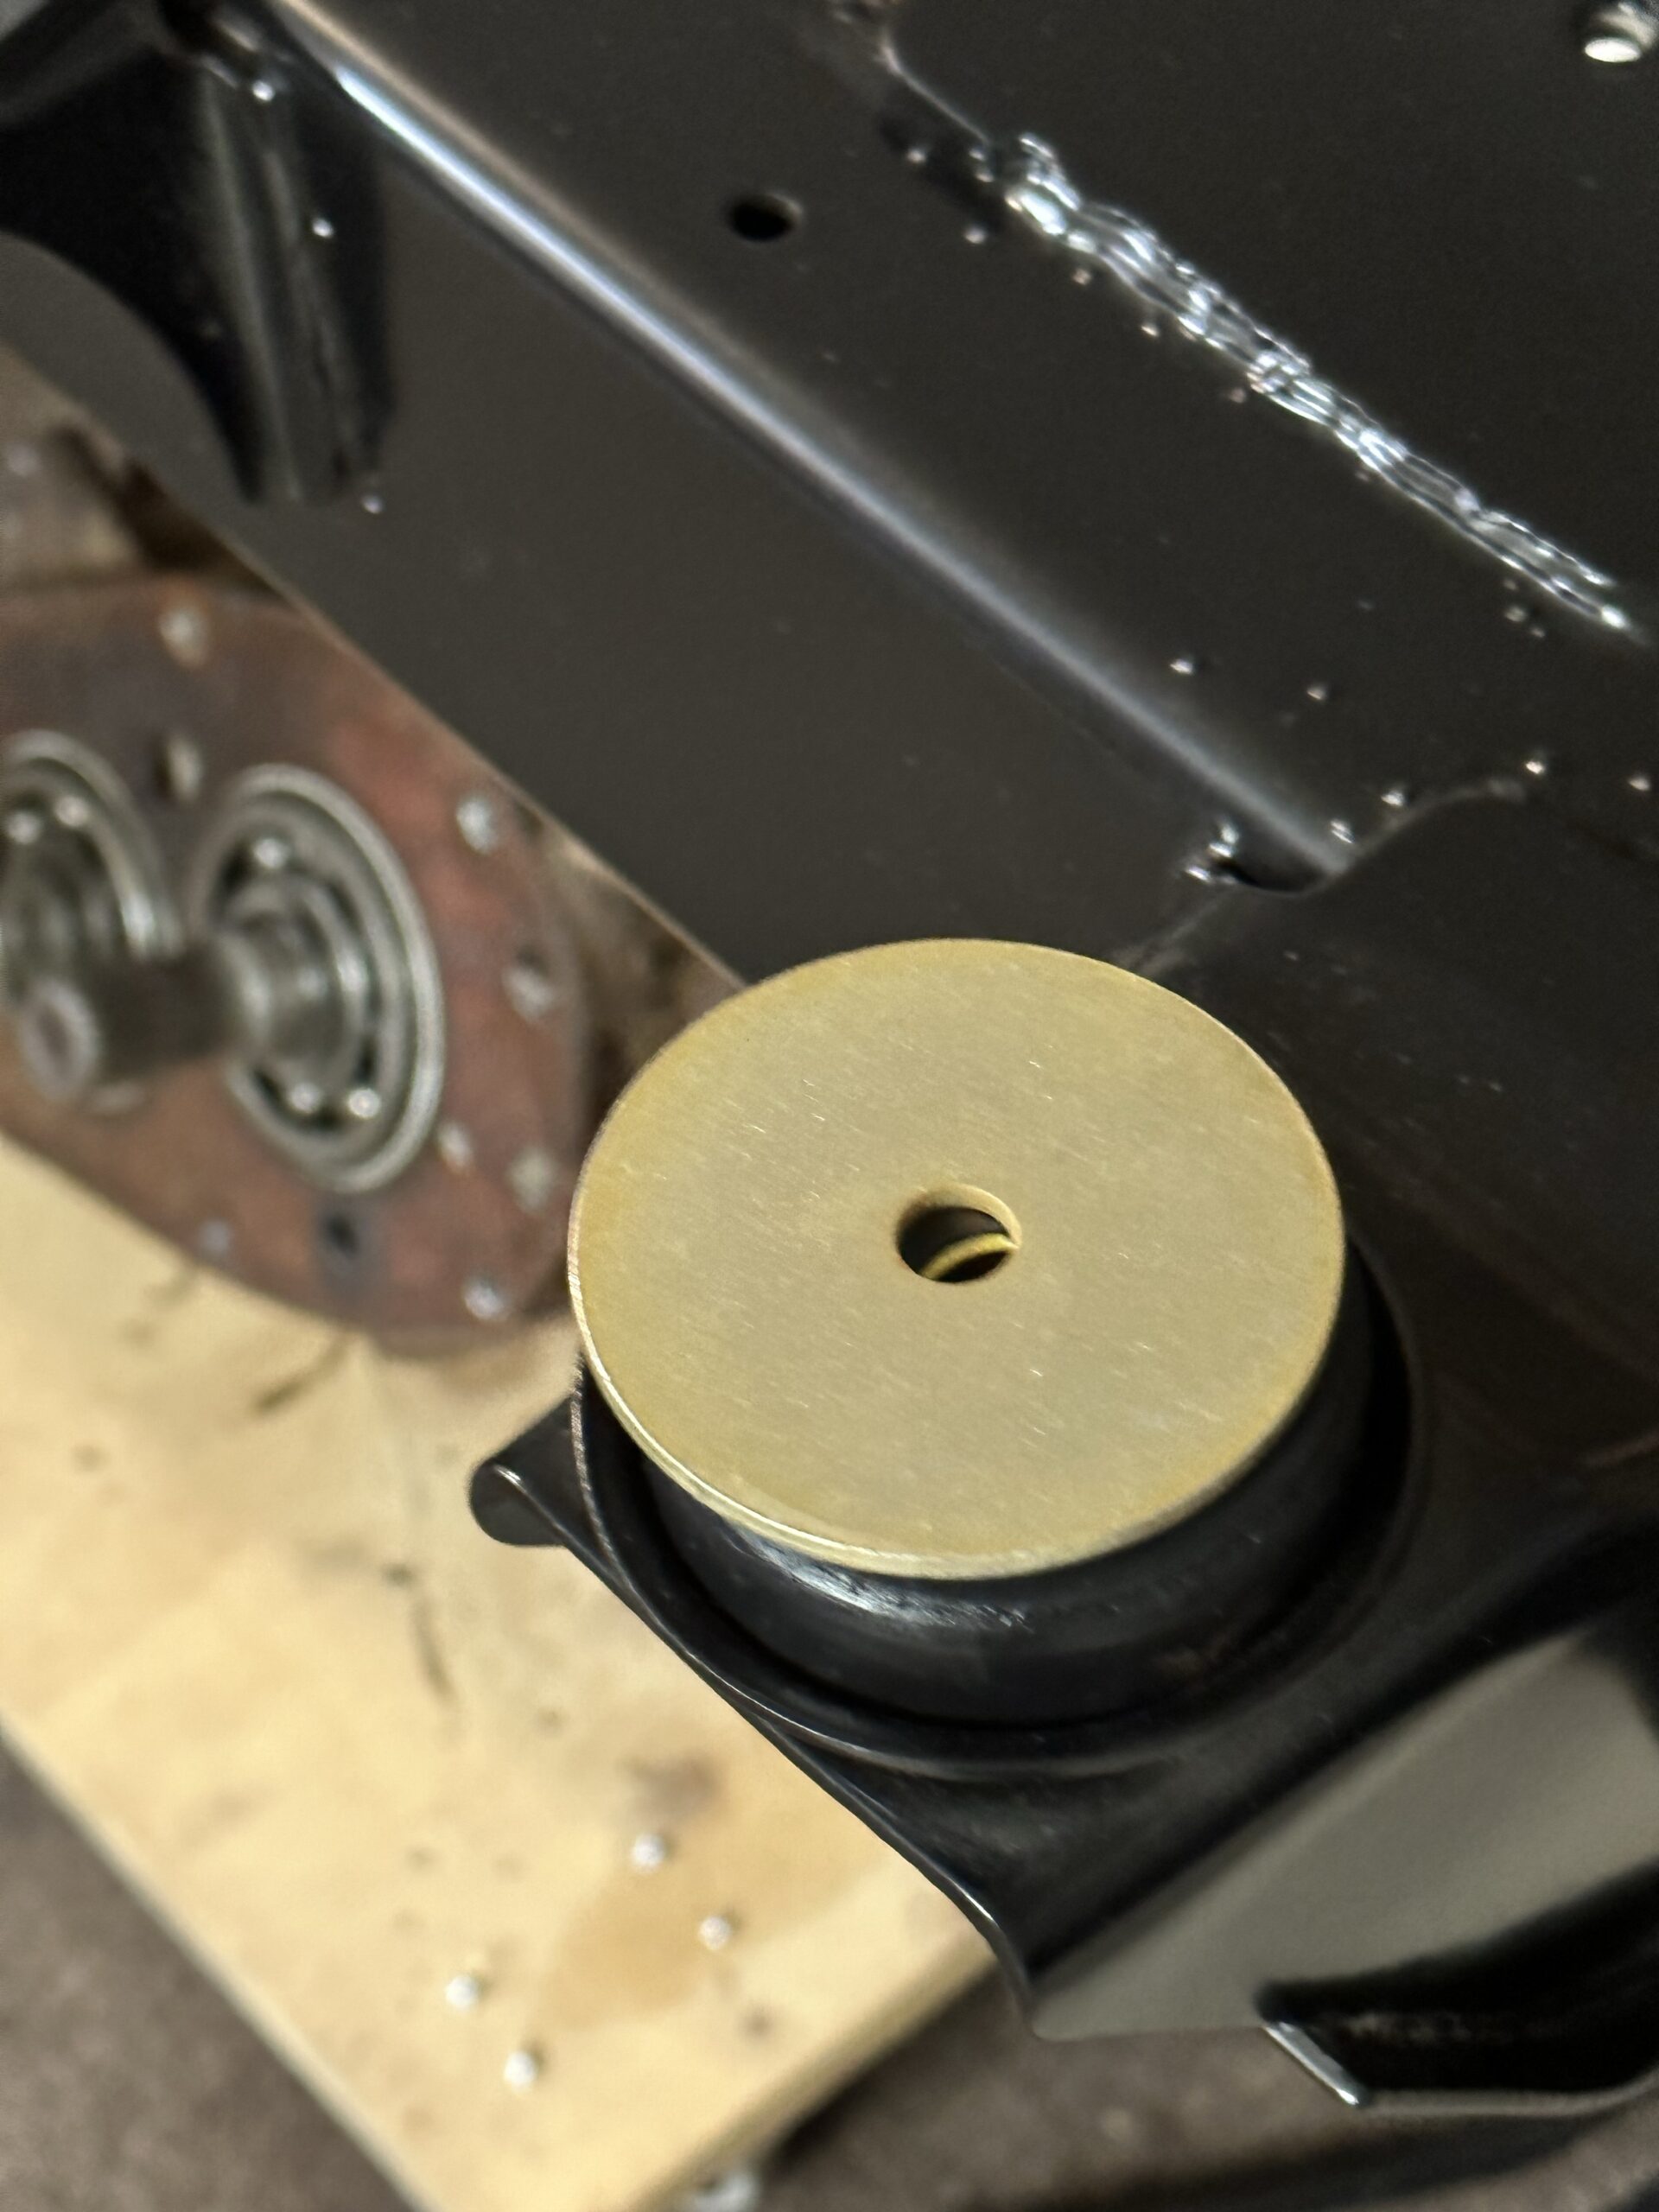
I’ve been working on the body mounting hardware. I have not been able to find the cab to frame bolts and washers from when I took the truck apart so I ordered a set of those. Unfortunately only part of the order arrived and I still need to find nuts but we are getting there! For the bed to frame bolts I have 6 of 8 since two broke during disassembly. I’ve plated what I have and I bought new bolts from the Budget Bolt here in town. I don’t really like using the new bolts because they have different head sizes but I have not be able to find replacements for the original bolts anywhere. Also they are black oxide. Maybe I will plate them too at some point to match the others. I ordered new bed to frame bushings and they look great! The cab to frame bushings from Energy Suspension are also very nice quality.
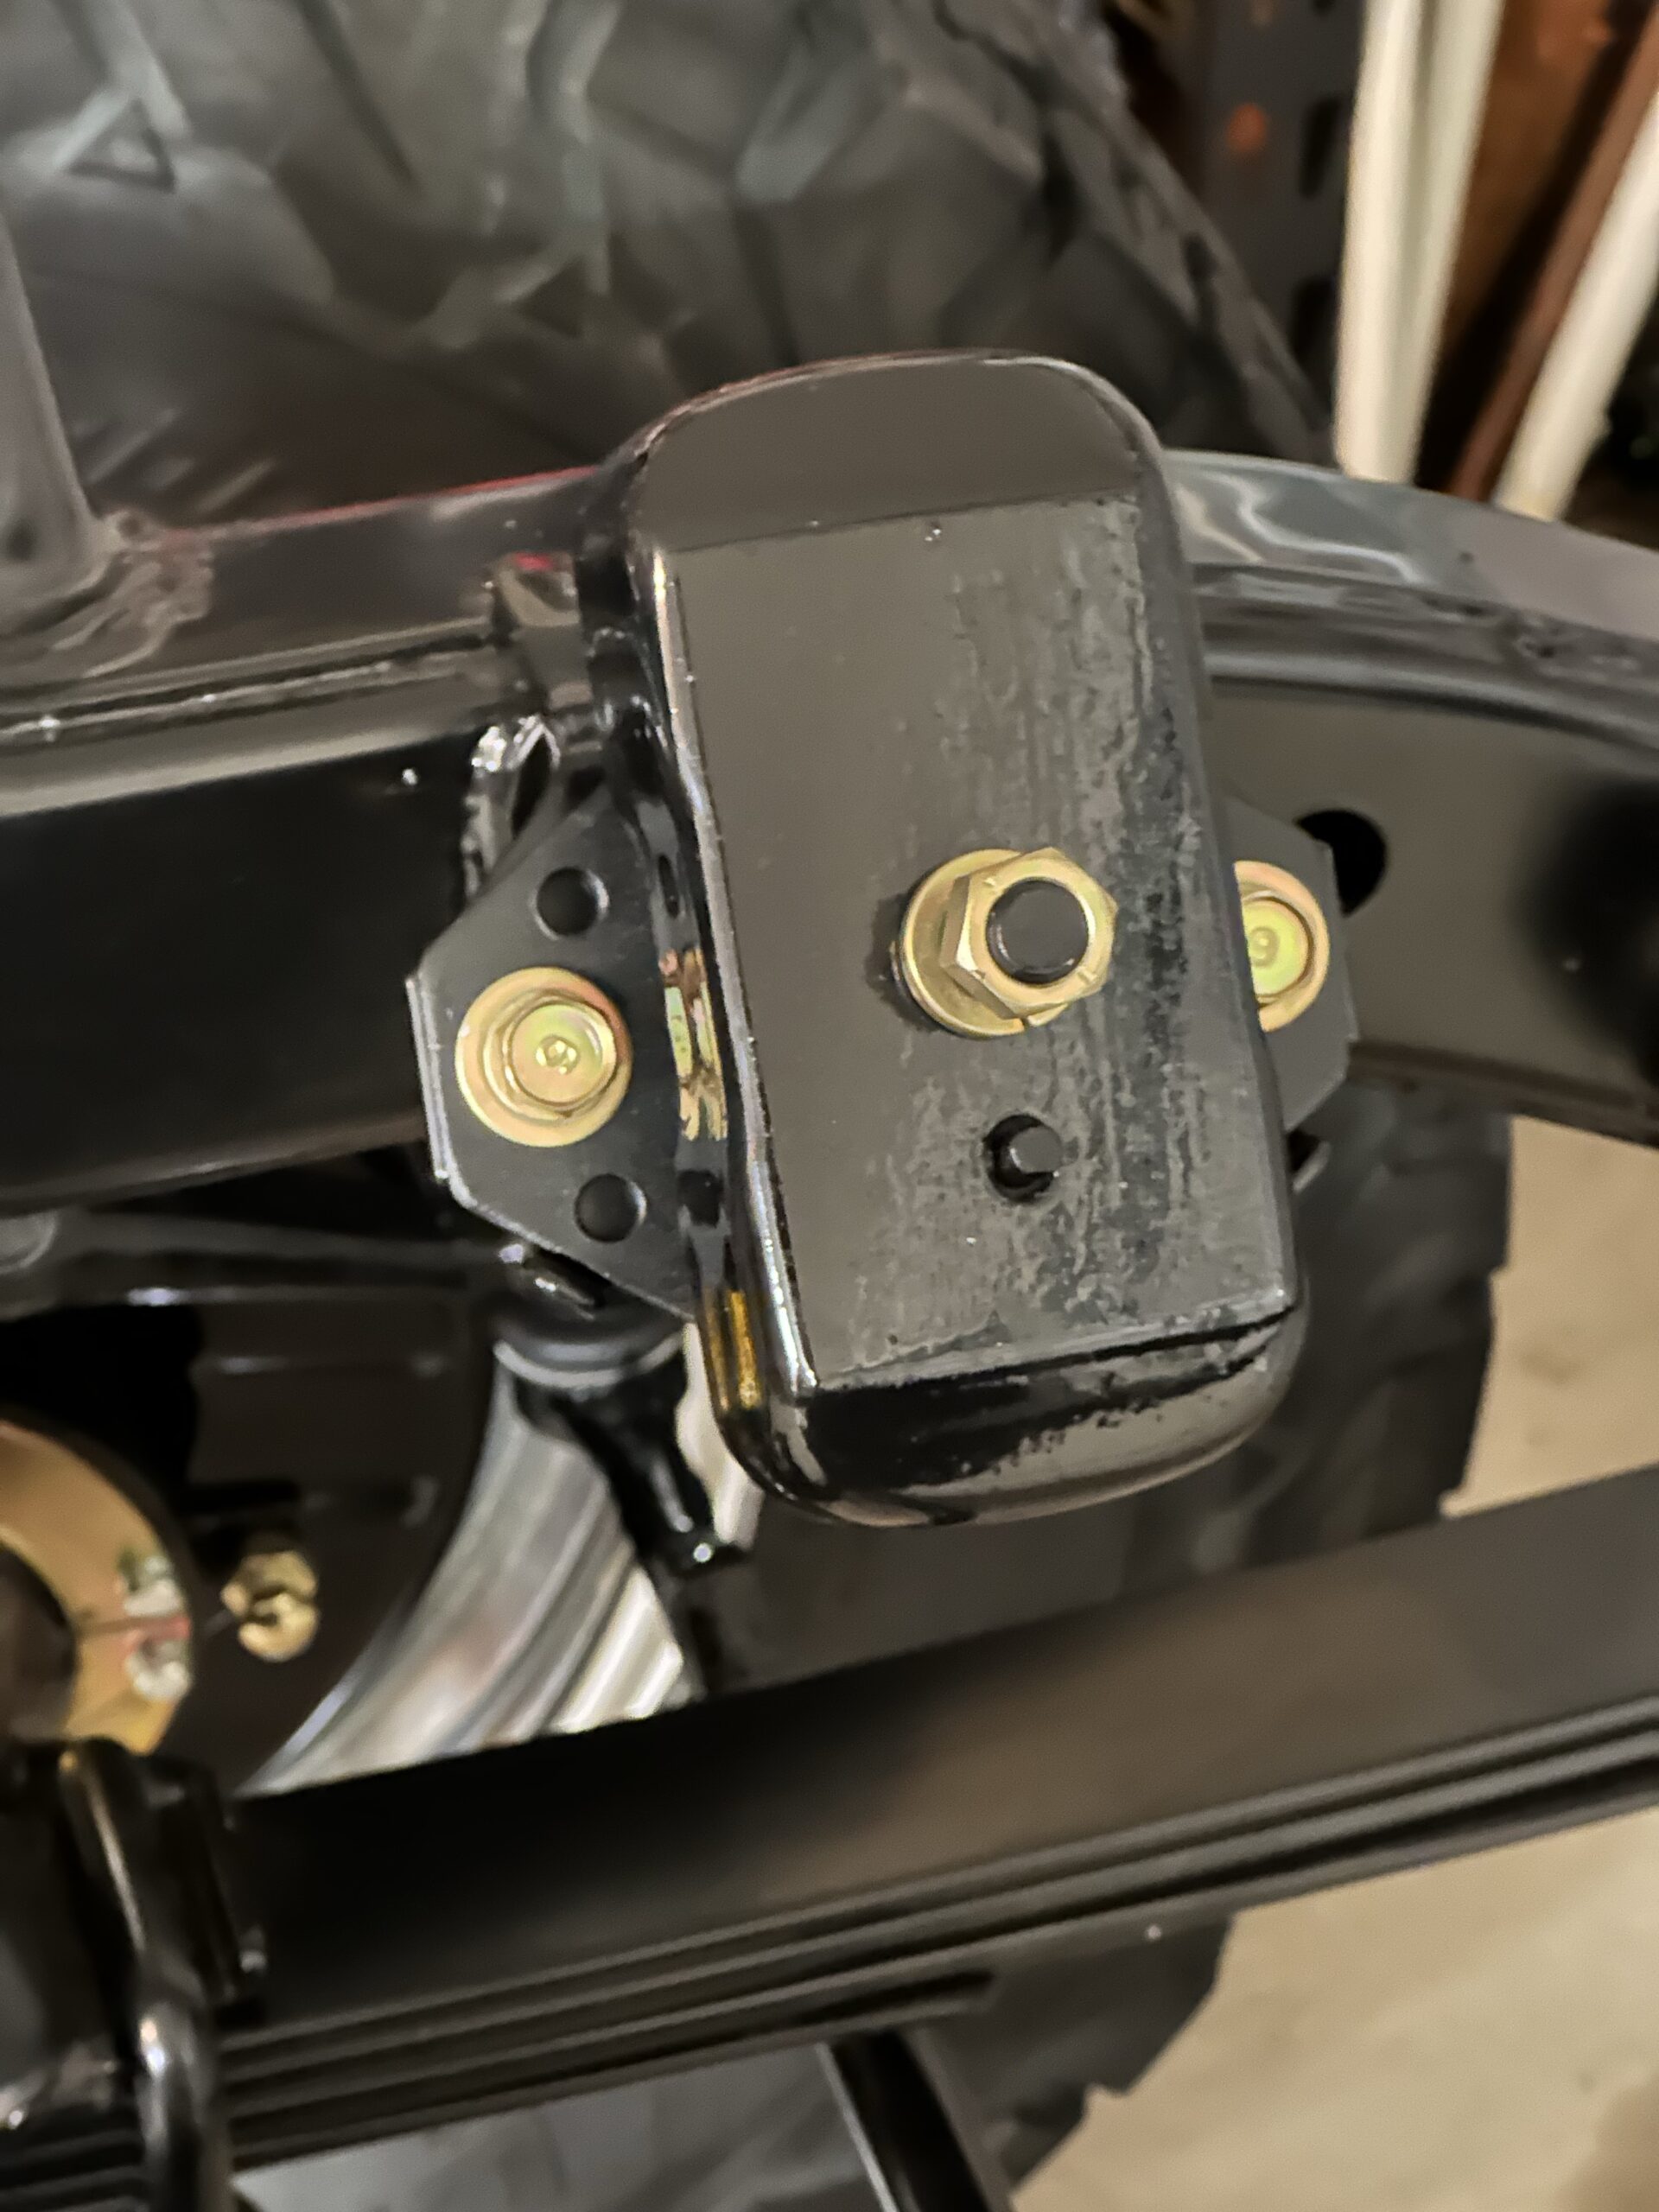
Today I installed the motor mounts. The previous mounts were both broke where the rubber meets the stud plate so I ordered a new pair. There are some fancy mounts out there but I went with a set of basic Beck Arnley mounts. I was fairly disappointed in the quality of these mounts. One had a pin that seemed a little too small in diameter and the other had such a fat pin that I had to dremel it down to get it to fit into the motor mount plate. I think they will work fine but I was surprised how sloppy they were.
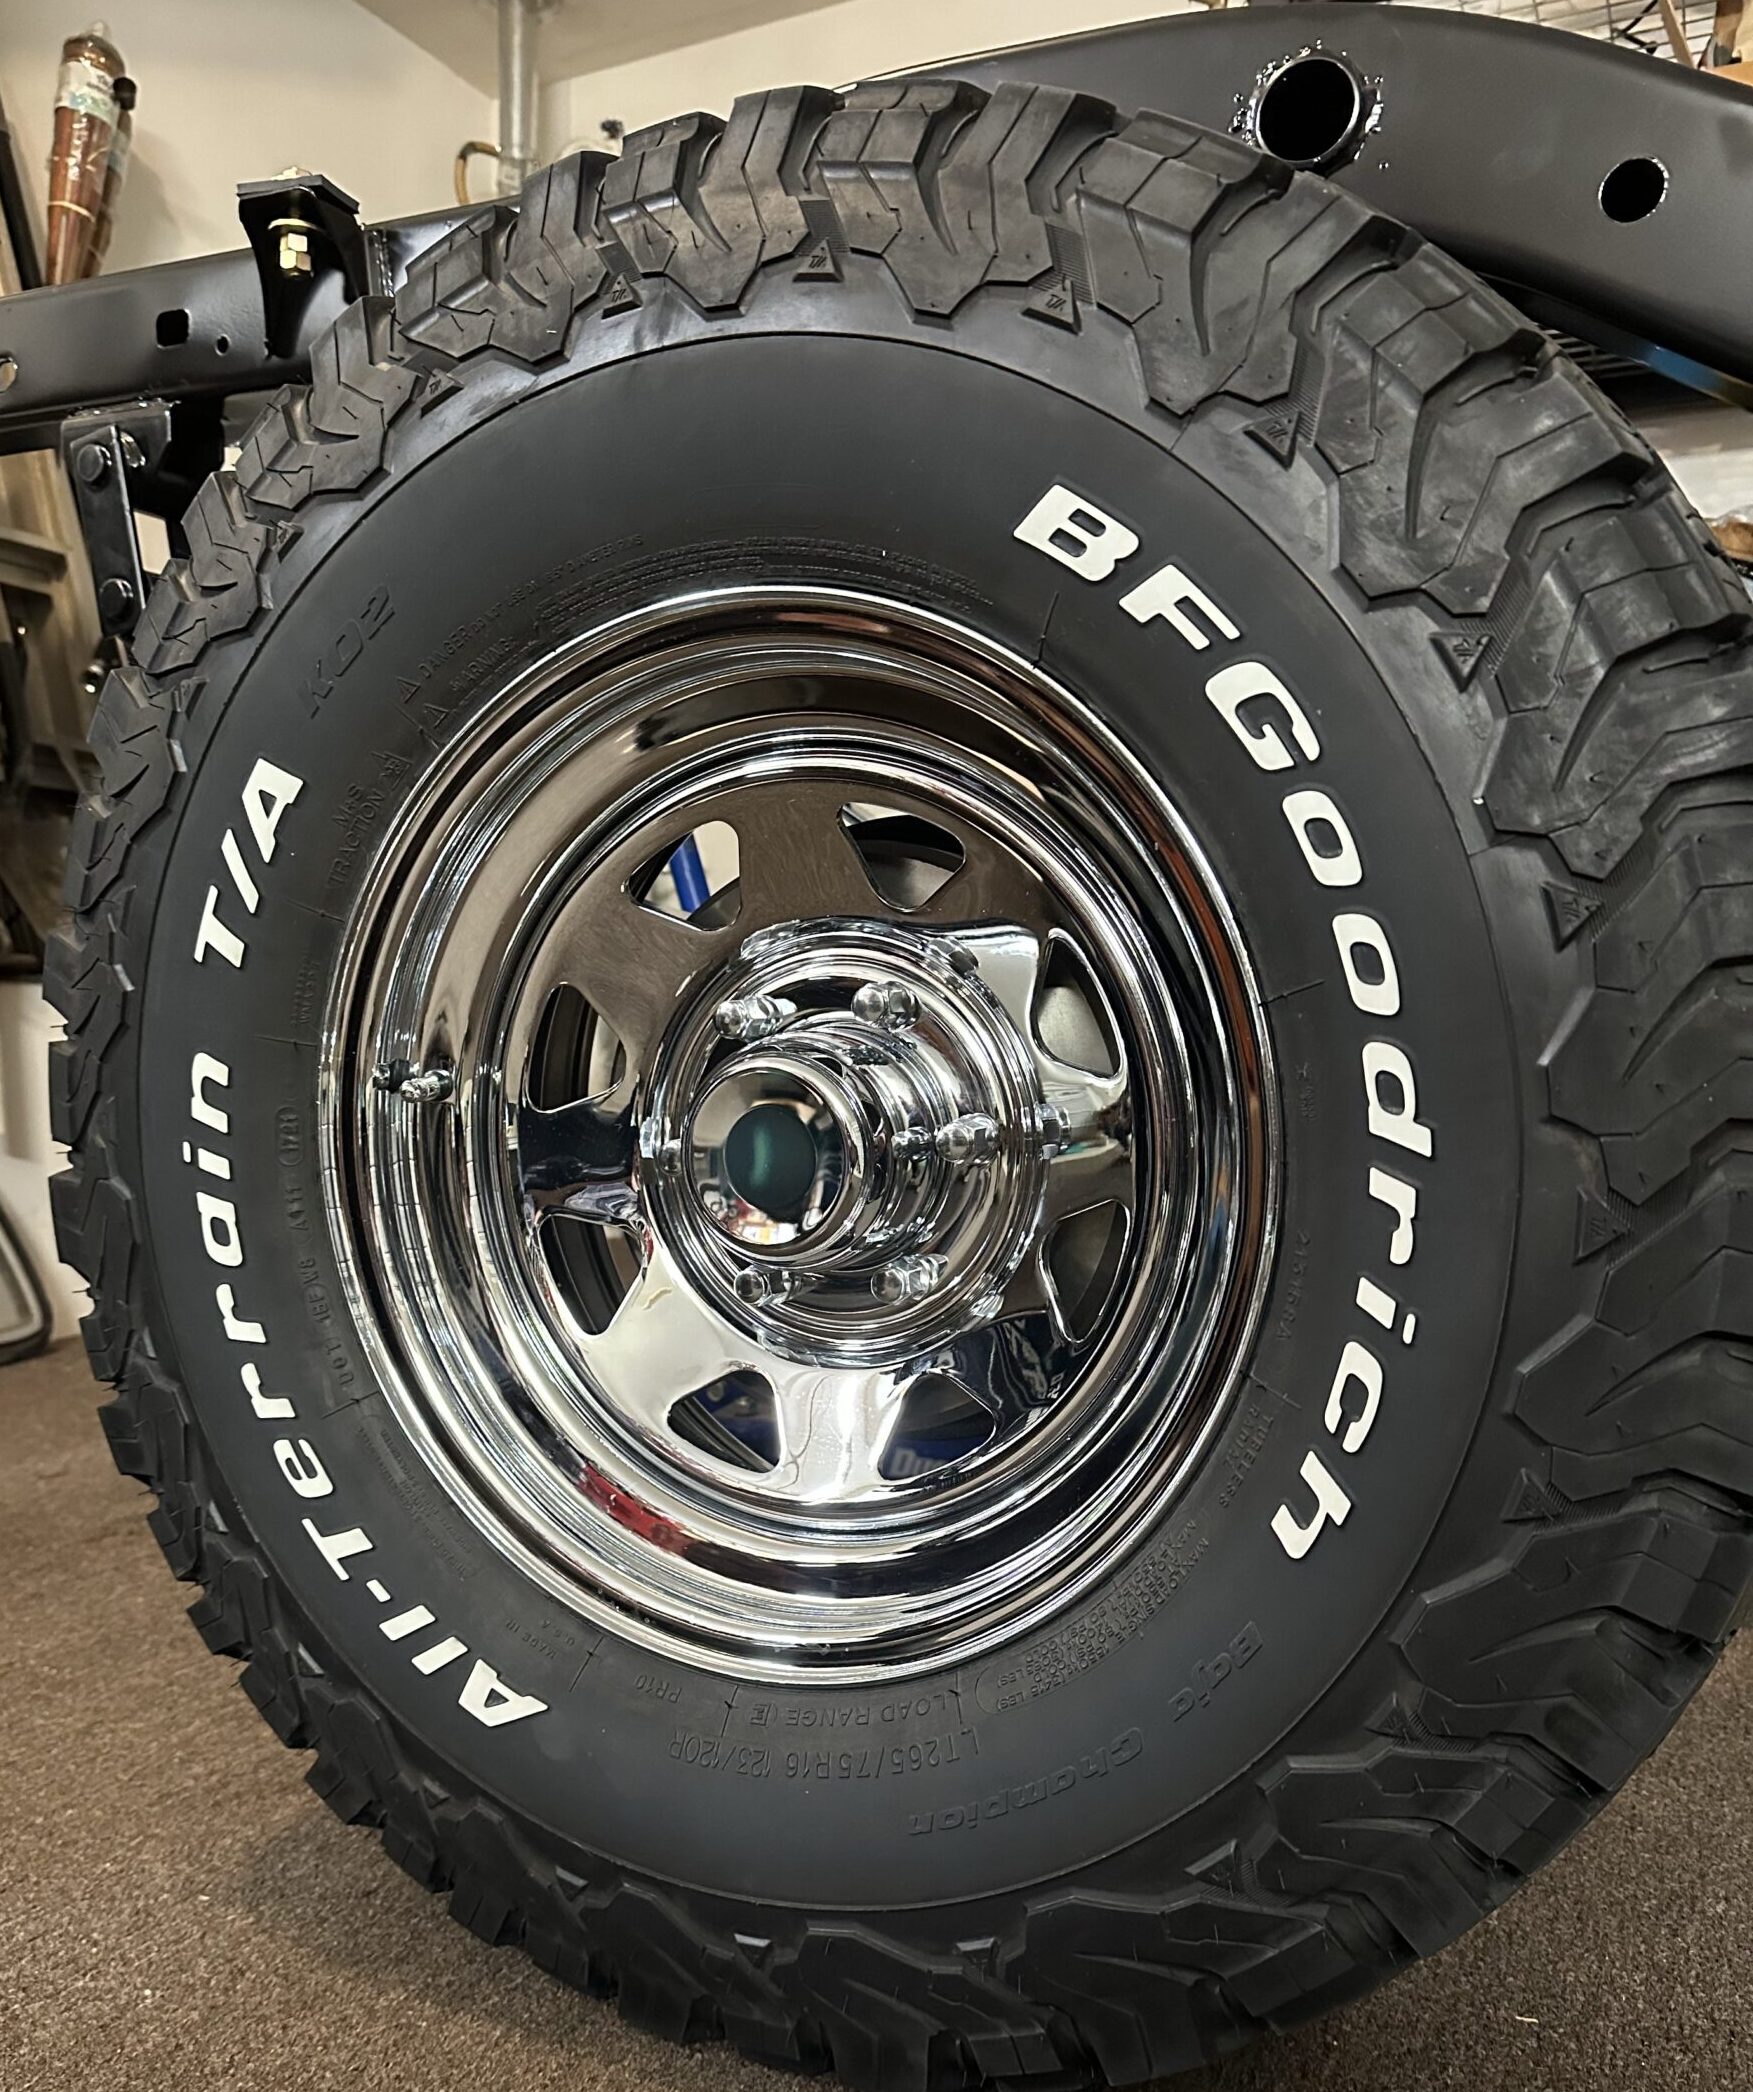
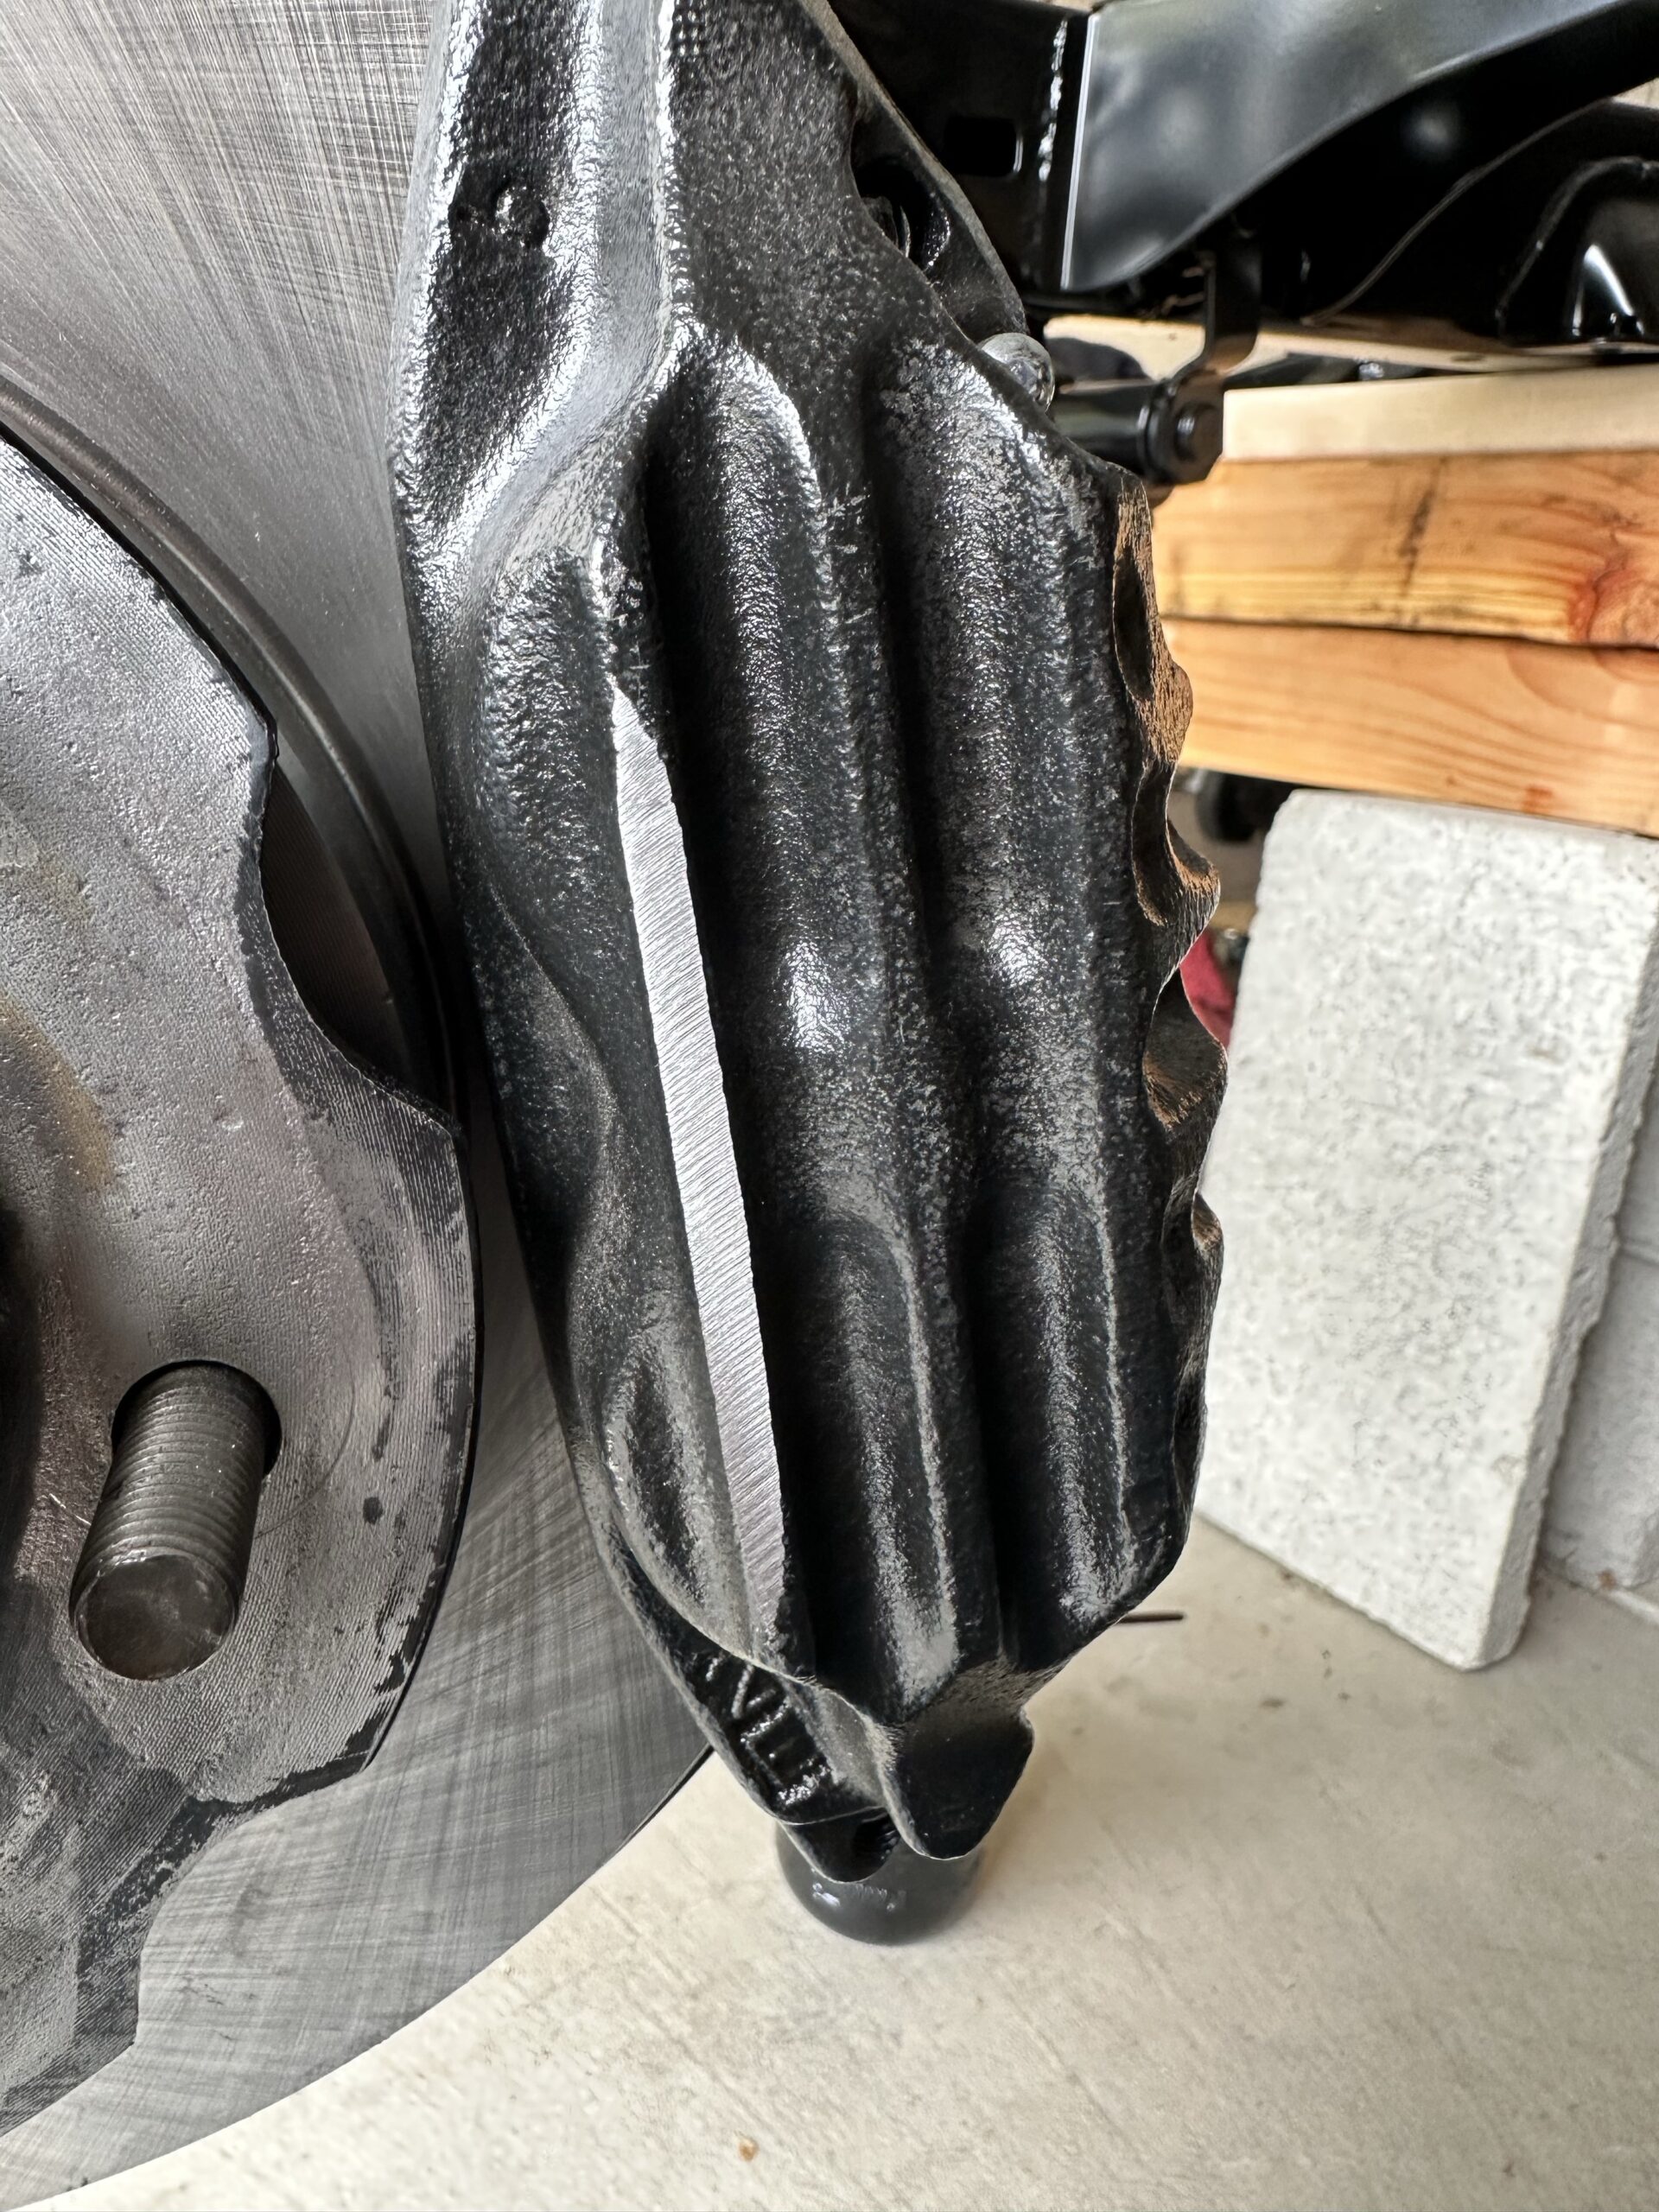
Today I ground down the brake calipers a bit, touched them up and mounted the tires. It is sure nice to see the truck with the tires on! We are getting close to ready for mounting the body and the bed. The only thing left to do is to sort out the bed to frame and cab to frame bolts.
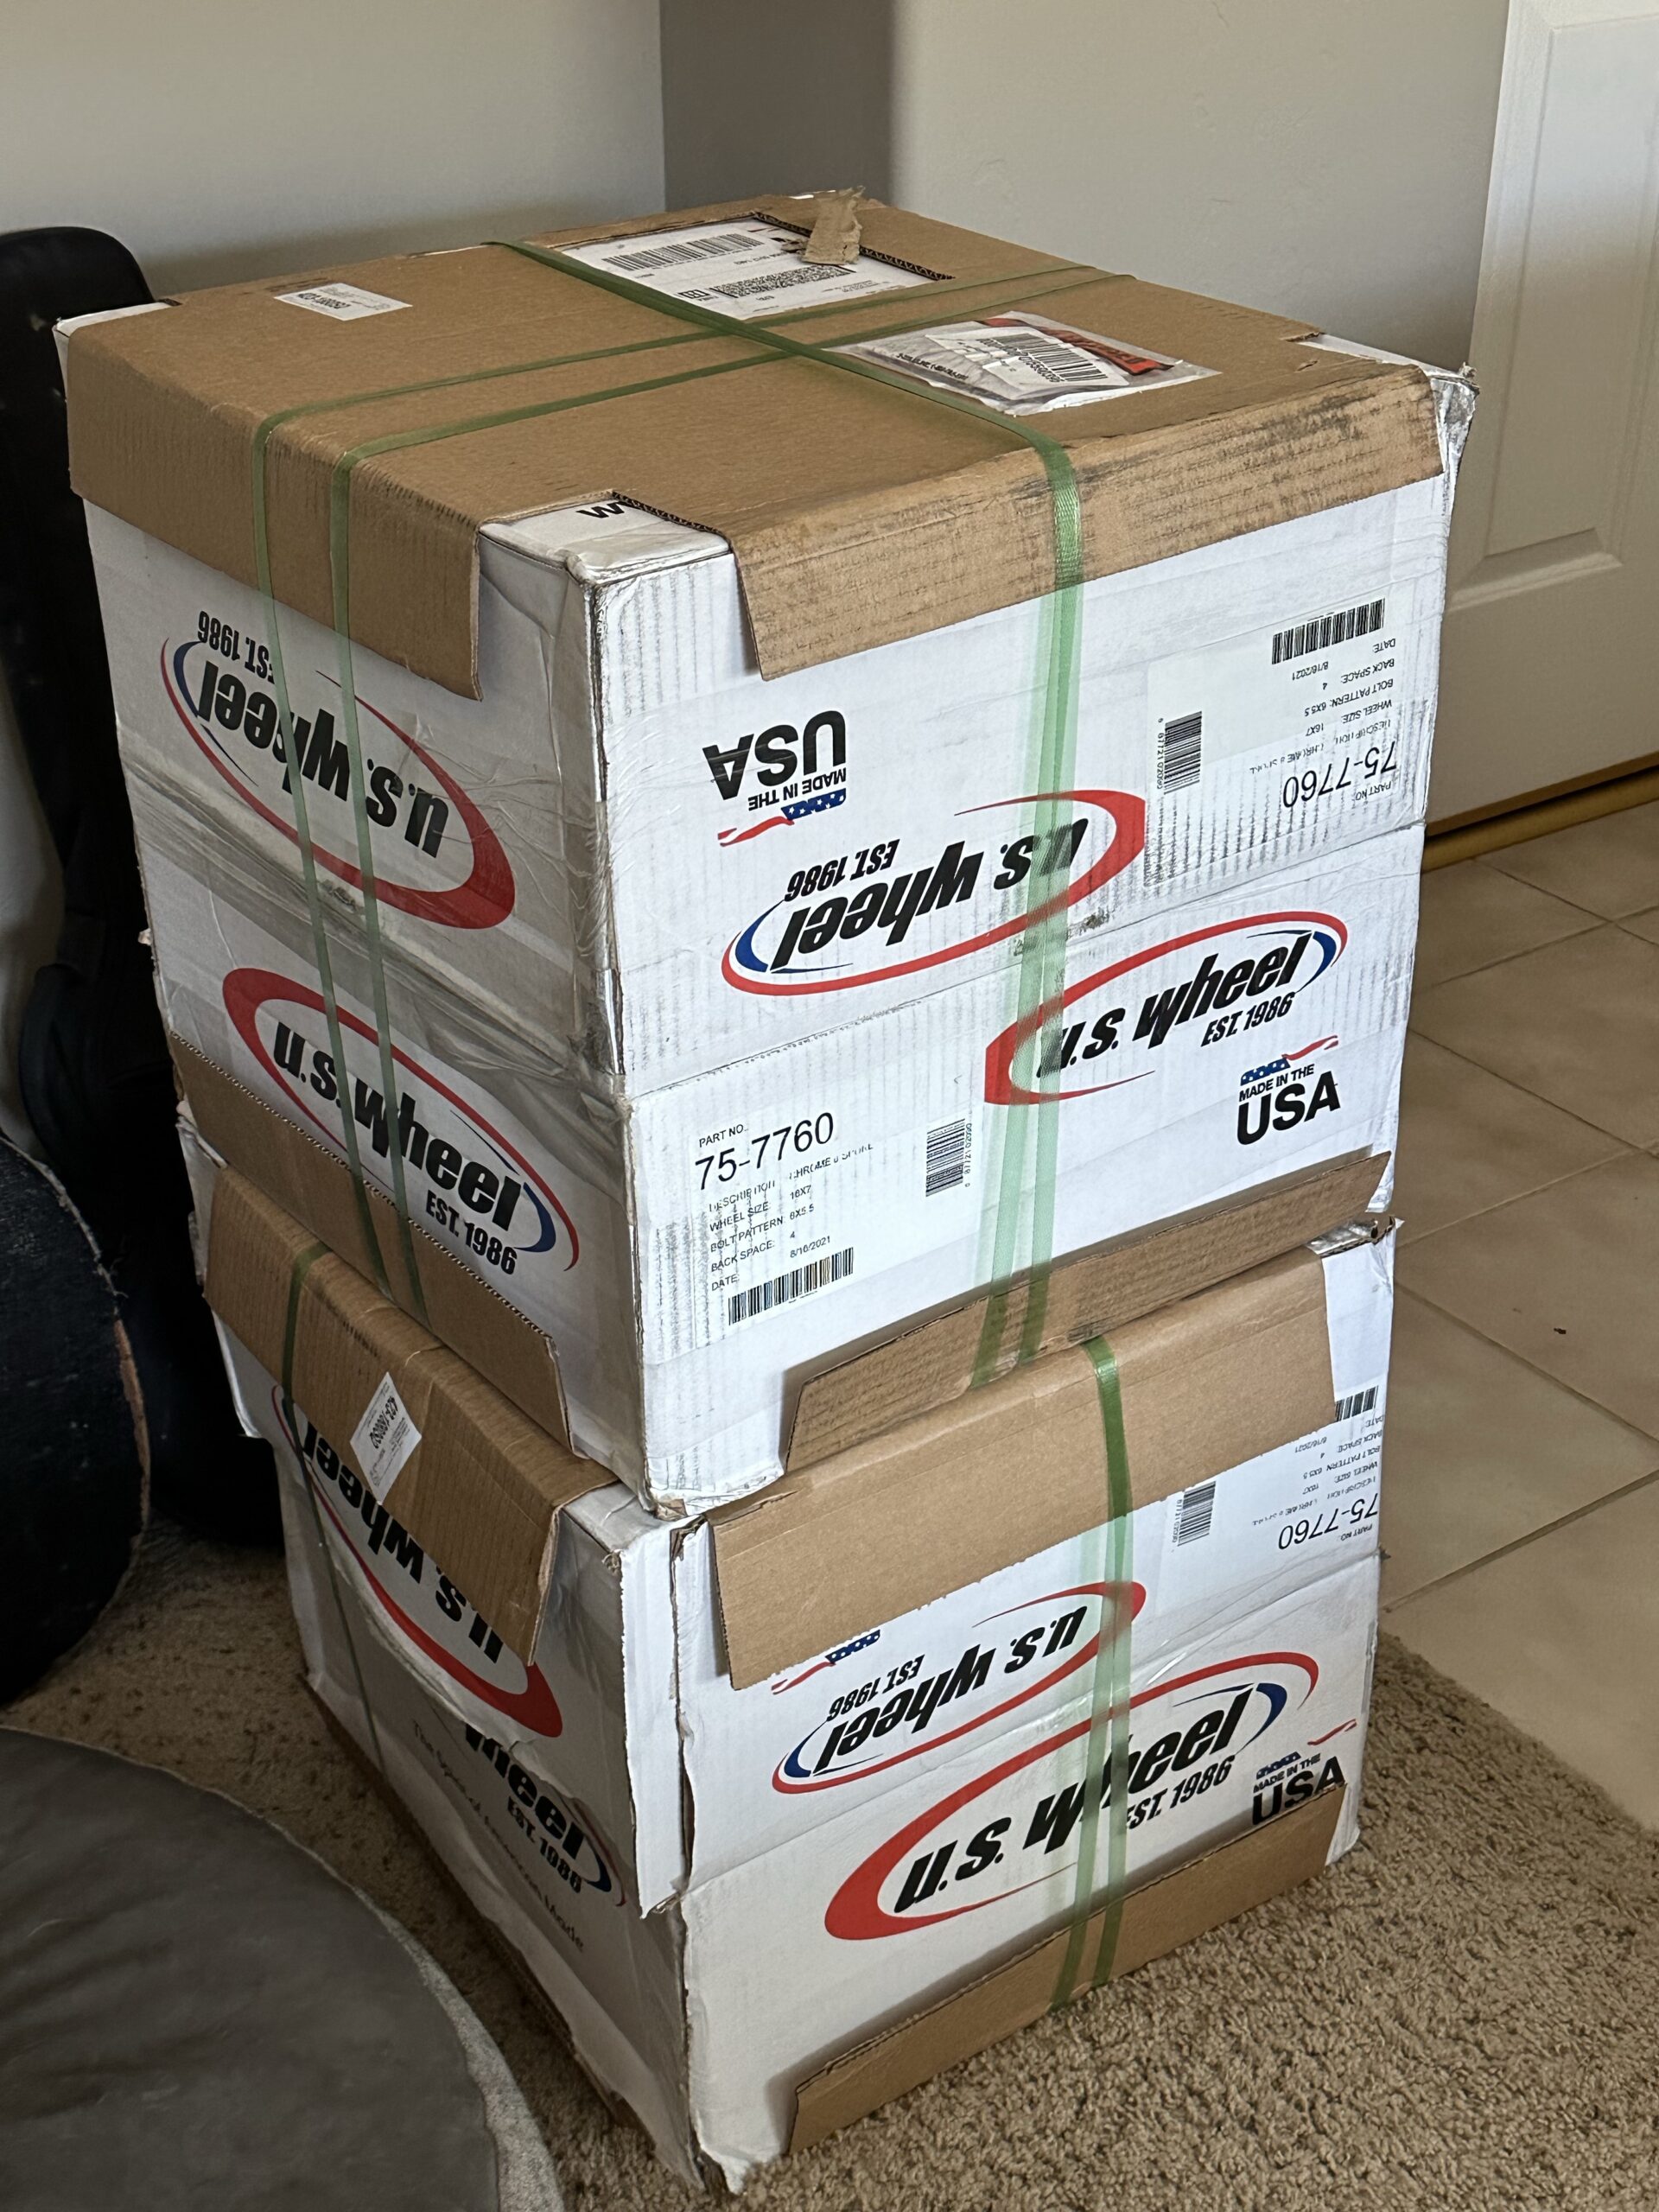
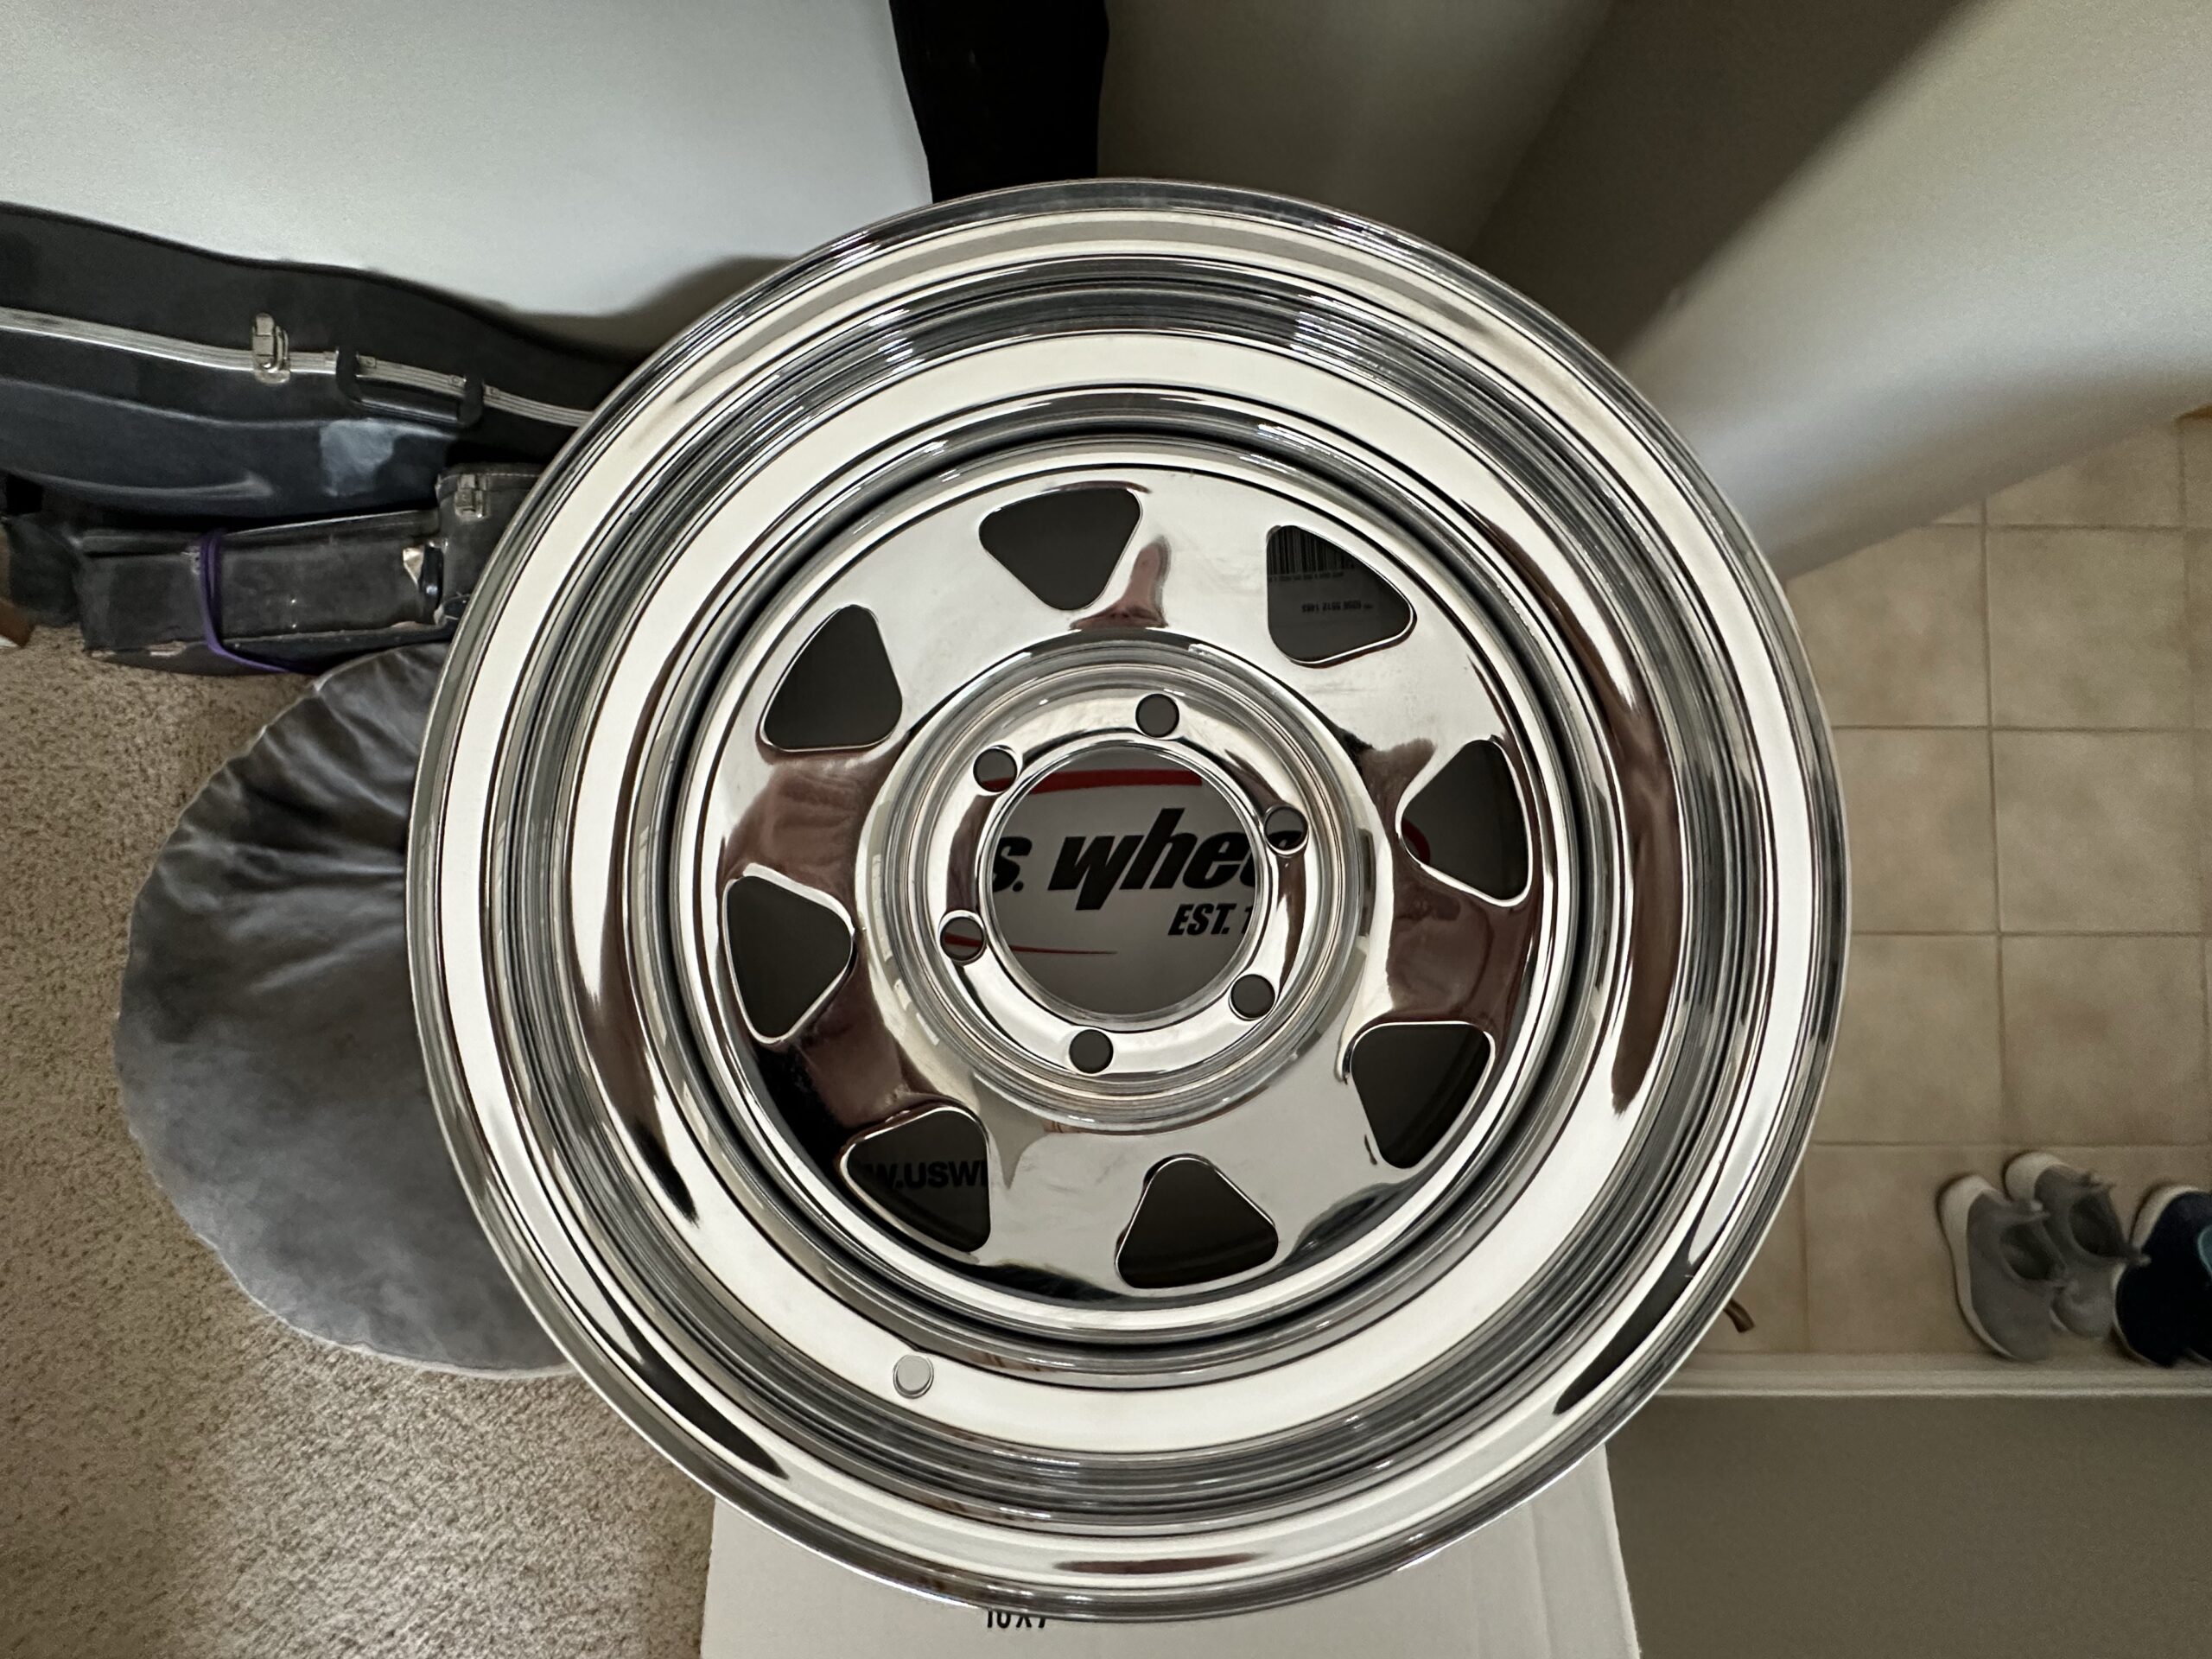
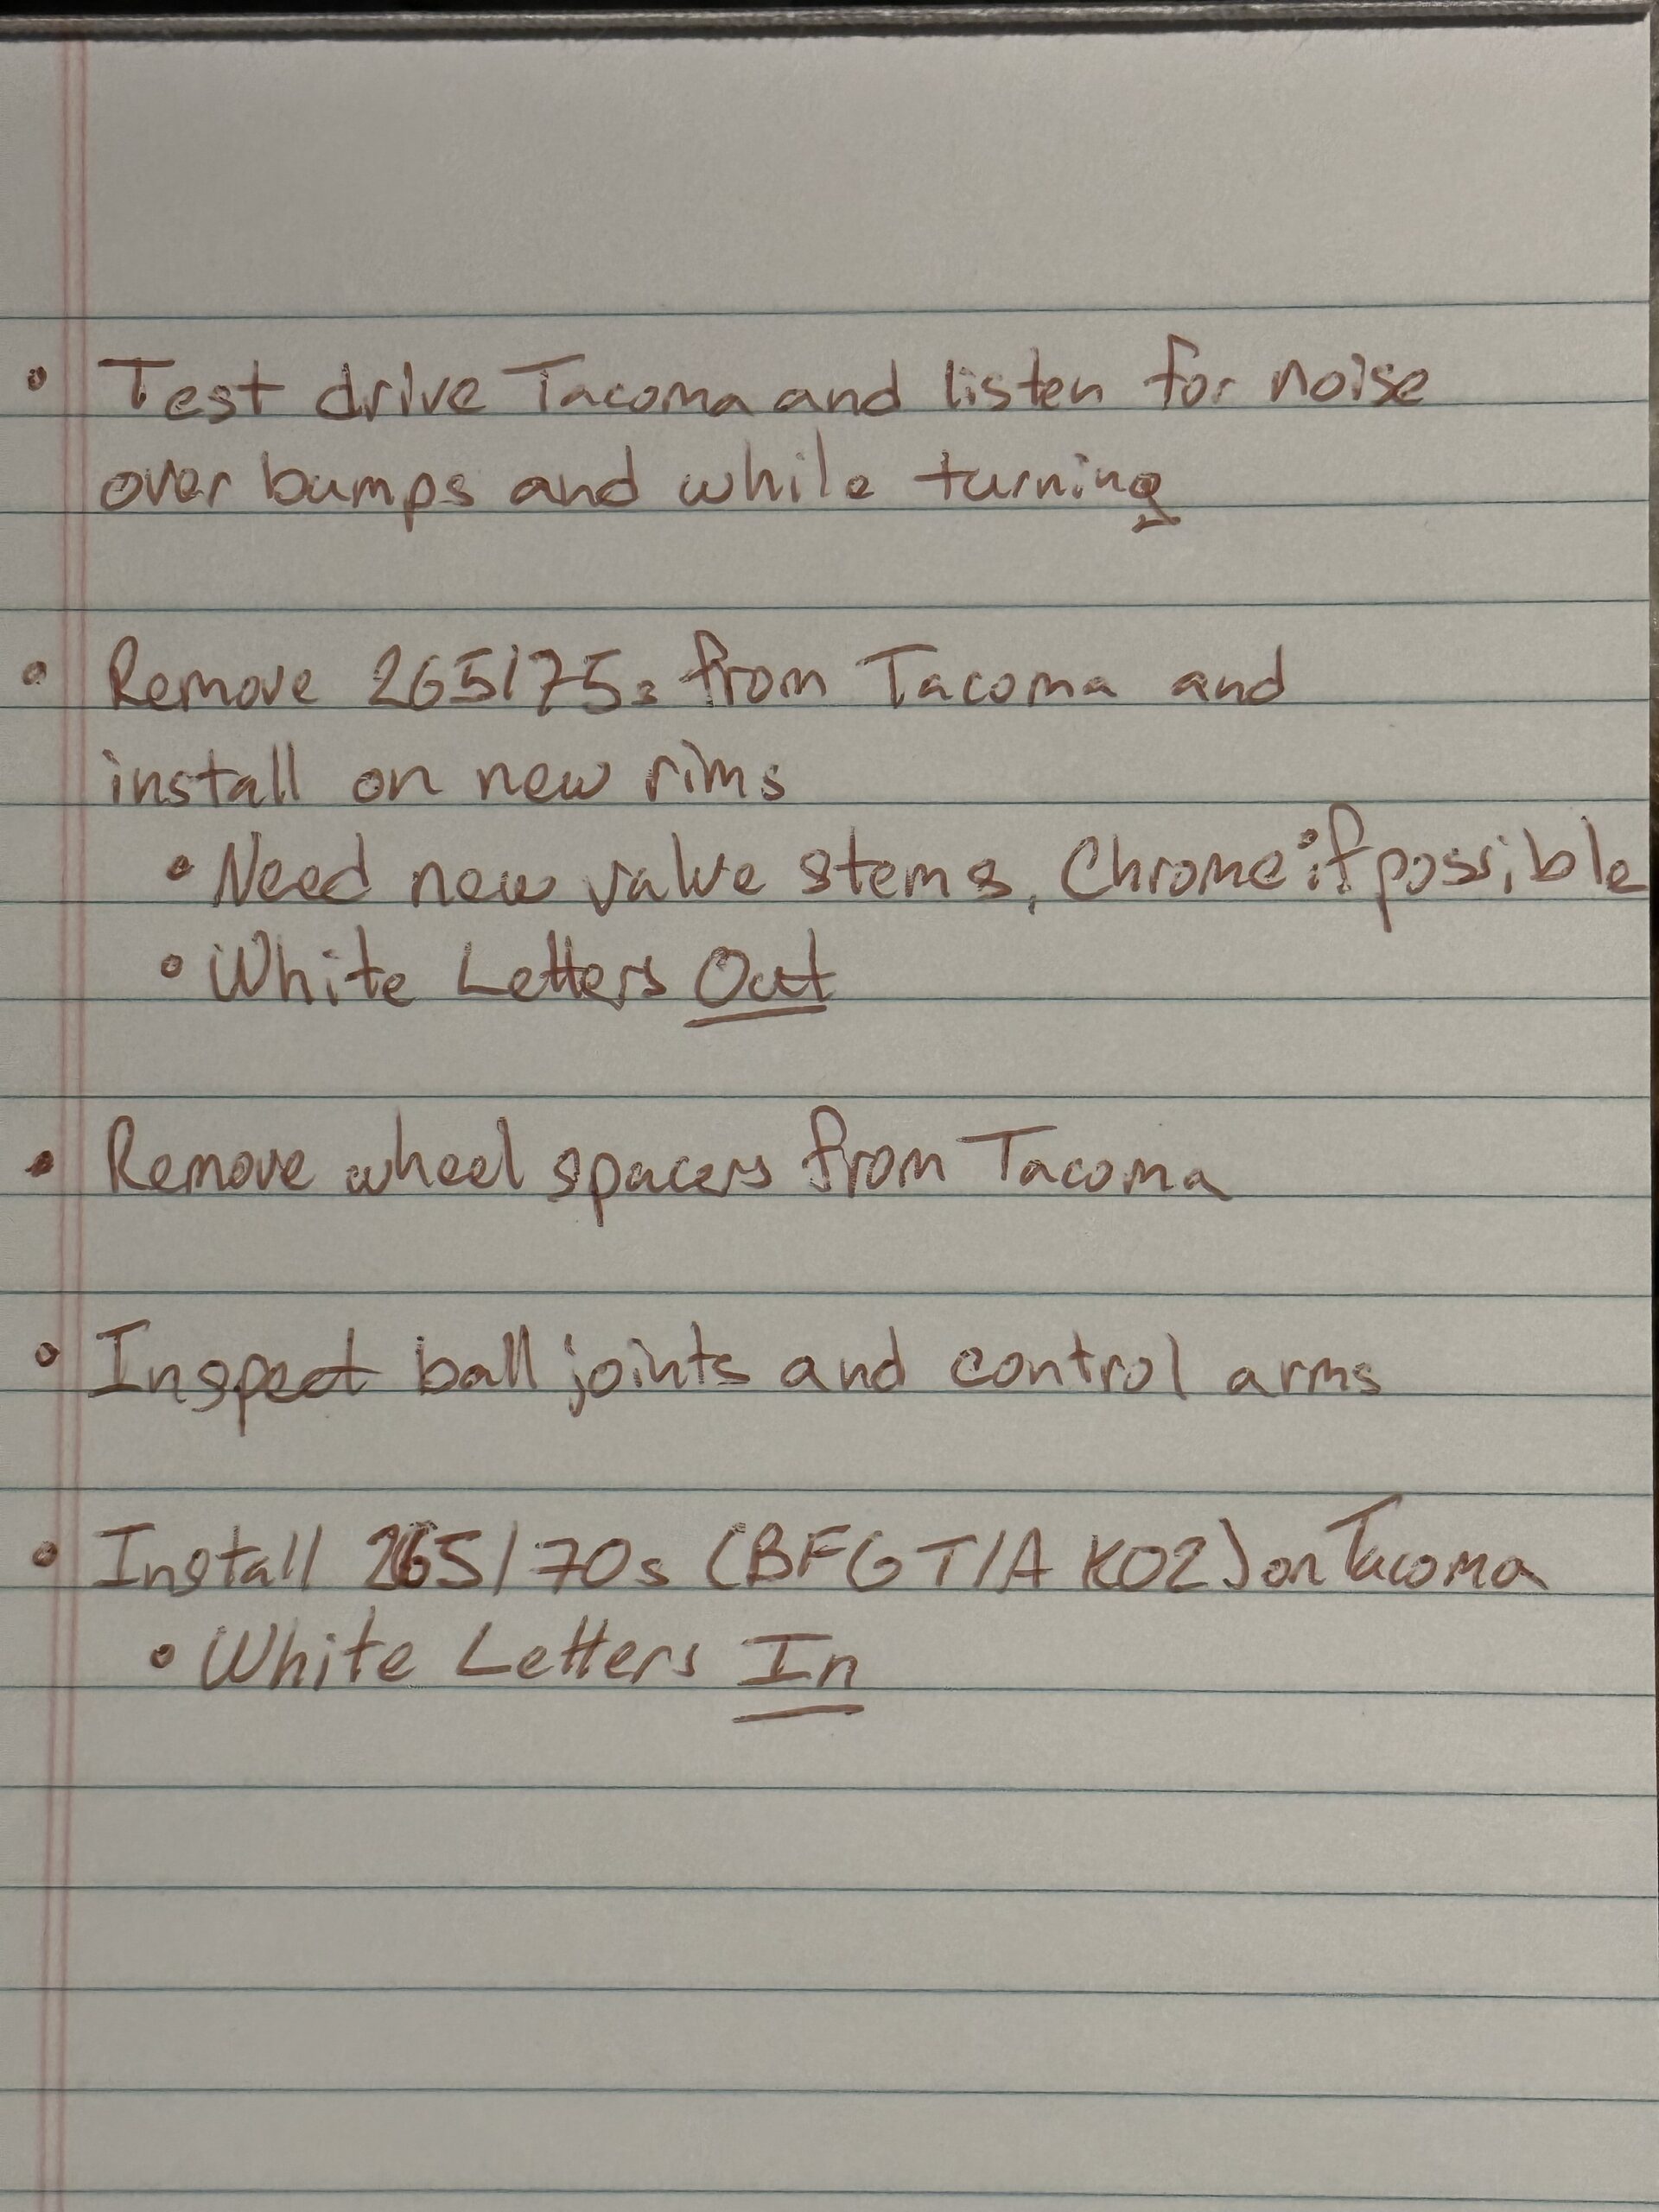
The wheels arrived over a week ago. Earlier this week I had the 265/75s removed from the grey Tacoma and mounted on the new wheels. I went back down to 265/70s on the gray truck and also removed the 1″ spacers. It is going to take a little getting used to, but the tires no longer rub the wheel-well lining and I can put the front mud flaps back on.
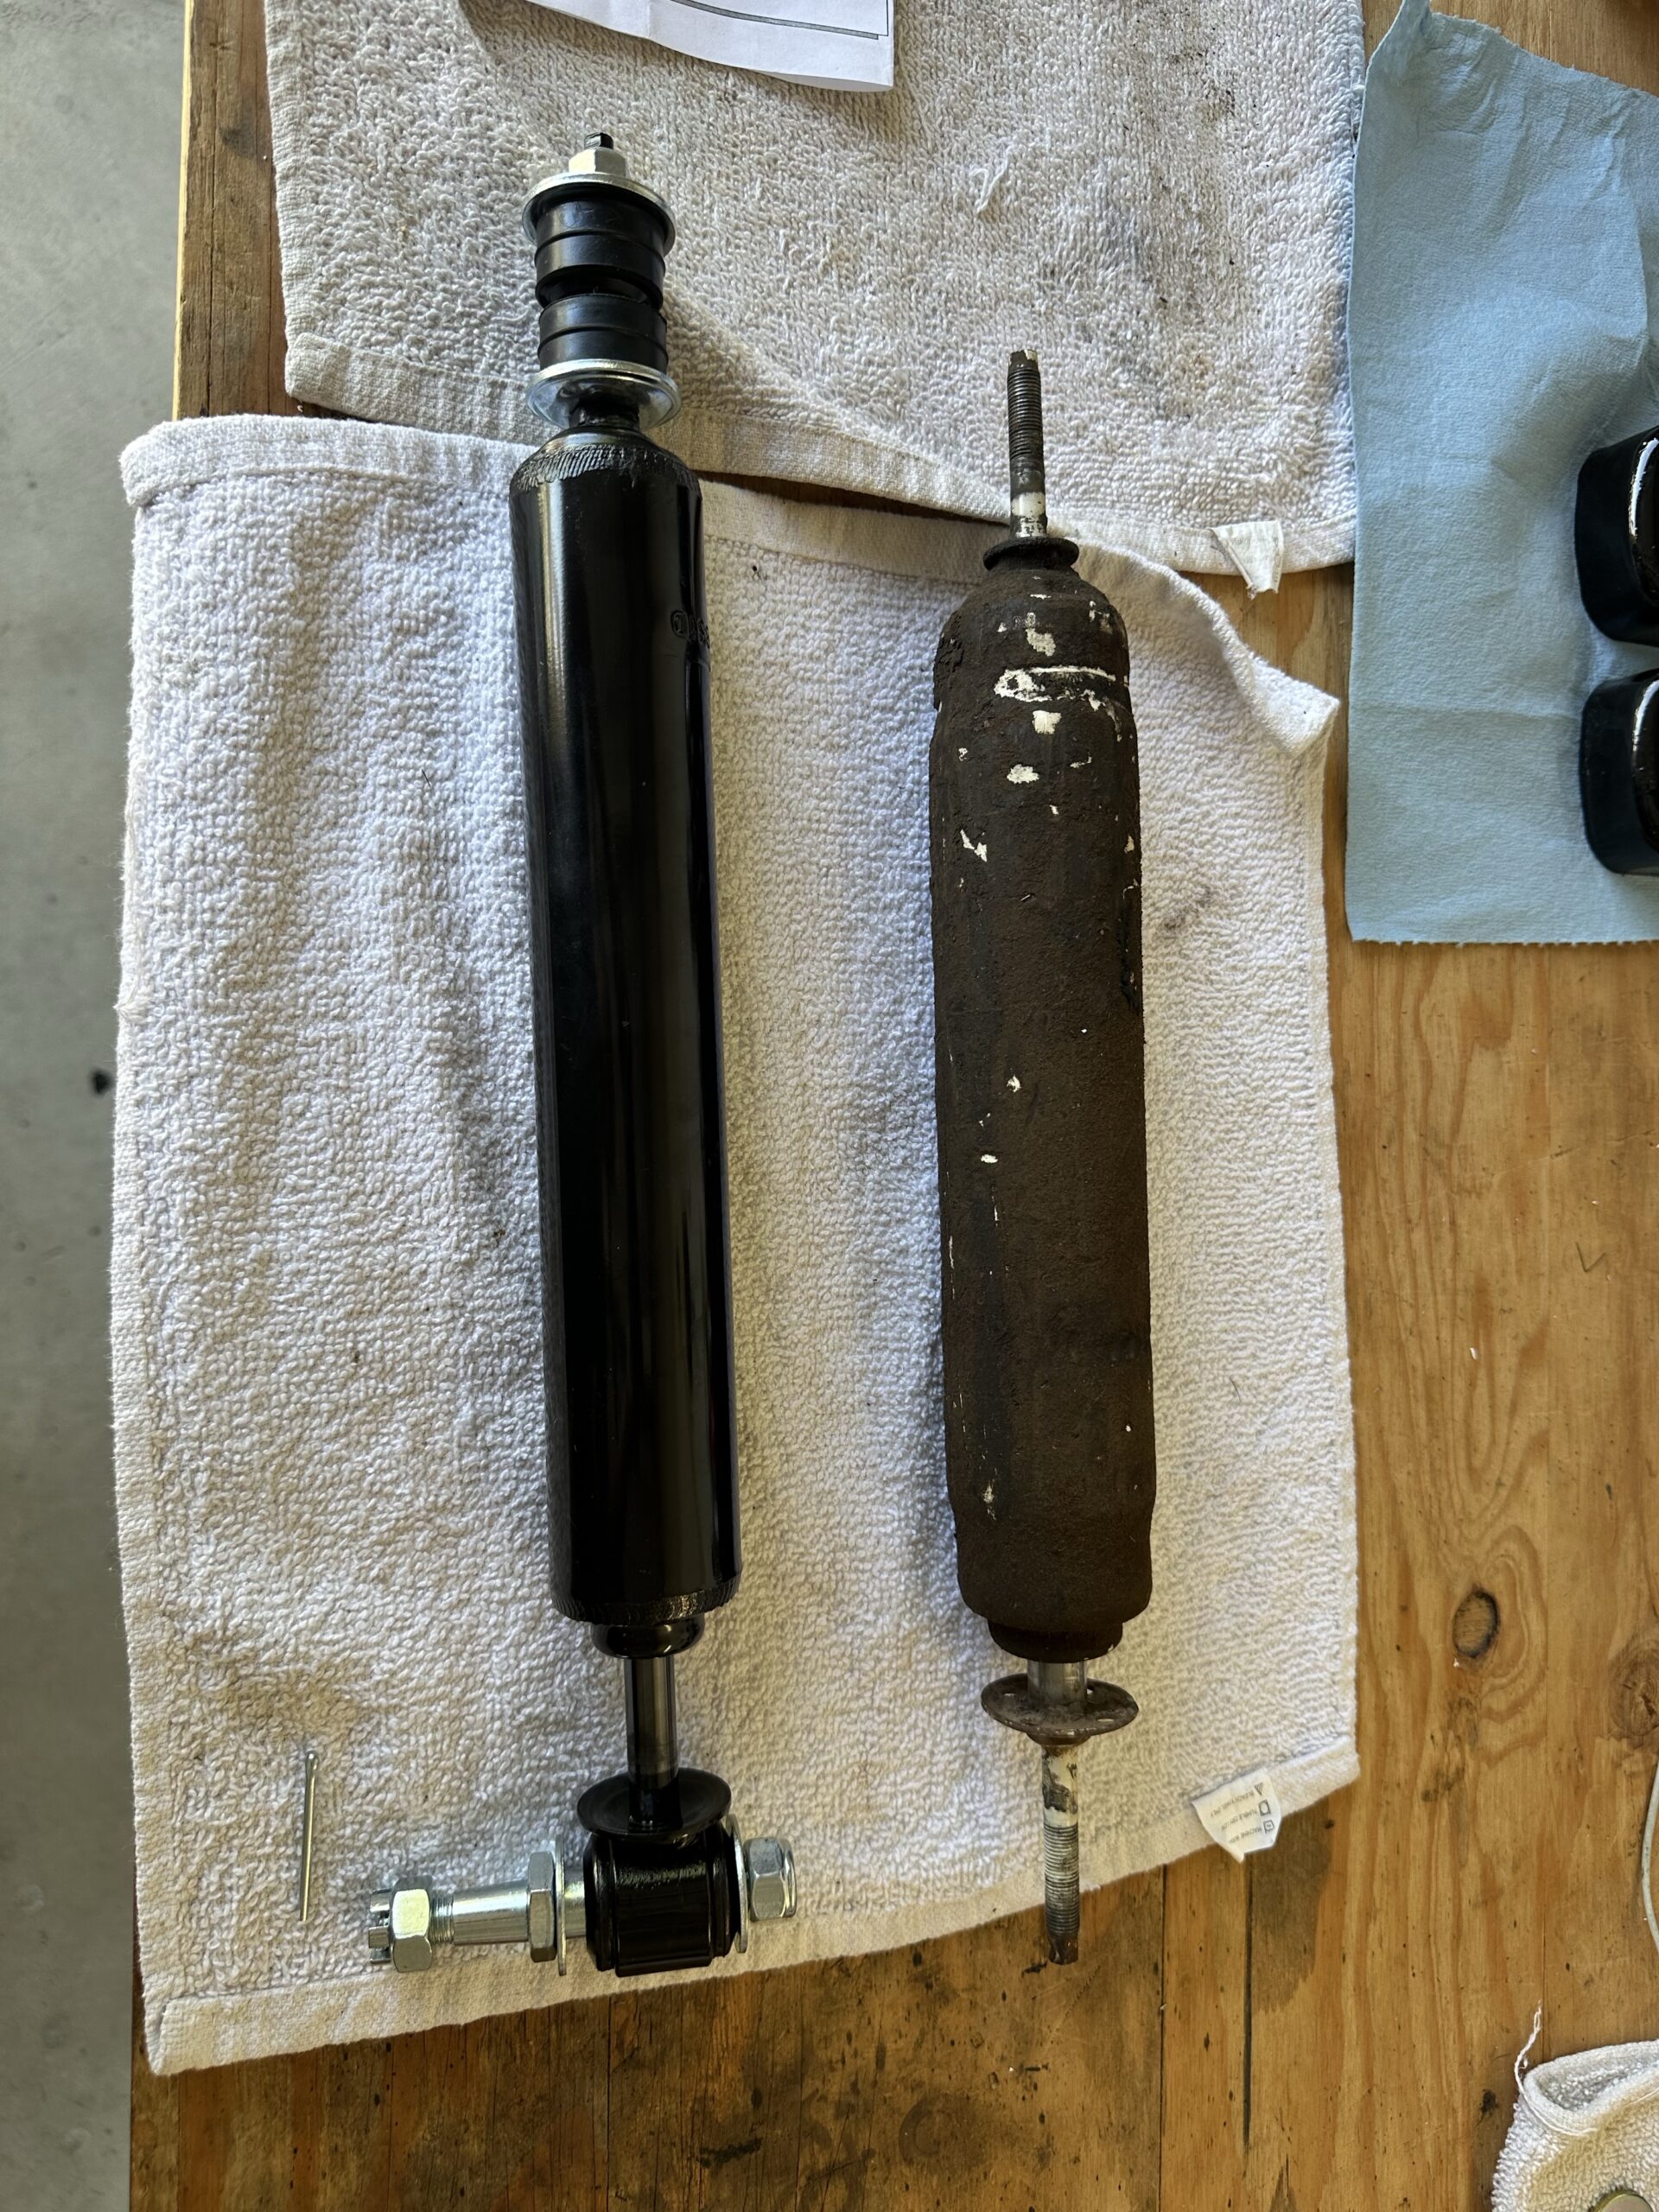
I really like the look of these chrome wheels… I’ve spent quite a bit of time cleaning the tires, I’m going to give it one more go this morning and then I’ll work to put the tires on the truck. I’ll need to do a little grinding on the brake calipers to give me a little more clearance. Right now there is less than a millimeter but I figure I can safely grind the calipers to get a couple of millimeters. Then I need attach the front shock absorbers and touch up any bare metal around the knuckles, then we should be ready to get the tires on the truck!
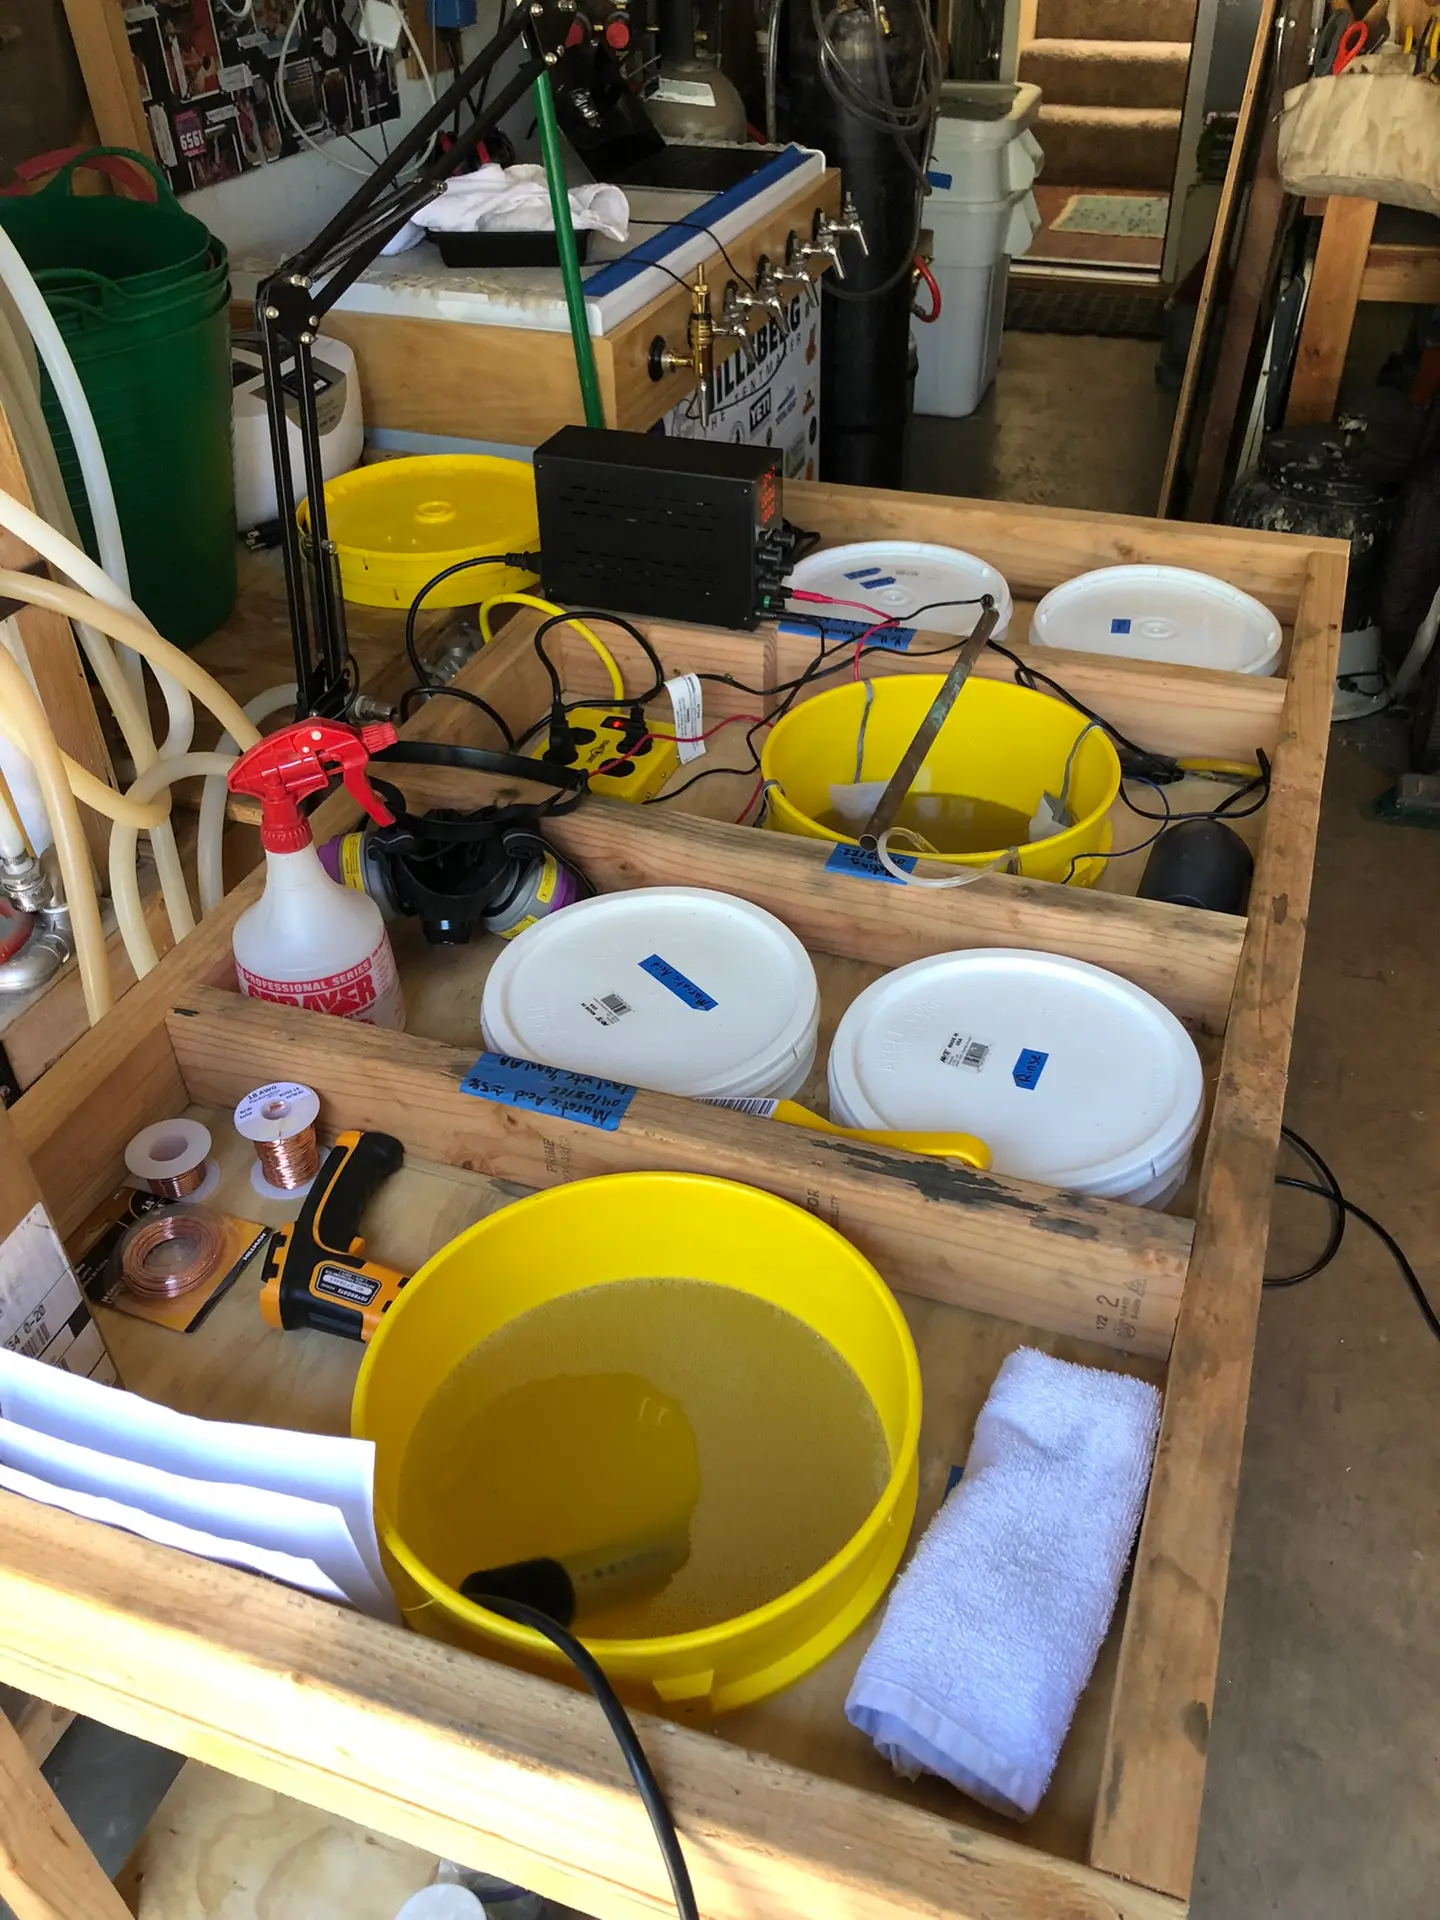
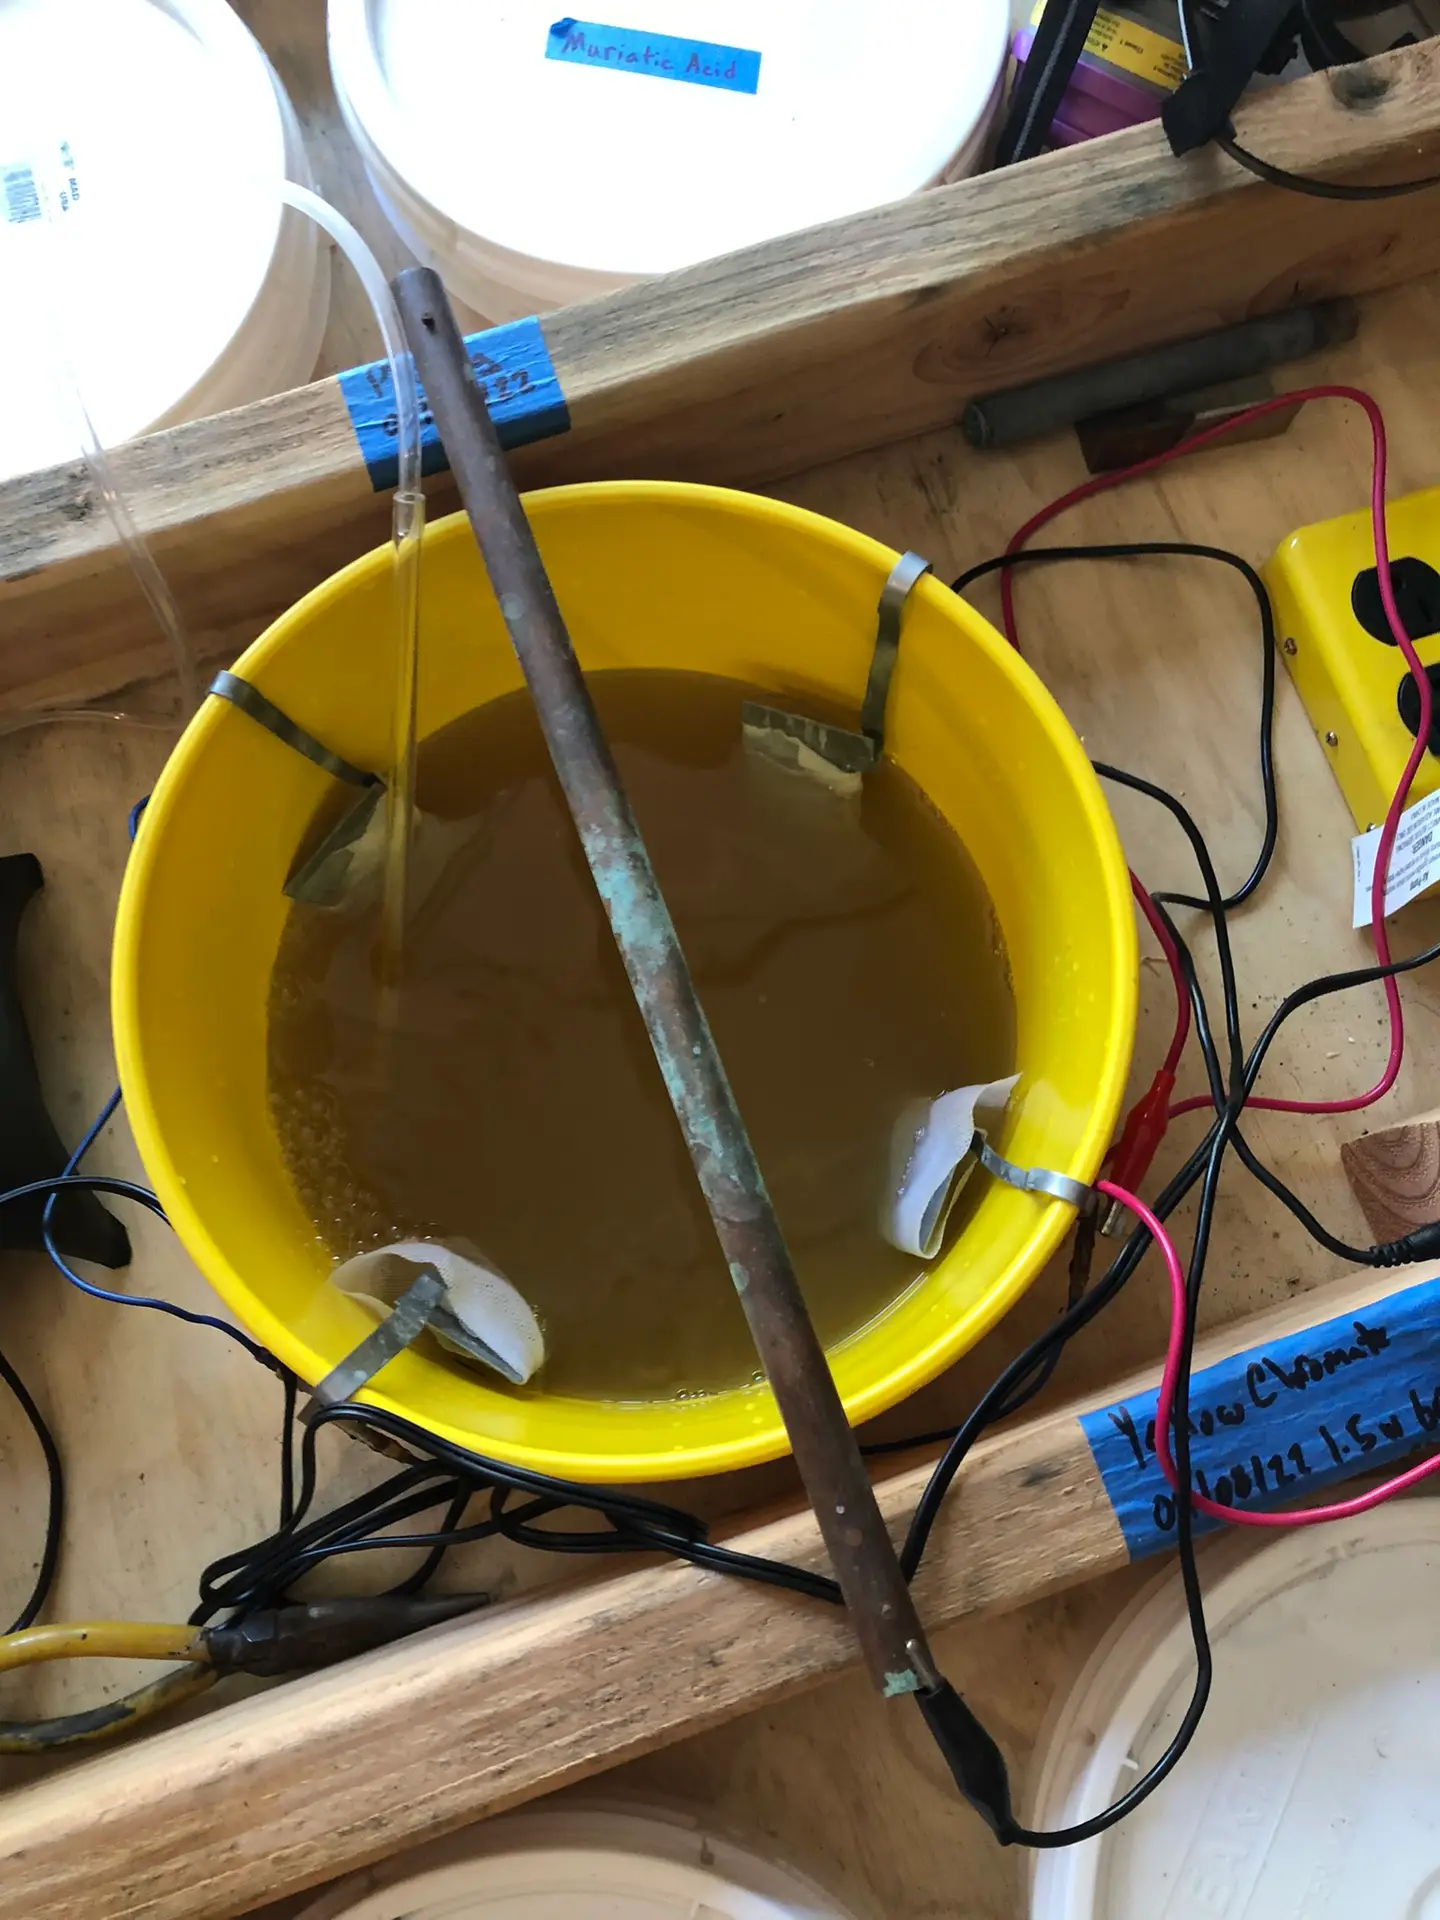
It think I finally have the plating table figured out. After all the upgrades and tests I made a final acid adjustment to my pickle to get to 5% HCl. So far so good!
We got our name on the list with Yota1 to rebuild the engine. They are about six months out so we could have the engine back around August! That is very exciting!
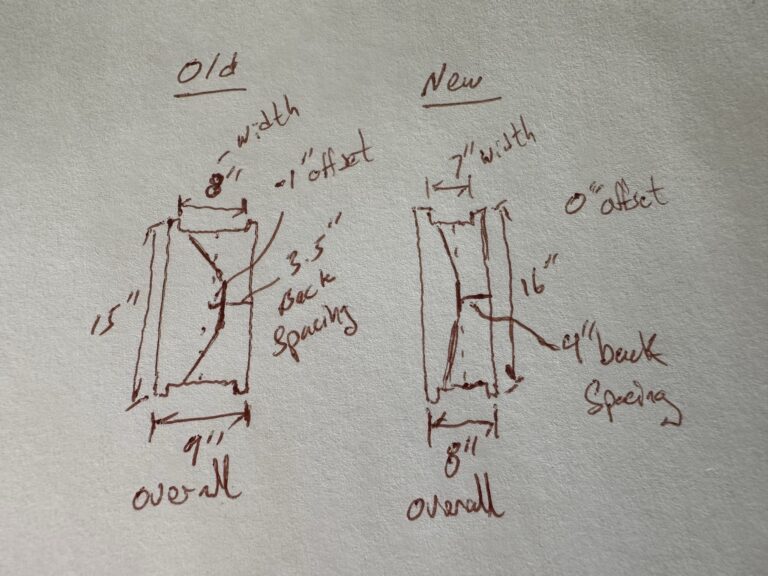
After what feels like eons of deliberating wheel style and dimension combinations I finally ordered a set of 8 spoke, steel, chrome, 16×7″, 6×5.5″, 0 offset, 4″ backspacing US Steel rims! I was all over the place with this decision. The rims she had on her before were the same style and I have always liked the look of them. They were in such bad shape both in their rusty appearance and in the fact that they required so much lead to balance that I really don’t think rechroming them was a good idea. Among countless other options, I considered going back to original style steel wheels with the chrome caps but those never got me that excited and I’m just partial to the way she was when I first brought her home. Though I stuck with the same style rims I did change the diameter from 15″ to 16″ so that I can share tires with the Tacoma and I changed the width from 8″ to 7″ because some say it helps to not break the bead when aired down.
A year or so ago after we got back from our long awaited Baja trip where Bernadett too often reminded me that our tires were in pretty bad shape (especially when I took her hostage on an 8 hour trip up the remote Laguna Salada valley starting north of San Felipe and pulling into Guadalupe Canyon Hot Springs well after dark) we took the Tacoma to the Tire Store in San Luis Obispo. When we got there, after calling to verify that they had a set of 265/70 BFG T/A KO2 tires, the guy told us they didn’t in fact have those but that they did have a set of 265/75s and that they put them on ‘those’ Tacomas all the time. Our coil springs were in pretty bad shape and we were often bottoming out over rutted Baja dirt roads so I figured the extra height would help a bit and I decided to get them. Hello rubbing… after removing the mud flaps, screwing the wheel-well lining to the body, adding 1″ spacers (this did stop the rubbing on the frame) and replacing the worn out OEM springs with stockier Old Man Emu 881 springs they still rub the wheel-well lining when turning! So I’m going to take these 265/75s off of the Tacoma and put them on Old Bessie and go back to 265/70s on the Tacoma.
When I went to plate the bolts for the front shock absorbers I was getting a very dark plate and after the chromate the parts were looking very brown and pretty bad all around. I think there is a good chance that I have contaminated my electrolyte solution by sandblasting and wire brushing the old bolts without removing the old zinc finish. I’ve read that I’m pushing the old zinc into the pores of the steel and this is contaminating my electrolyte. So I’m going to revisit my system and make some improvements. Then I will plate a dummy to see if I can clean up my solution and in the process run a series of test billets.
Improvements I will make
Add two additional rinse buckets and a distilled water spray bottle so that each step has its own rinse
Add new zinc anodes
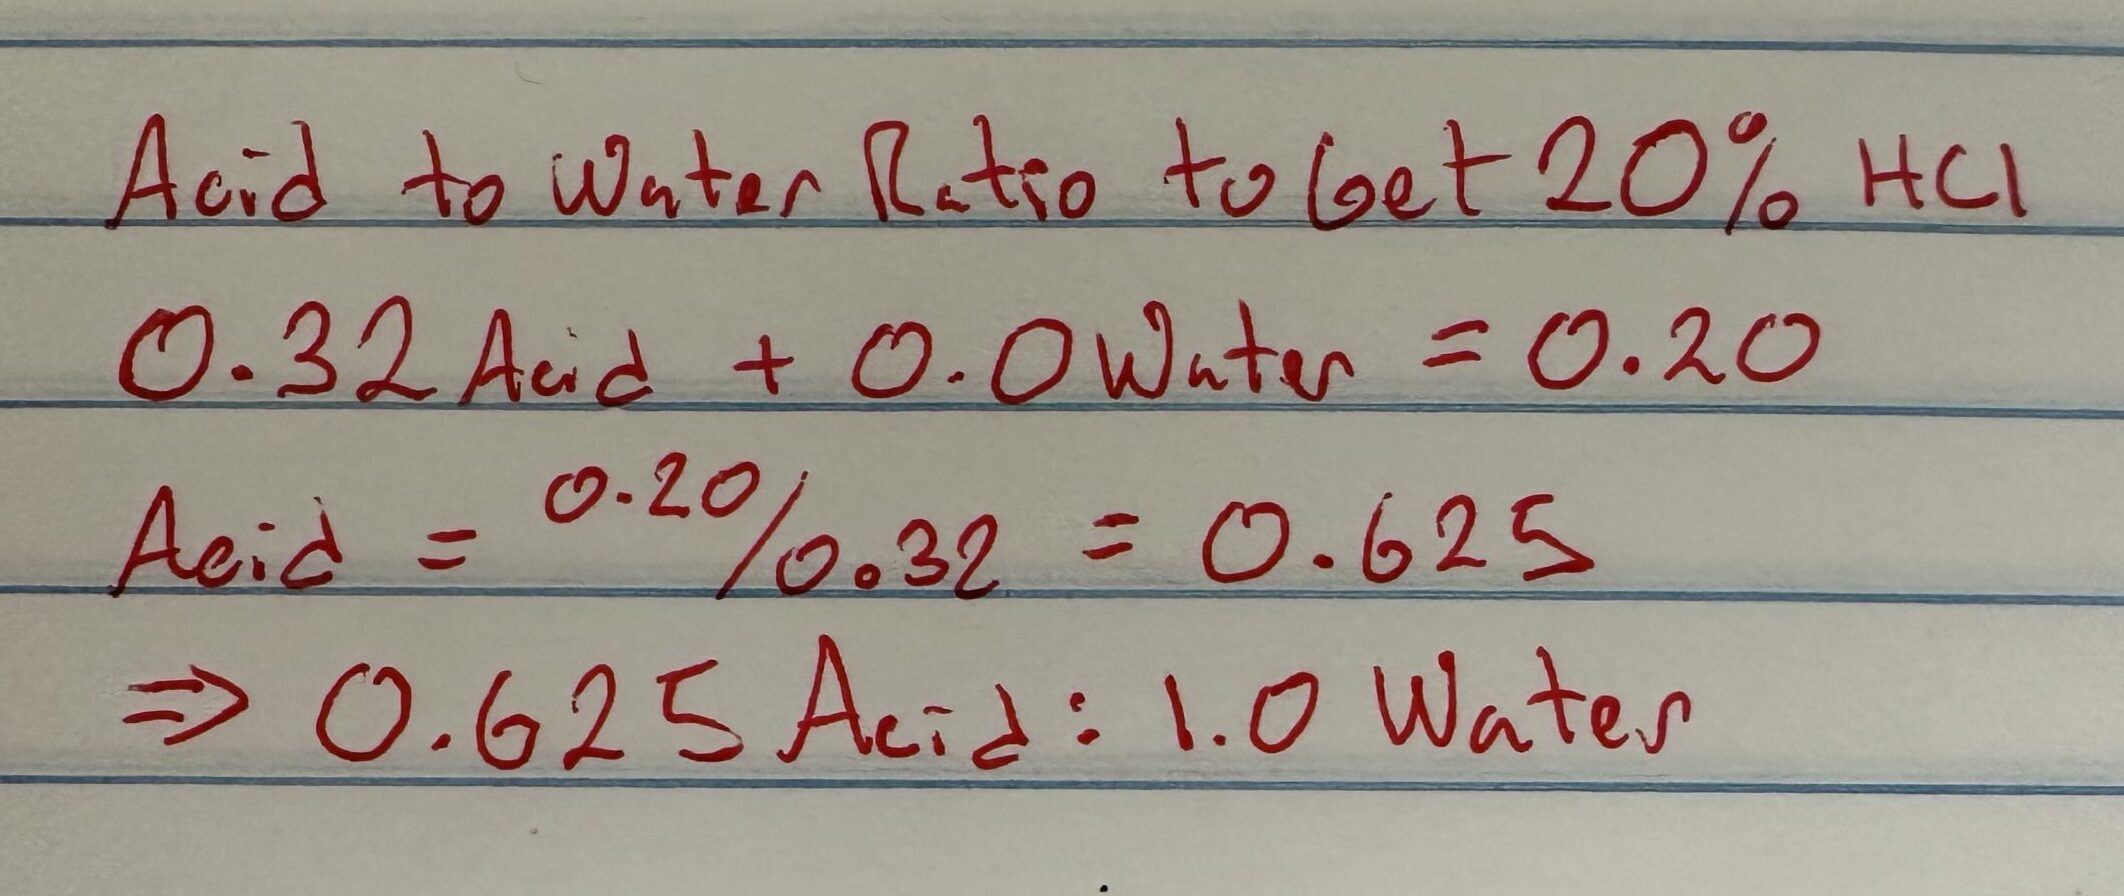
Add a 20% acid bath and rinse for removing zinc plate prior to blasting
Buy a more powerful air compressor that can keep up with the my blasting setup
Switch blasting media from aluminum oxide to glass beads to increase the shininess of the blasted part and hopefully eliminate the wire brushing step
Add a flood light to blast cabinet so I can see the parts better when blasting
Improve electrolyte agitation by using a fluid pump and a dispersion cone
Add heaters for the plating and yellow chromate tanks
Create a plating log to record:
Number of parts, dimensions and amperage
Surface preparation steps
Electrolyte pH
Solution temperatures and times in solution for degreaser, muriatic acid, electrolyte, blue and yellow chromates
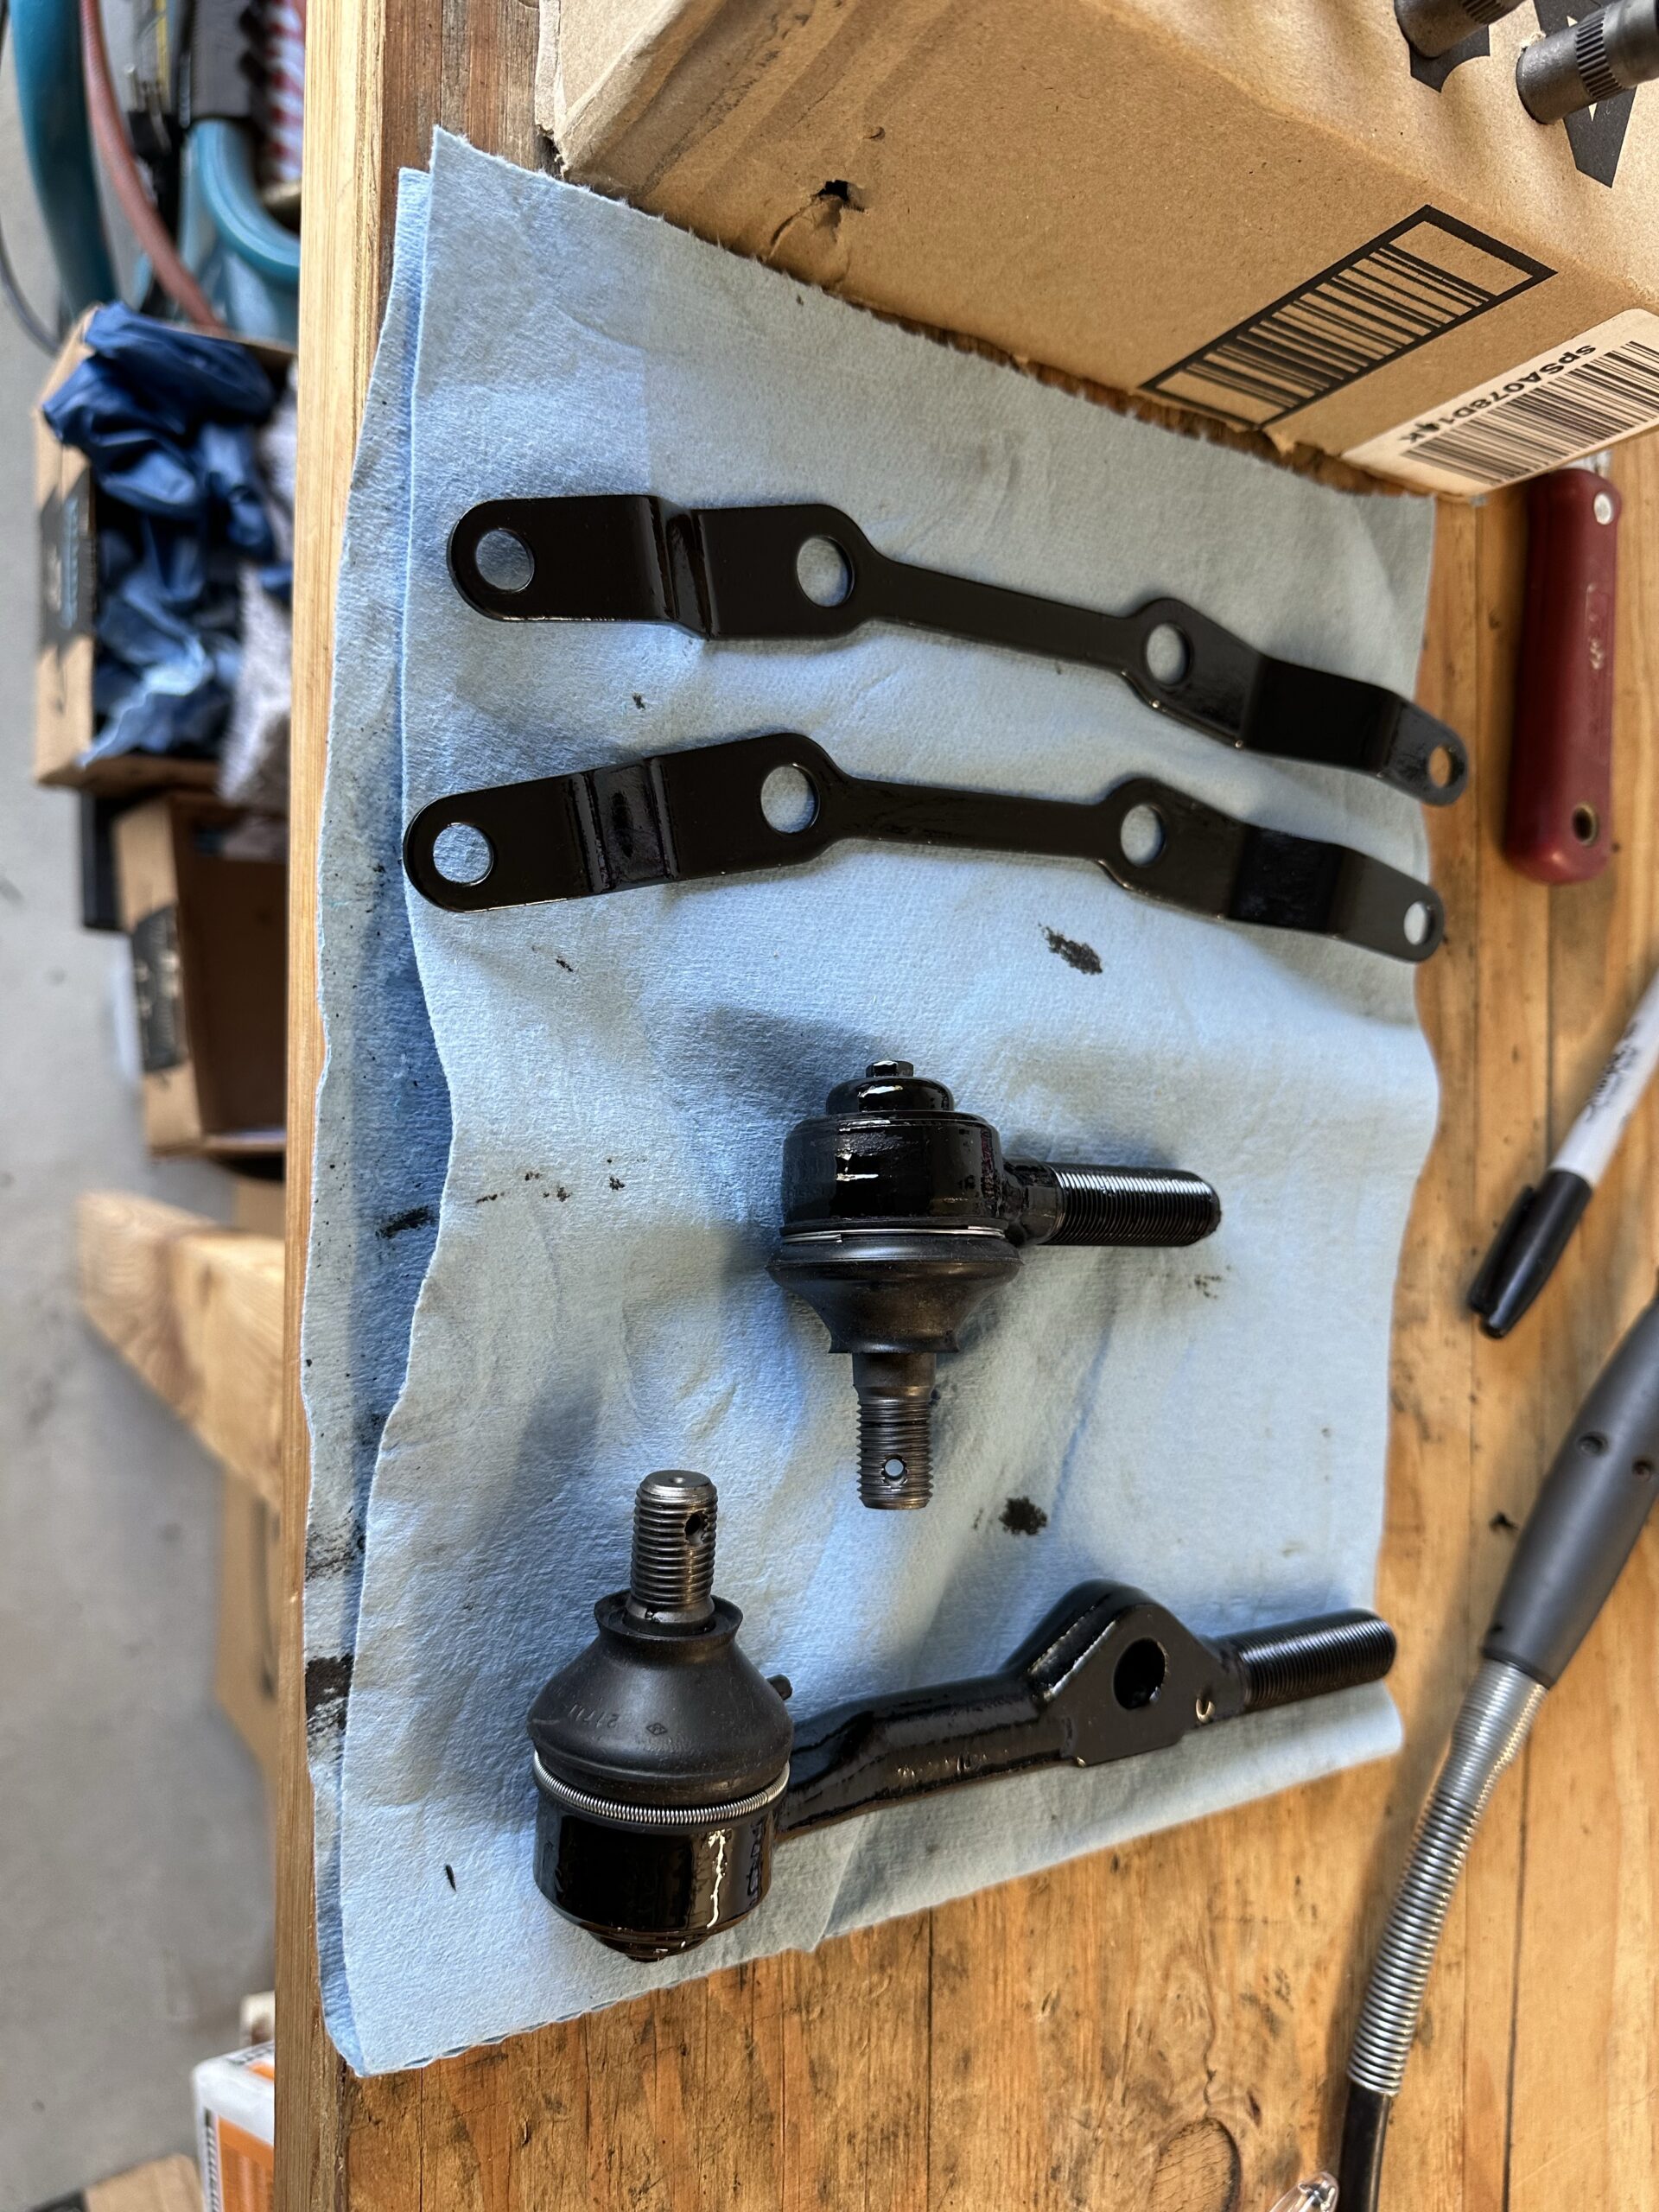
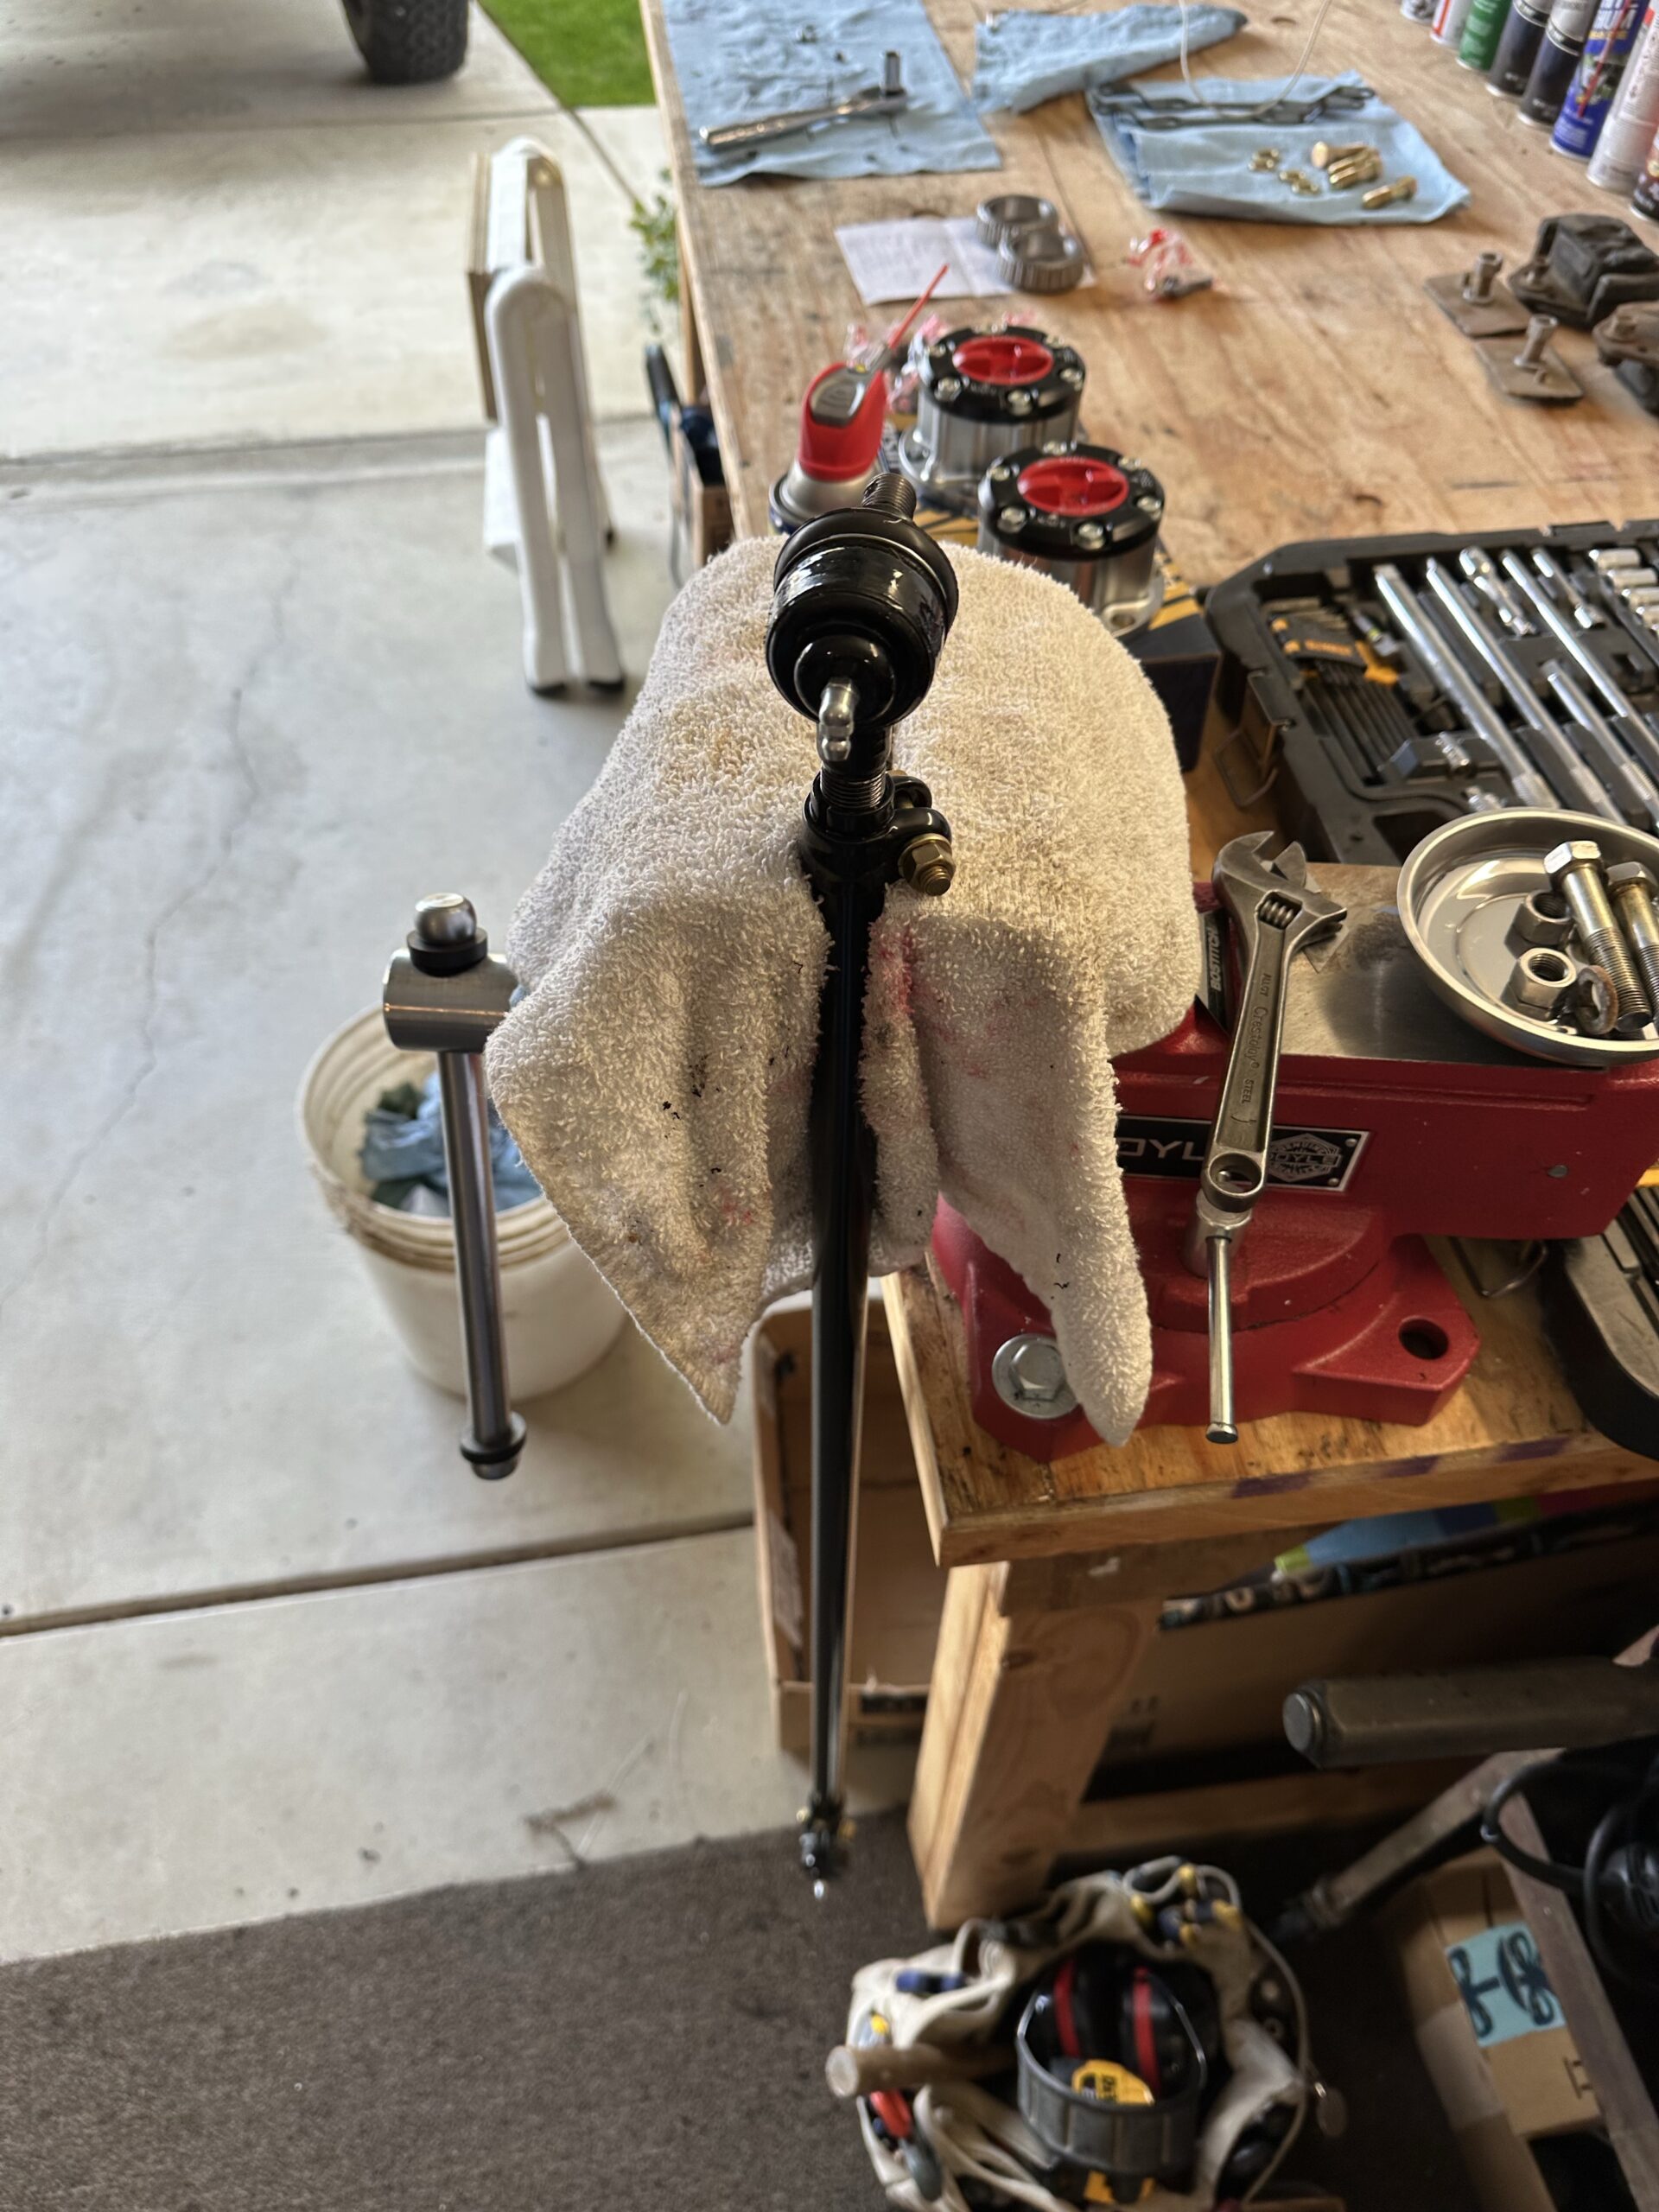
Next it was time to mount the new Calipers. I had to do a fair amount of grinding to clear the backing plates on both sides of the truck. I touched them up with some black enamel and put them on. Using the larger calipers is going to complicate finding wheels that will fit the truck without spacers. That will be one of the near term challenges. With the calipers on I torqued the new ends of the steering rod to the knuckles. The next step will be to plate the front shock absorber bolts and finish that installation.
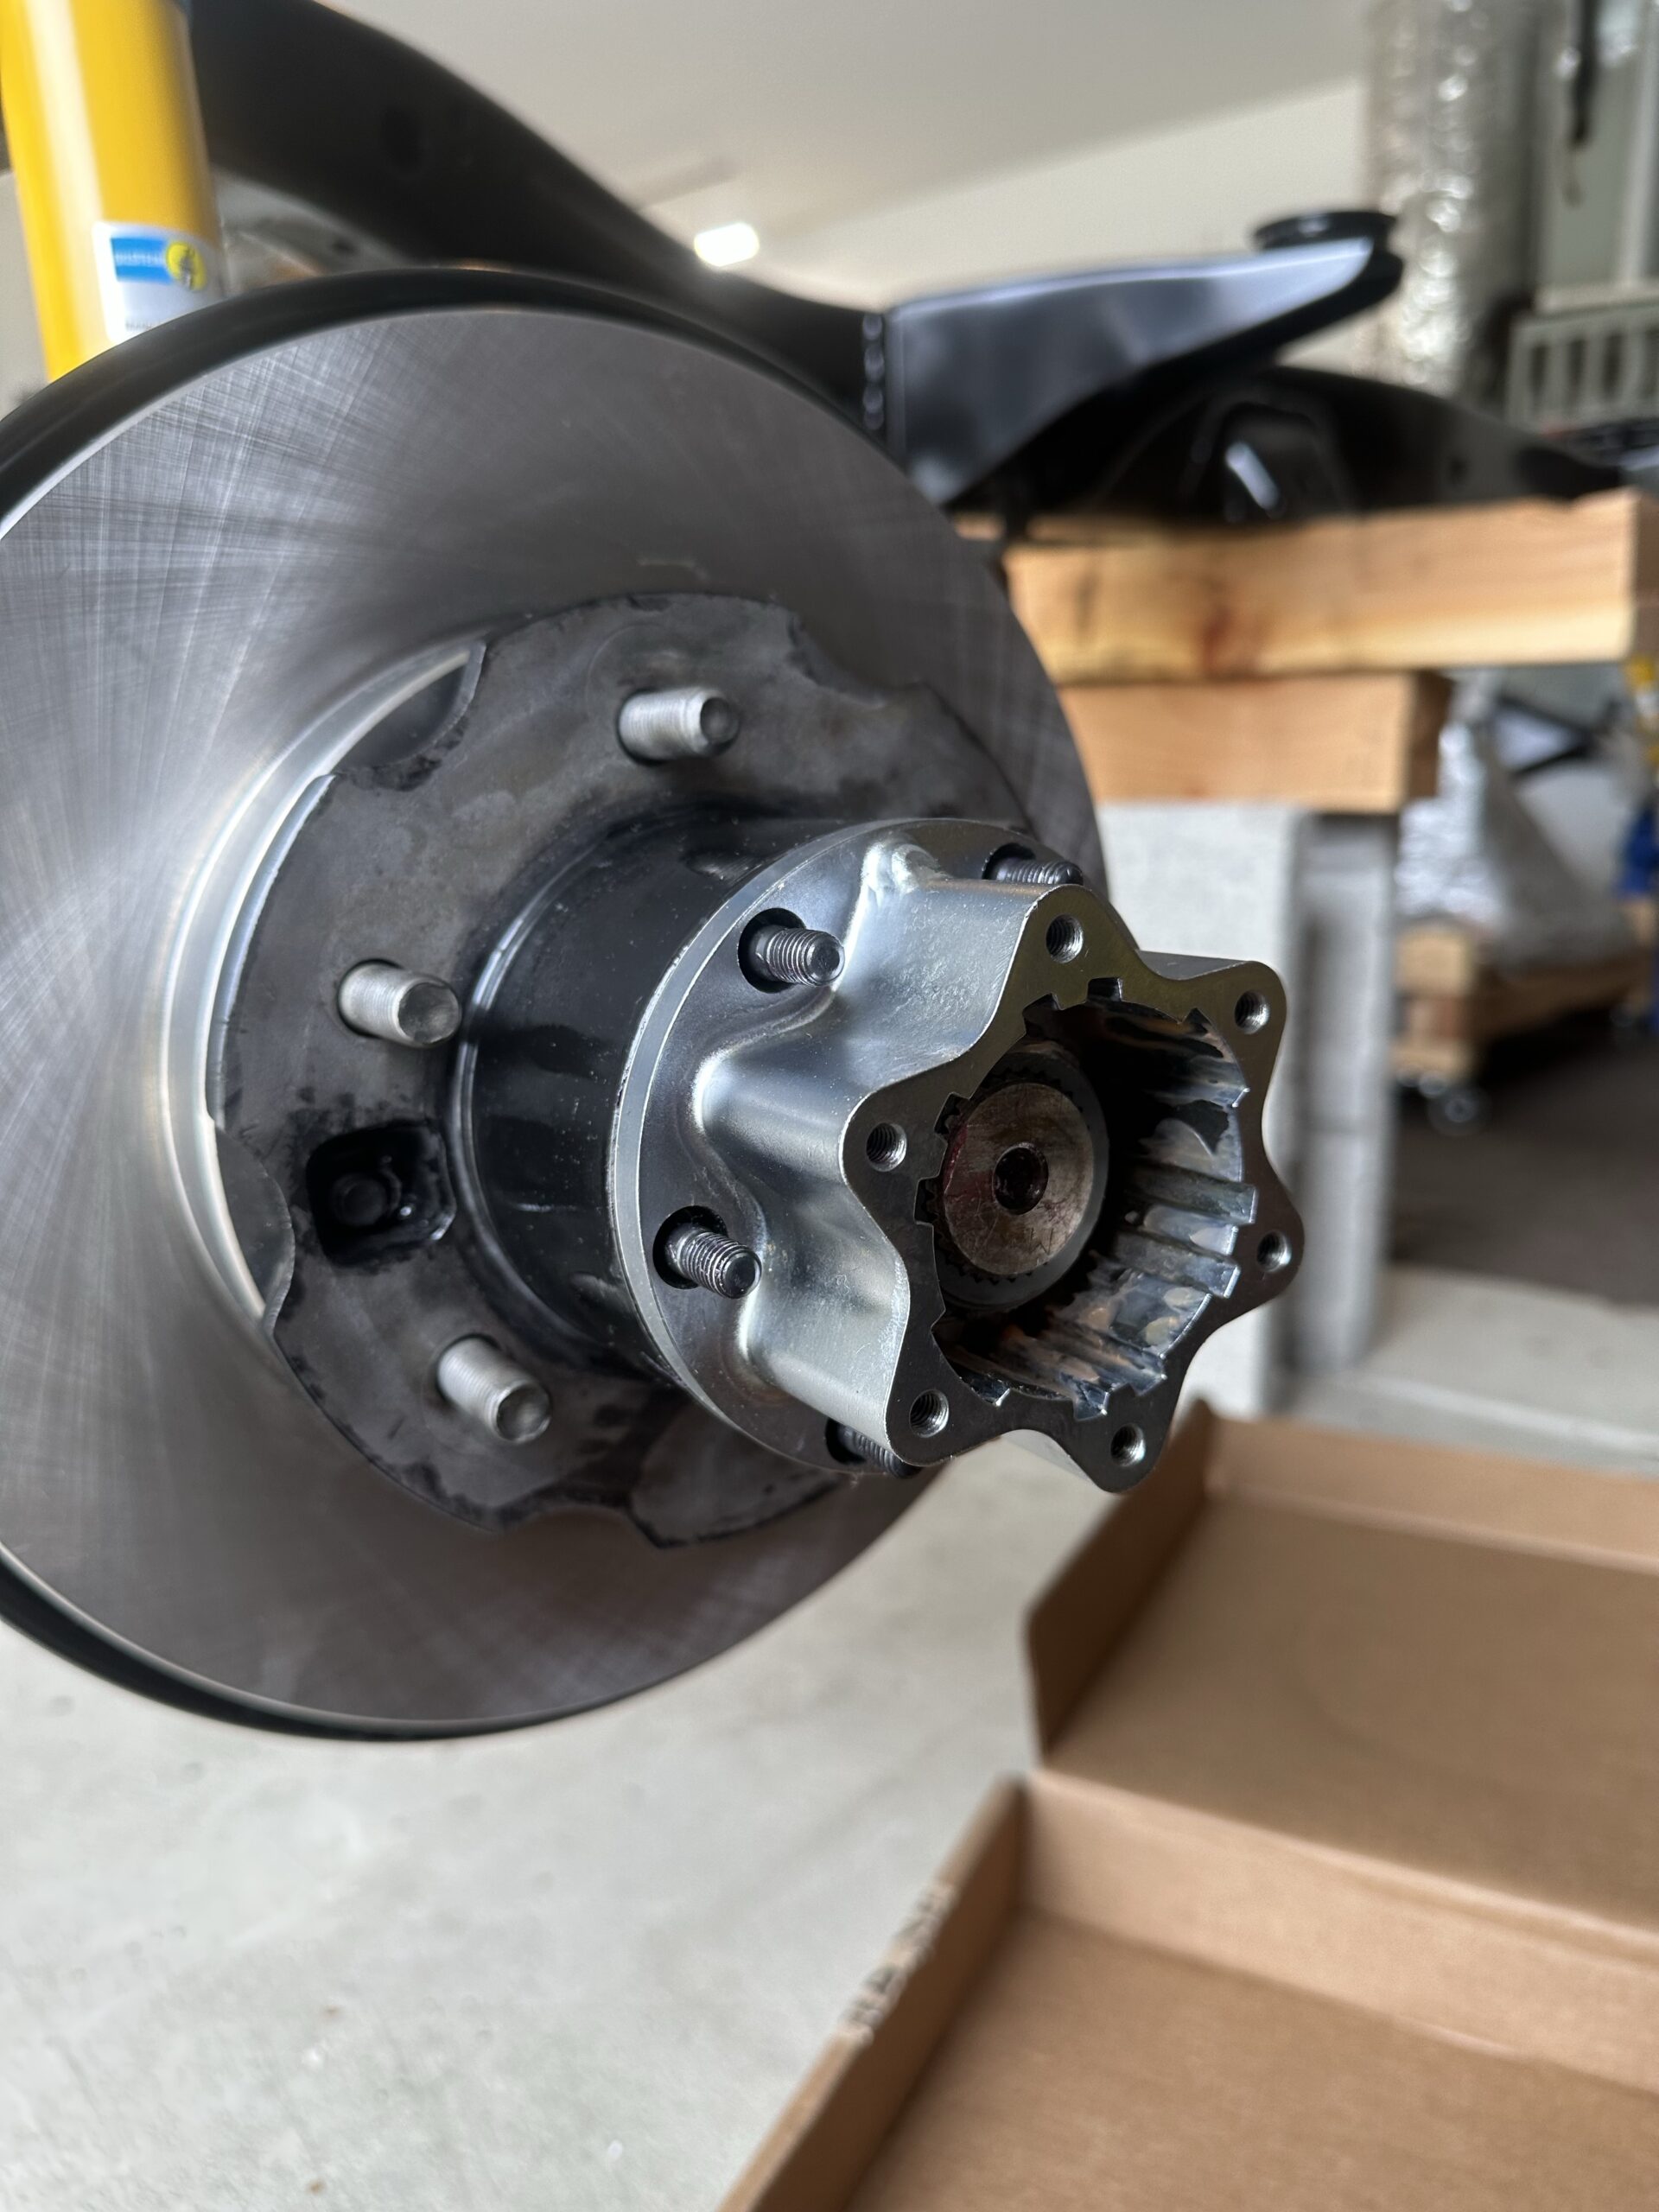
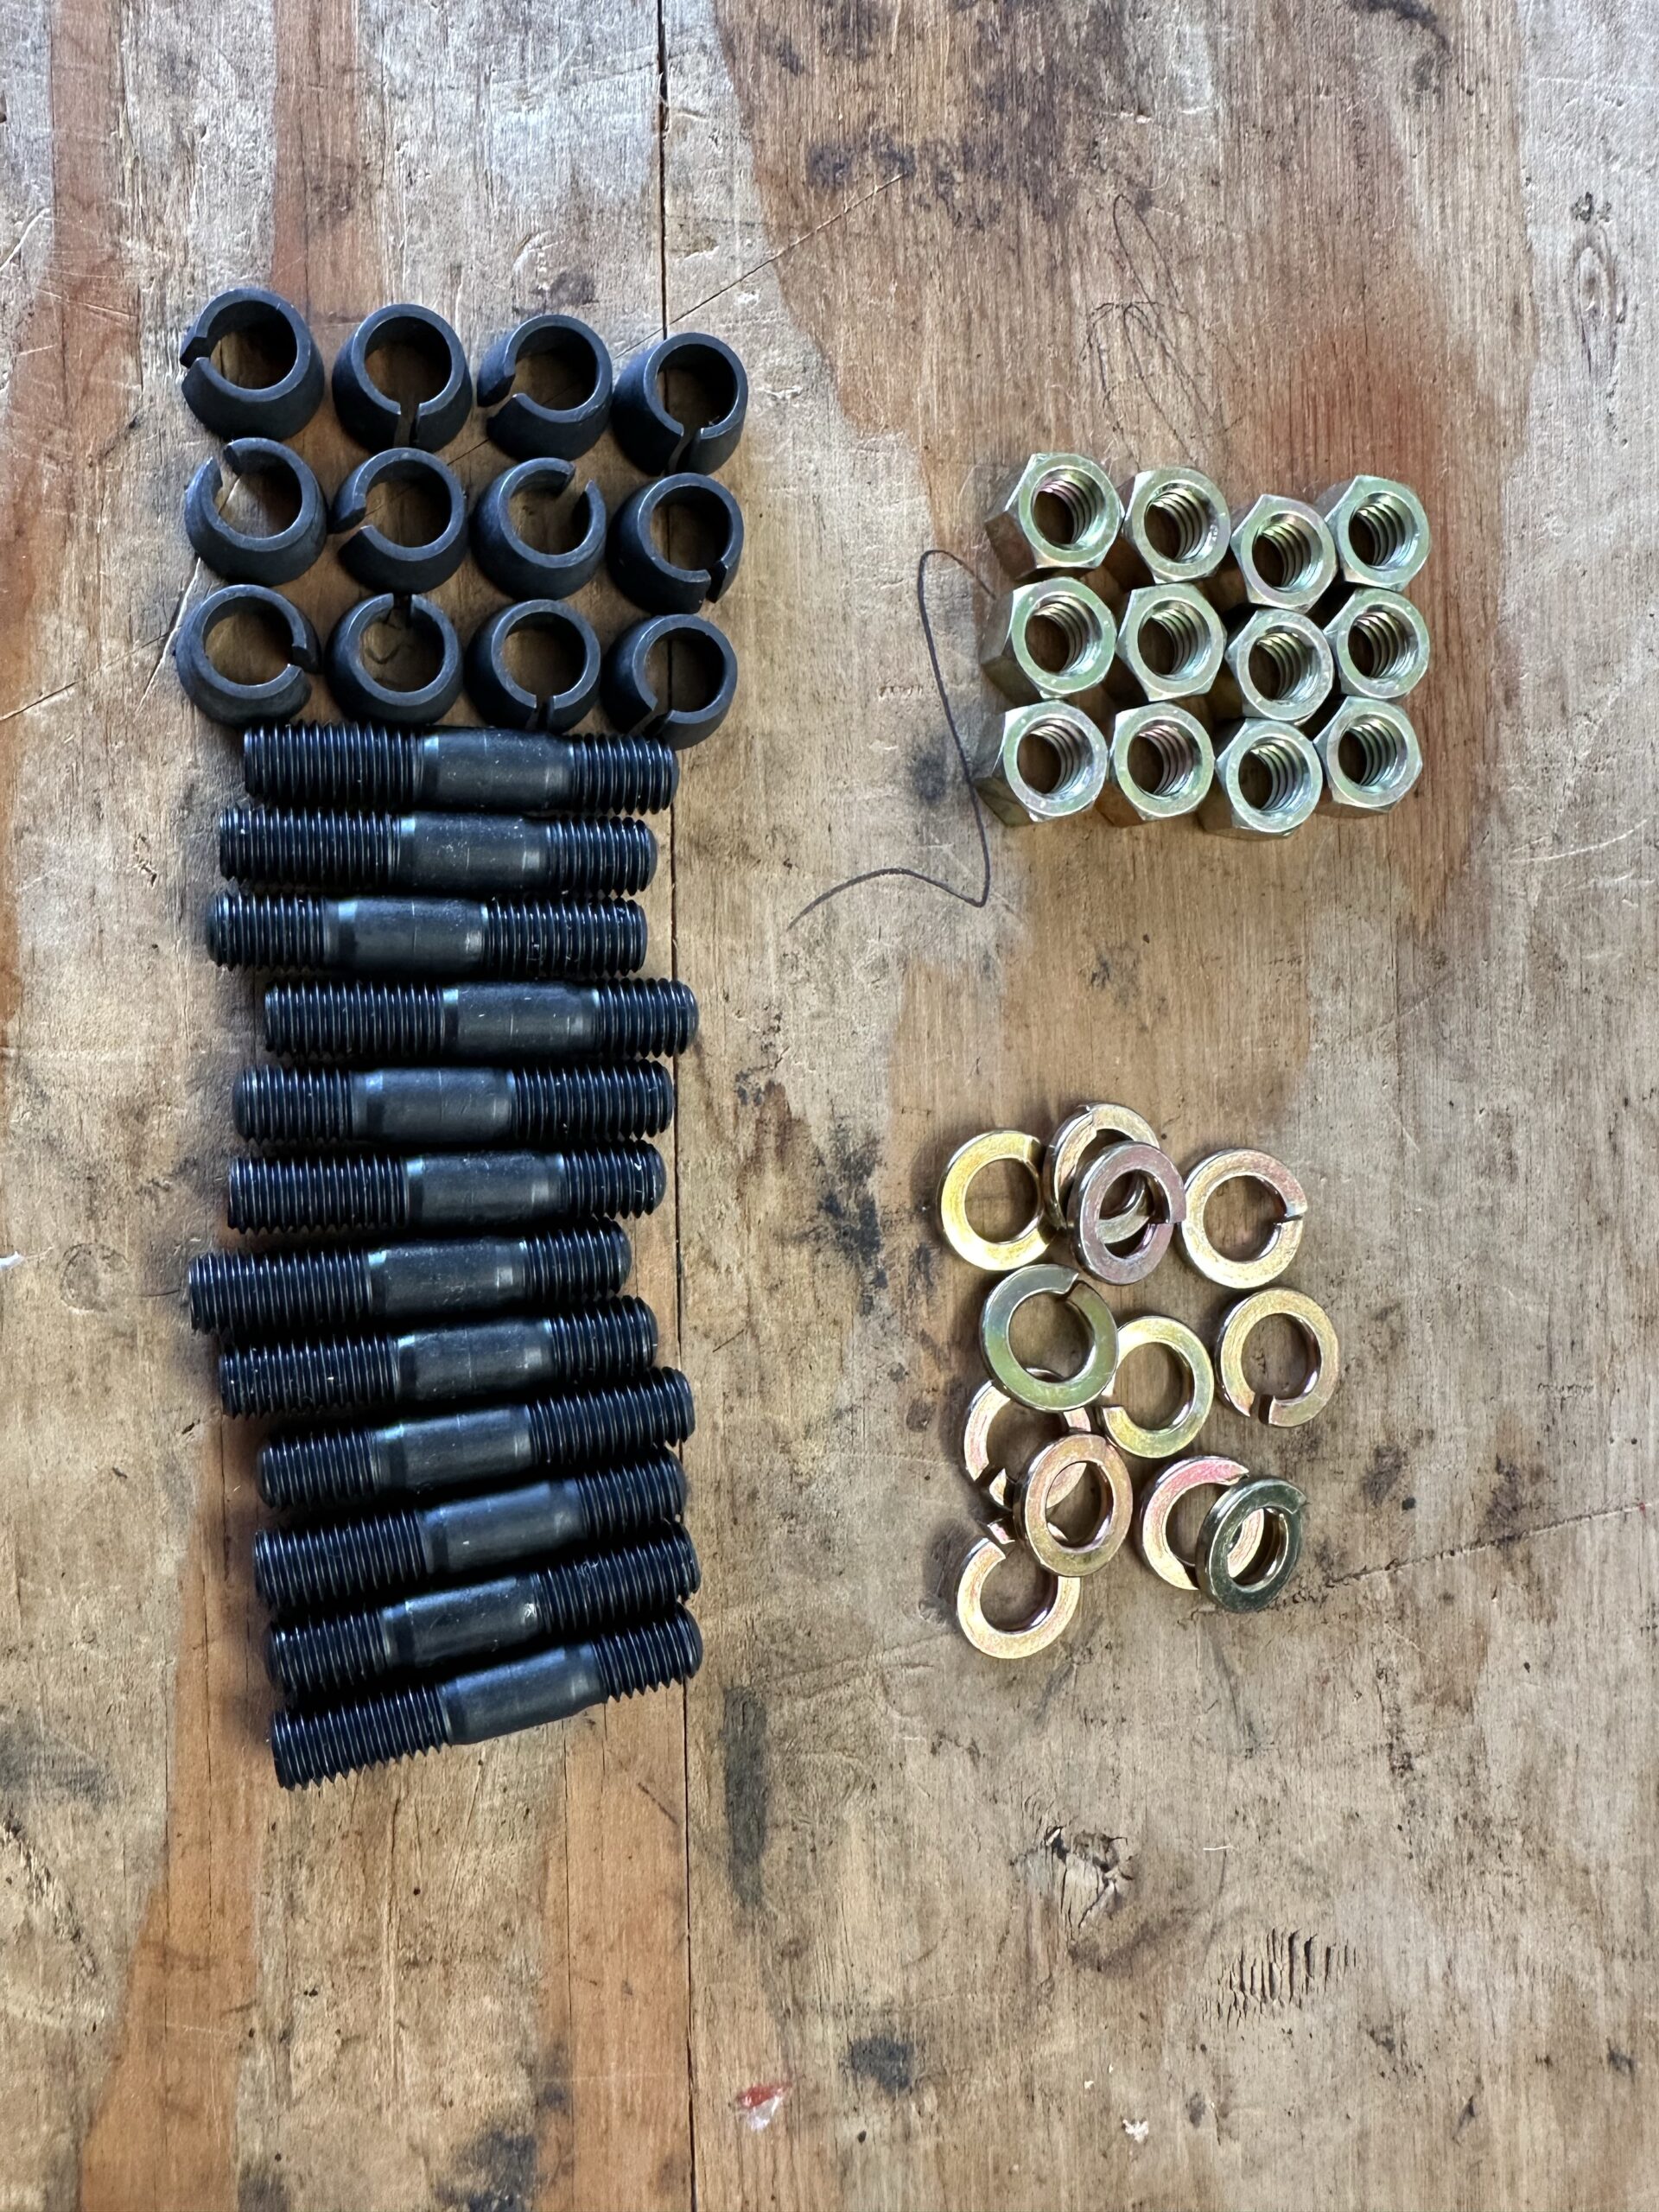
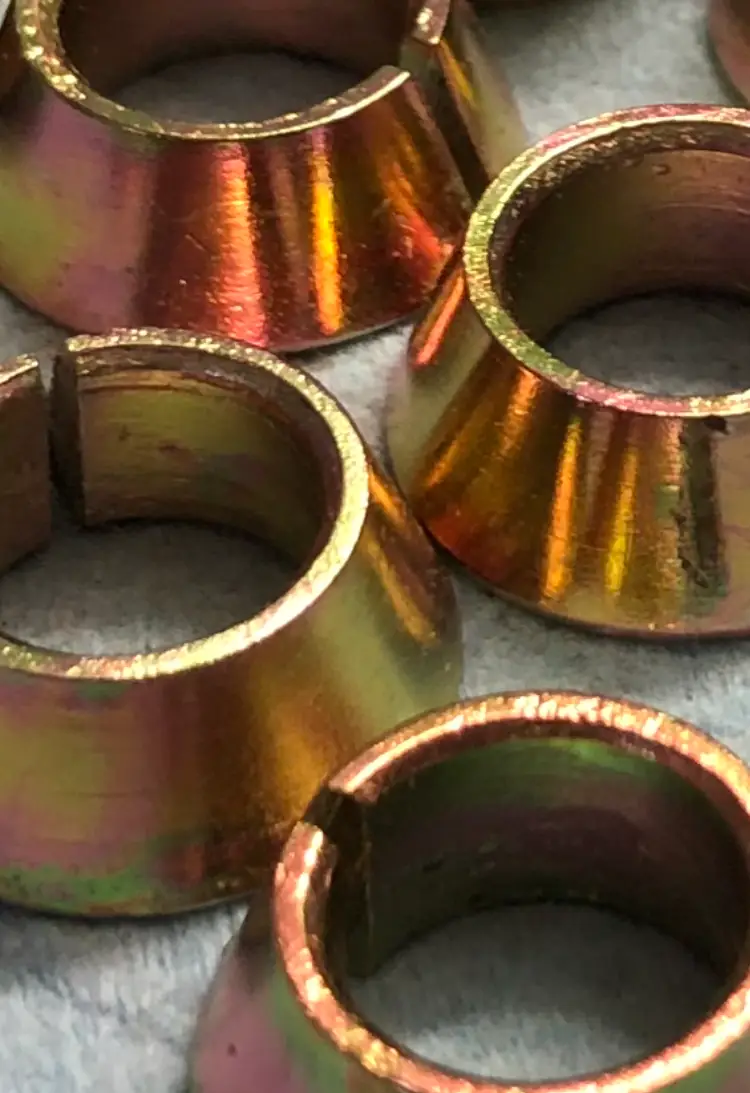
The original locking hubs were pretty beat up and prongs in the housing that had broken off so I bought a new set. I also installed all new cone washers that came with the 8mm Hub Stud Kit. Getting the old cone washers out was a real pain and nearly all of them were pretty chewed up. This installation was straightforward; just install the gasket, mount the locking hub base, install the snap rings on the end of the axle and install the locking hub cover.
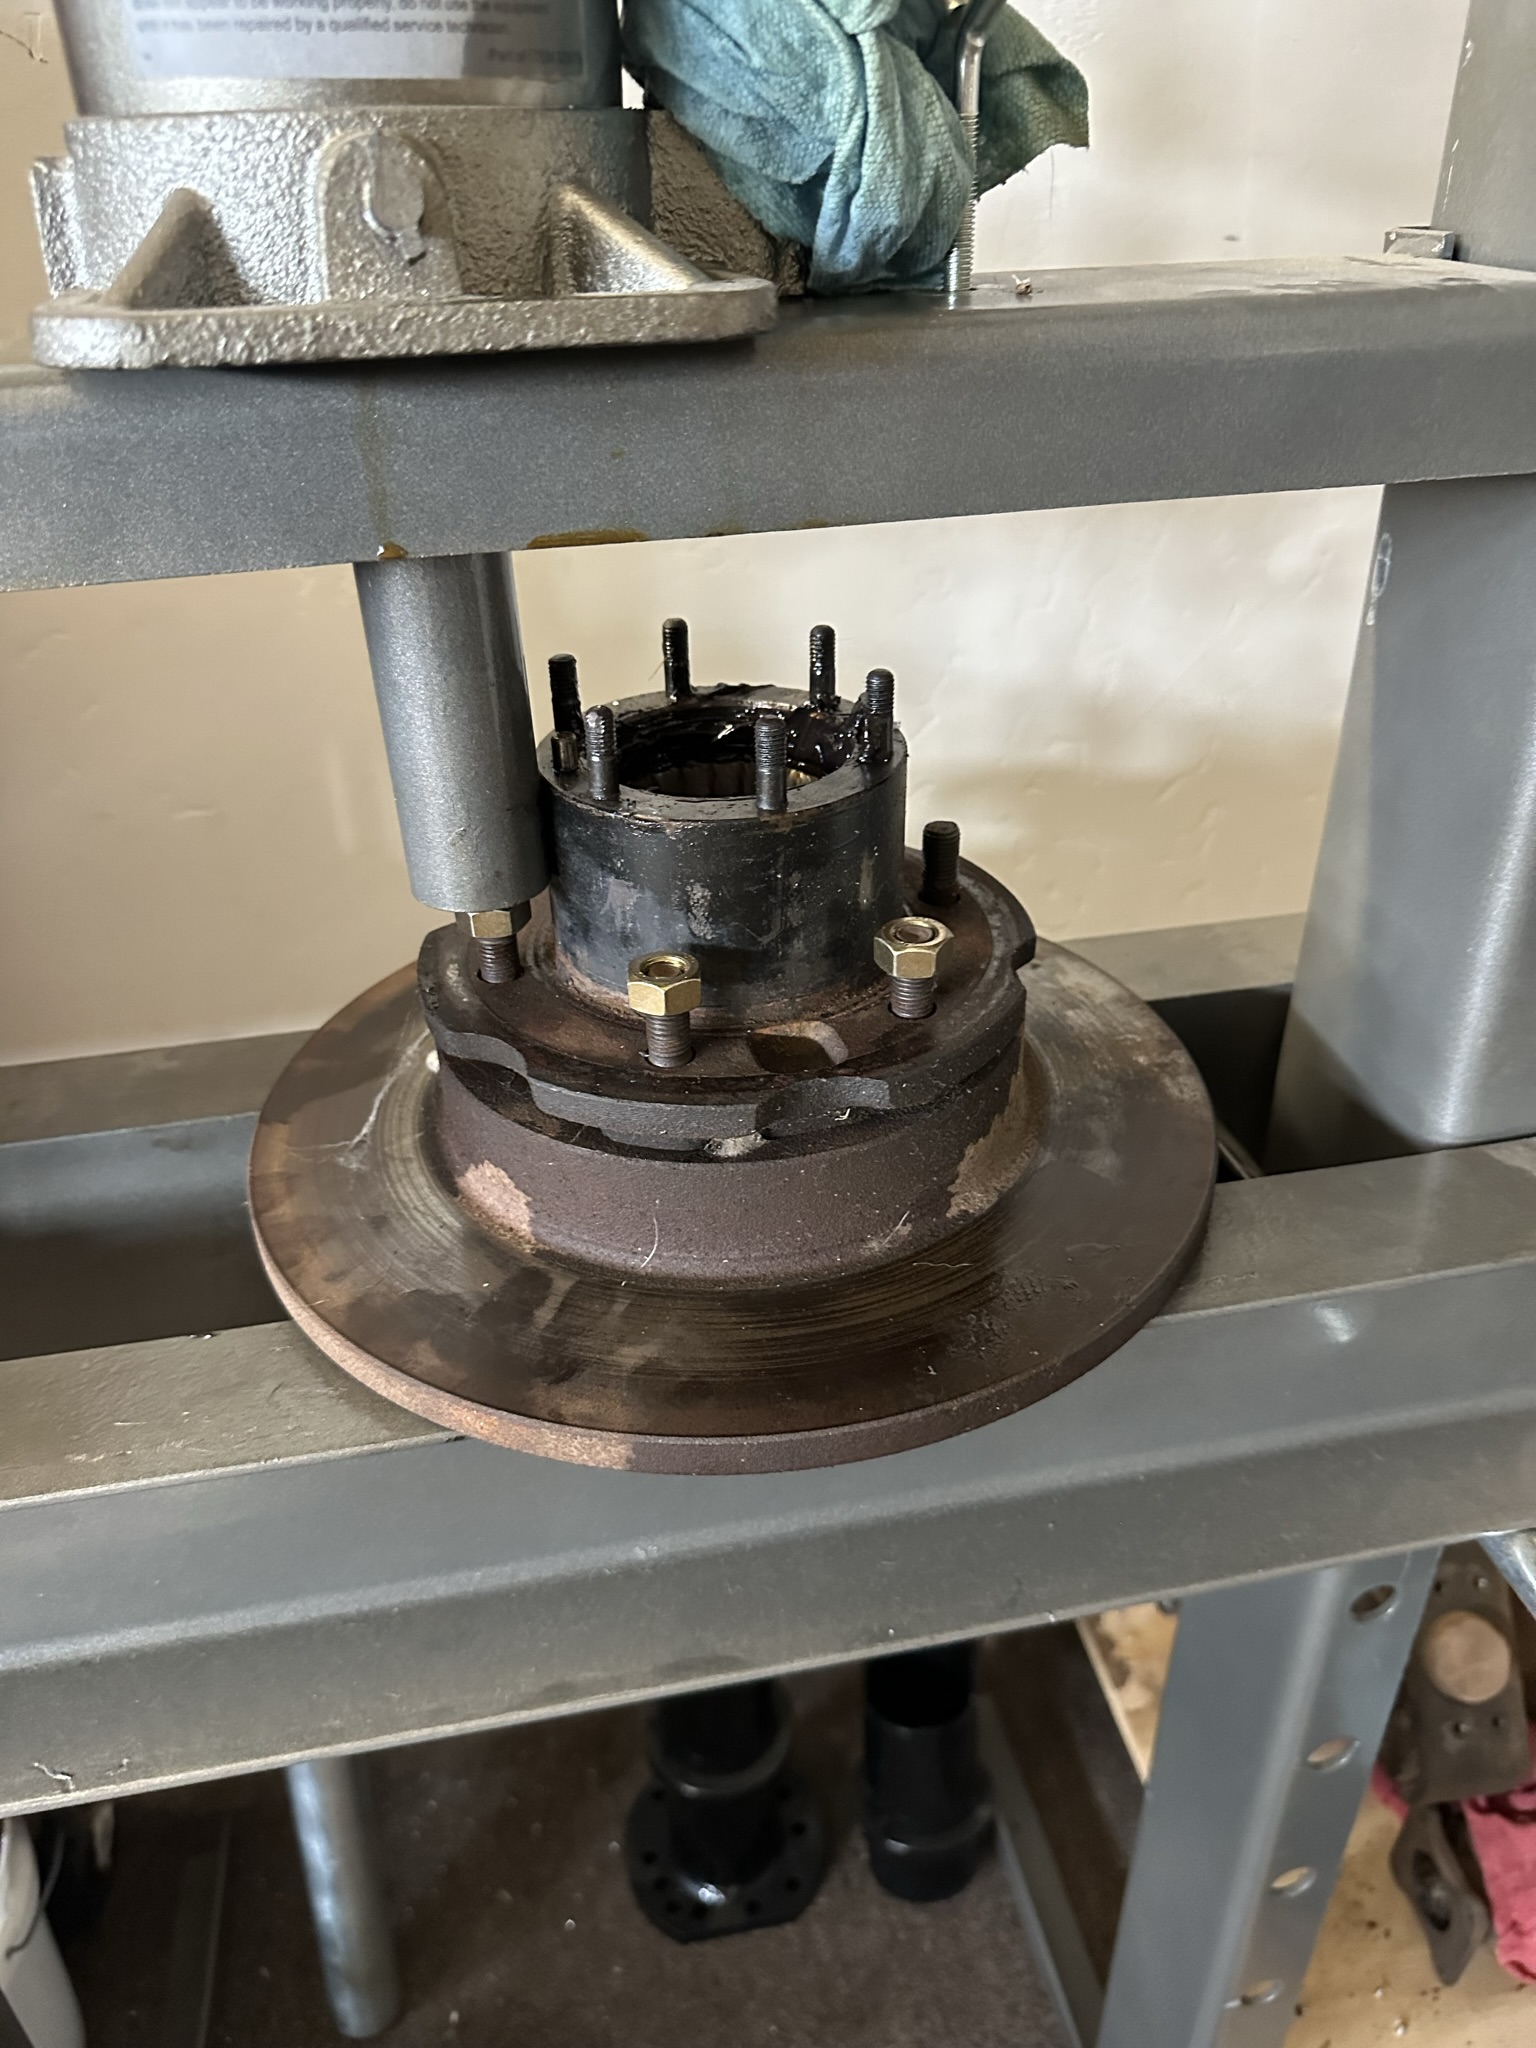
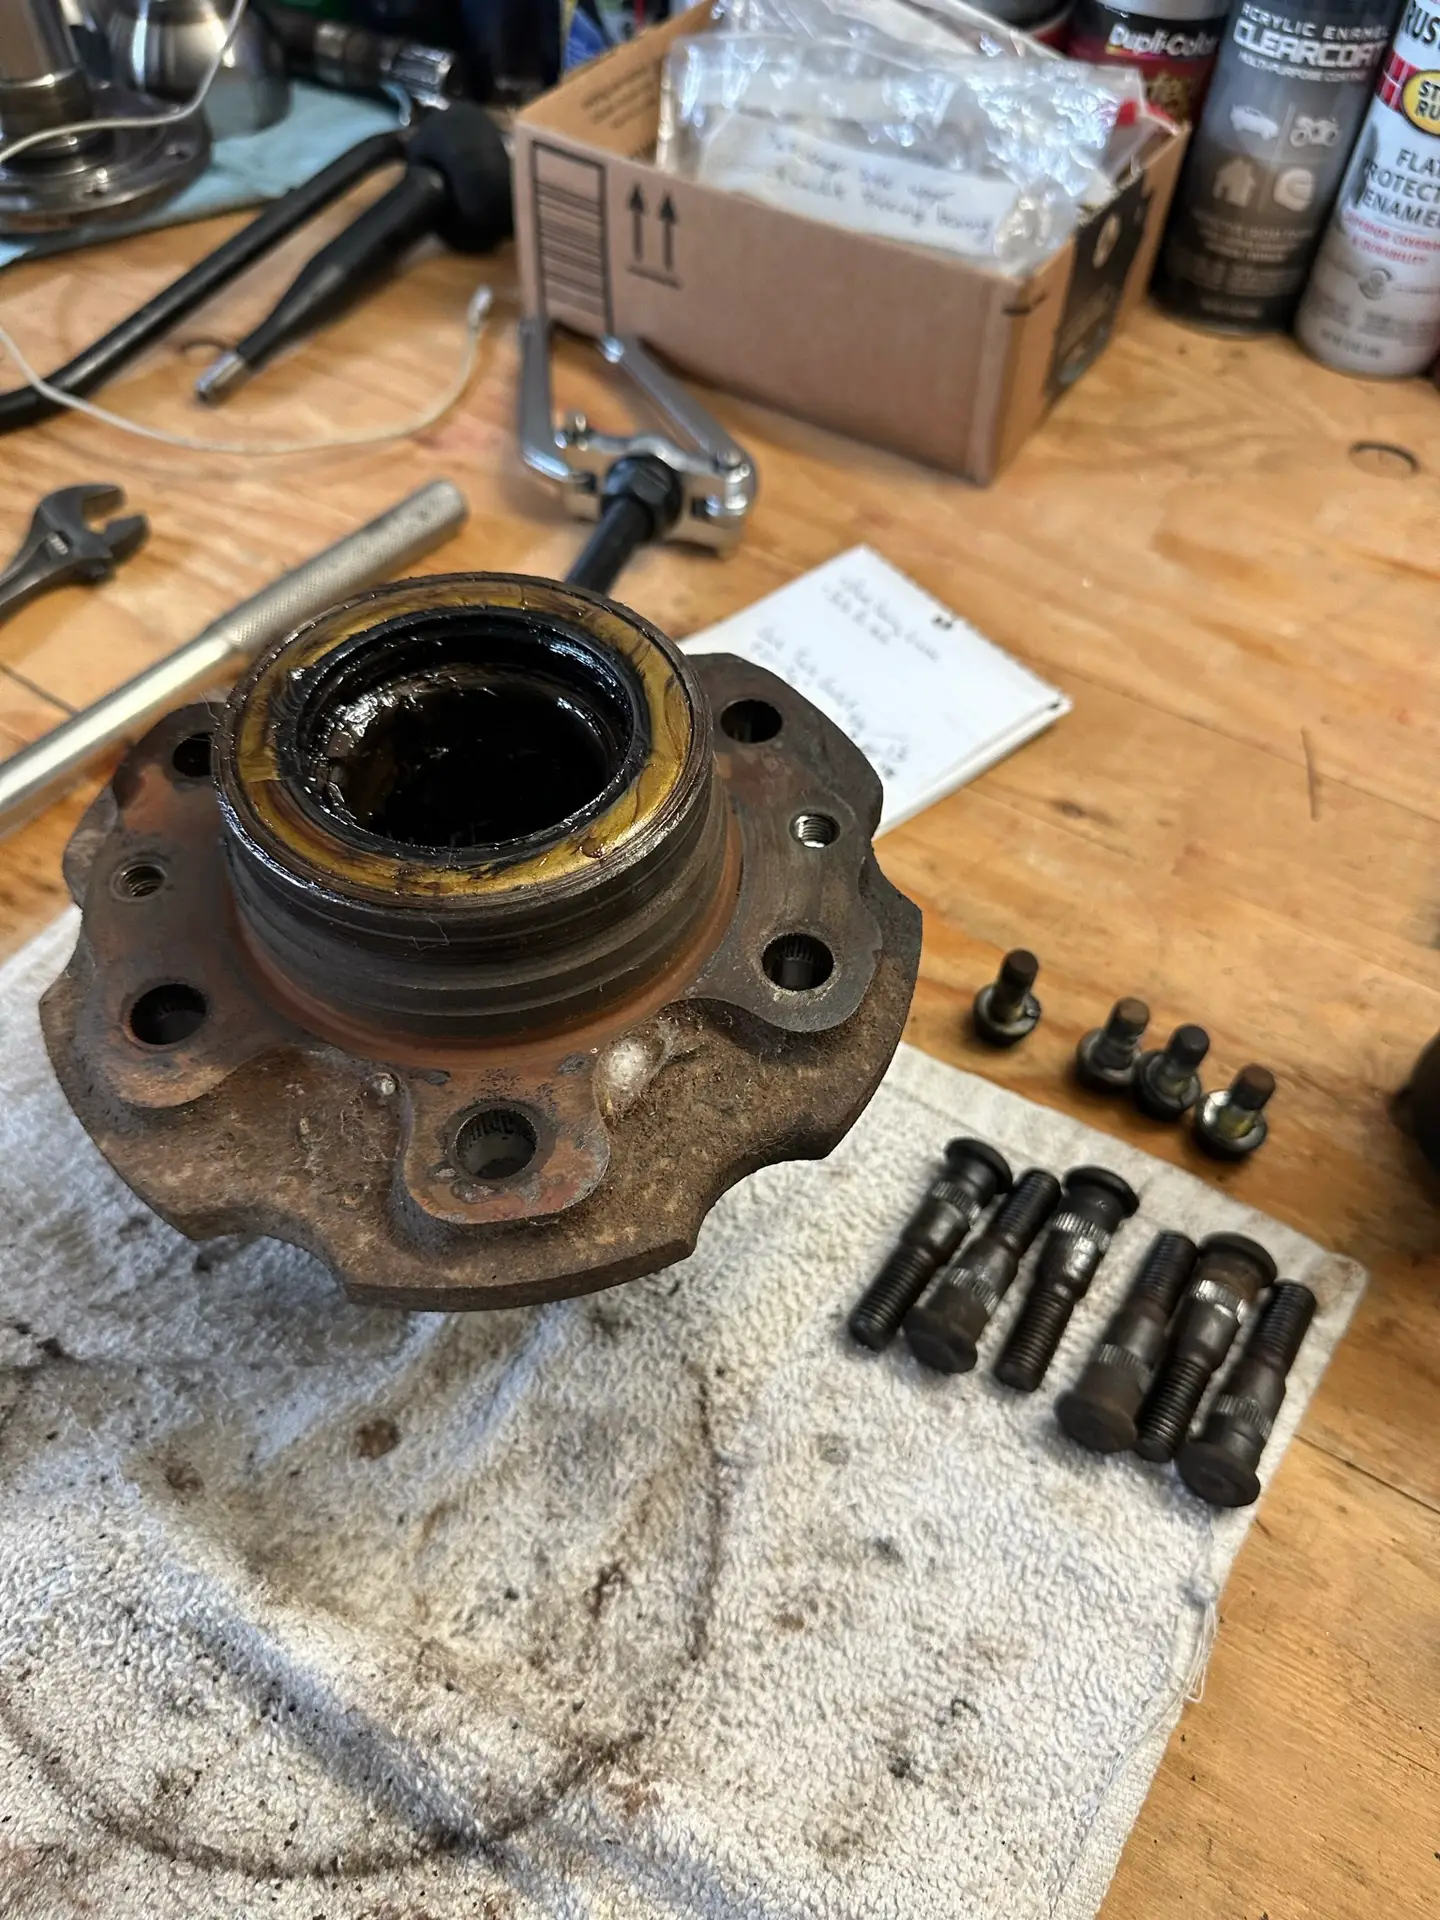
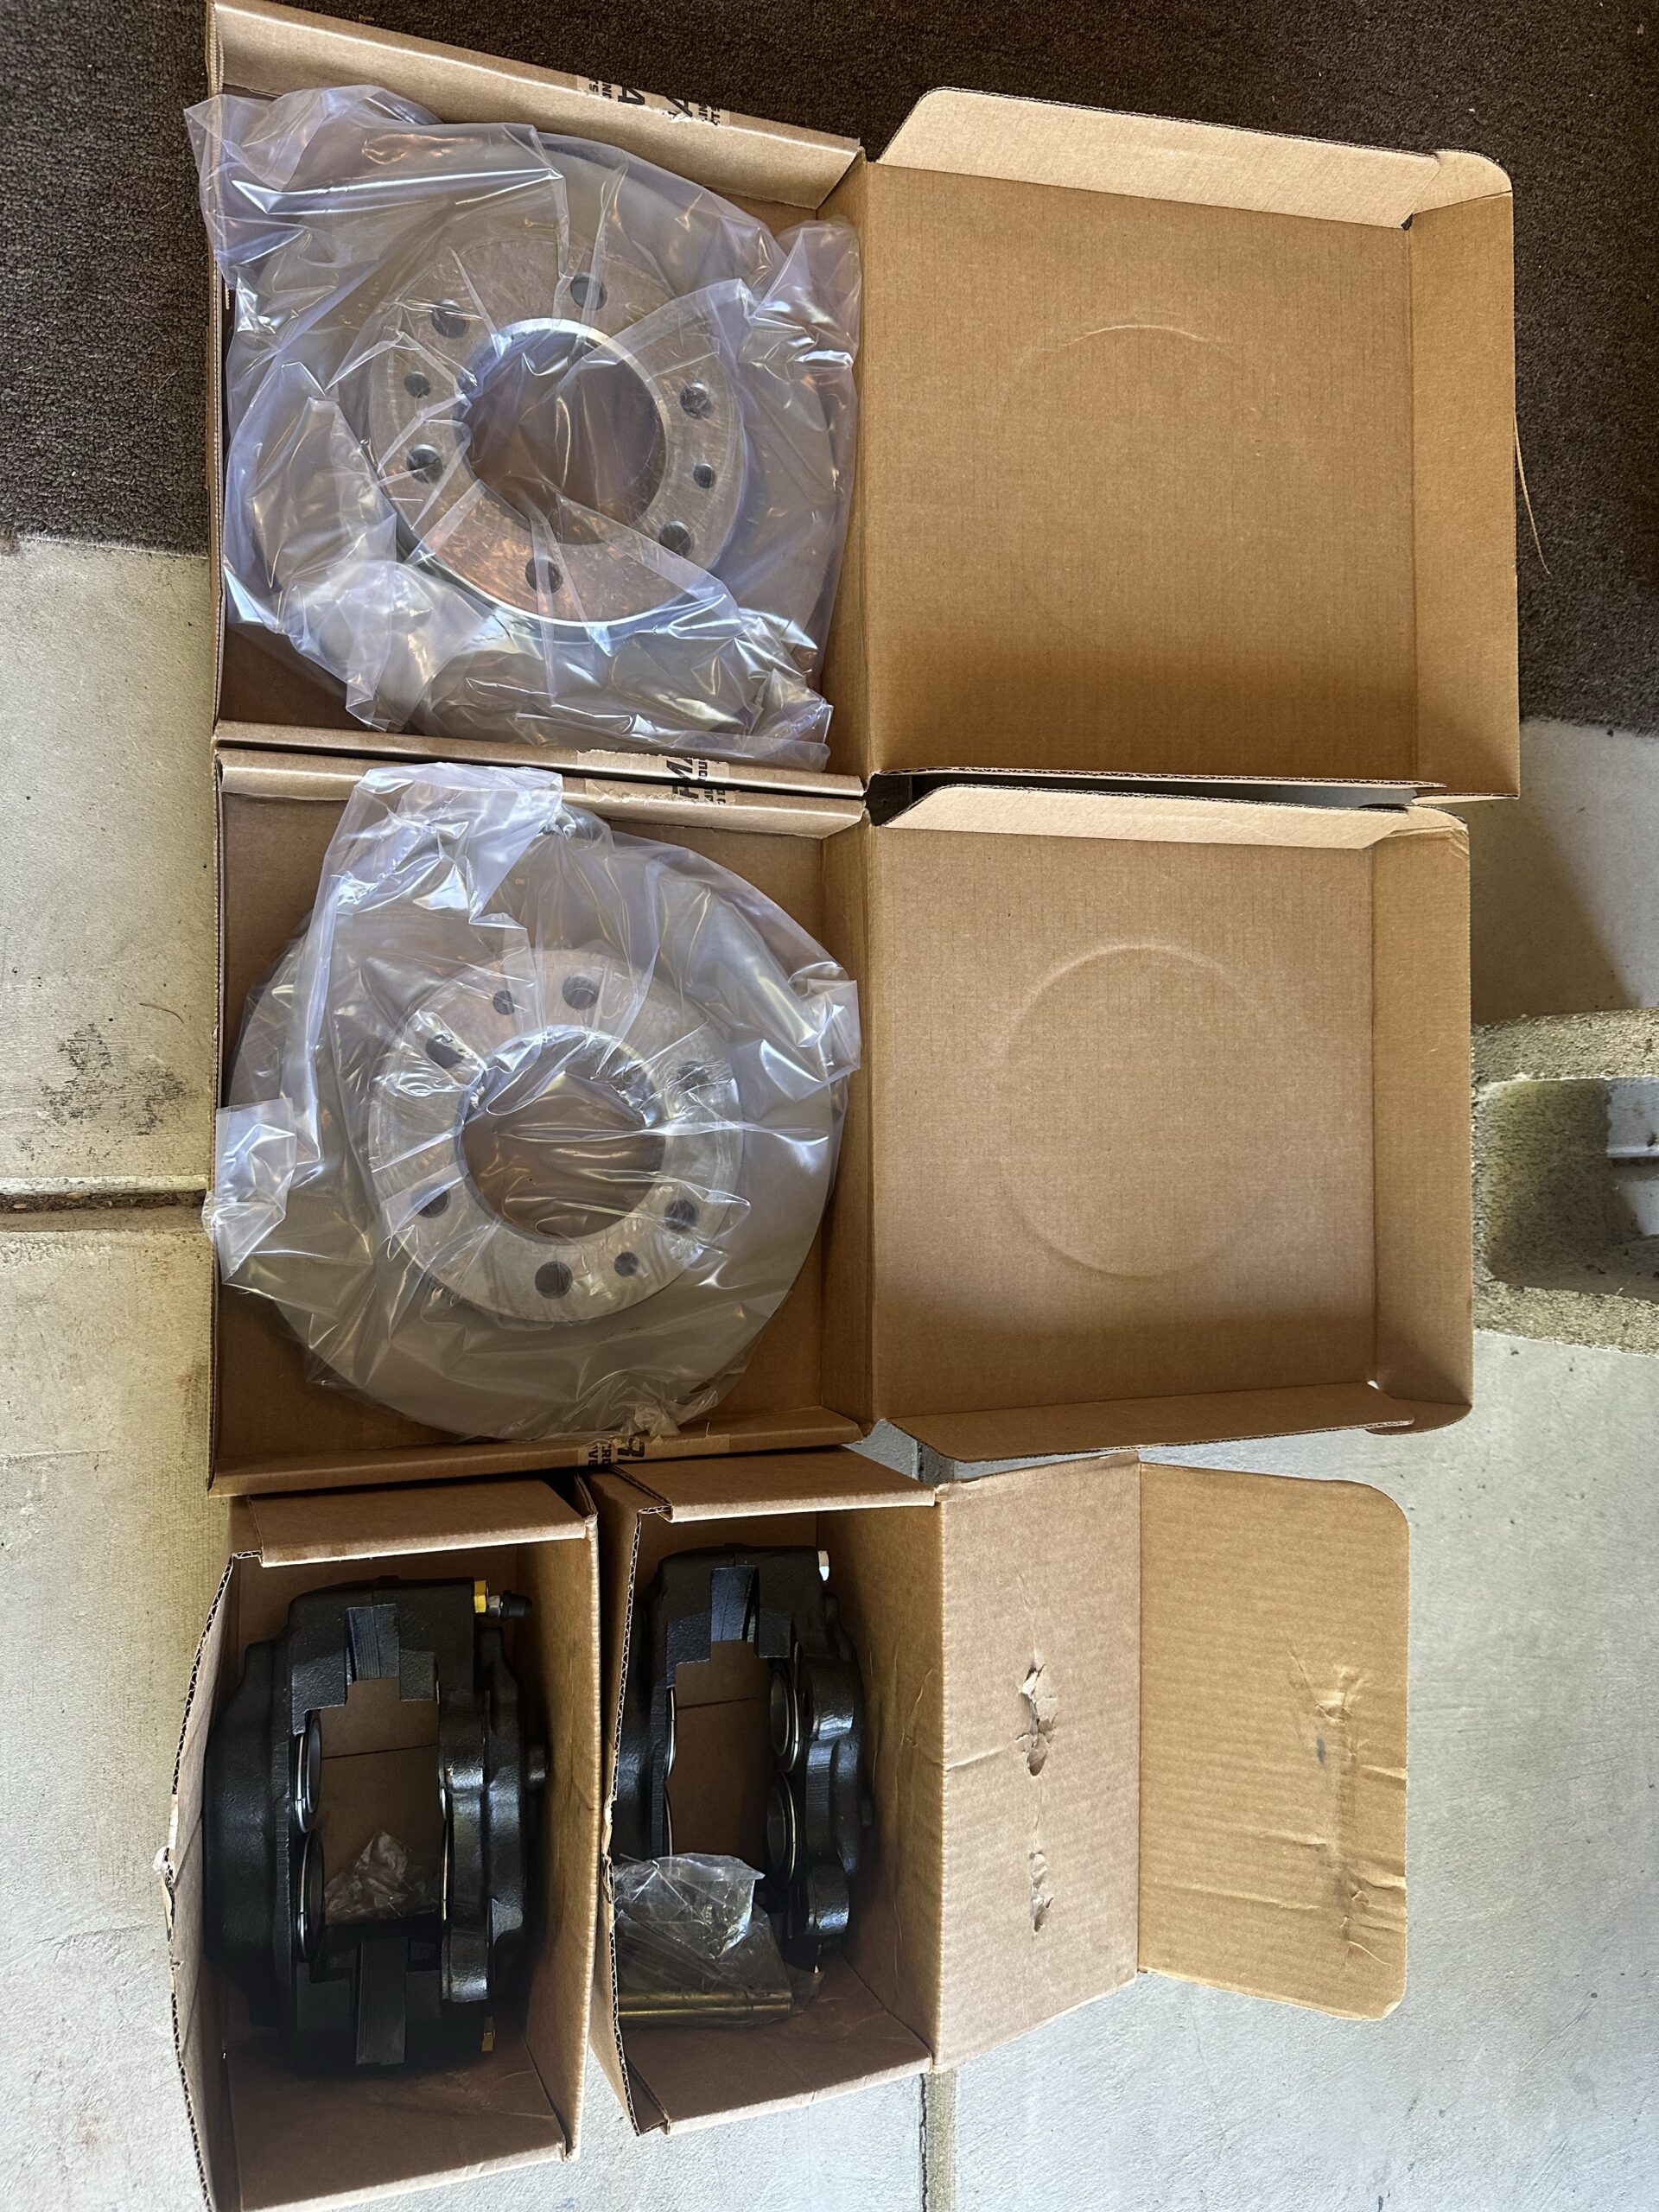
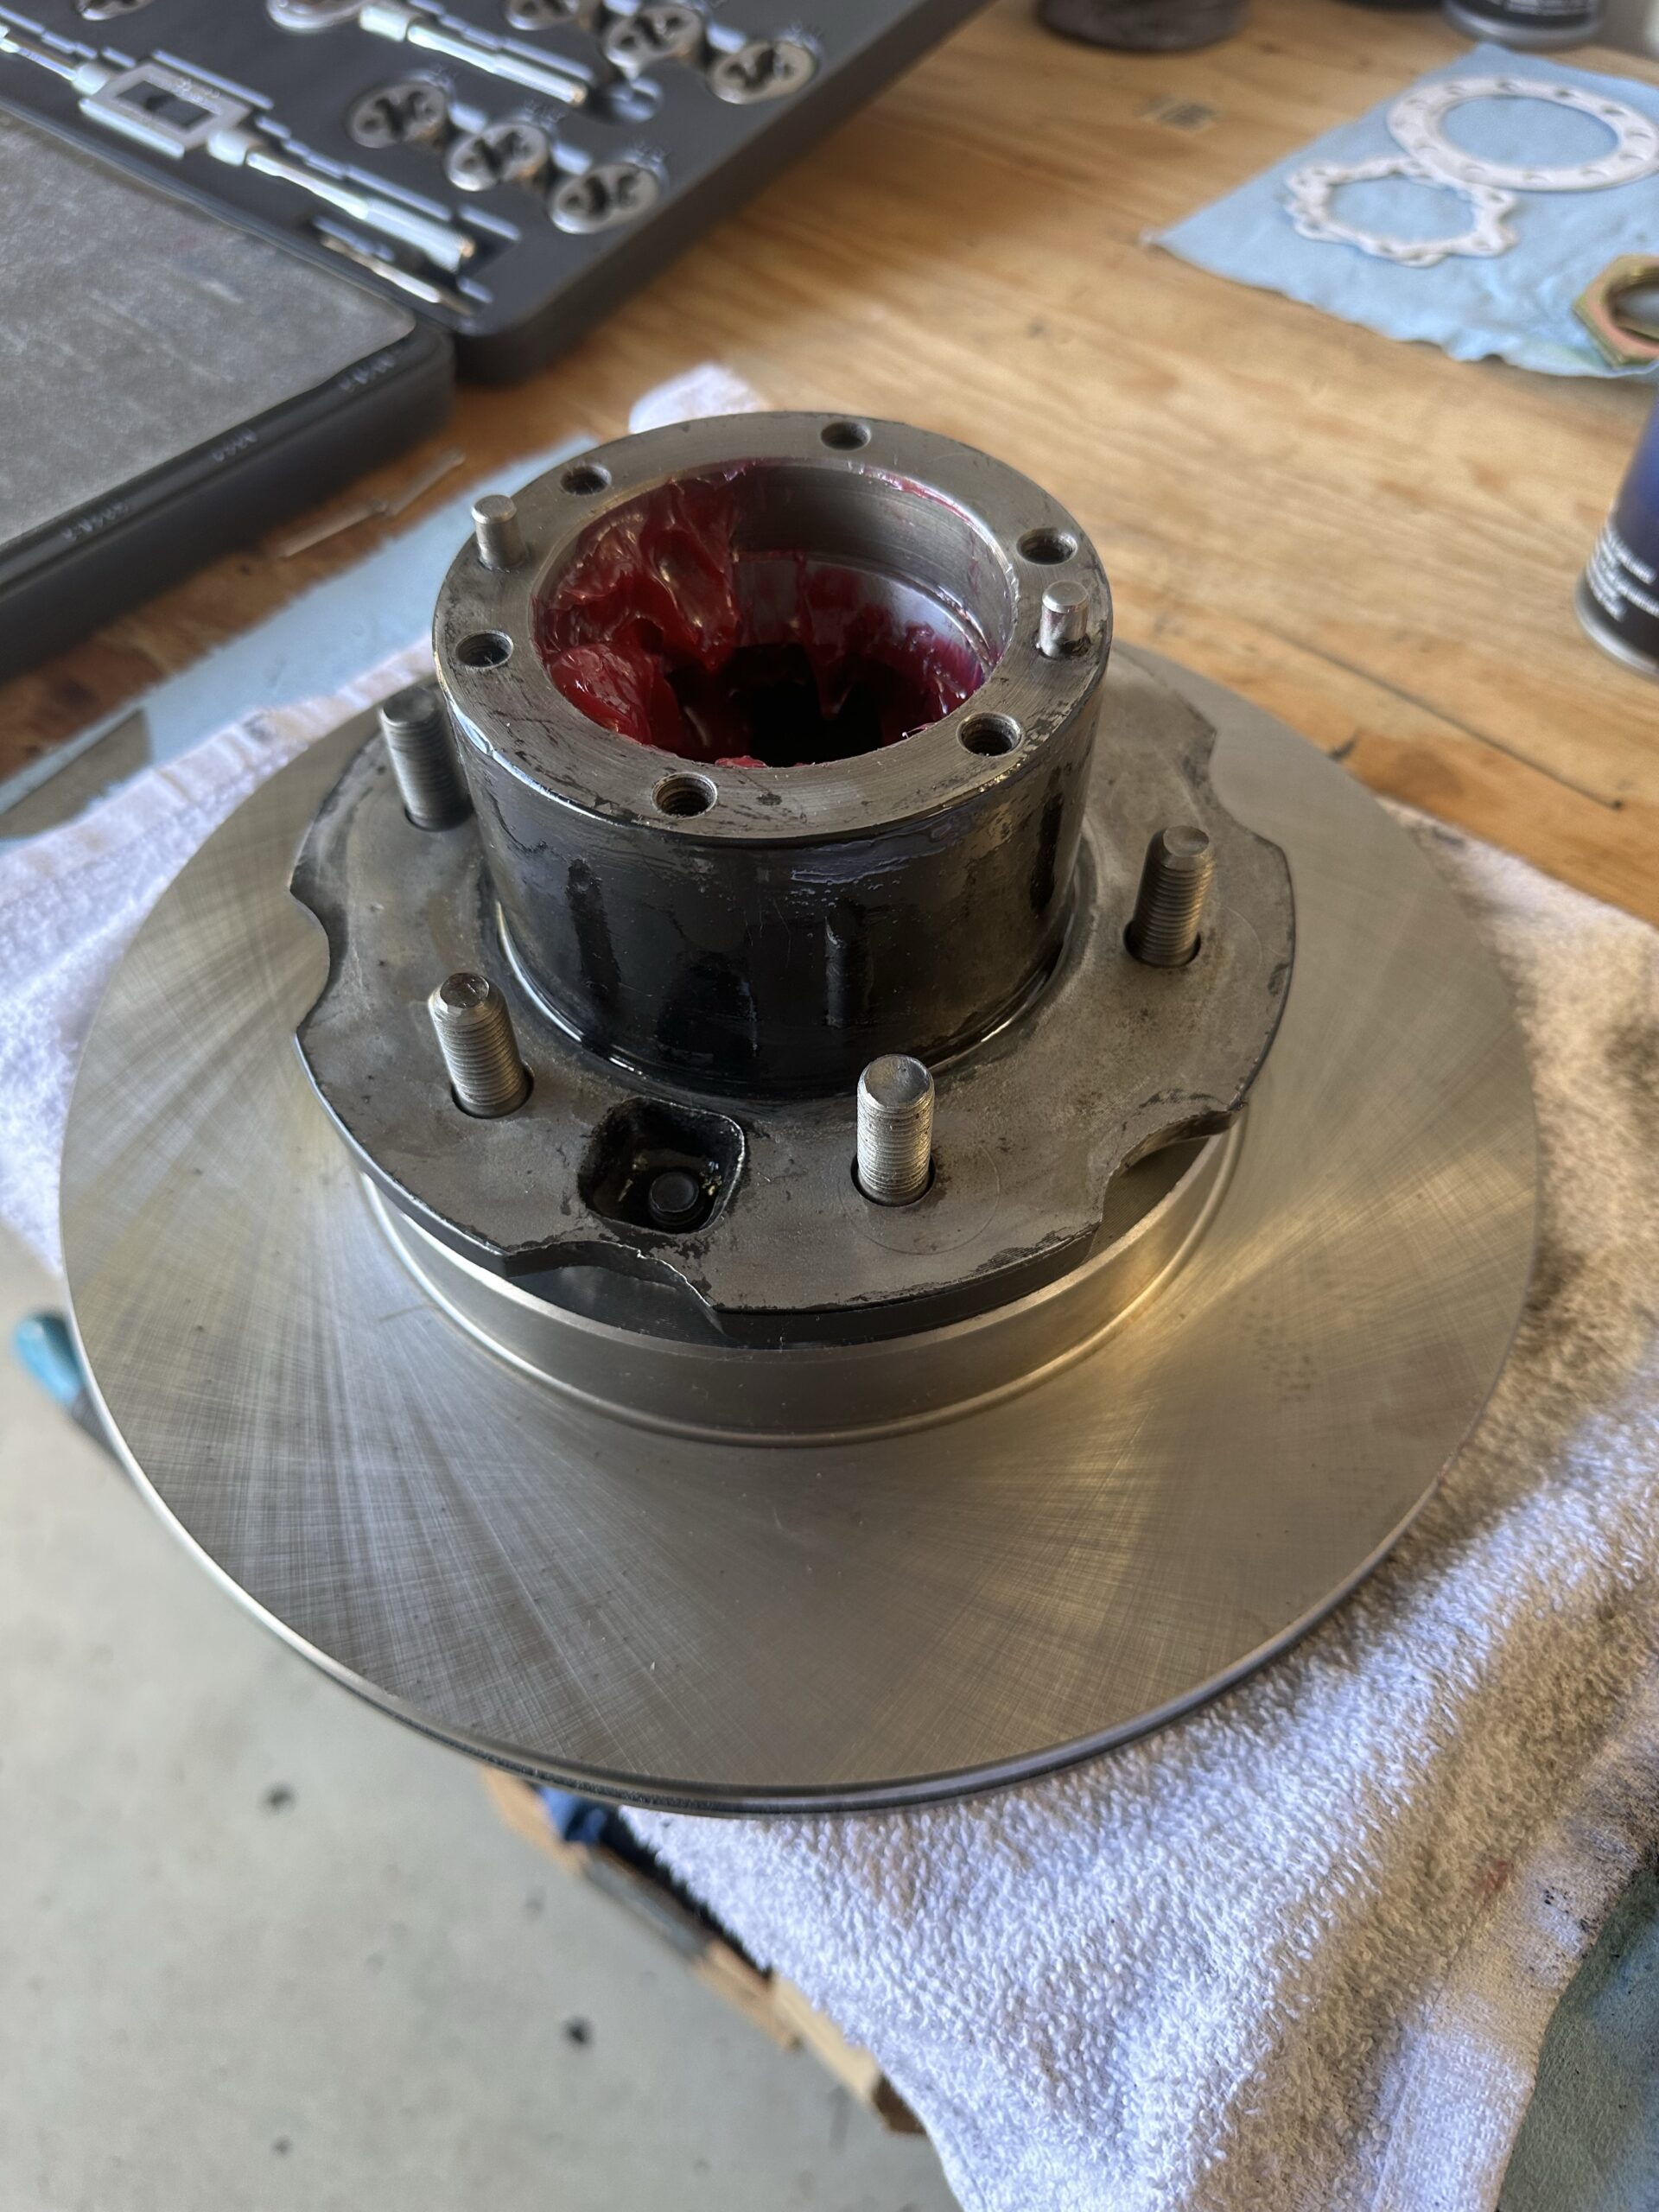
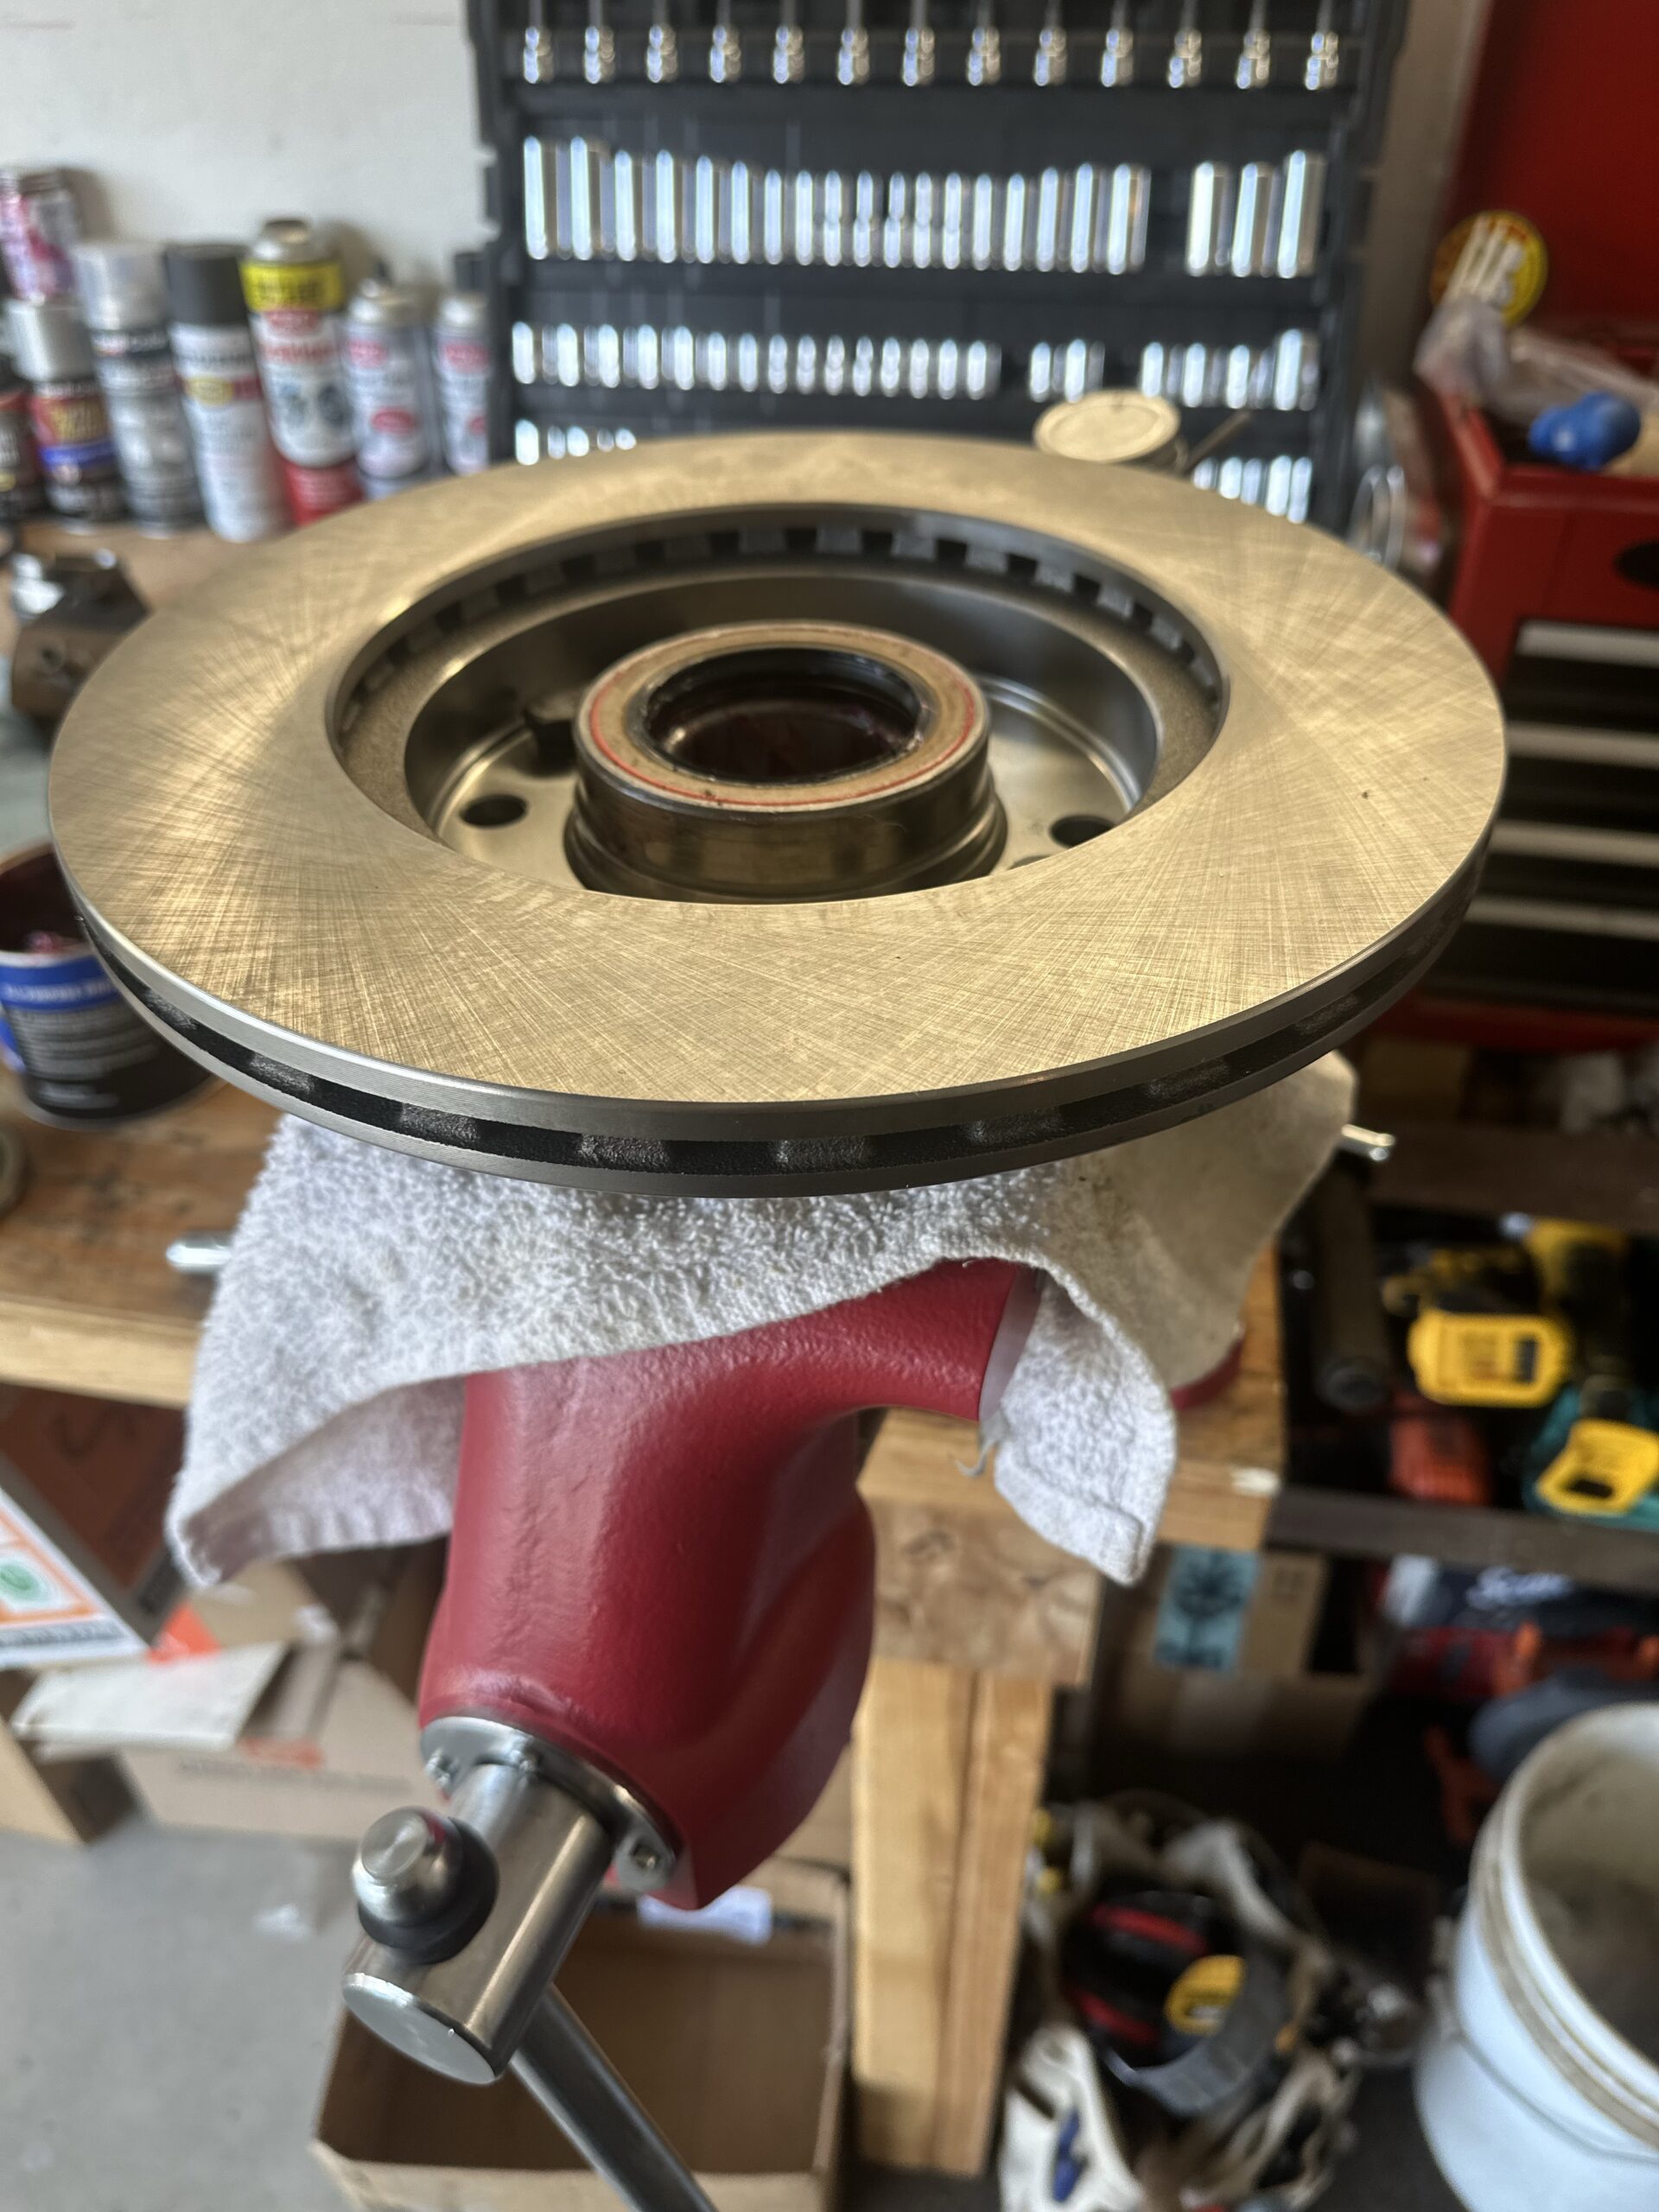
Next I focused on getting the hubs and rotors fixed up. I pressed out the lug nut posts and separated the old rotors from the hubs. The old rotors were pretty warped. The last time I drove the truck back in 2004 I remember her shaking like mad. I also remember the brakes locking up on occasion. I’ll never forget one time when we were heading up to Lee’s Ferry and Bernadett was driving. She was approaching the left turn off the highway south of Page and she locked up the brakes and slid to a stop. I was holding on for dear life. Old Bessie did required considerable finesse. This time around I upgraded the rotors from the solid plate to vented rotors and also added larger calipers.
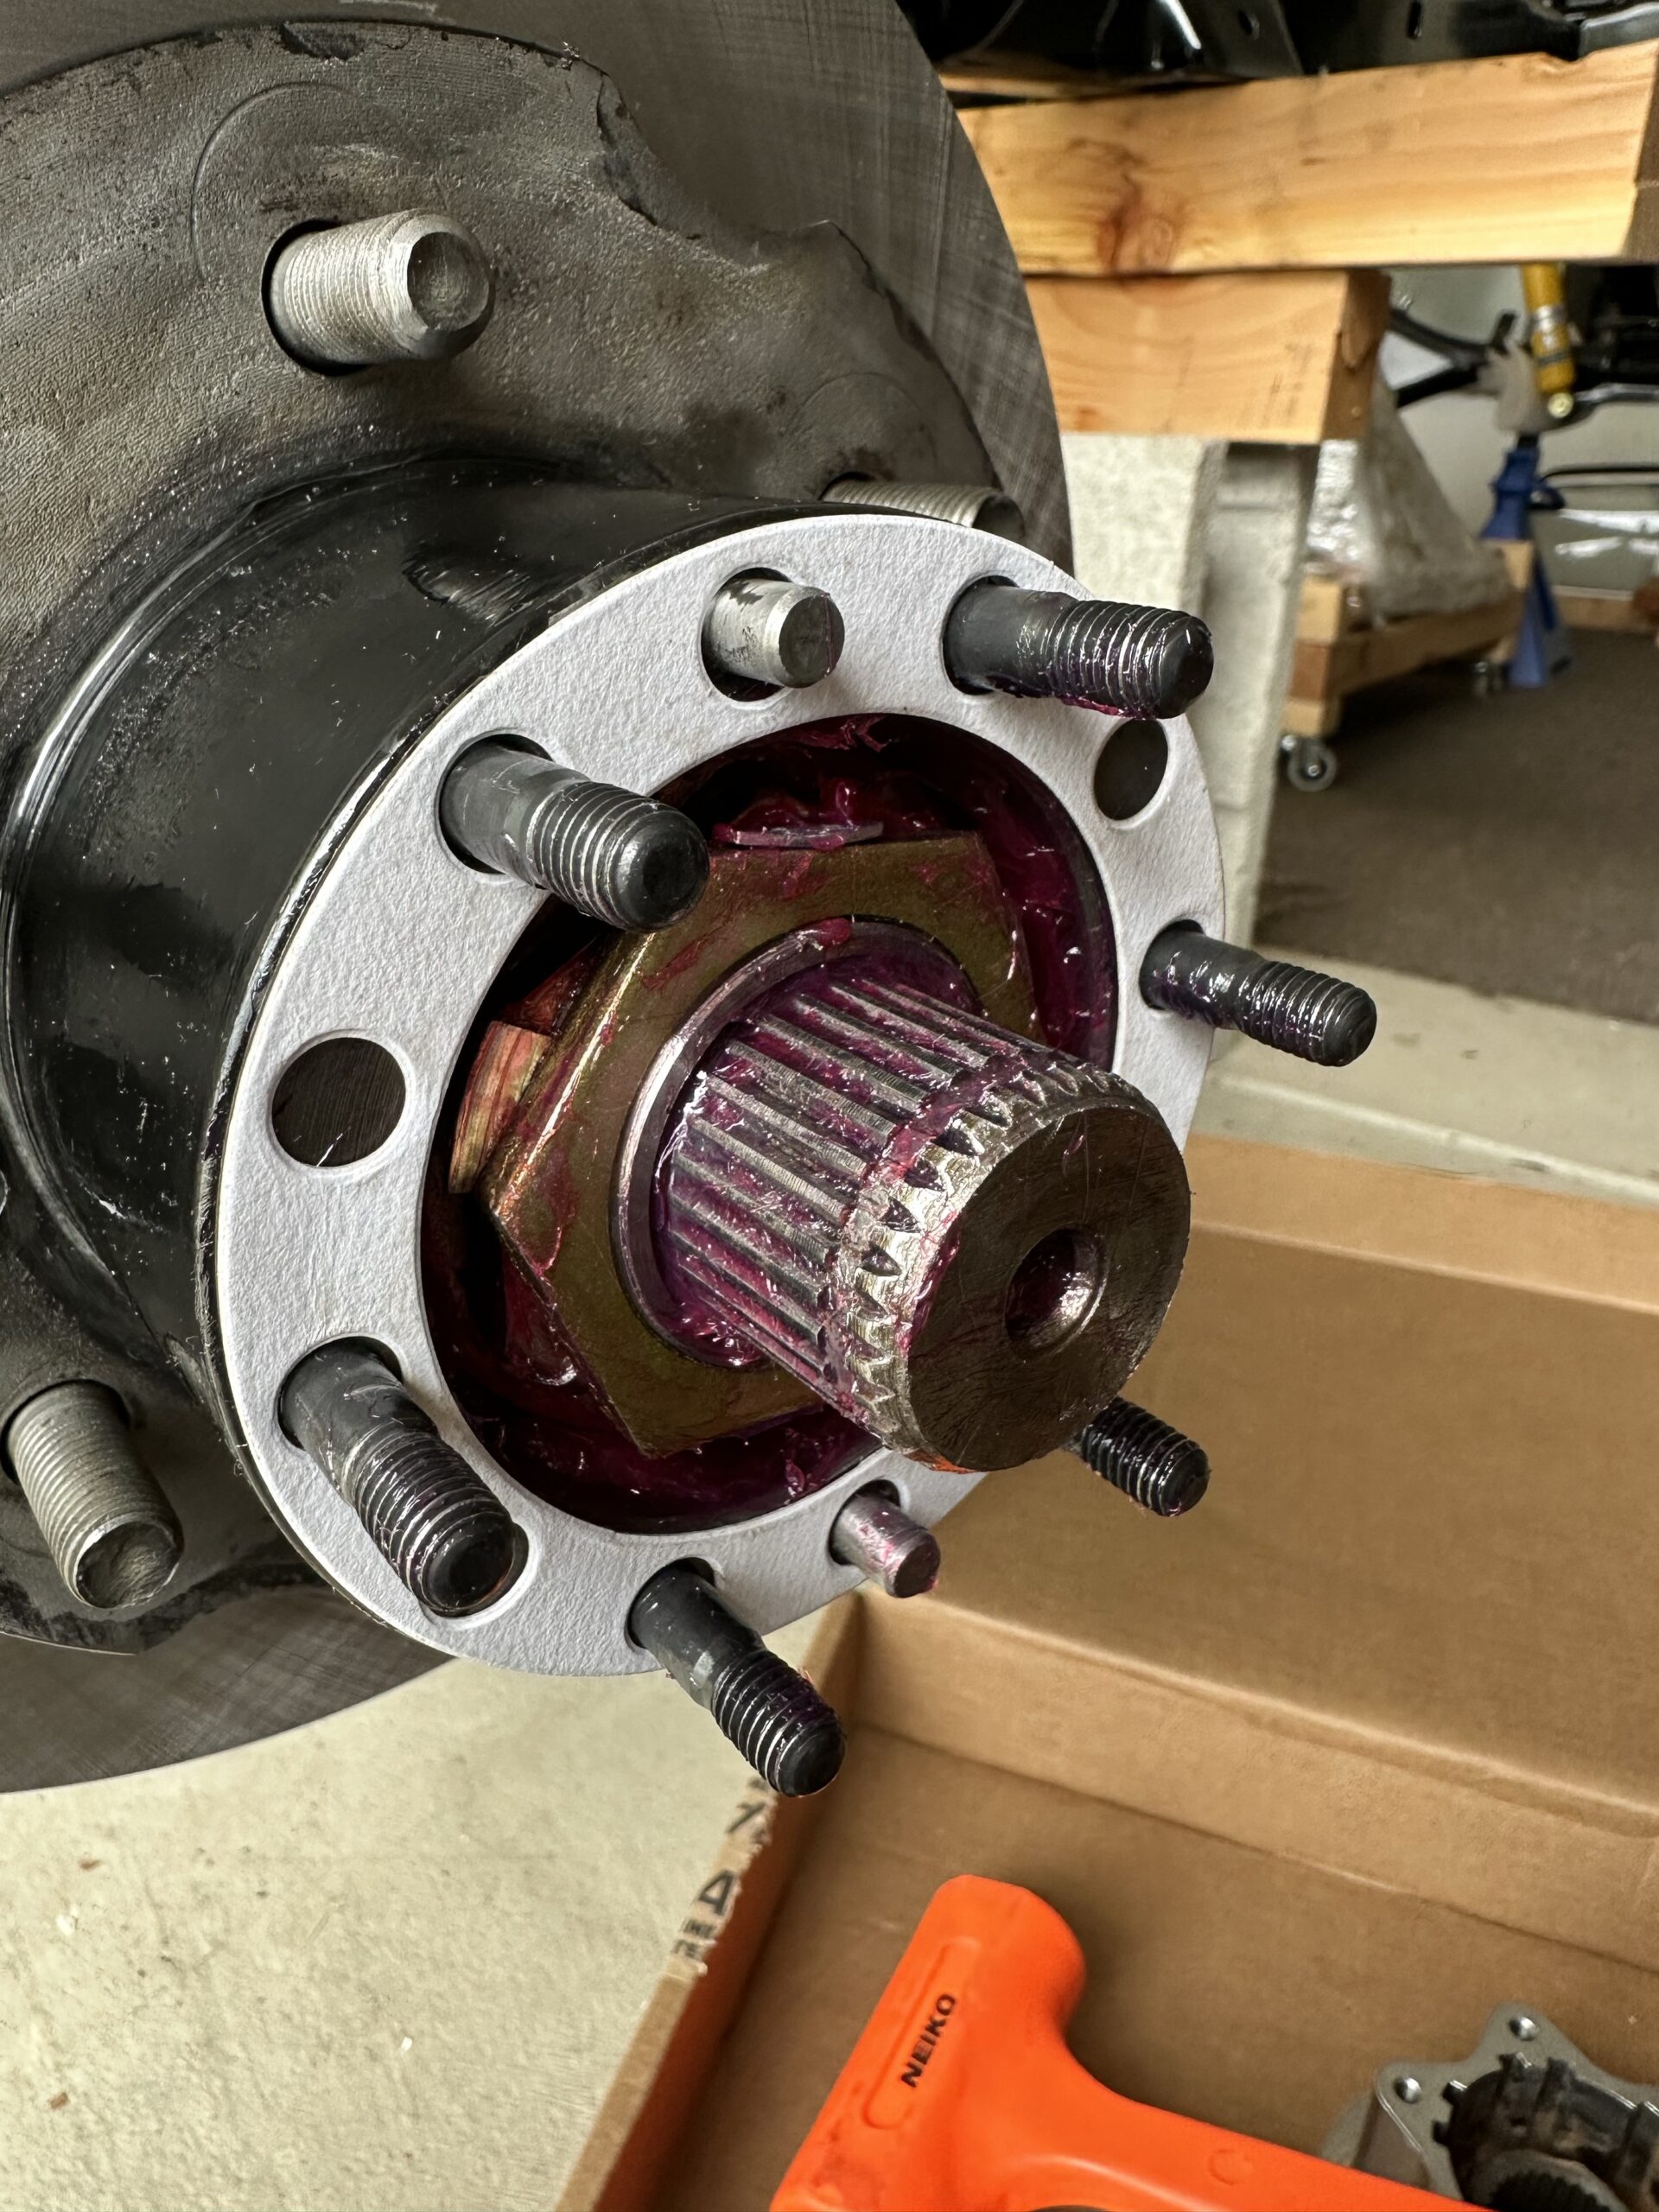
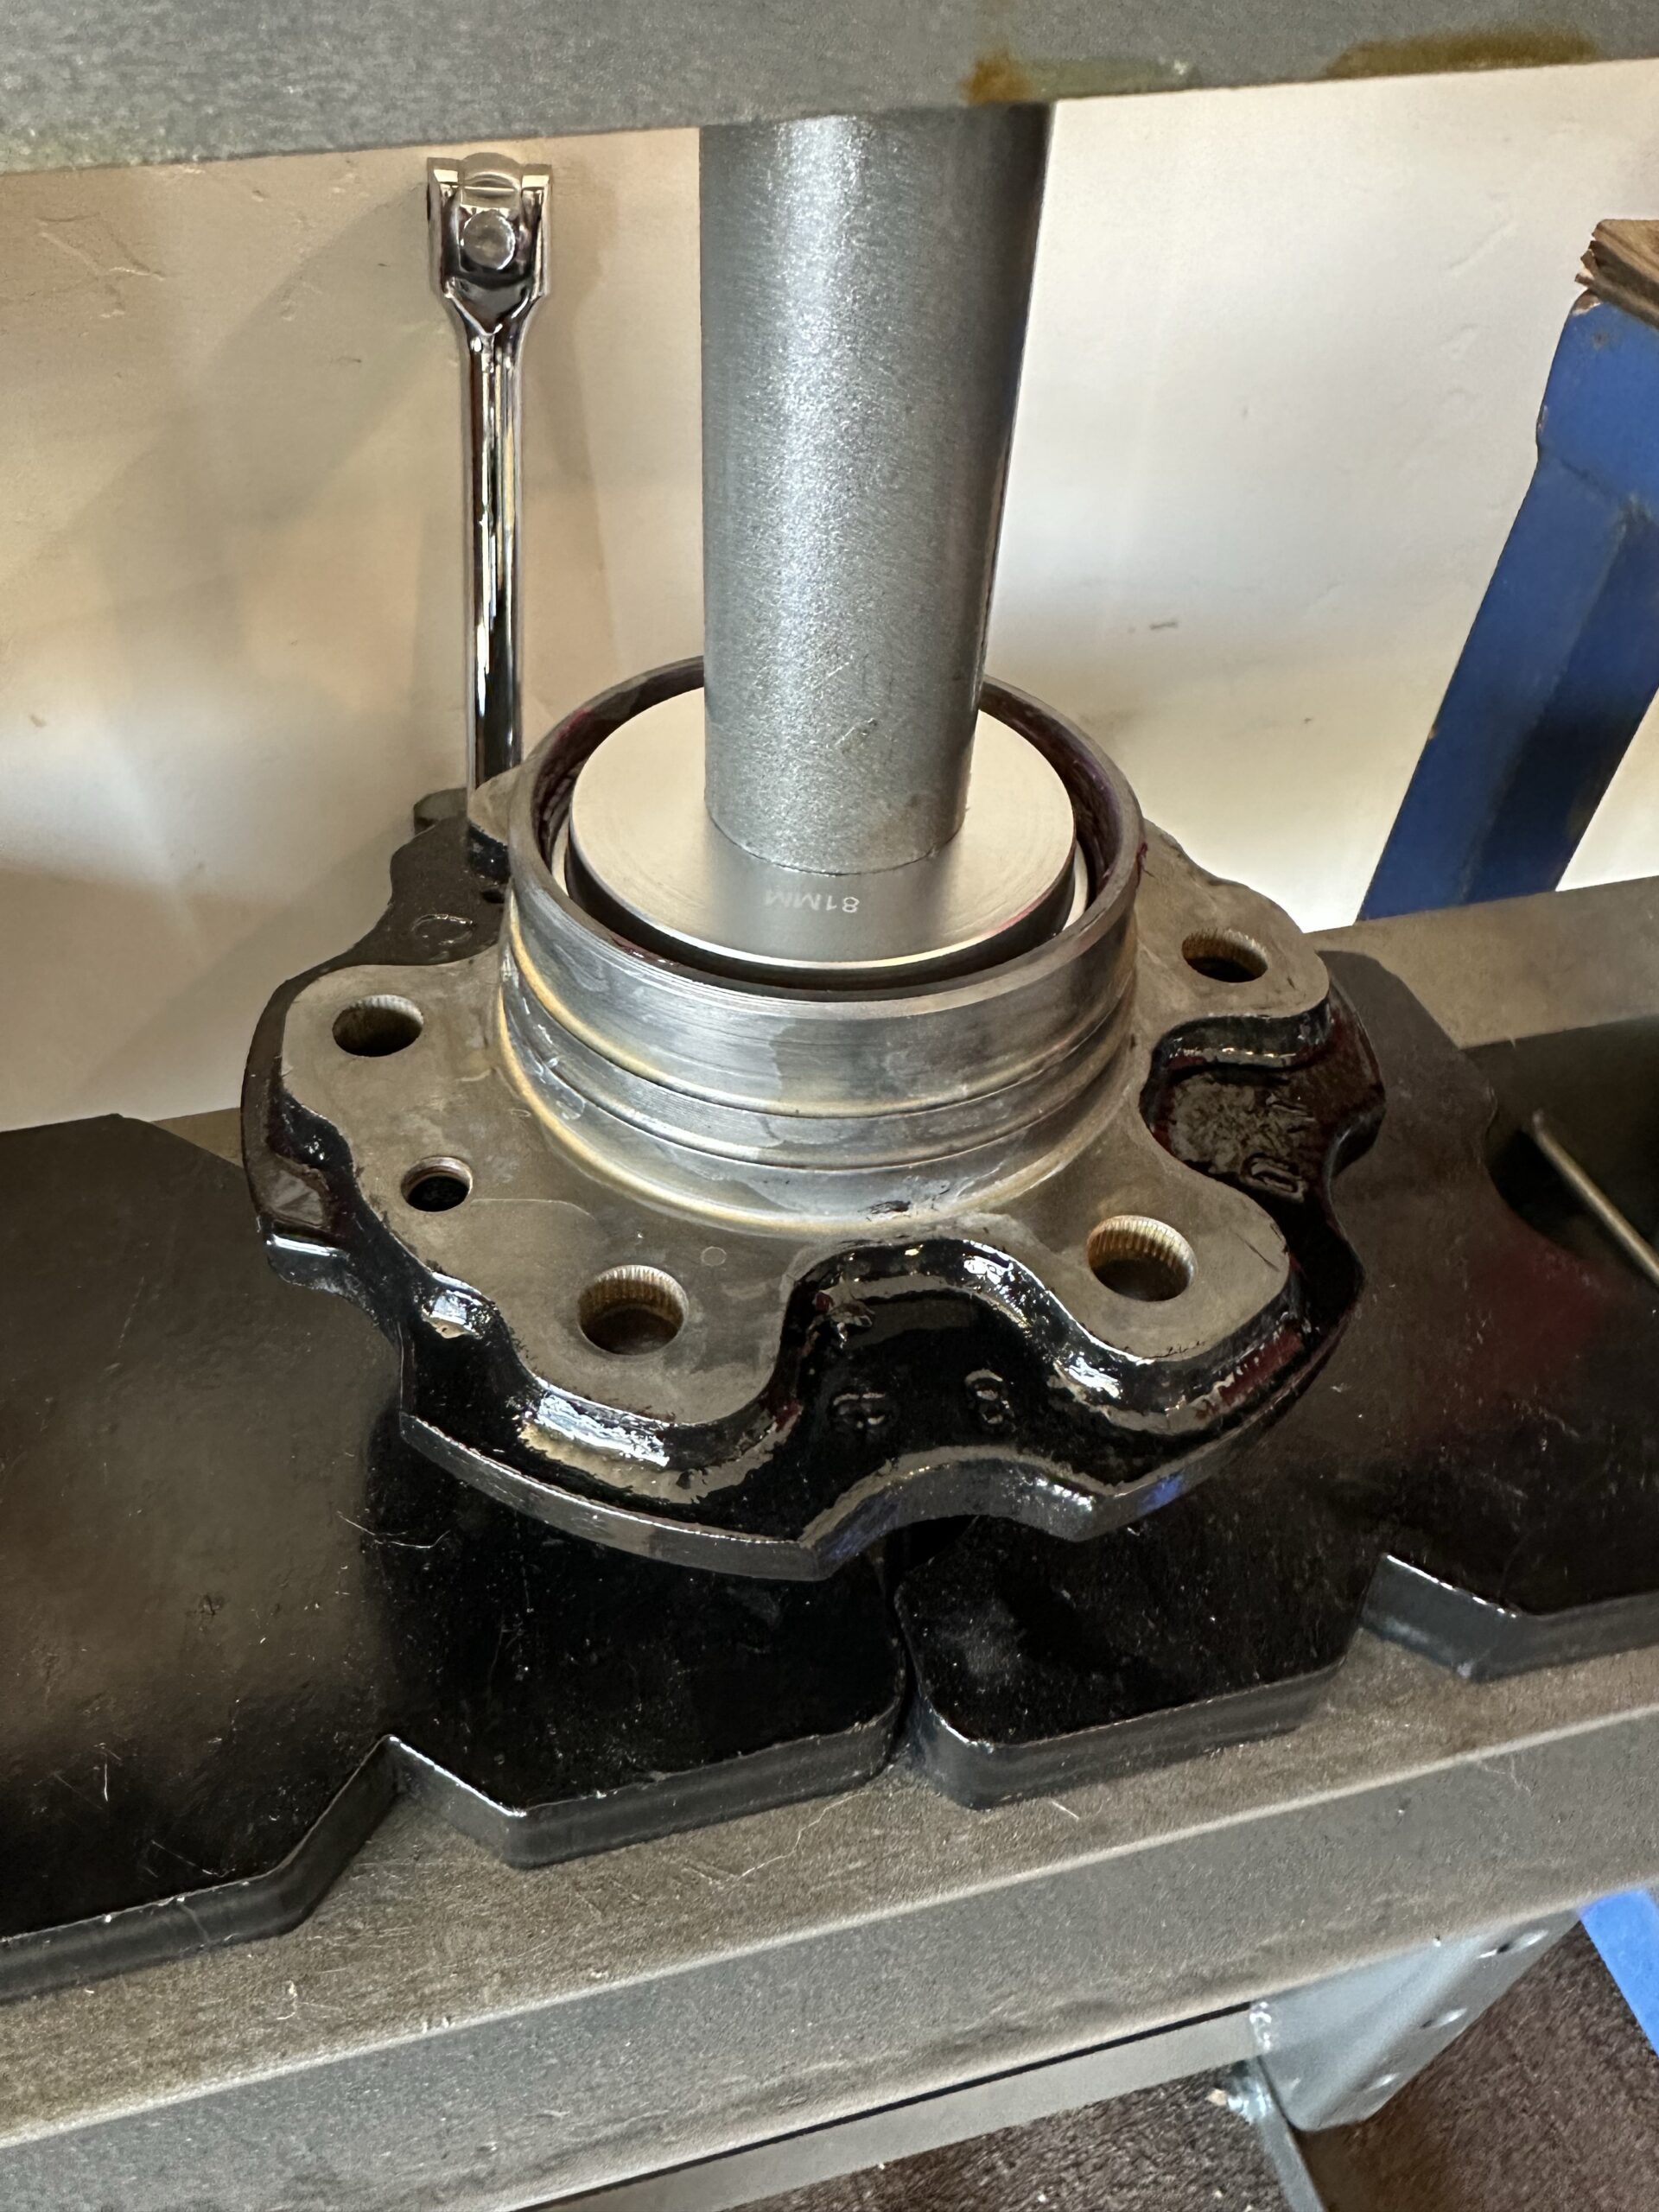
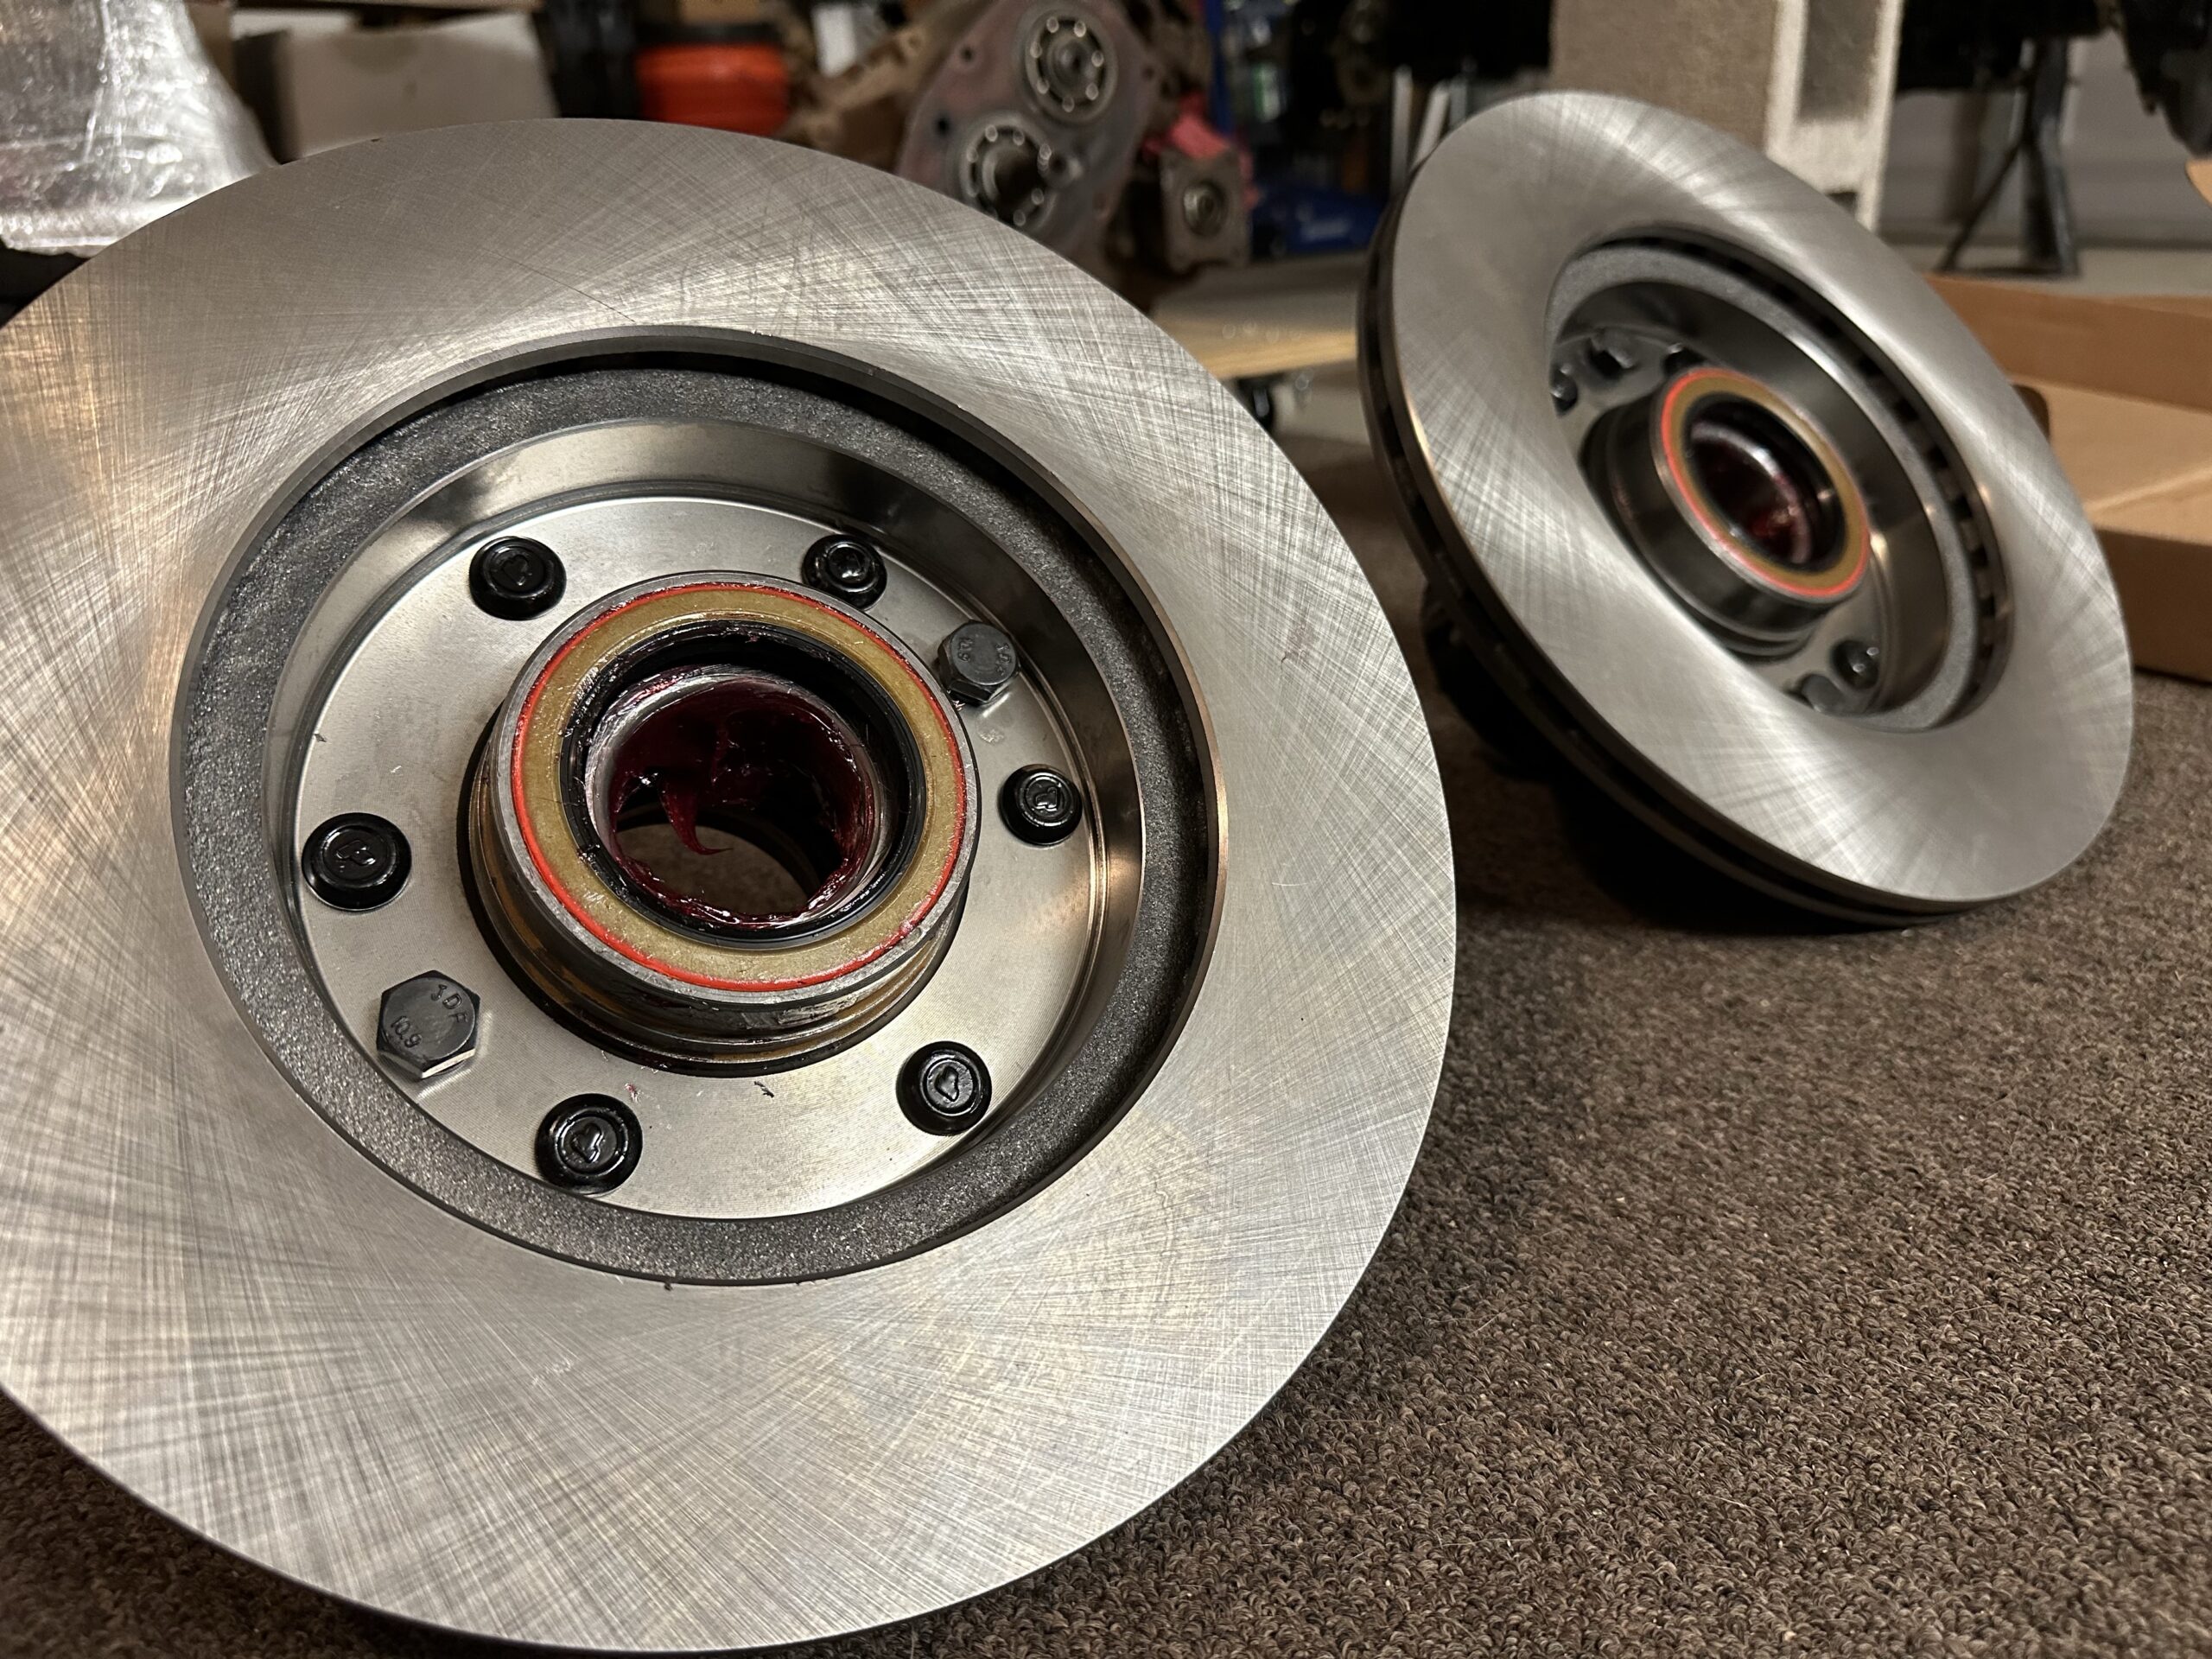
After removing the oil seals and races, sandblasting the hubs and a little cosmetic grinding, a couple coats of POR were applied. Once the hubs were dry I pressed in the new races, mounted the rotors and pressed in the lug nut posts and then packed the inner wheel bearings with grease, installed them in the rotor, and pressed in the inner seals. Replacing the 8mm posts for the locking hubs was a challenge and required running a die over the replacement posts to get them to fit into the hubs. Finally I added grease to the rotors and mounted them on the spindles.
Pressing Out the Lug Posts
Hub with the Rotor, Lug Posts and Locking Hub Posts Removed
With Races and Seals Removed, Hubs Painted with POR
Pressing in the Wheel Bearing Races
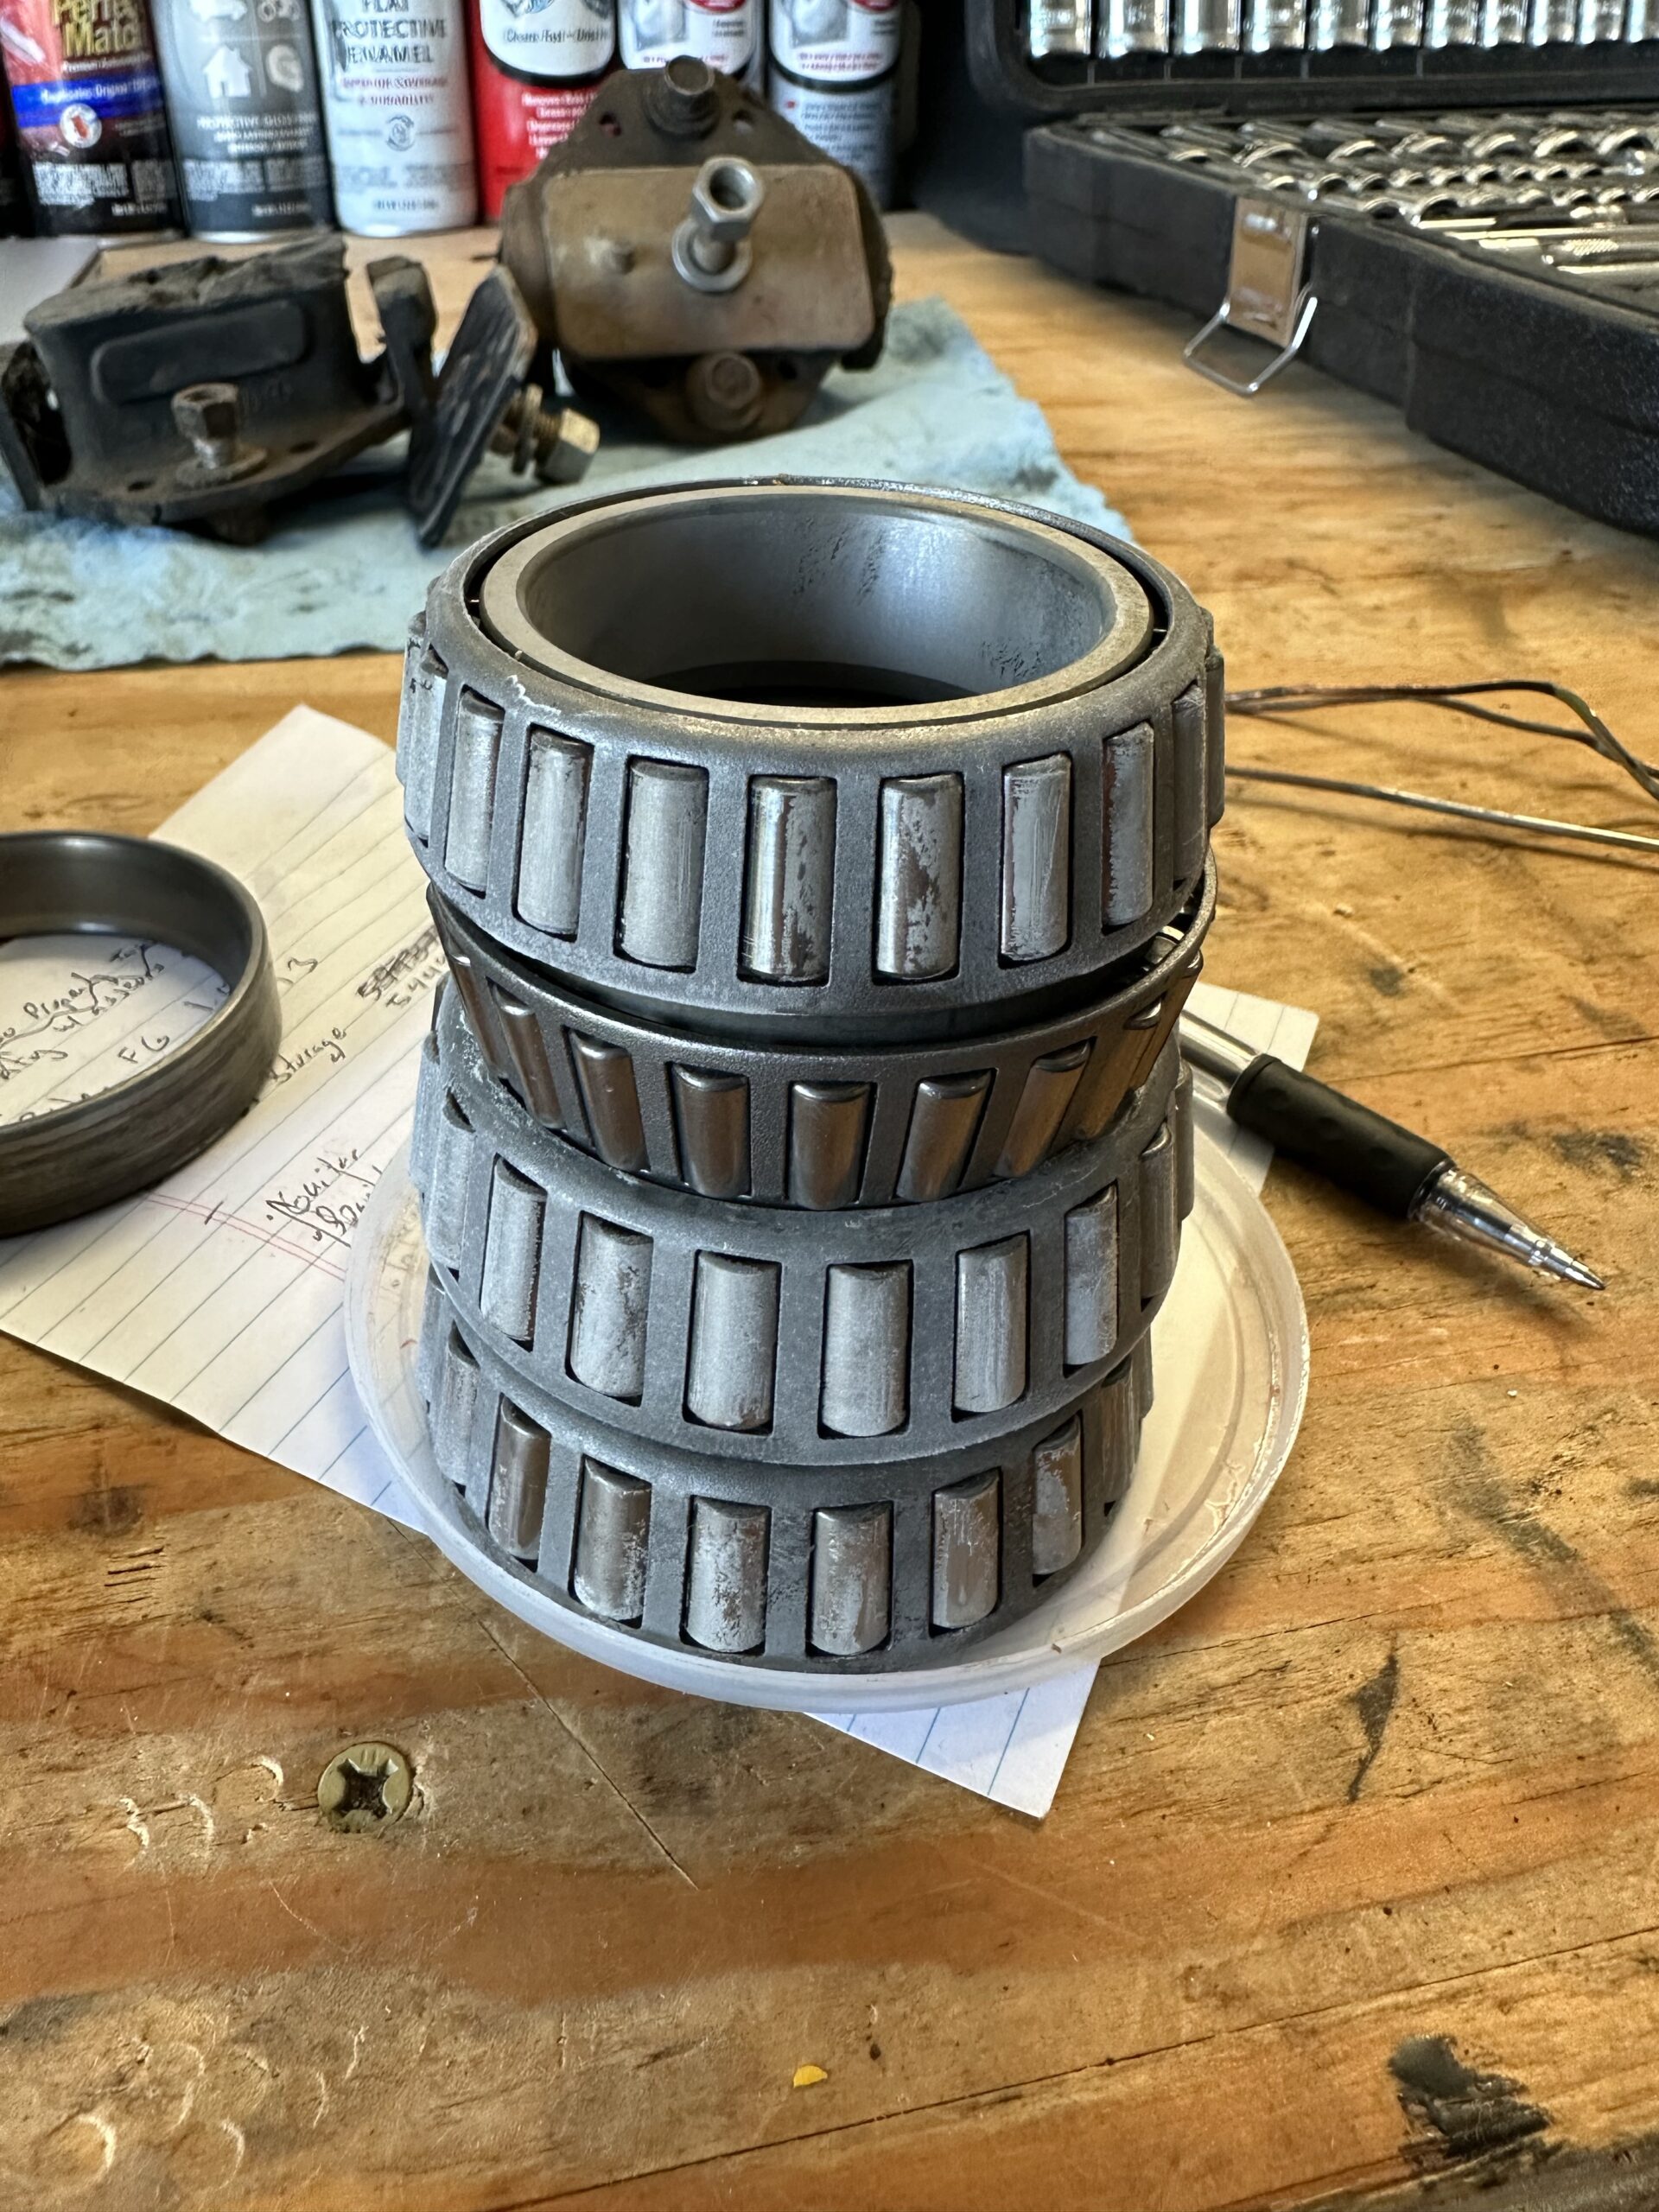
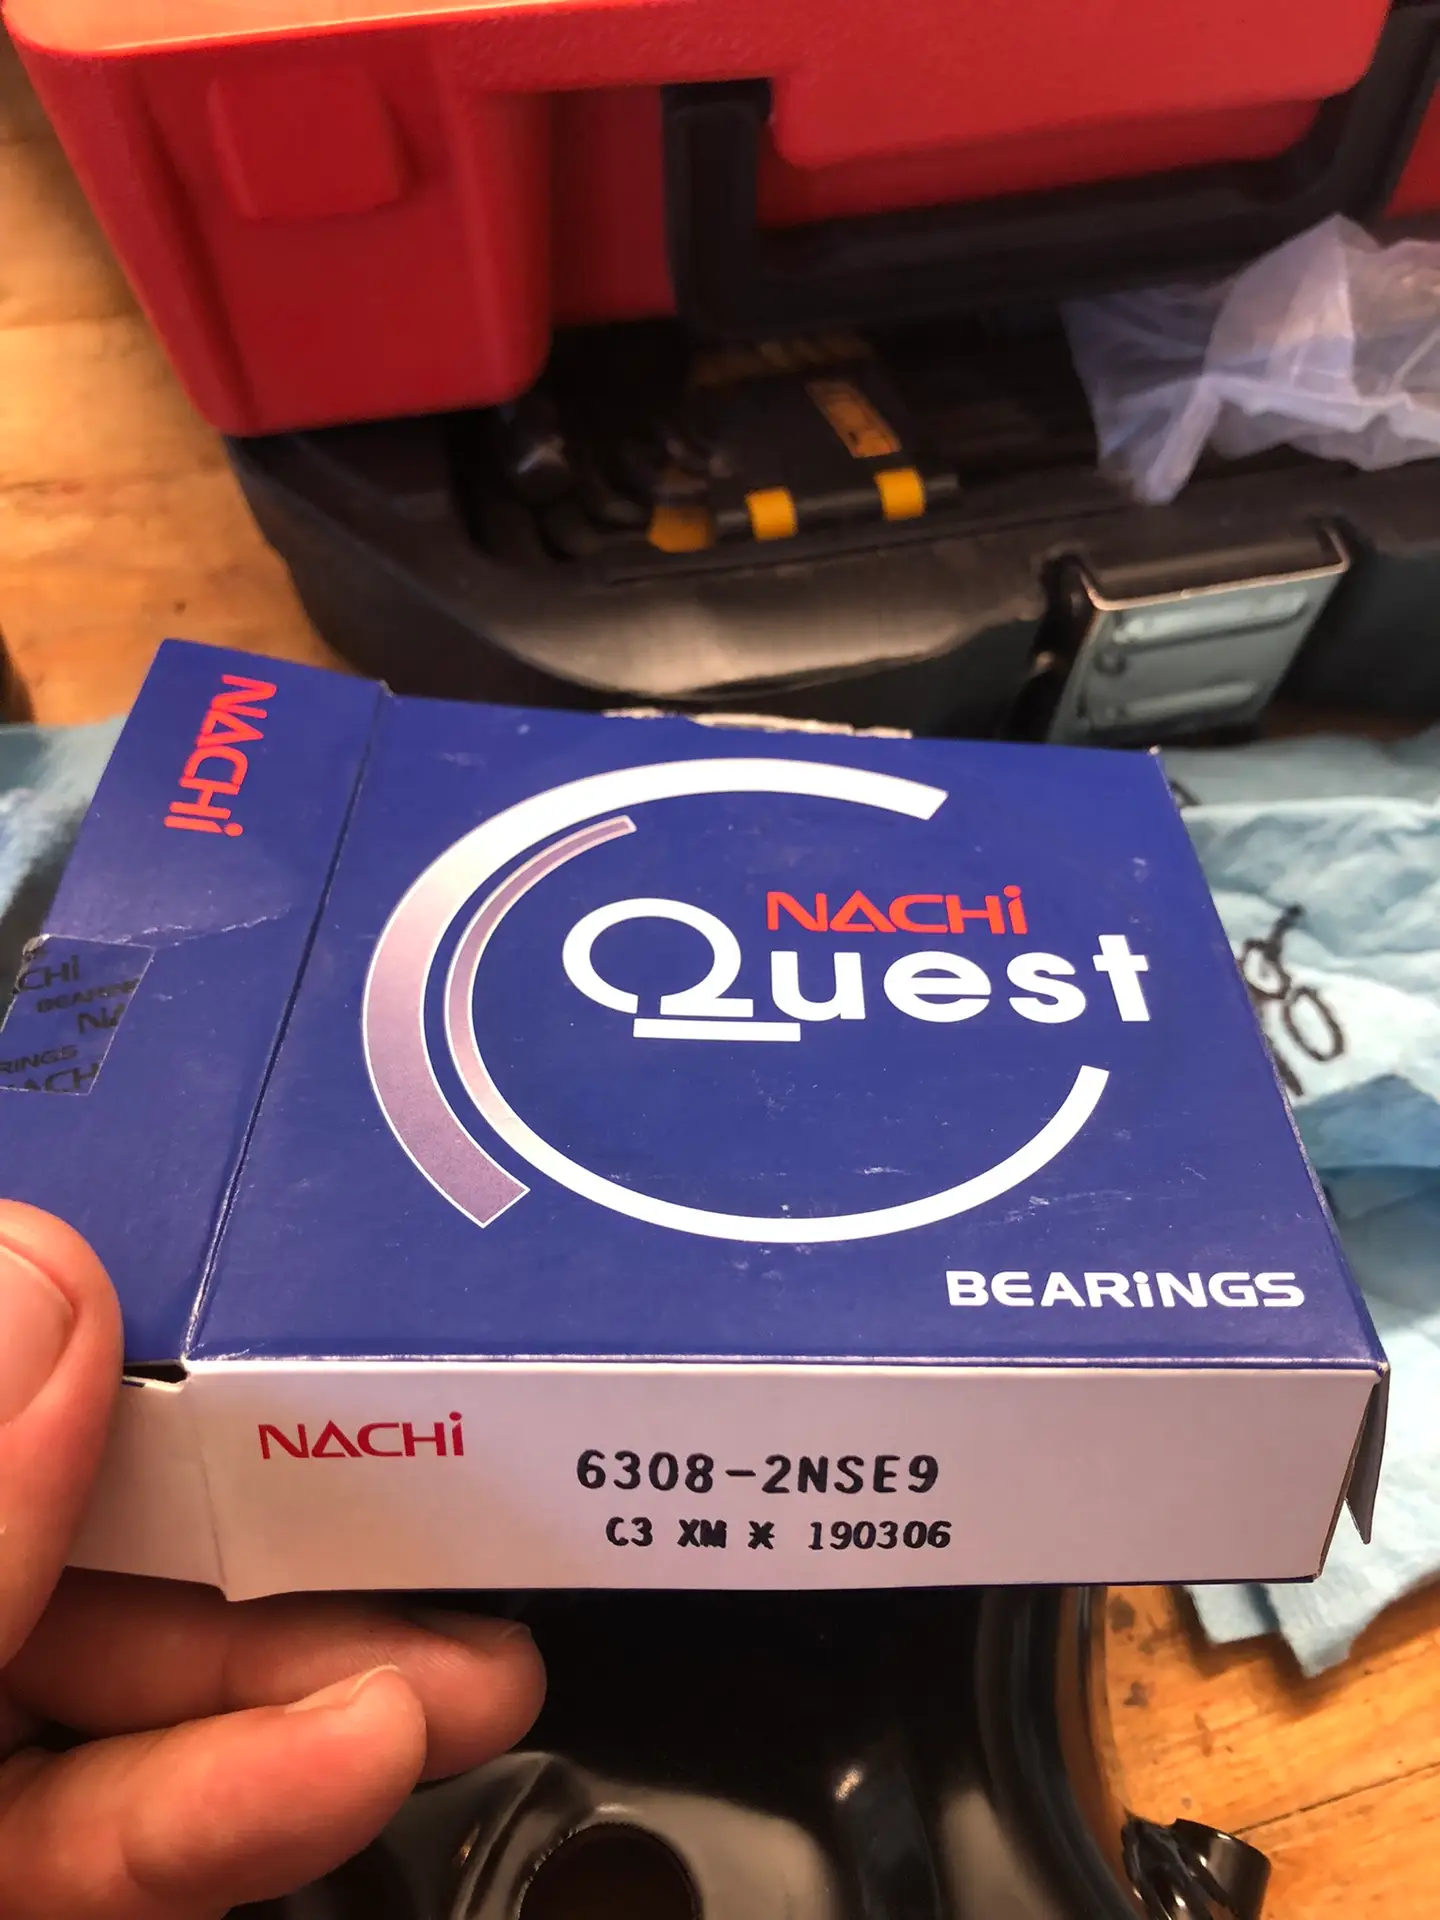
New Wheel Bearings
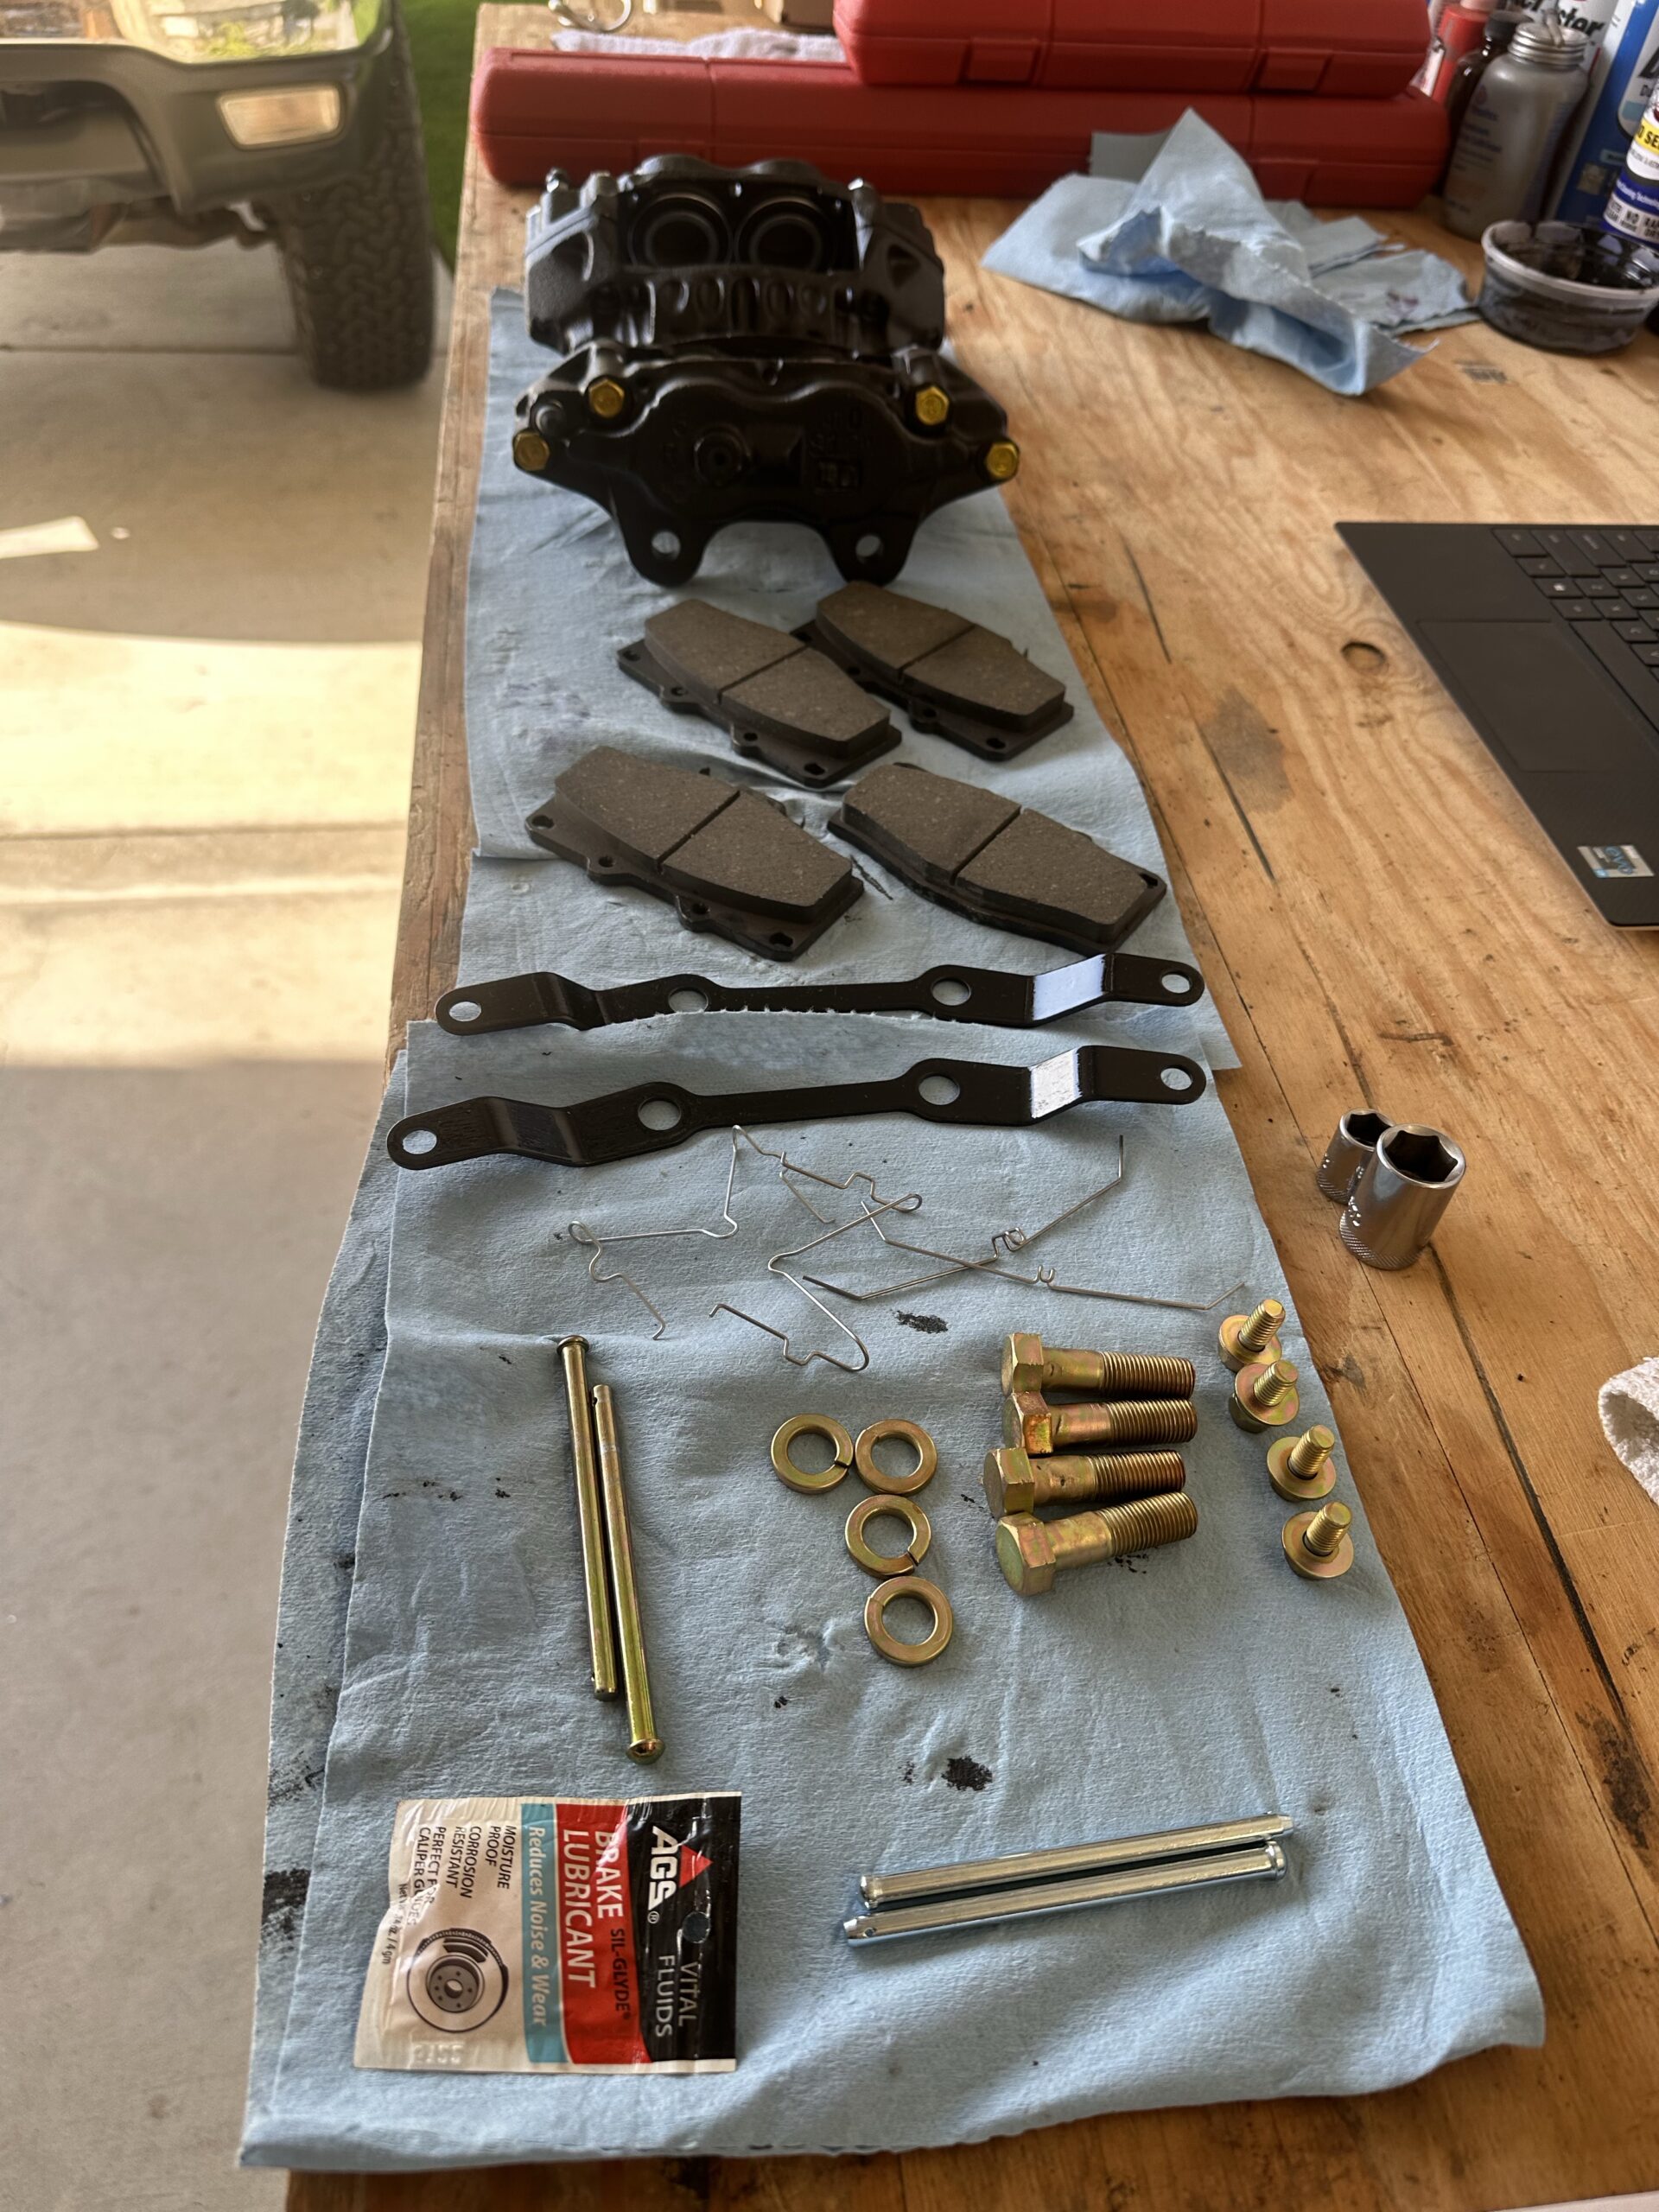
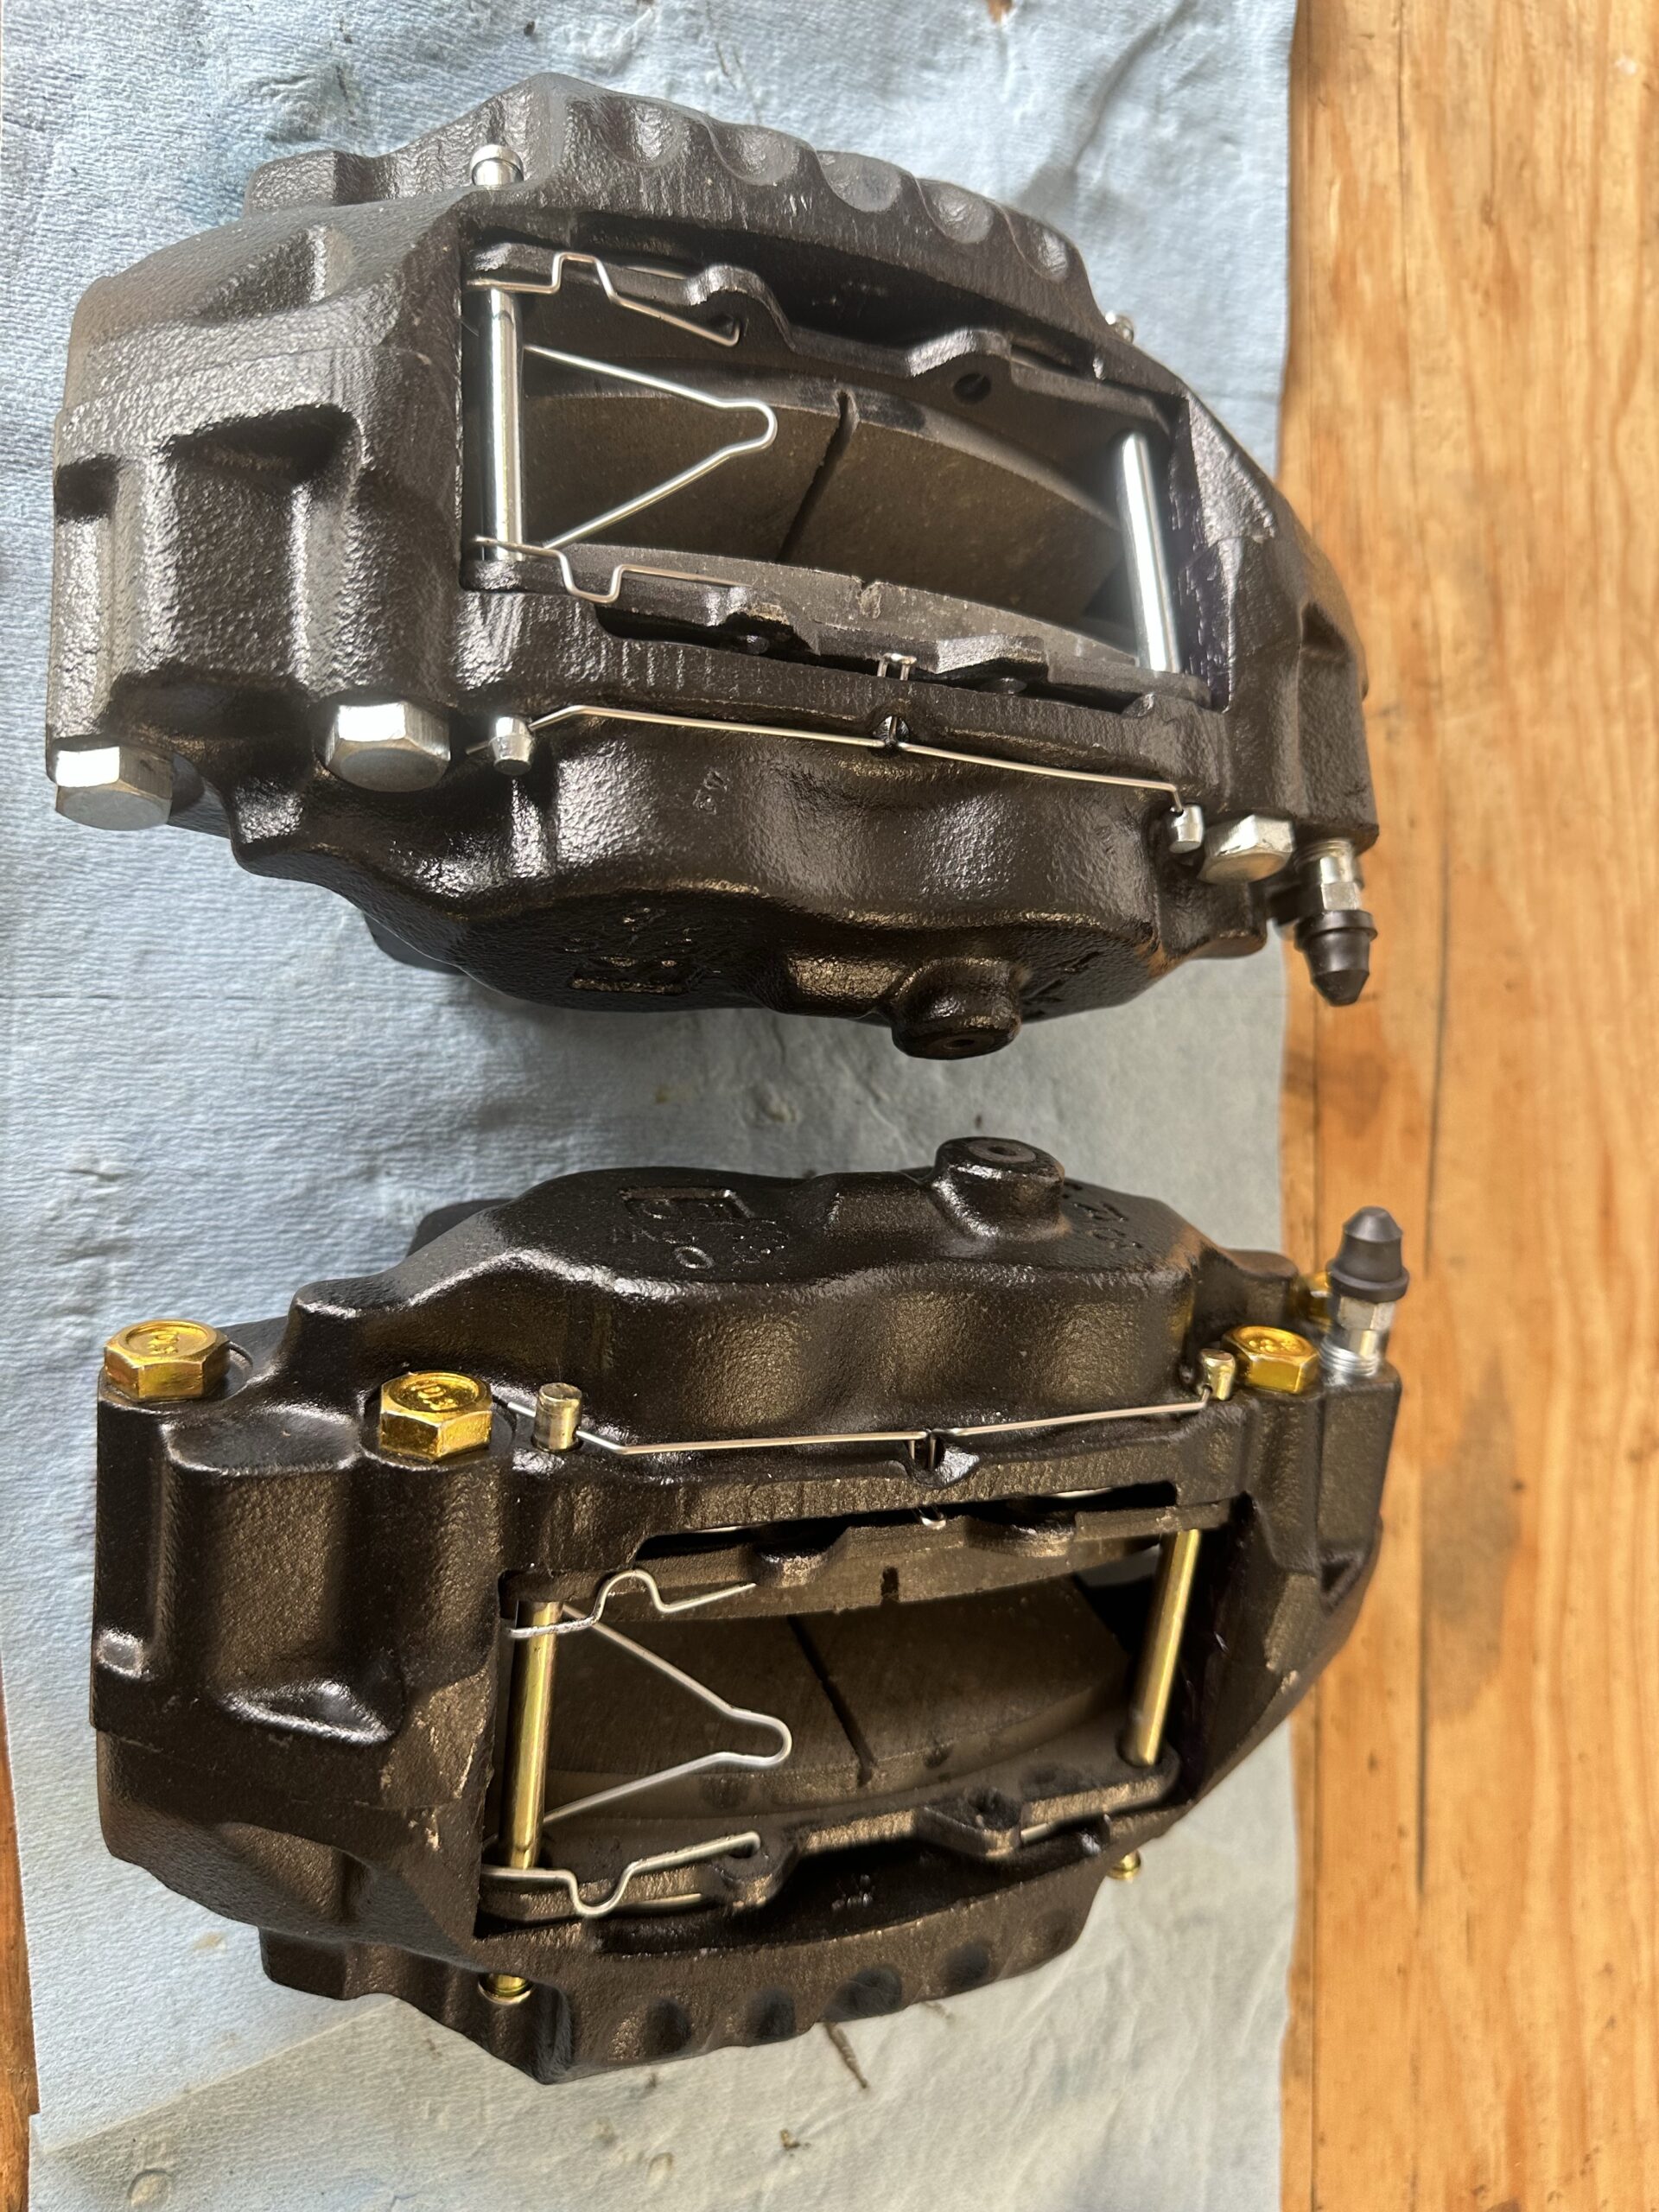
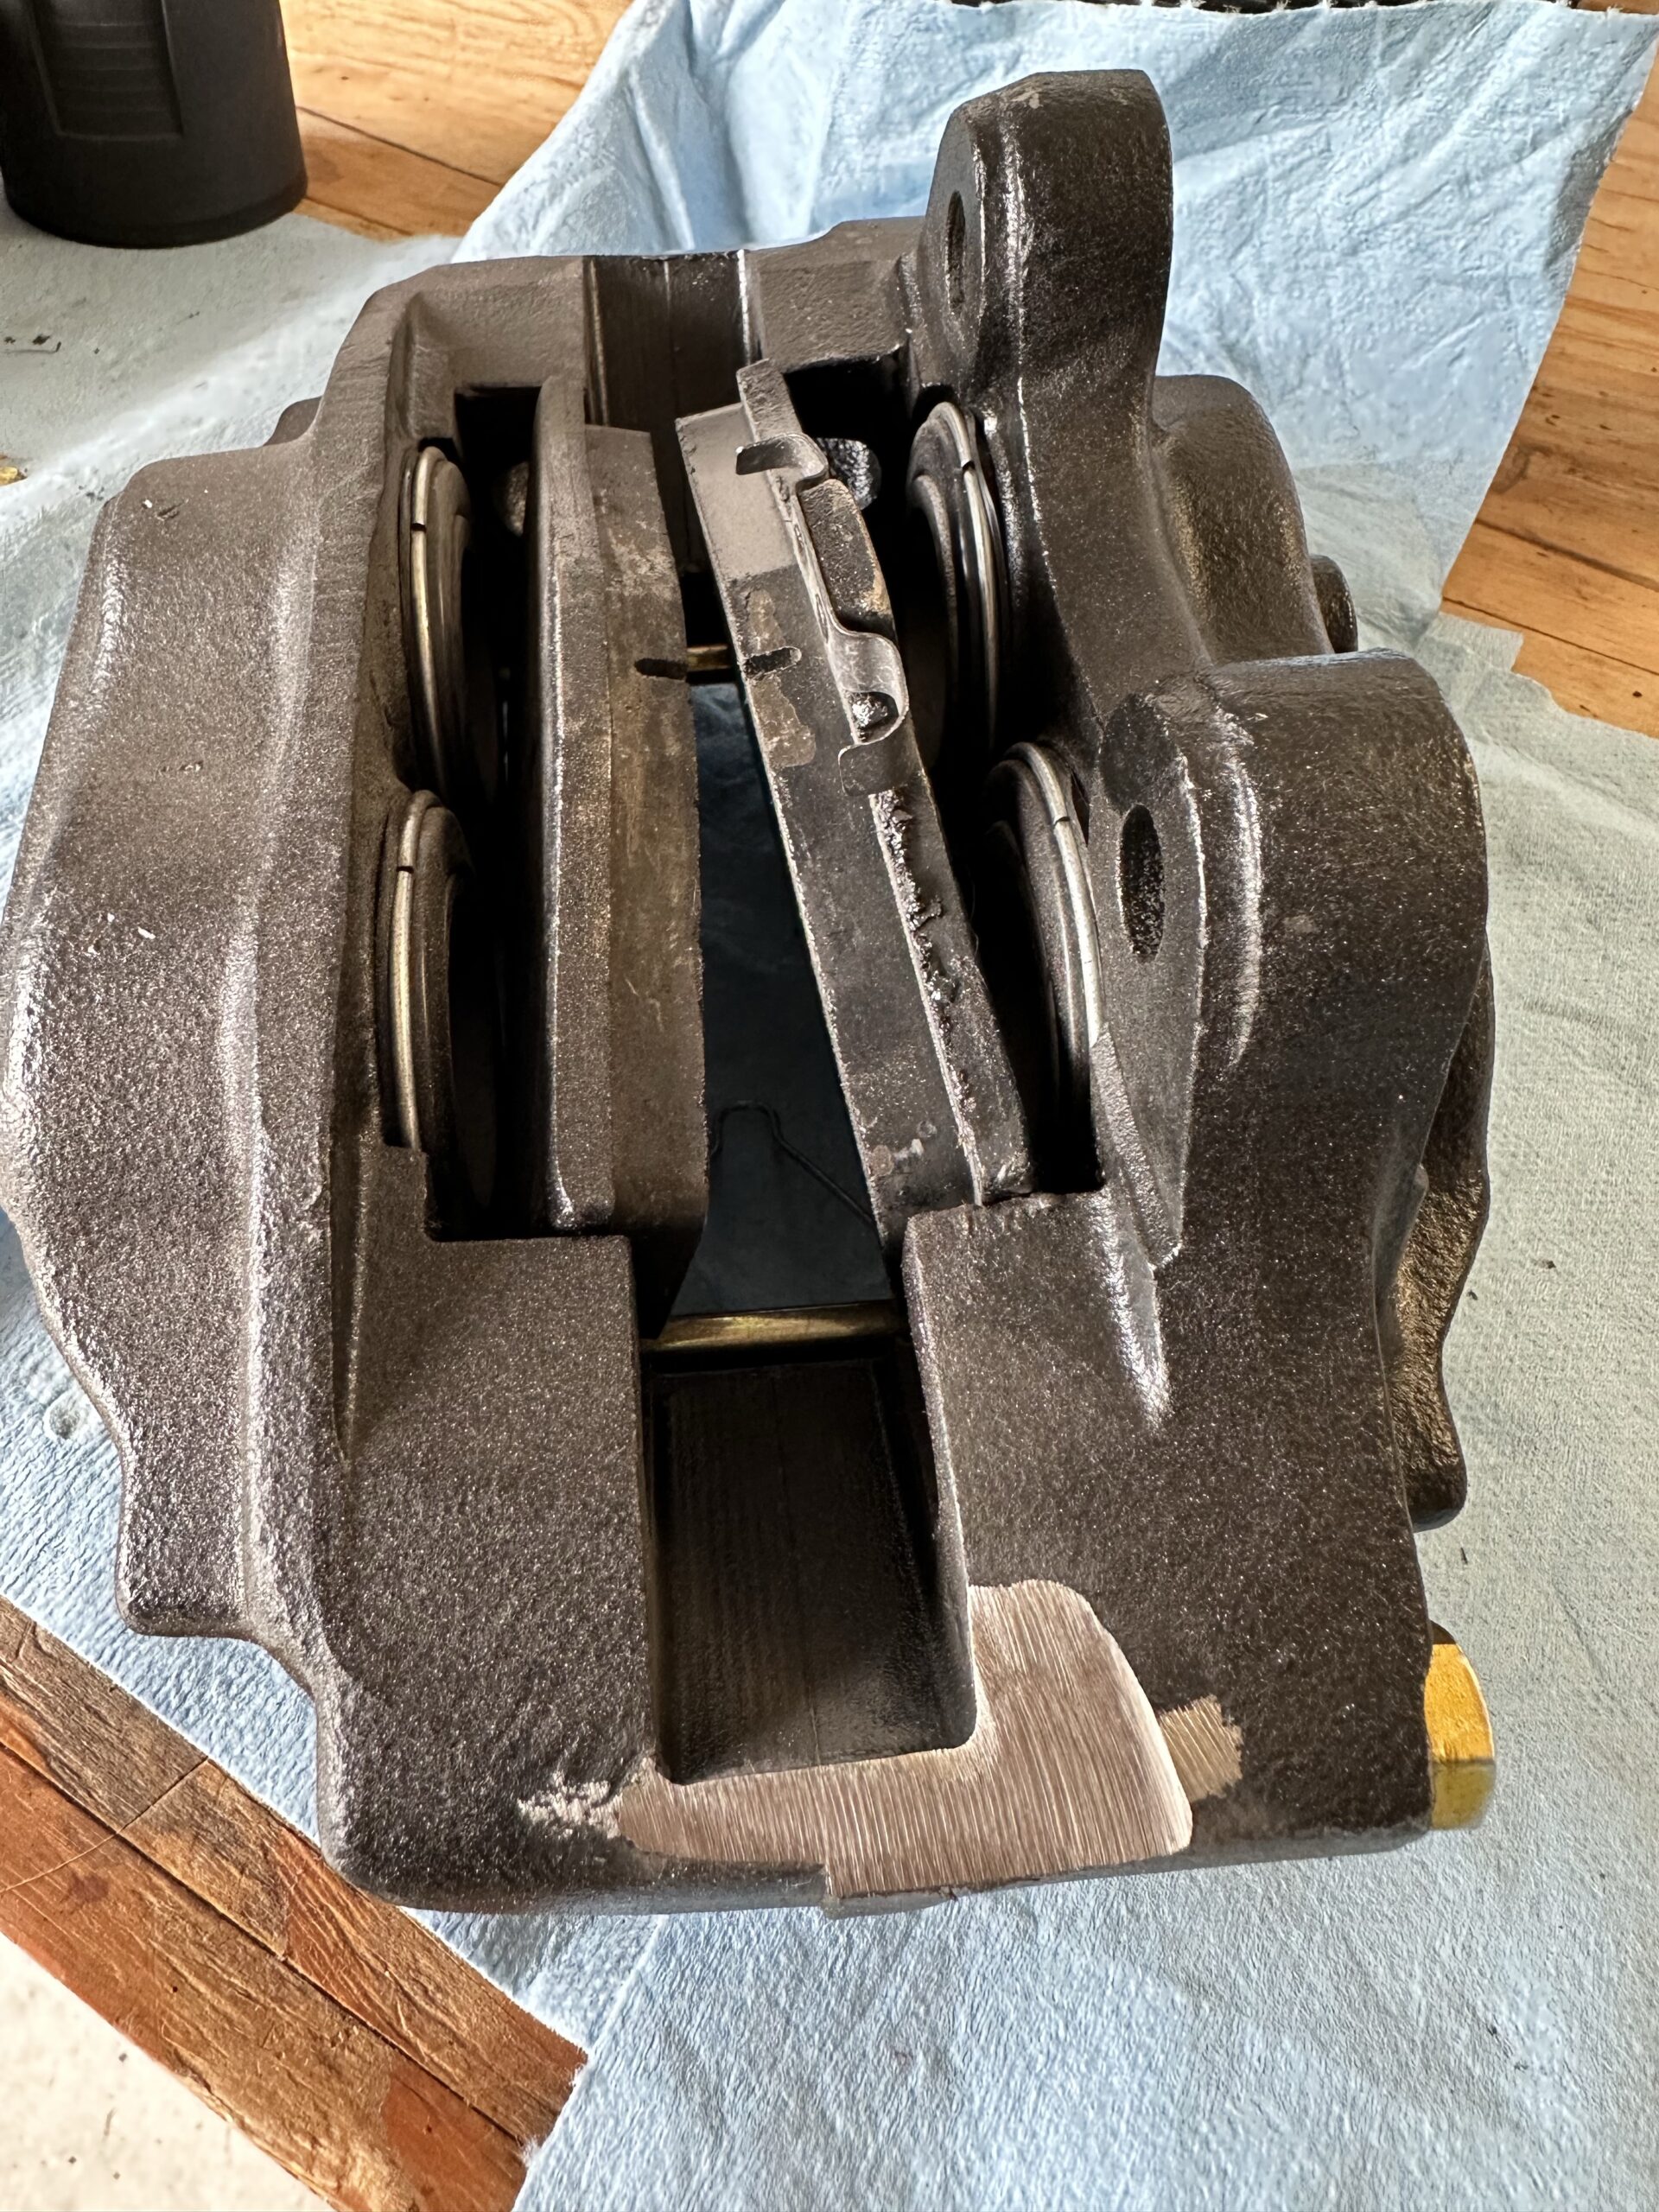
Vented Rotors and Upsized Calipers
Rotors Mounted to Hub with Lug Posts Pressed In
Pressing in Inner Oil Seal
Inner Bearing and Seal Installed
New 8mm Posts, Cone Washers, etc. for Locking Hubs
Die Used to Chase 8mm Post Threads
8mm Posts Installed in Hub
Spindle Nuts and Washers
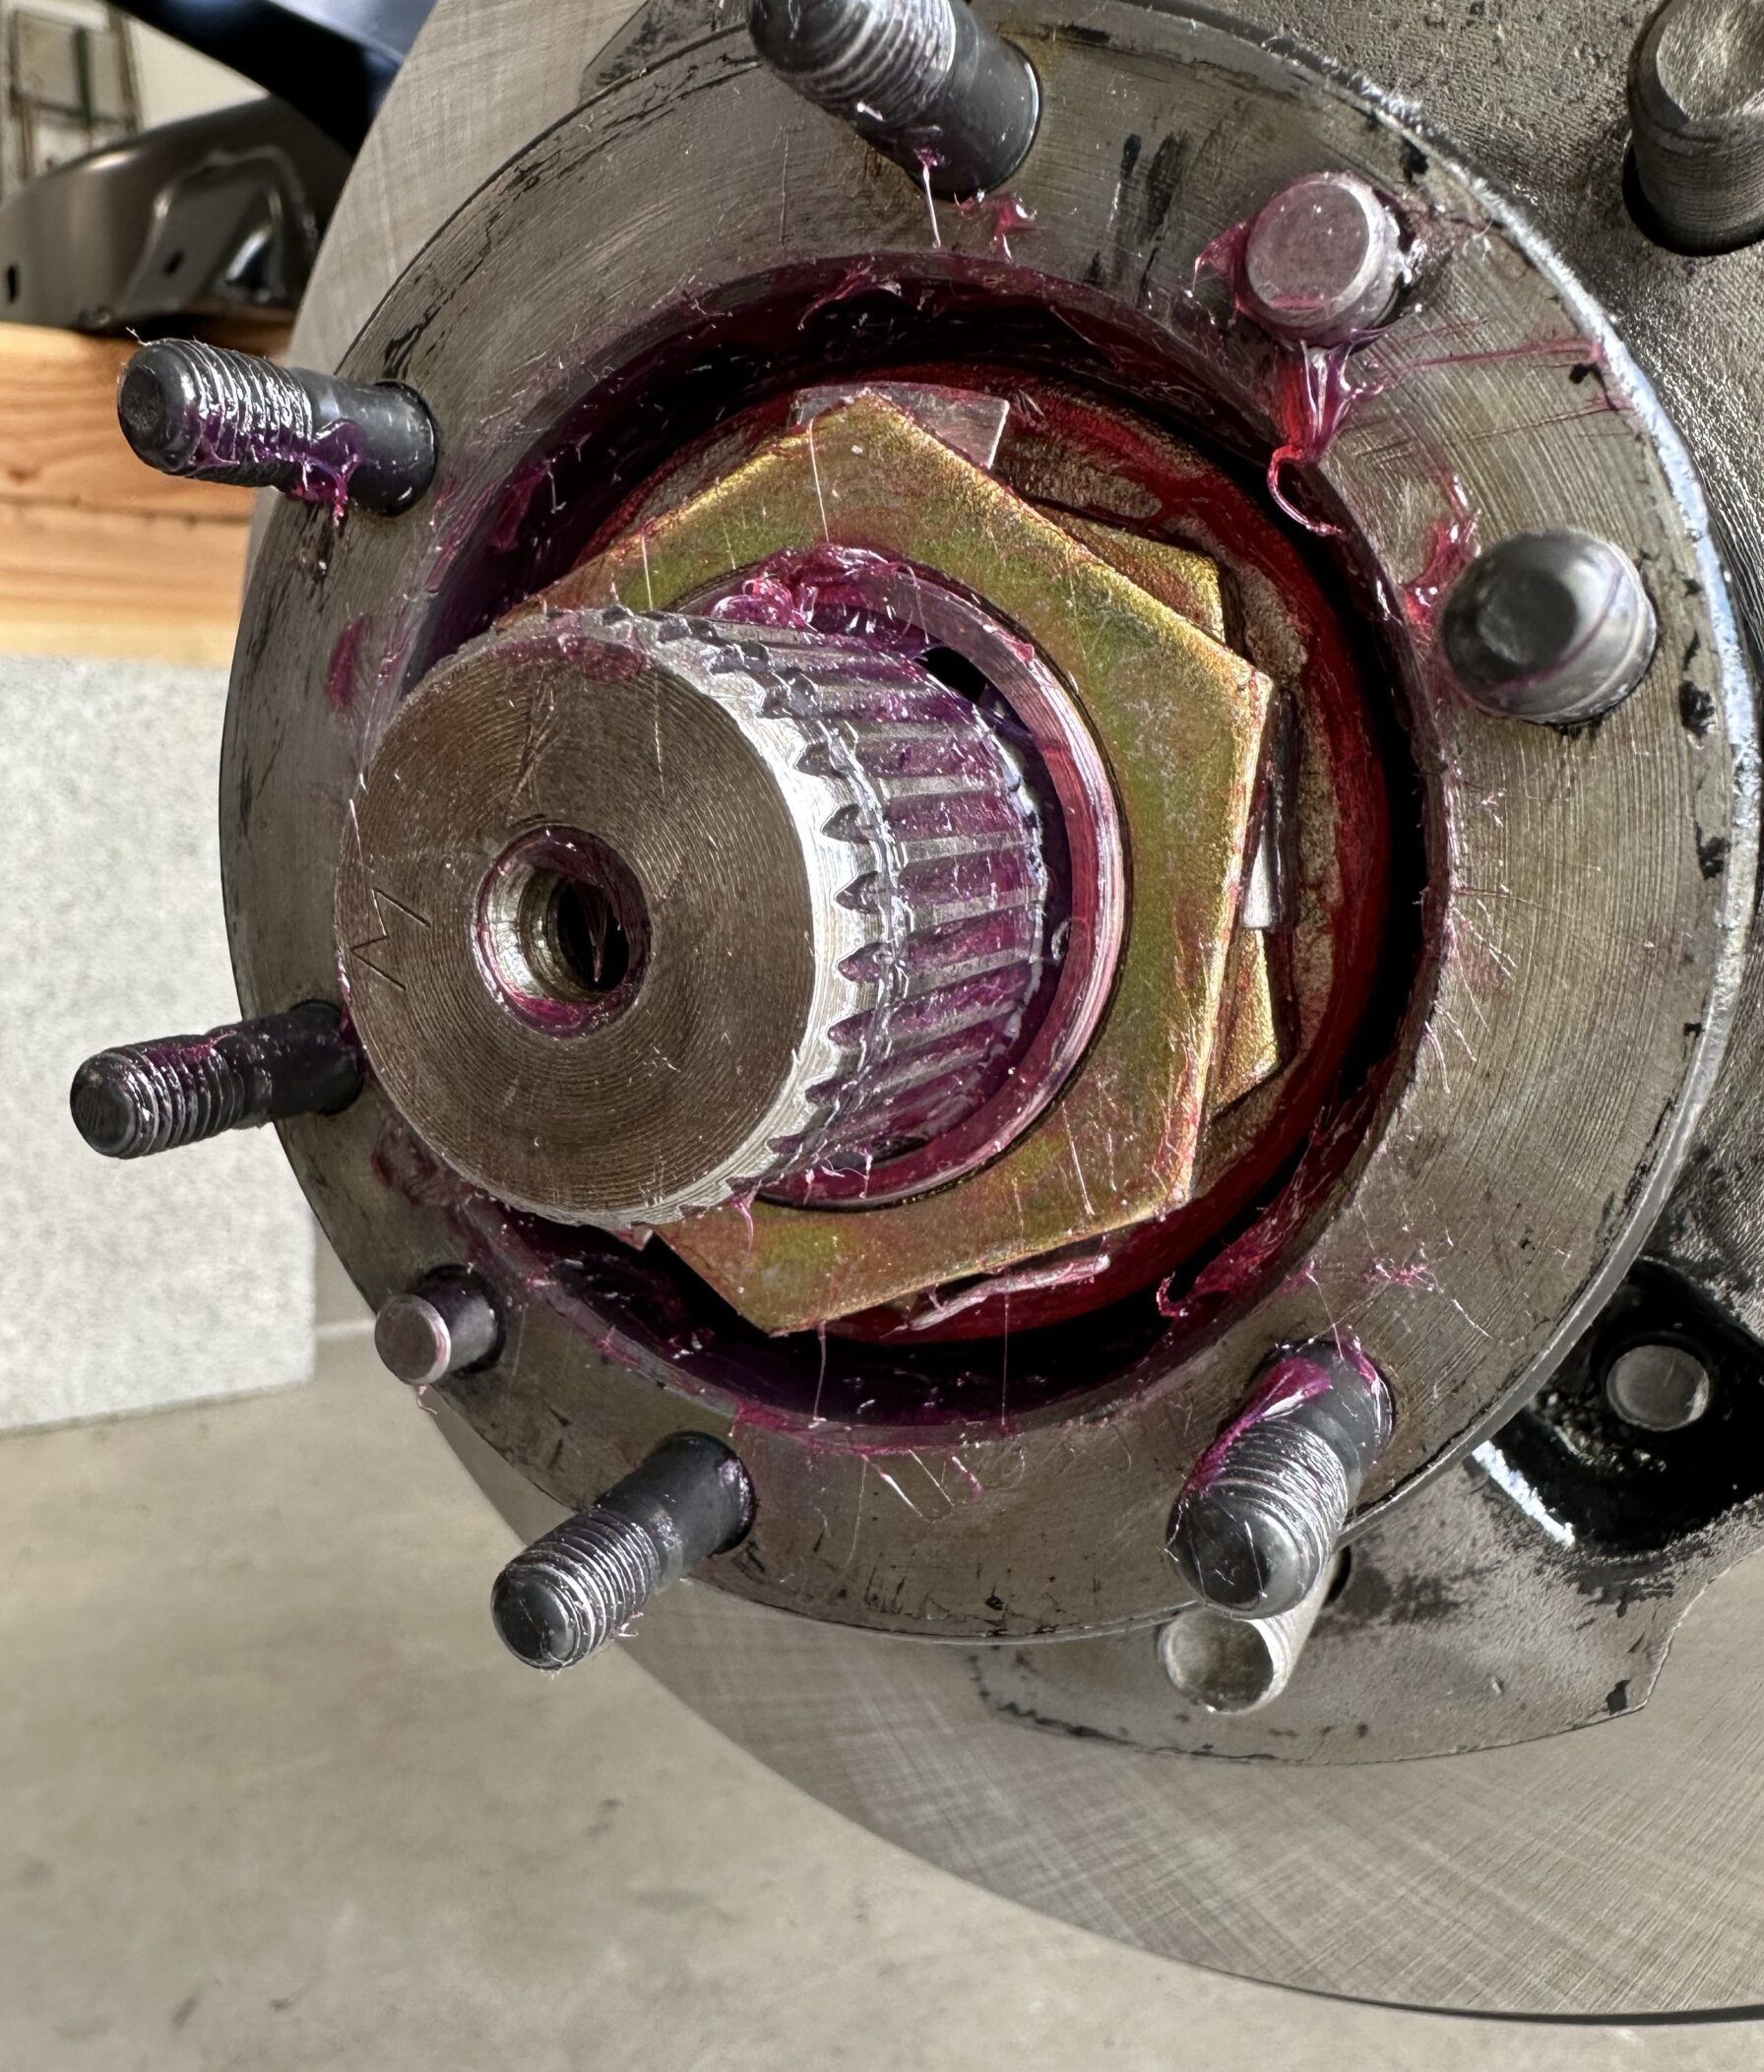
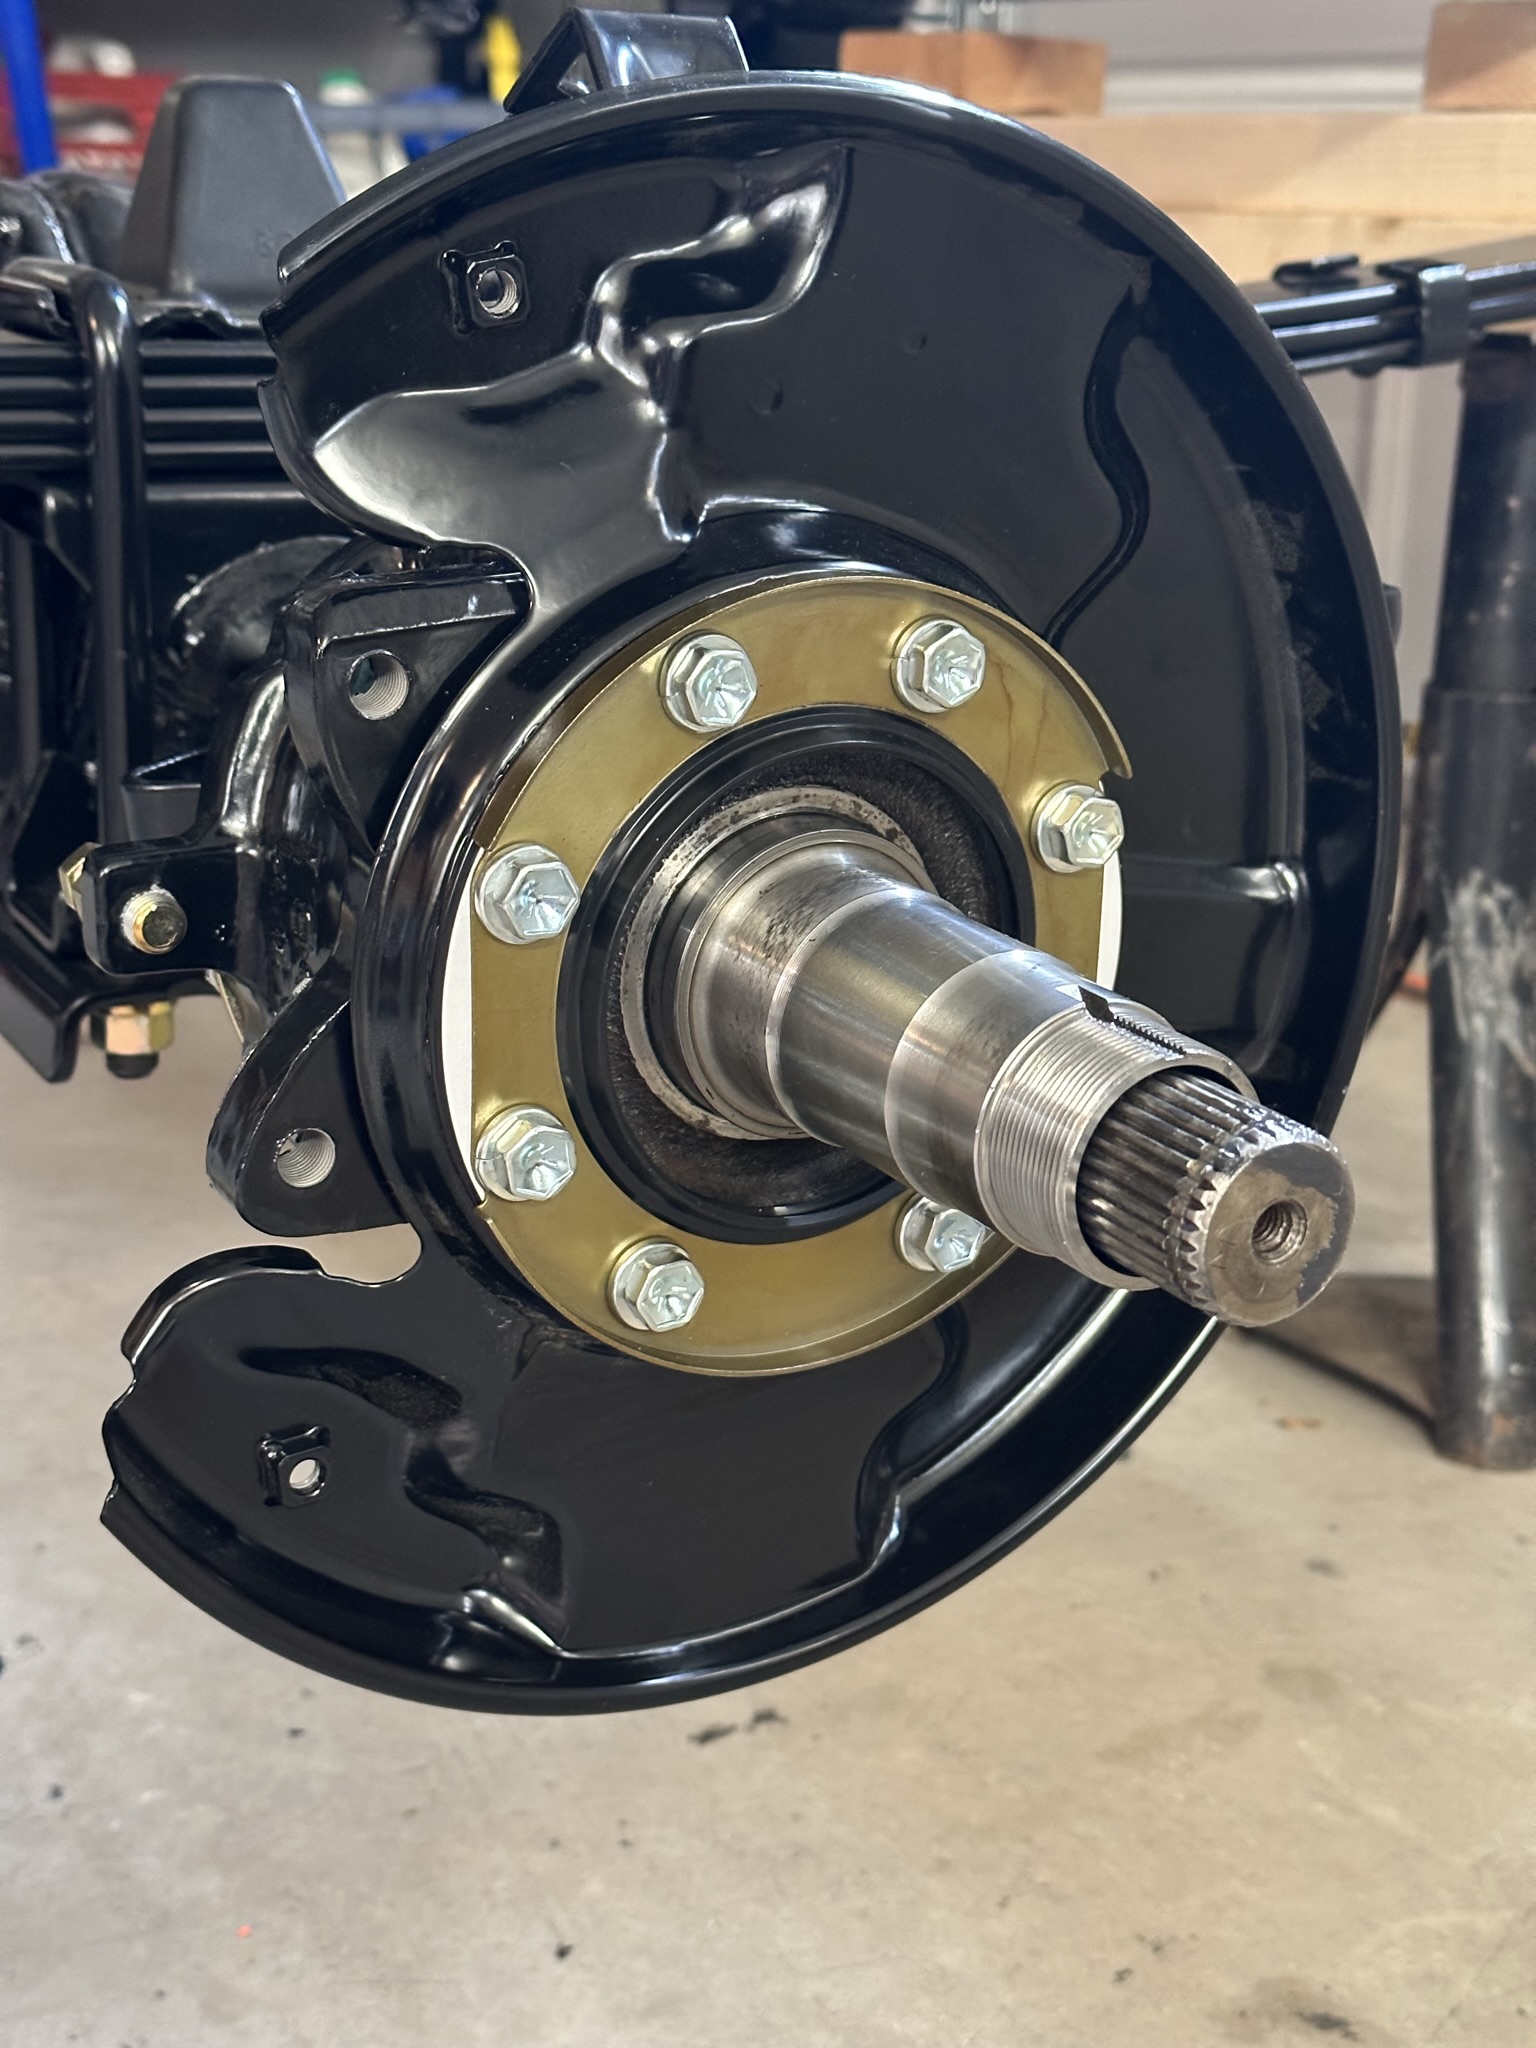
Hub Installed on Axle with Spindle Nuts Properly Torqued
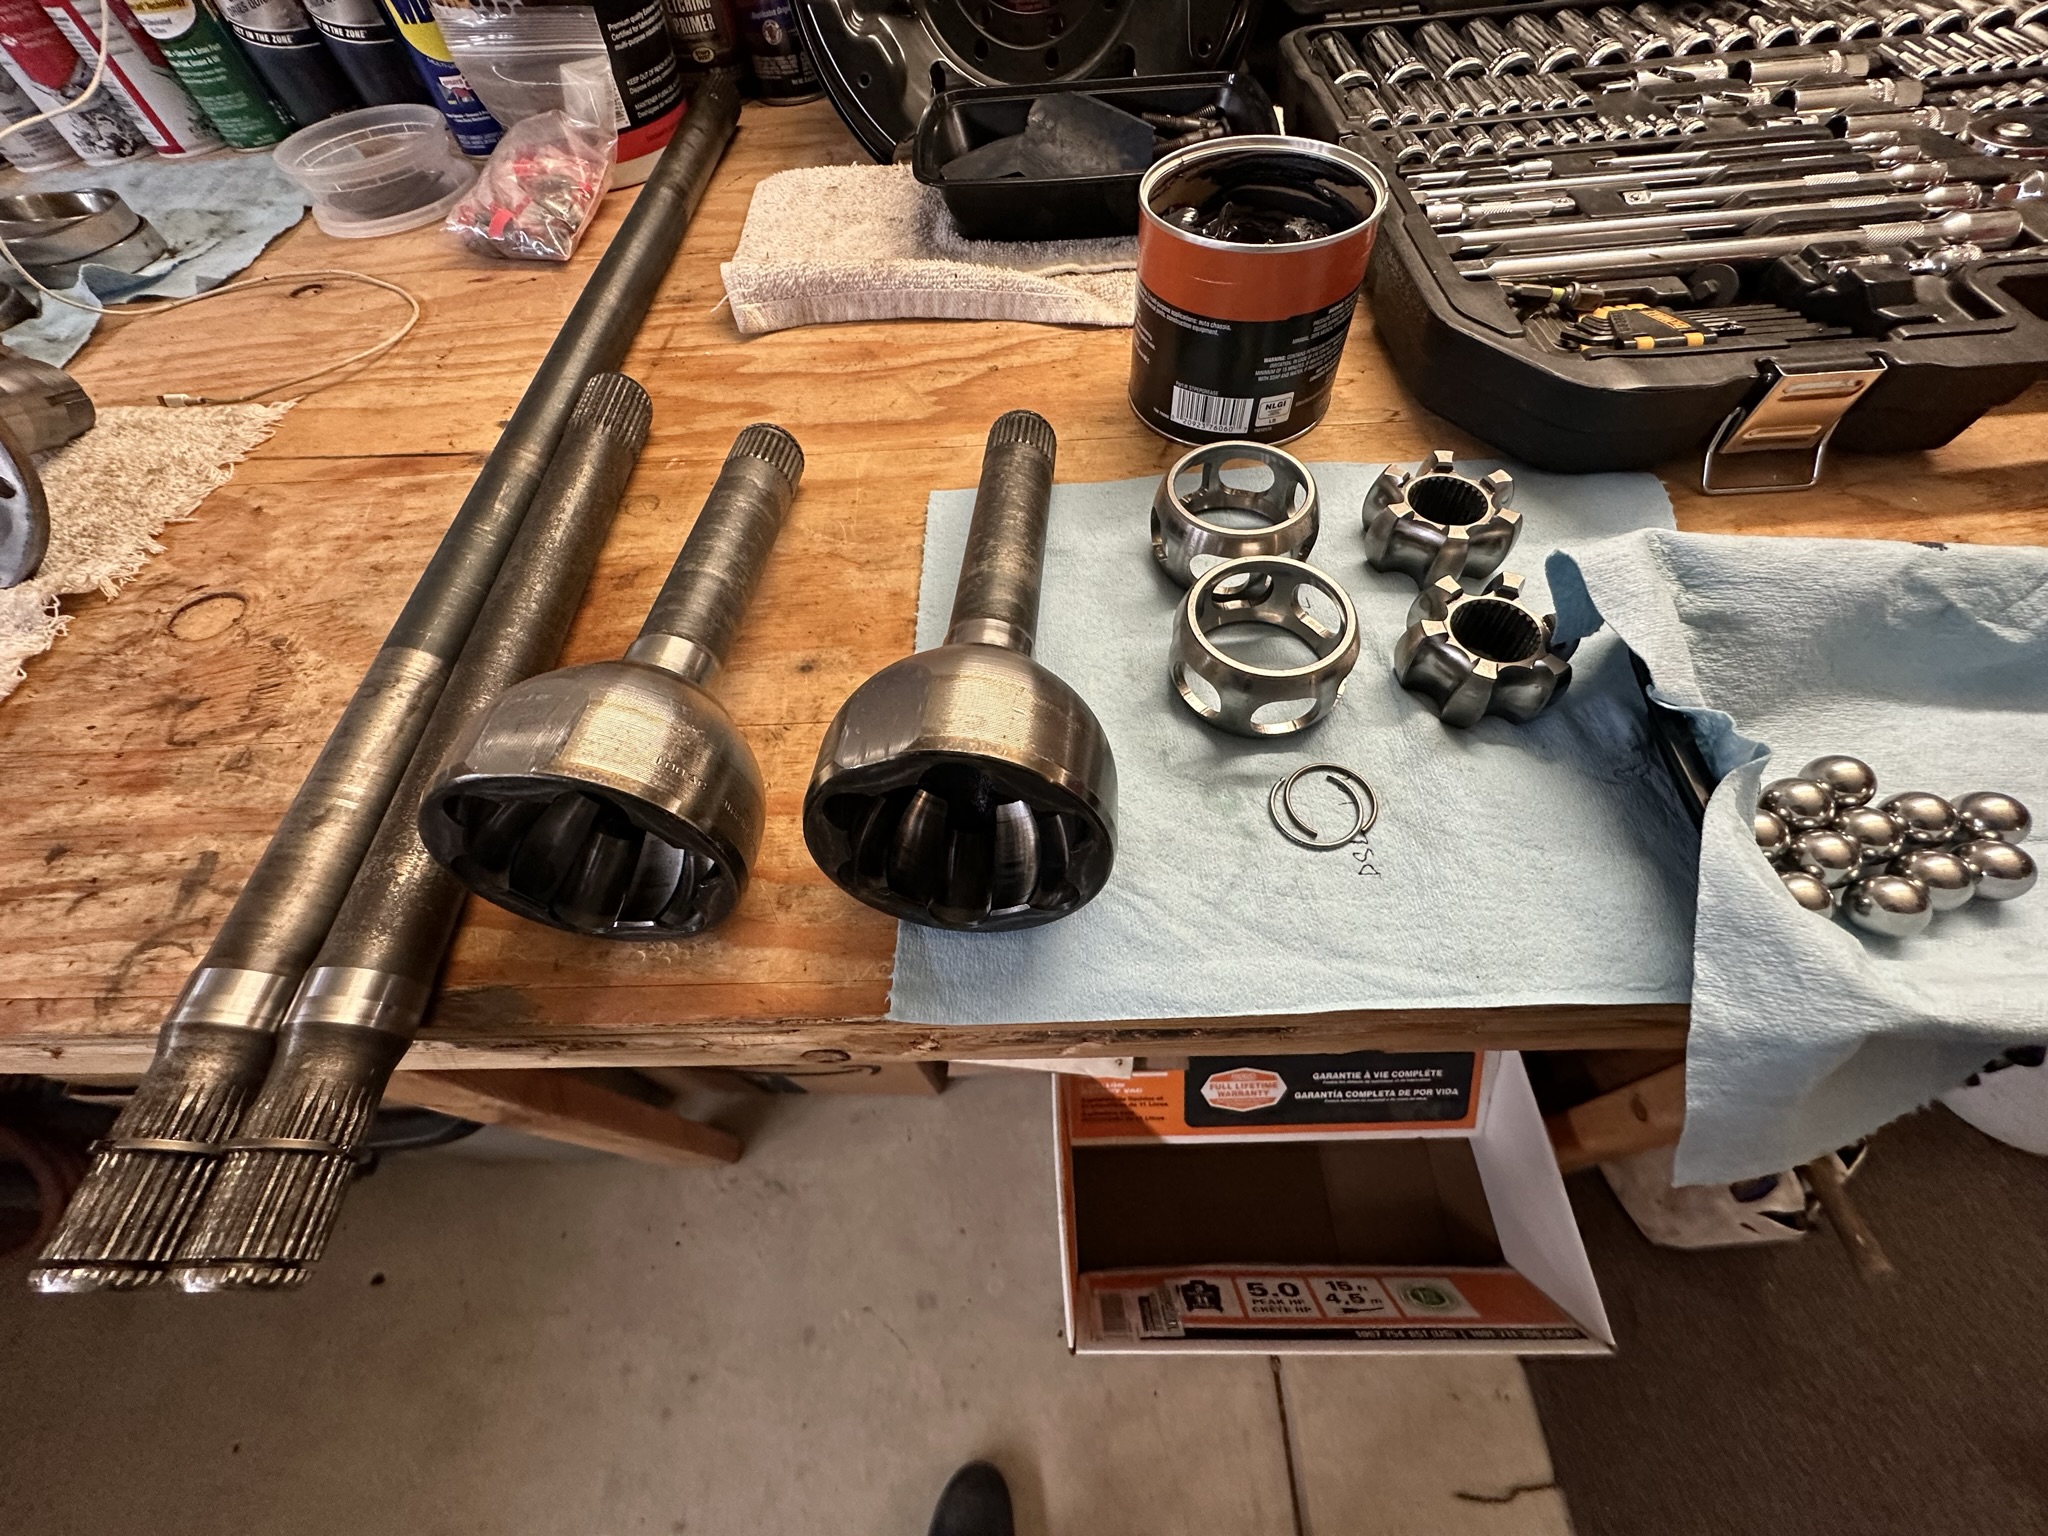
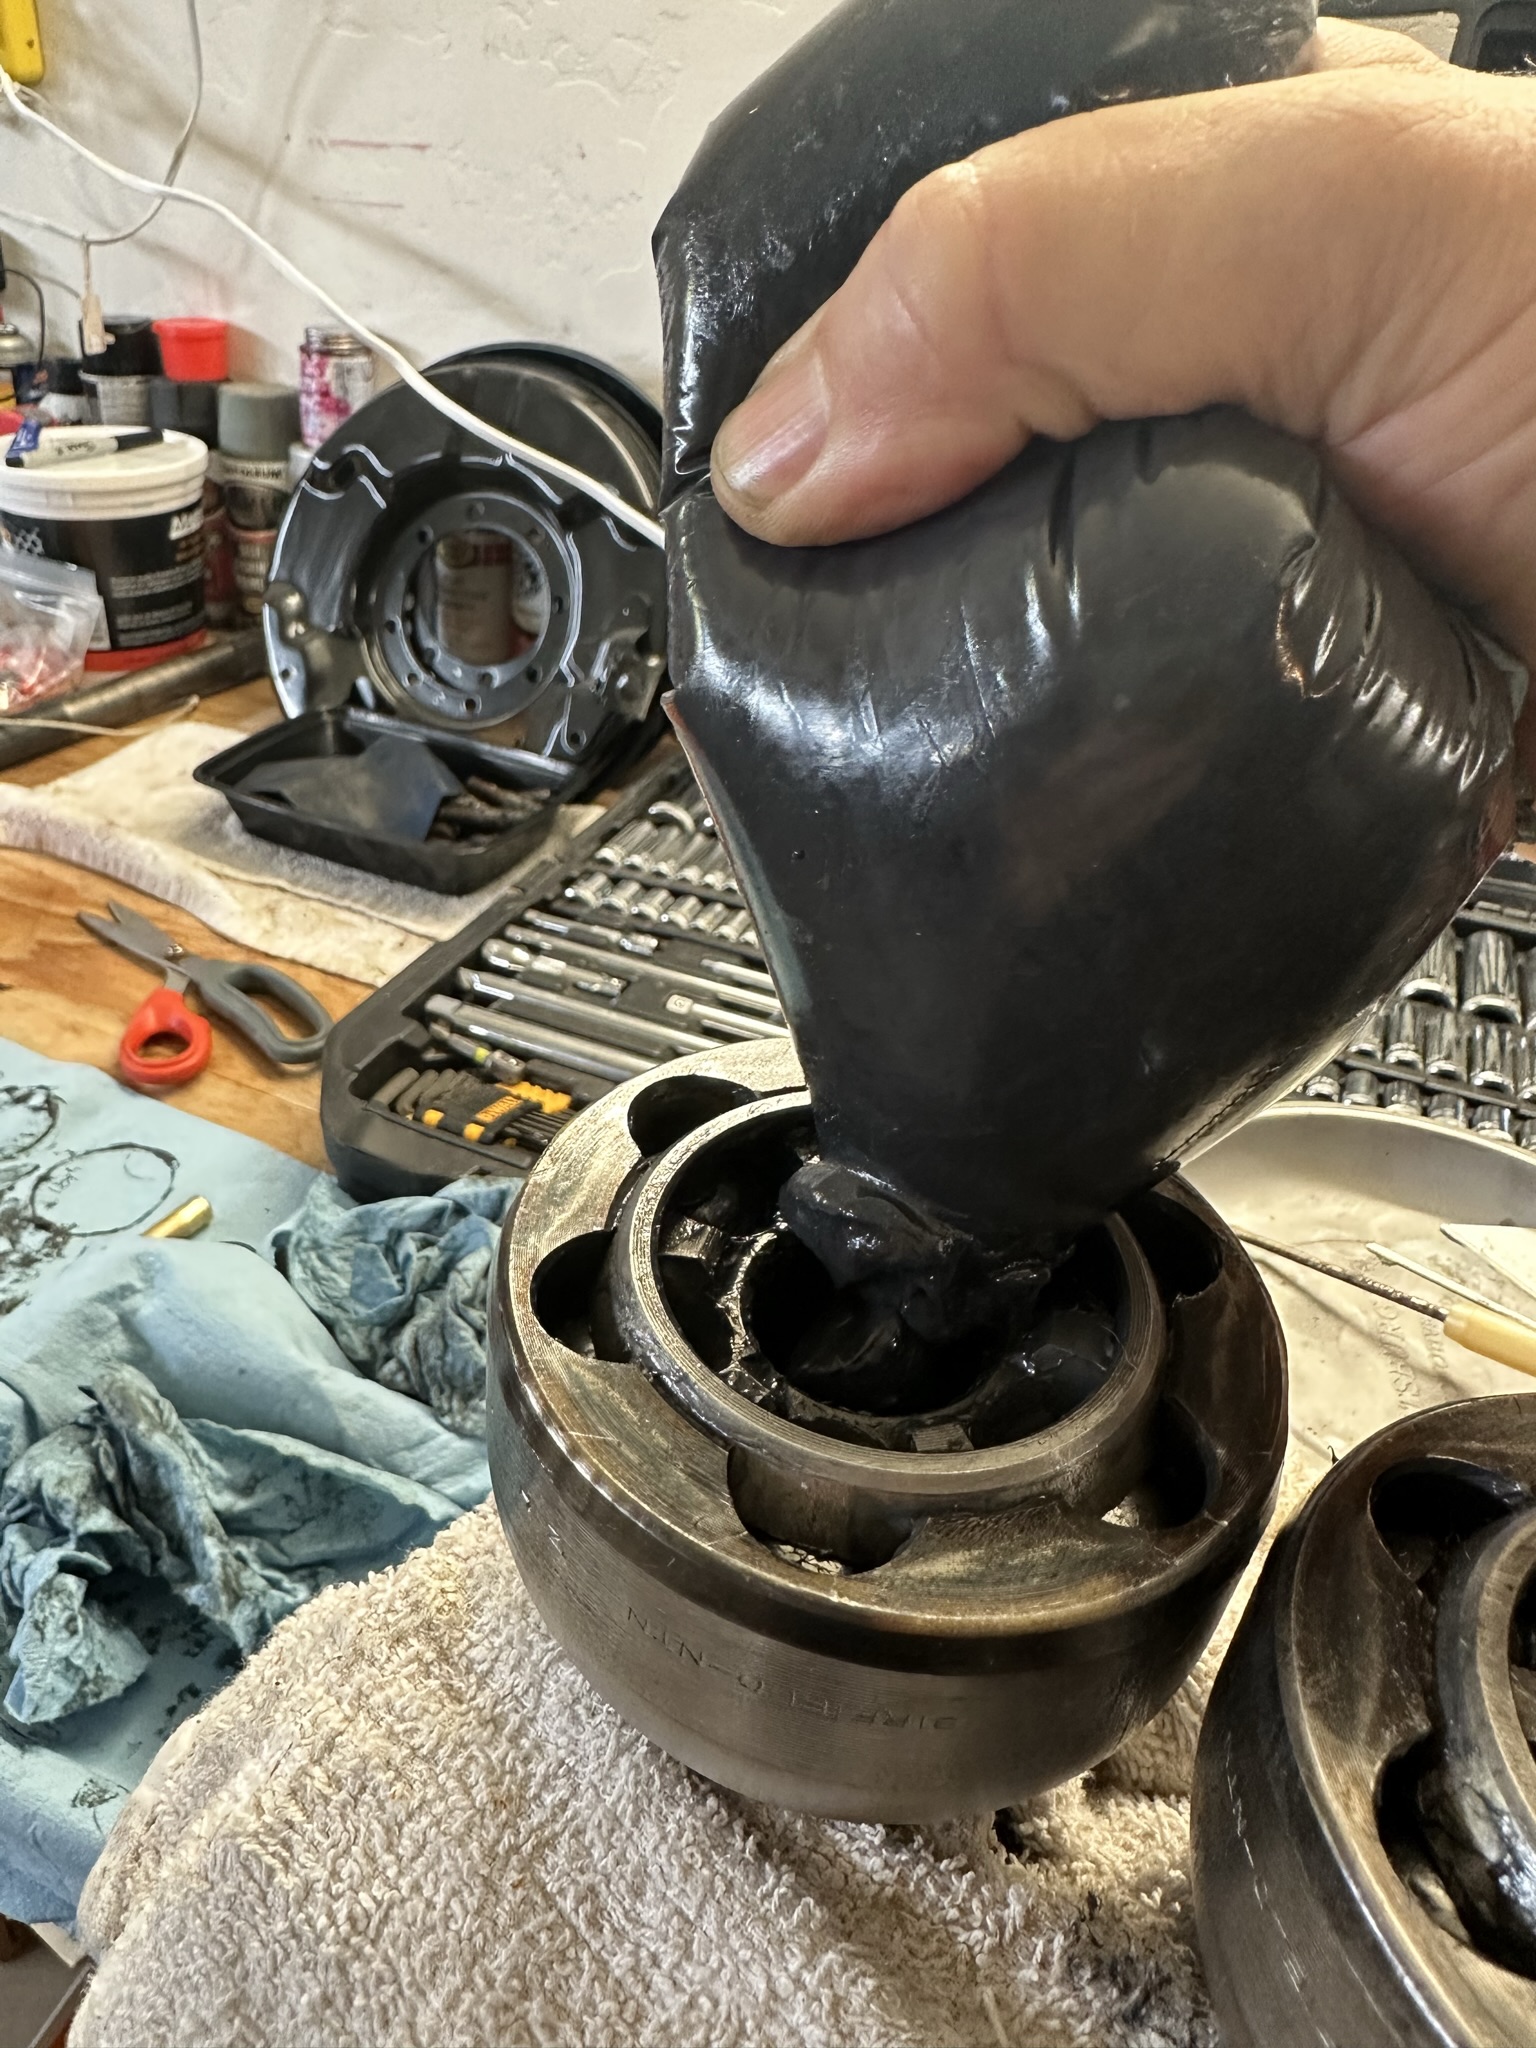
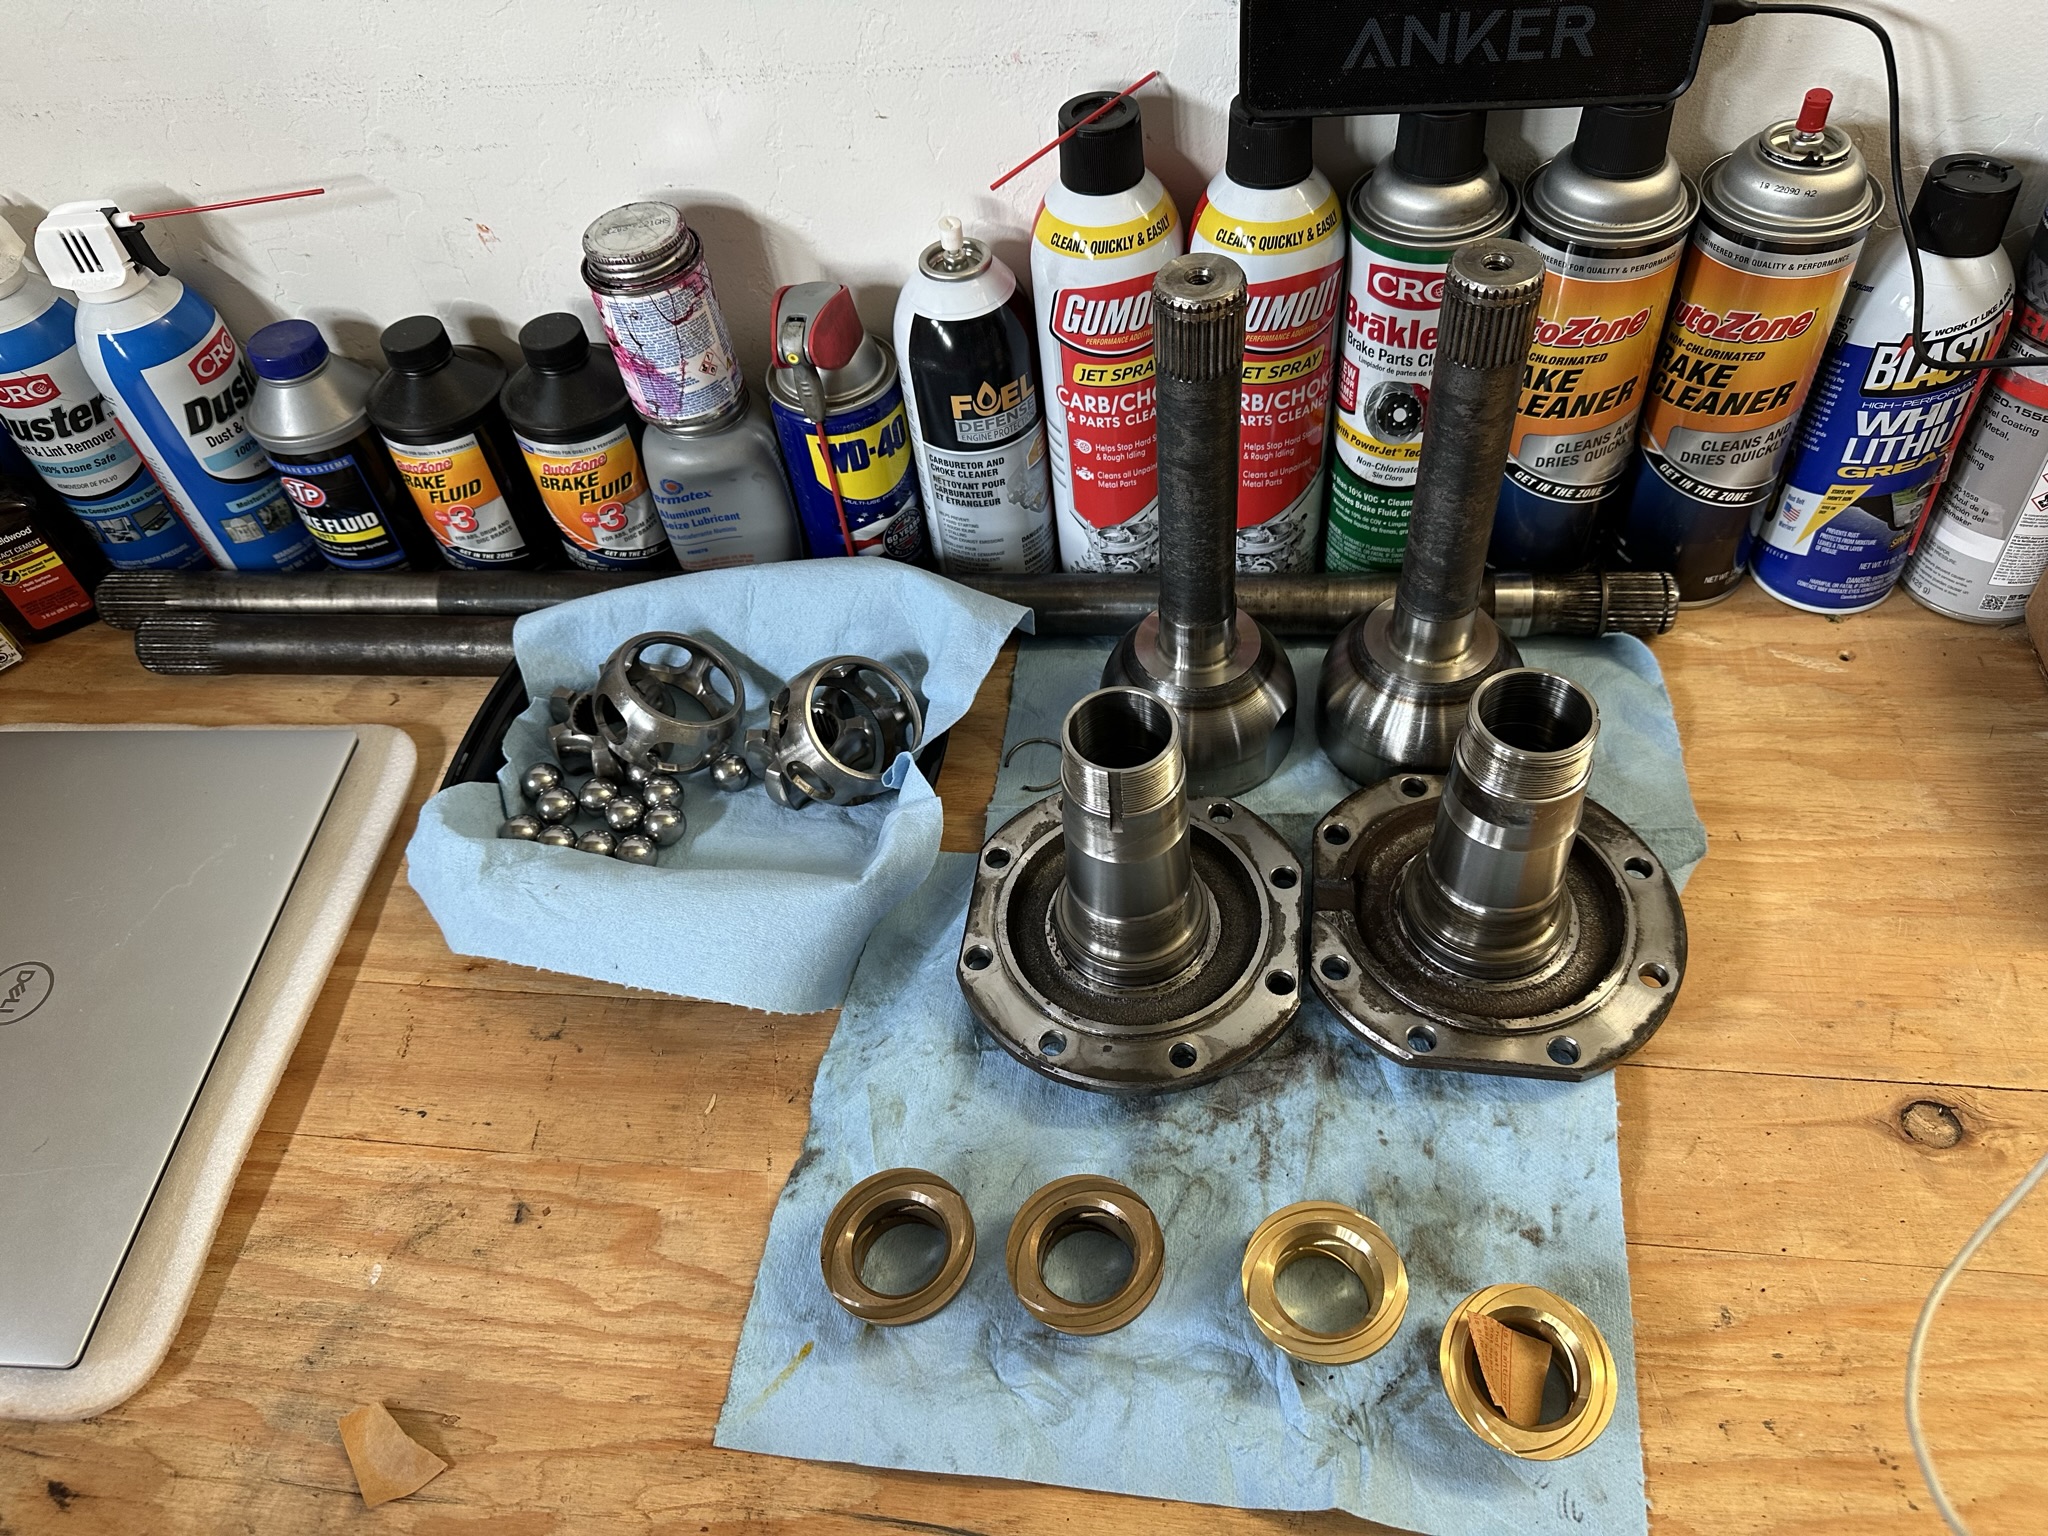
With the knuckle on I was ready to rebuild the birfields and install the spindle. I disassembled the birfields and inspected them and they were in pretty good condition. There was some discoloration on the outer race but virtually no scoring or pitting on either of the outer or inner races or balls. I rebuilt these birfields about twenty years ago and I used the red #2 lithium based wheel bearing grease. I didn’t have a FSM at the time and it seemed like wheel bearing grease was the way to go. Using the FSM this time around, it calls for packing the birfields and the knuckle with molybdenum enriched lithium based grease. Based on the lack of wear I think the red grease did ok. With the birfields reassembled, I installed the oil seals into the axle housing and installed the birfield axles into the housing and differential. Finally, I packed the knuckle about two-thirds of the way full with molybdenum grease. Before installing the spindle I replaced the brass spindle bushings. One looked fine but the other had chatter marks across the face that made for a rough surface. I pressed out the old bushings, pressed new ones in and installed the spindle onto the knuckle.
Birfield Joints Disassembled
Outer Races
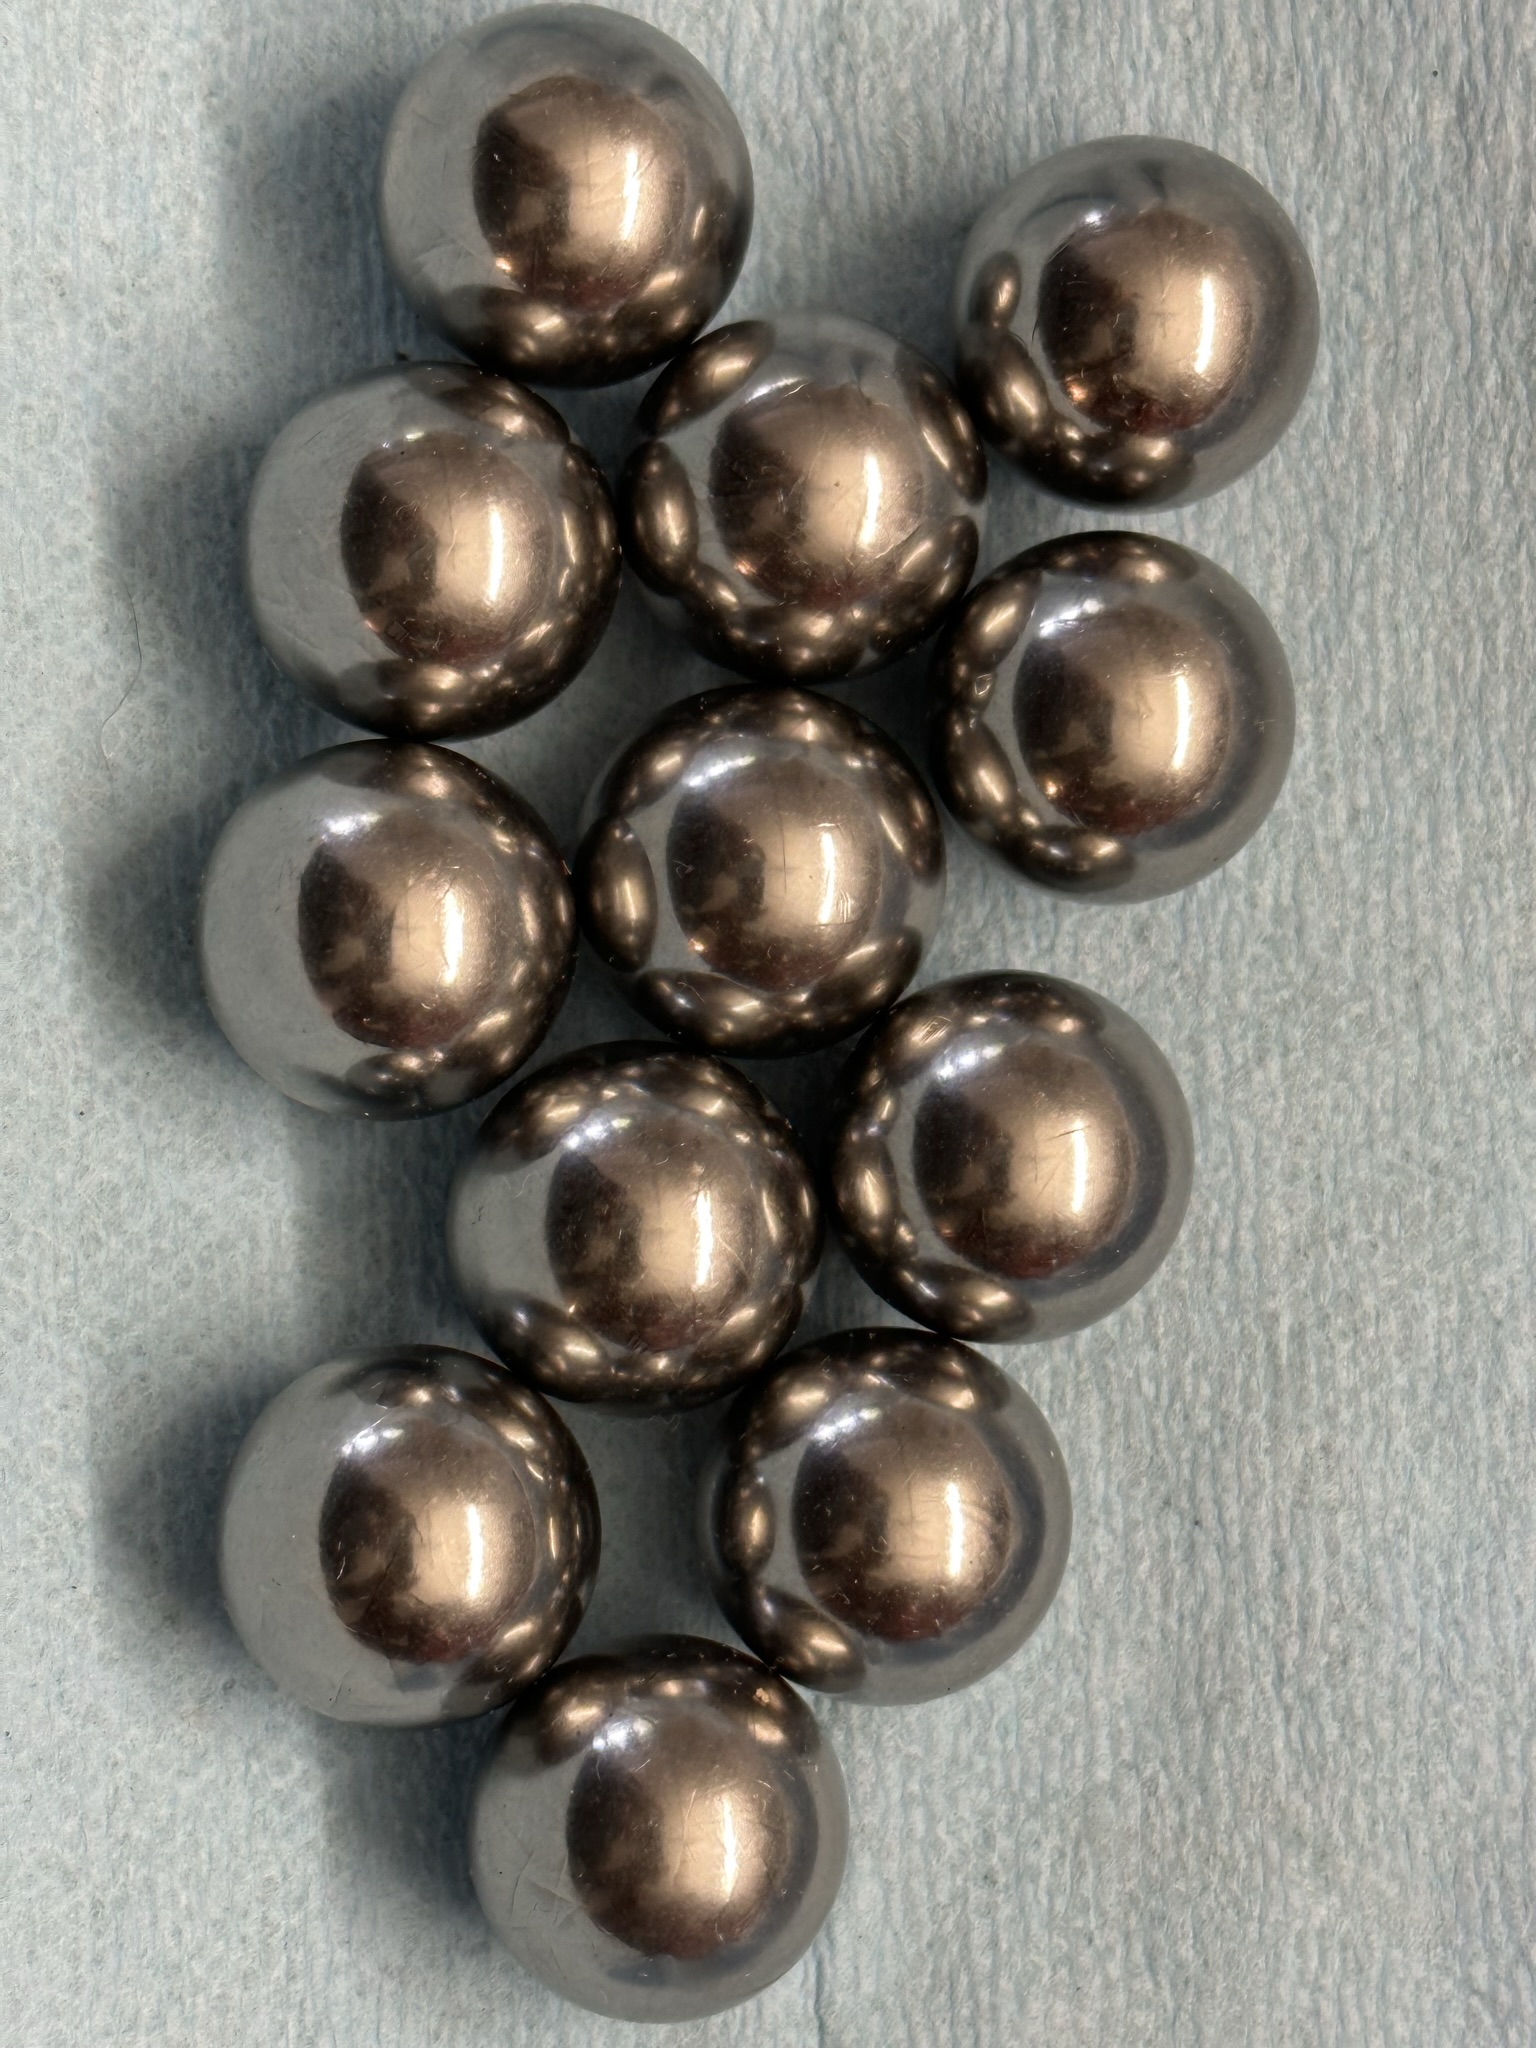
Birfield Balls
Birfields Reassembled
Packing the Joint with Grease
Birfield Installed and Knuckle Packed with Grease
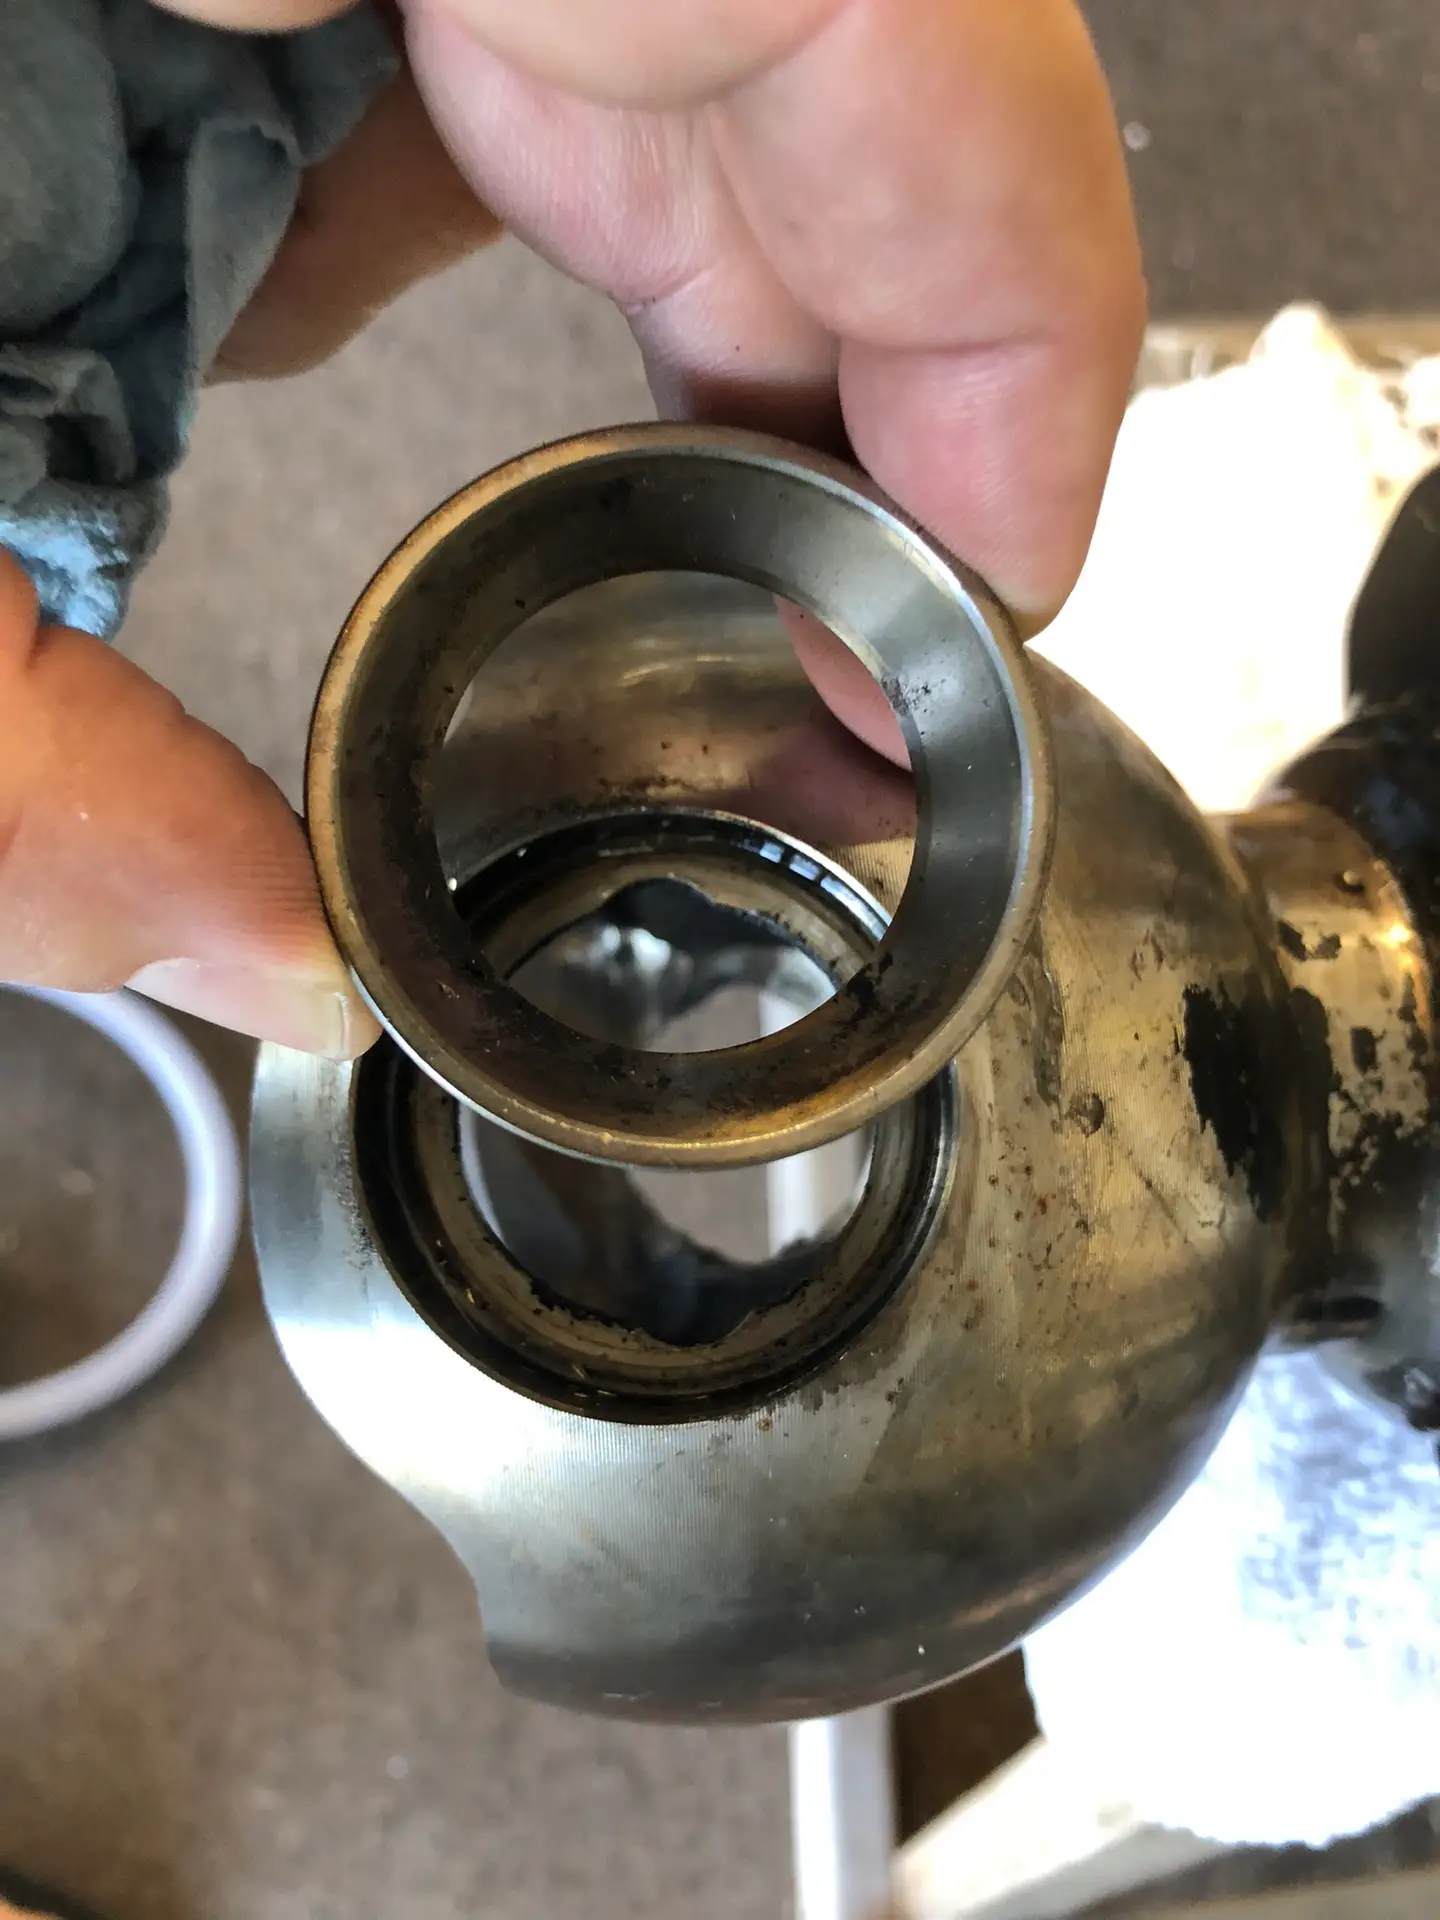
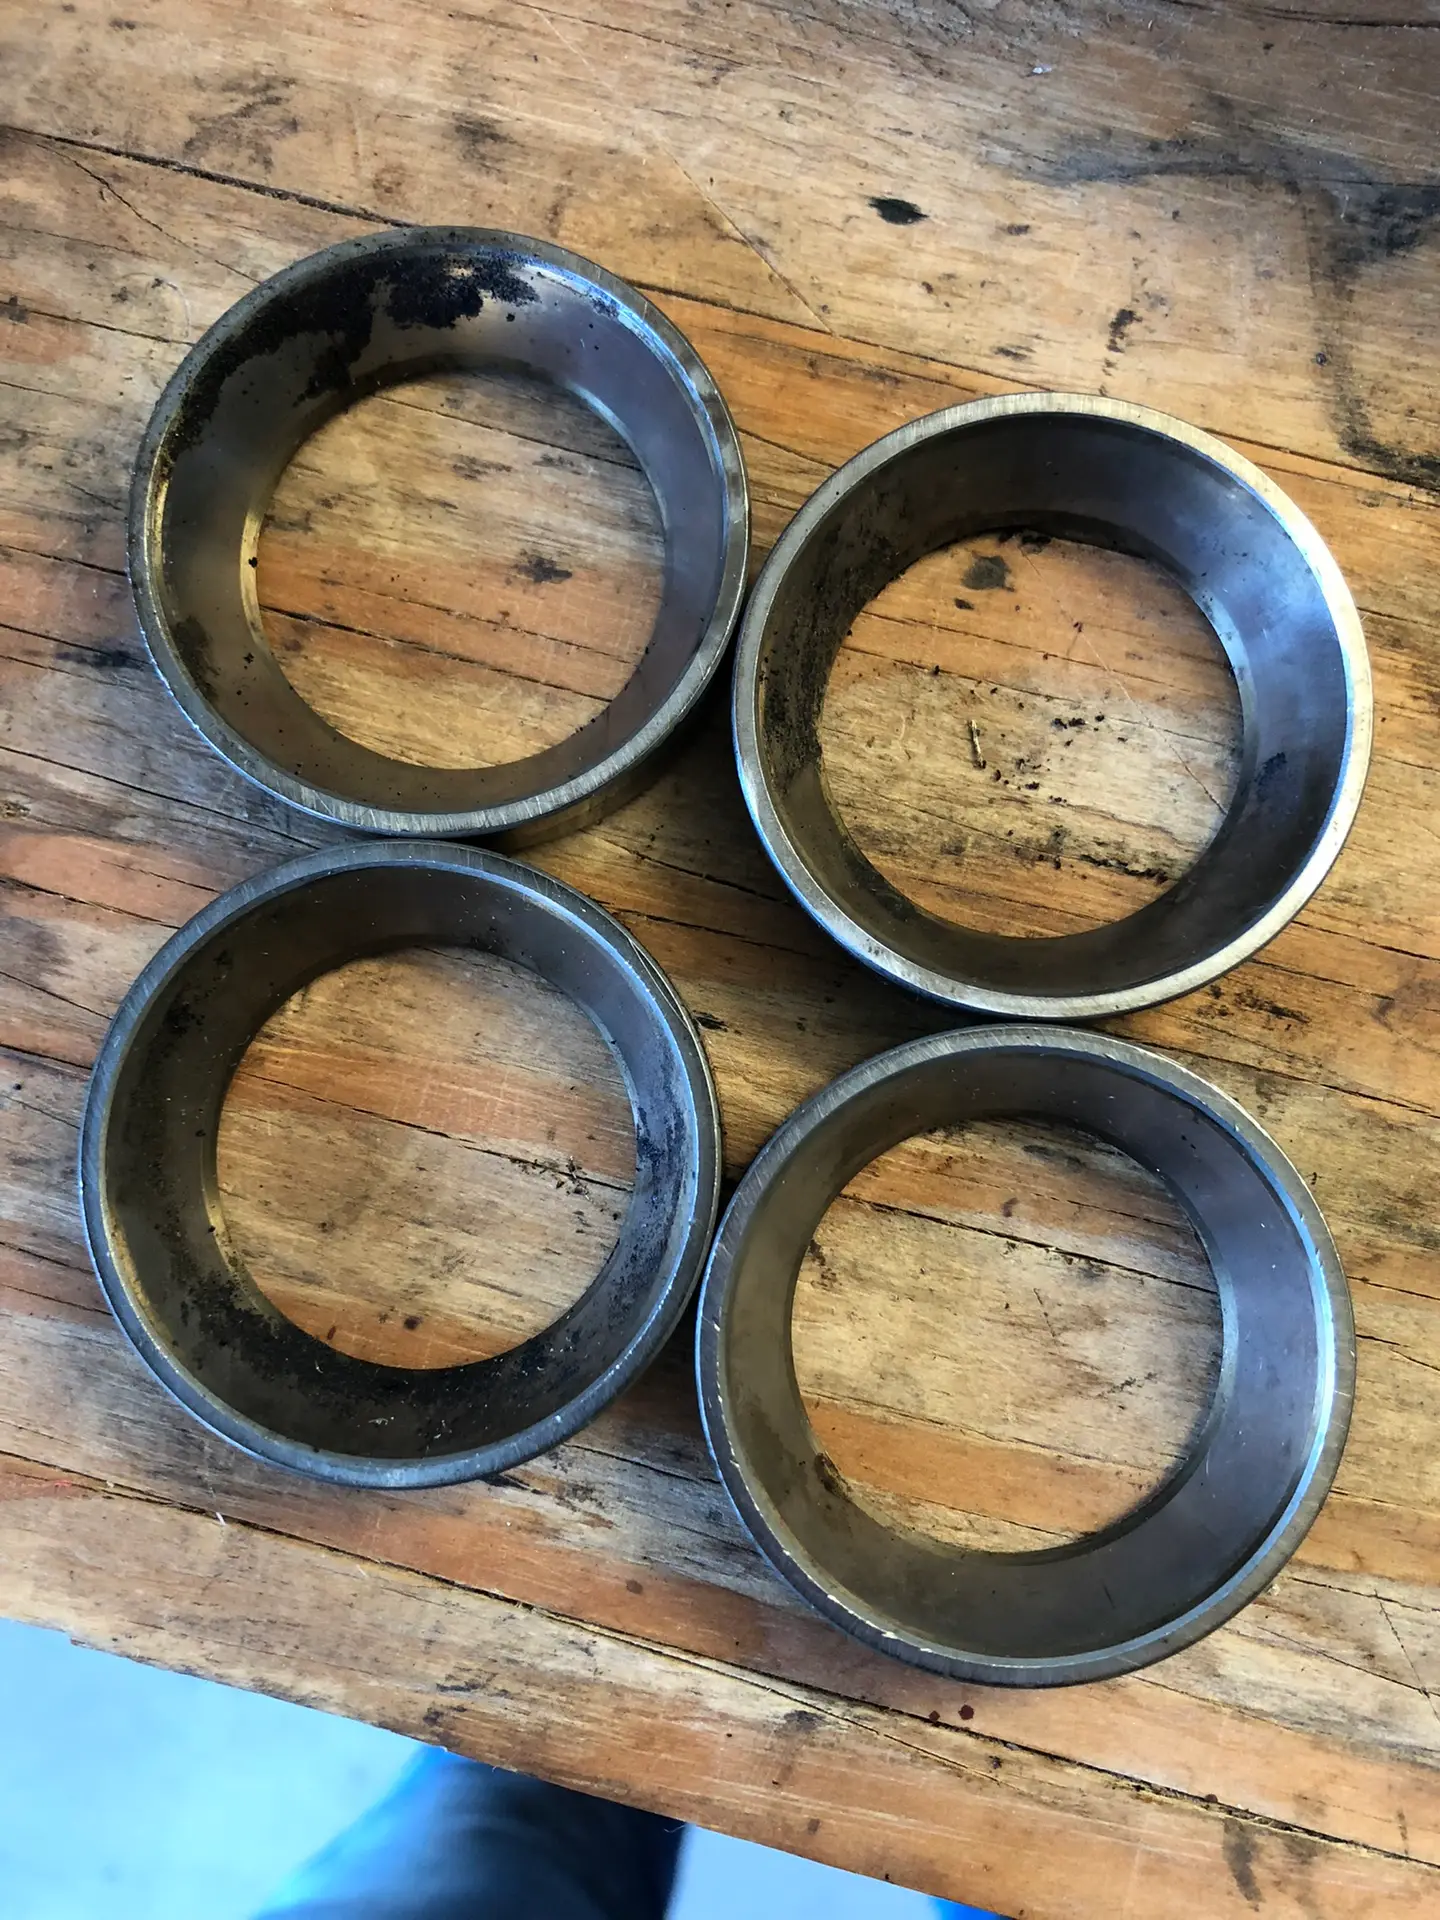
Spindles Before Cleaning with Old Bushings Removed and New Ones Ready for Installation
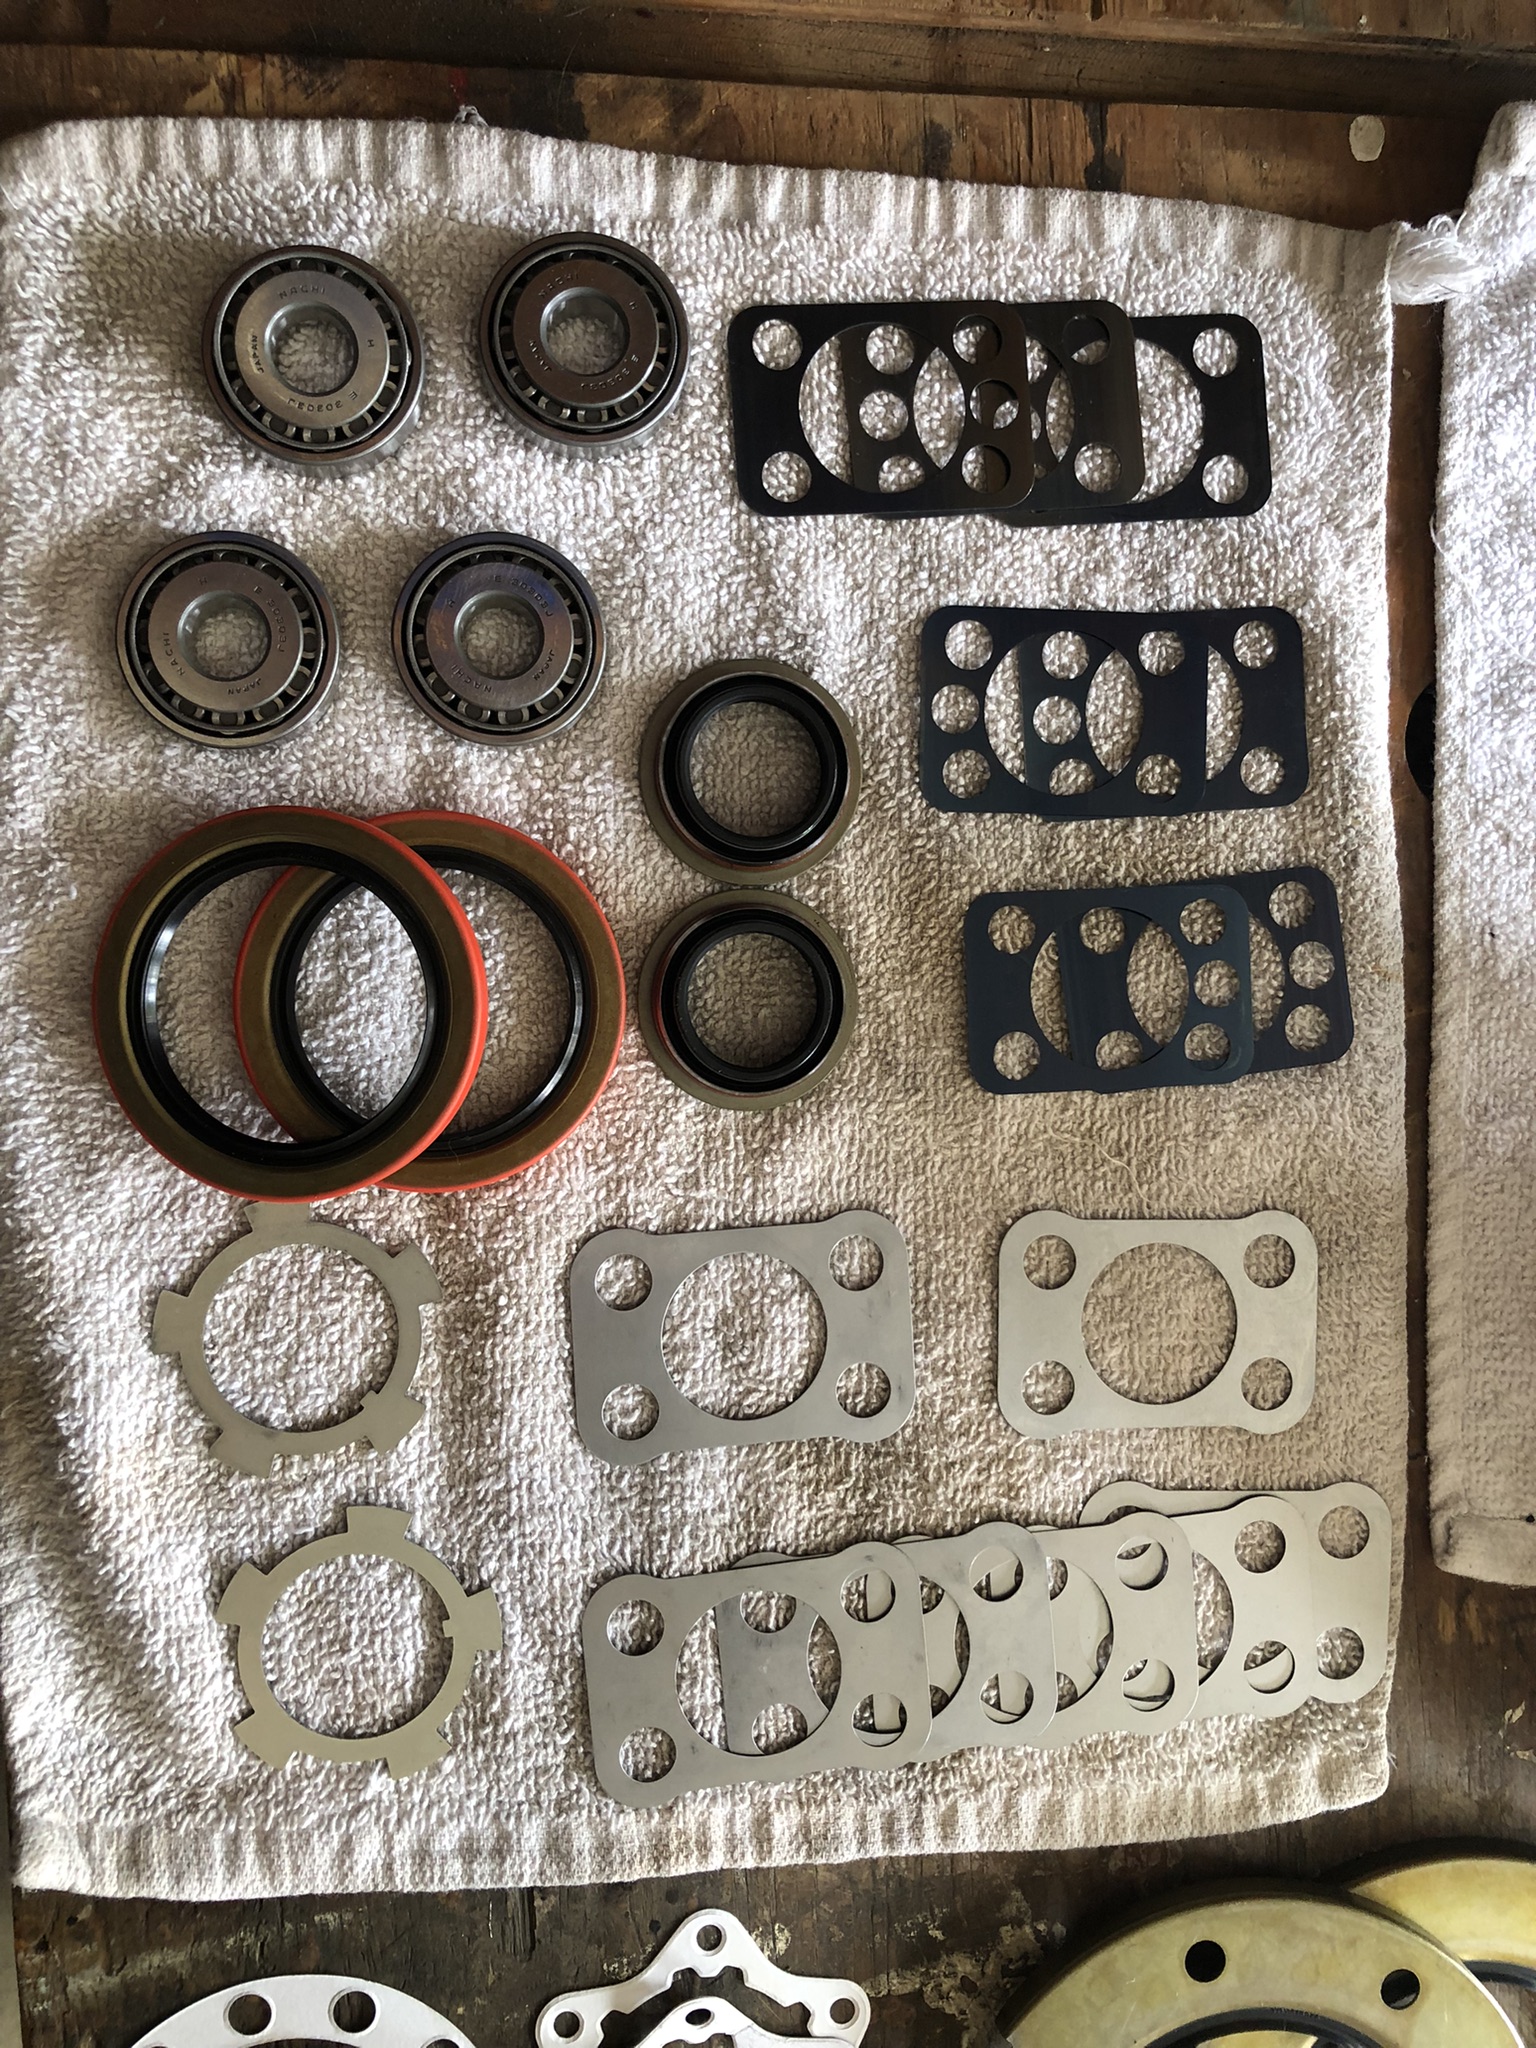
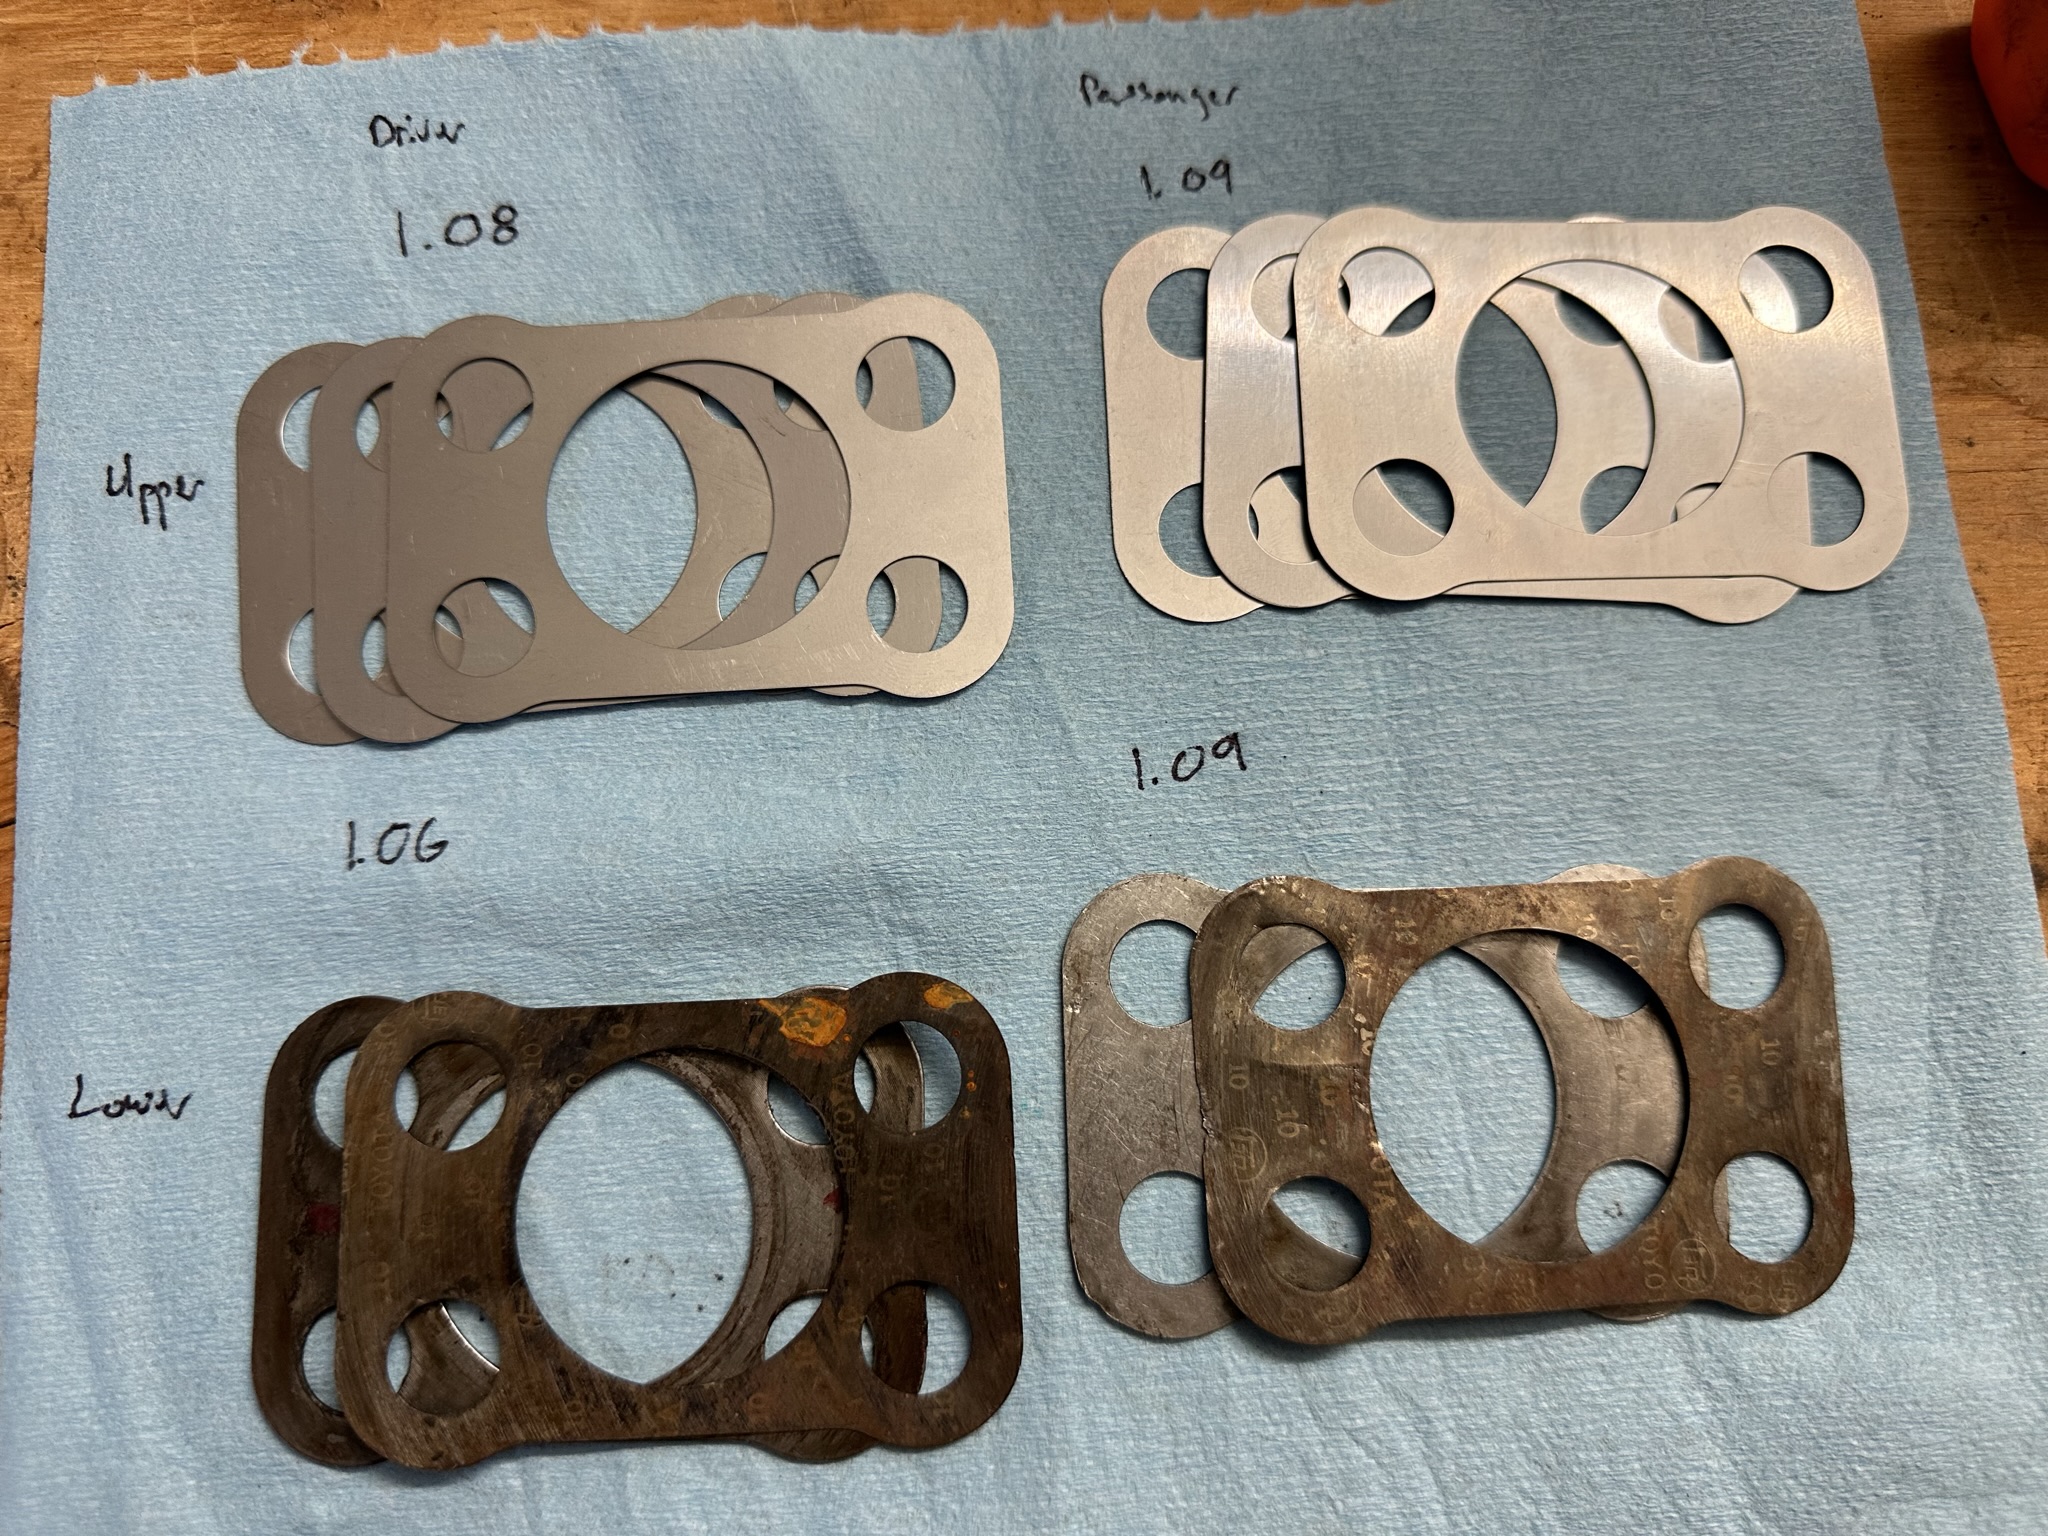
With the front differential mounted I began to reassemble the front axle. Using the Front Axle Service kit from Marlin Crawler, I first replaced the knuckle races in the balls of the axle housing. Then I measured the knuckle shim thickness using the Knuckle Alignment tool also from Marlin. I compared our measured thickness to the shims that had come off the knuckles during disassembly… I measured 1 mm on the top and 1.1 mm on the bottom. The original was 1.1 mm top and bottom. I figured the two were pretty much in agreement and stacked shims to give us a hair shy of 1.1 mm top and bottom. After mounting and torquing the knuckle I measured a tension of 1.5 kg which is 0.3 kg shy of the low end of the range. I probably should have removed 0.1 mm from top and bottom to get into range but I stuck with the 1.1 mm top and bottom since that was what came off the truck. So why buy the expensive alignment tool? Good question!
Before mounting the knuckle I filled in some minor pitting on the axle housing balls with JB Weld and sanded it down to give a smooth surface for the wipers to run over. Next, with the knuckles in place, I installed the wiper to the back side of the knuckle. I used a modified wiper kit from Trail Gear that replaces the felt wiper with a thick rubber wiper. This modified wiper looks to be high quality and the backing plates are much thicker that the originals. I think this will be an improvement.
Removing the Knuckle Races
Old Knuckle Races
New Knuckle Races, Bearings and Shims
Knuckle Alignment Tool on Axle Ball
Knuckle Alignment Tool on Knuckle
Shim Stacks Measured Out
Pitting Filled with JB Weld
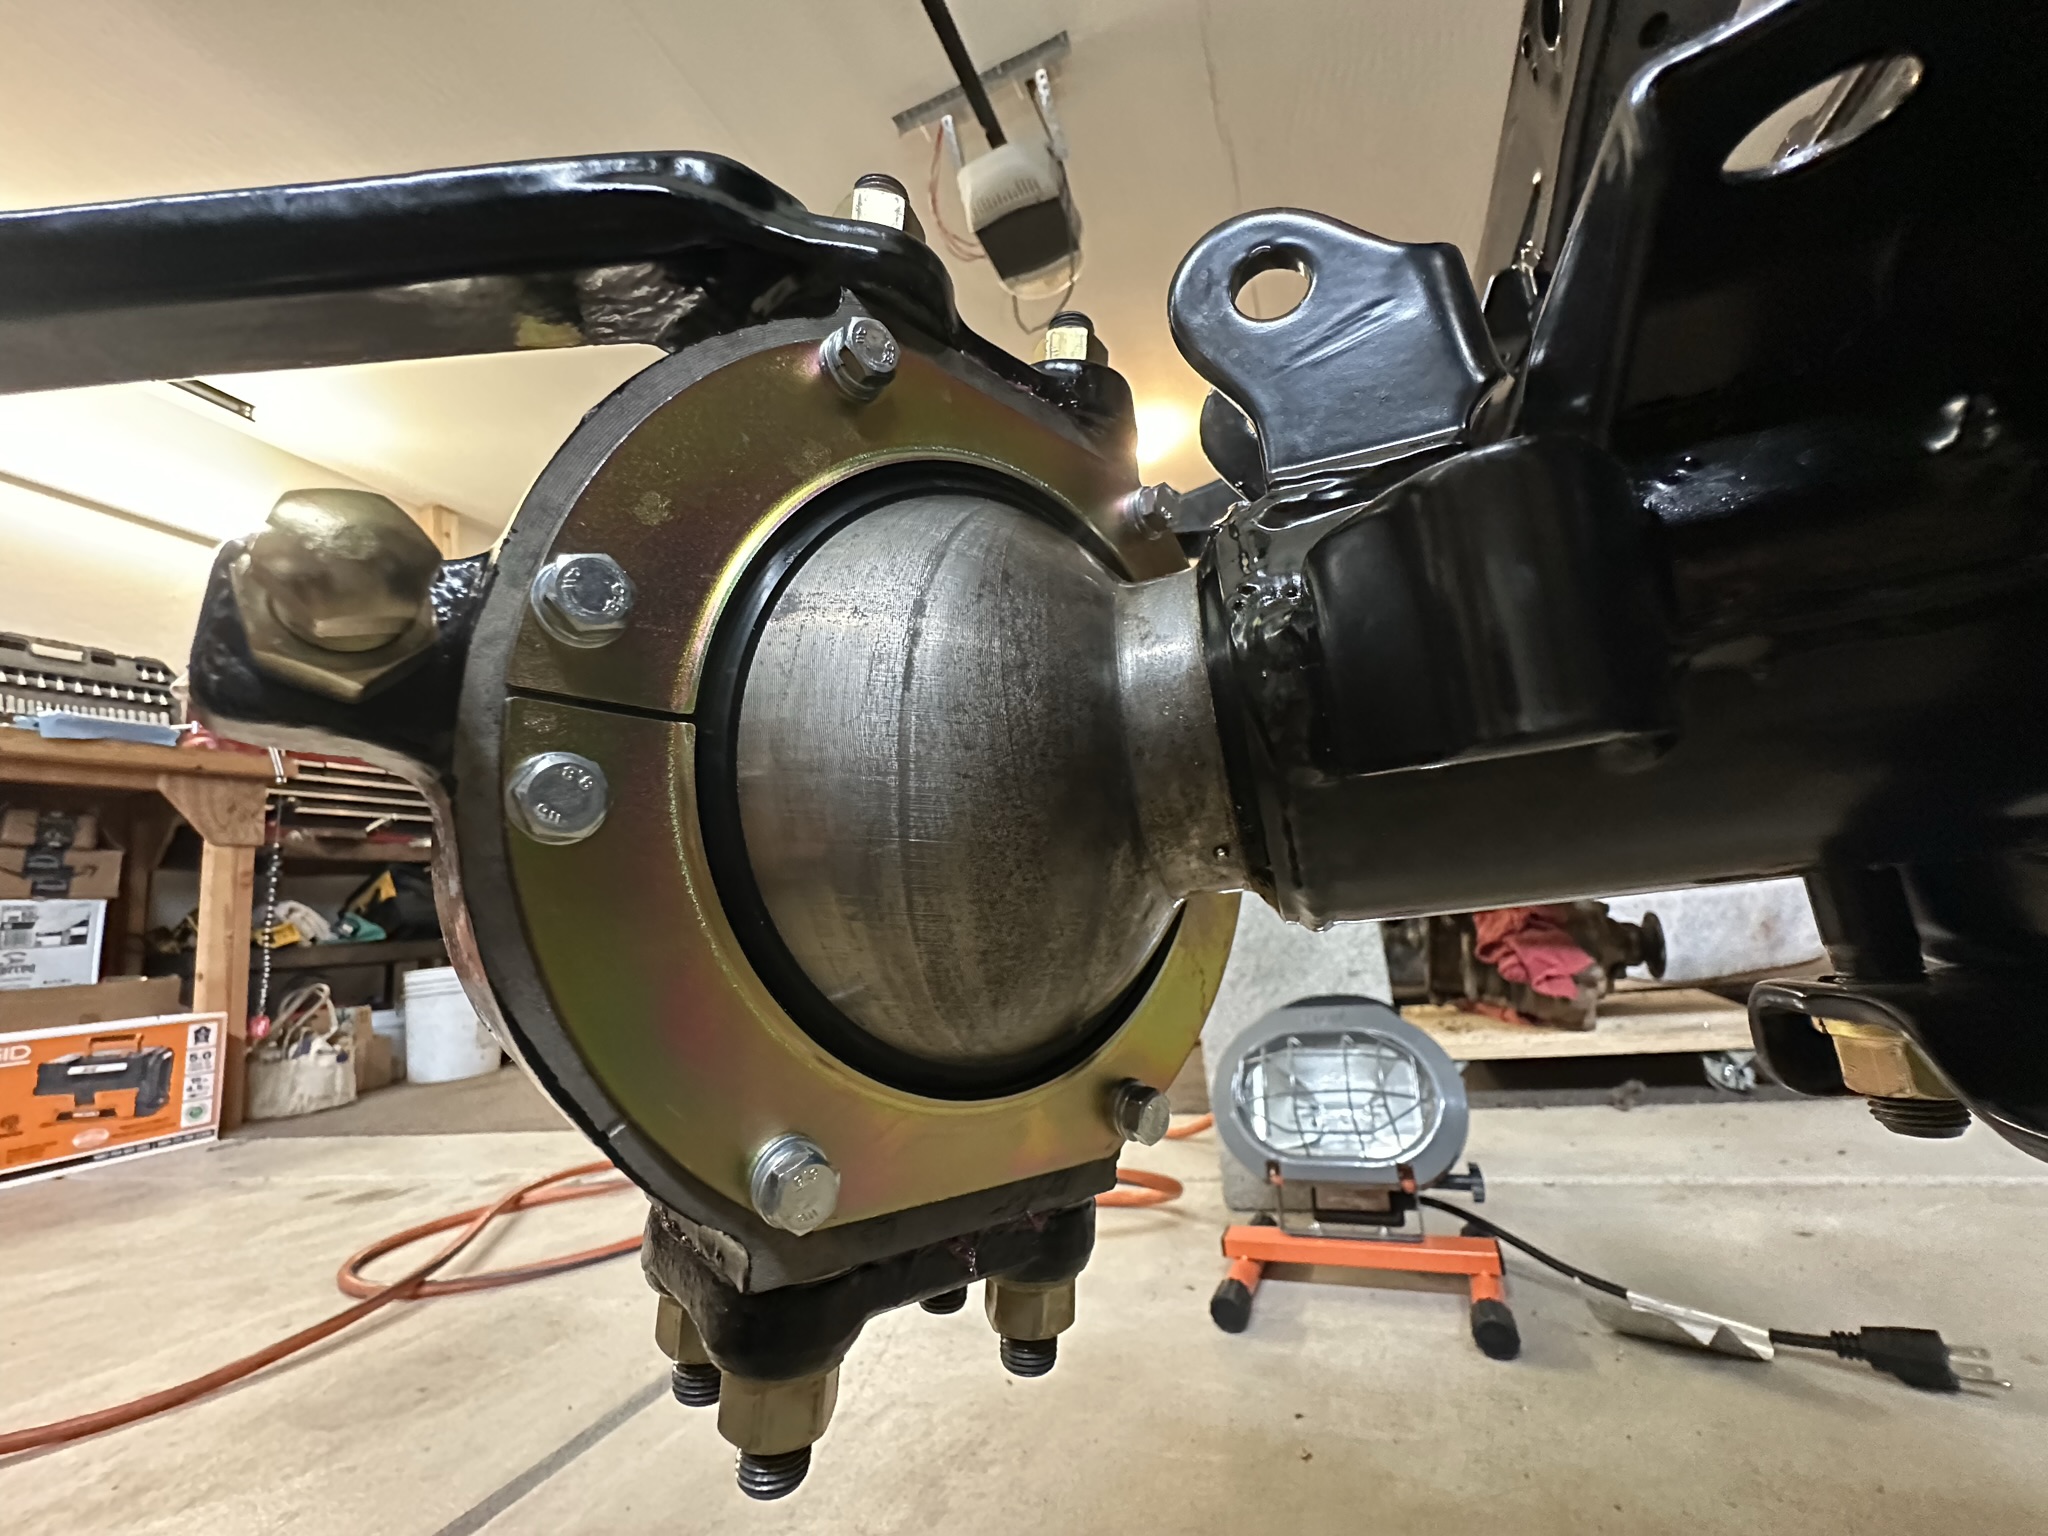
Knuckle Installed
Trail Gear Wiper
A special shelf in the freezer just for truck parts! (Arthur… don’t tell mom!)
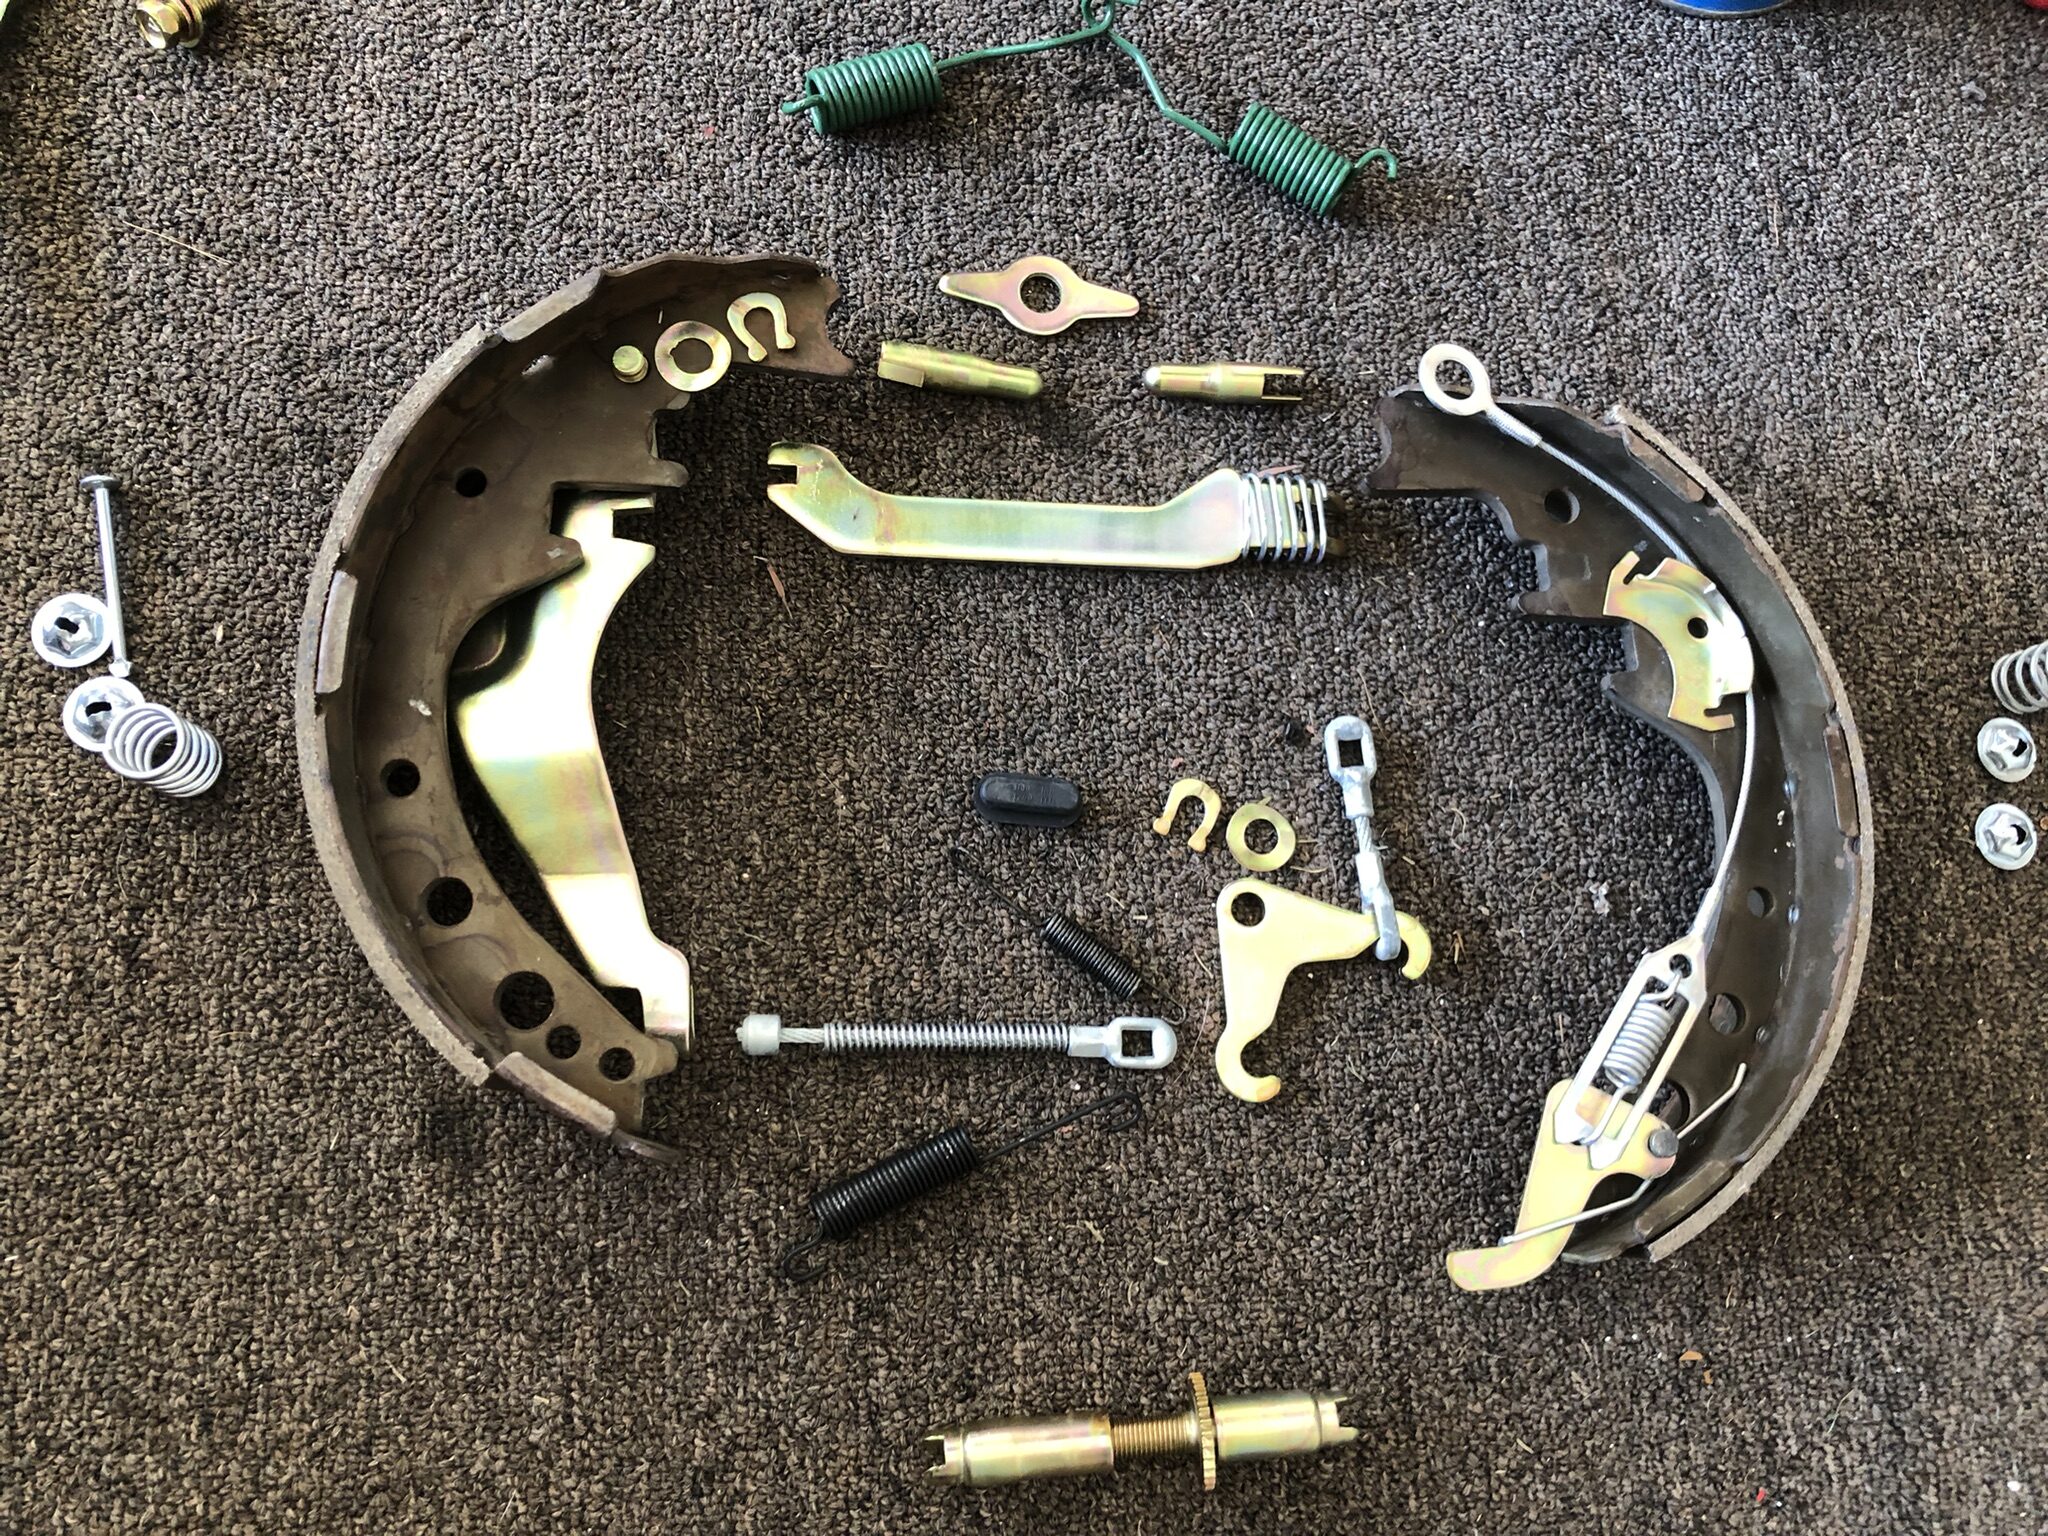
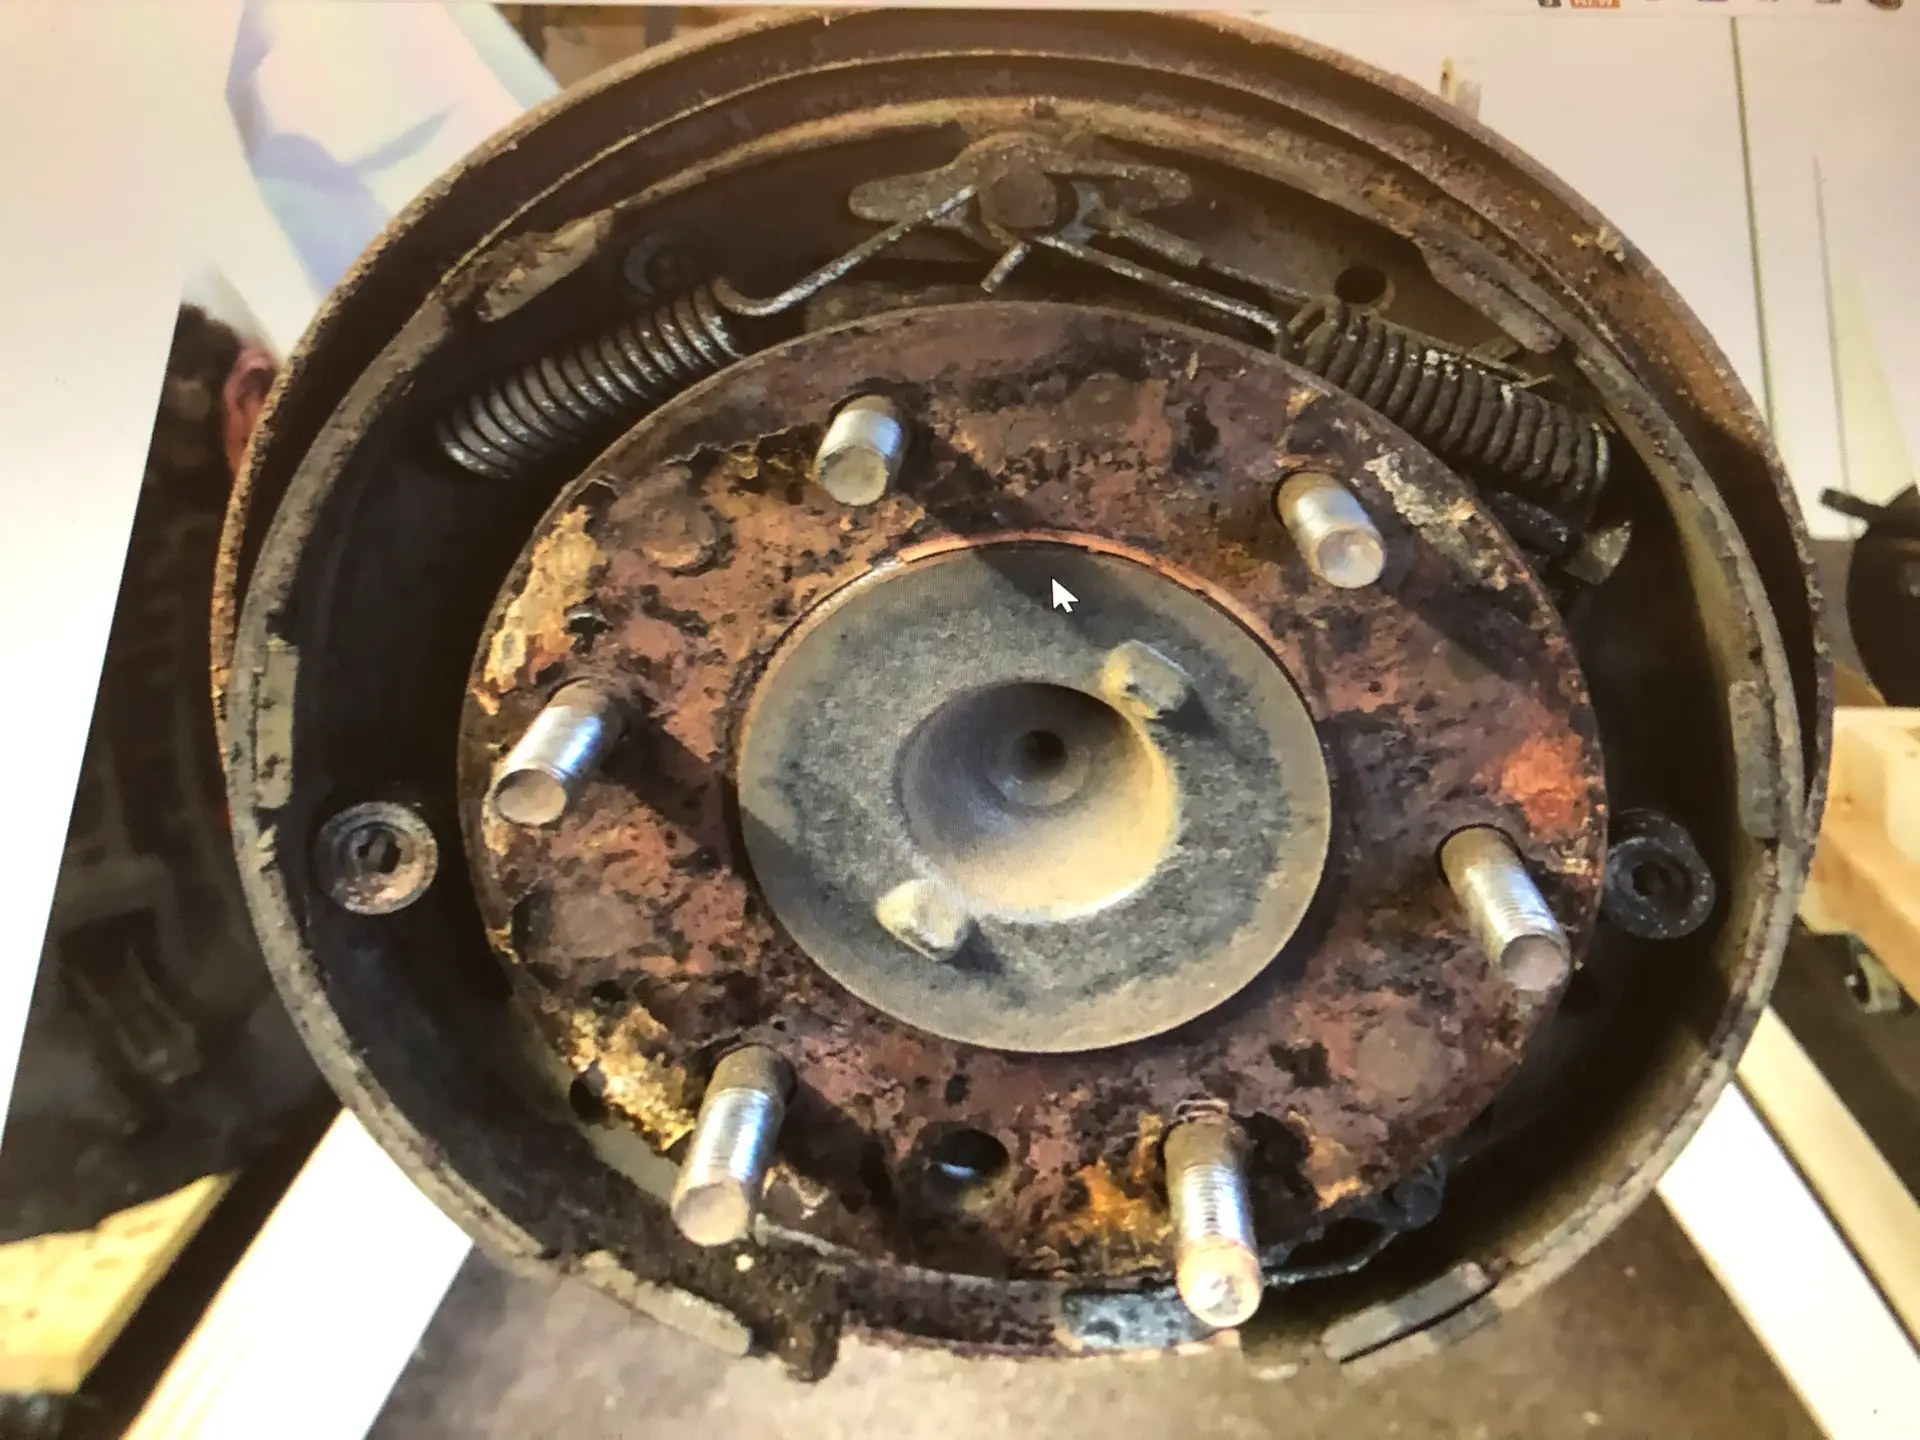
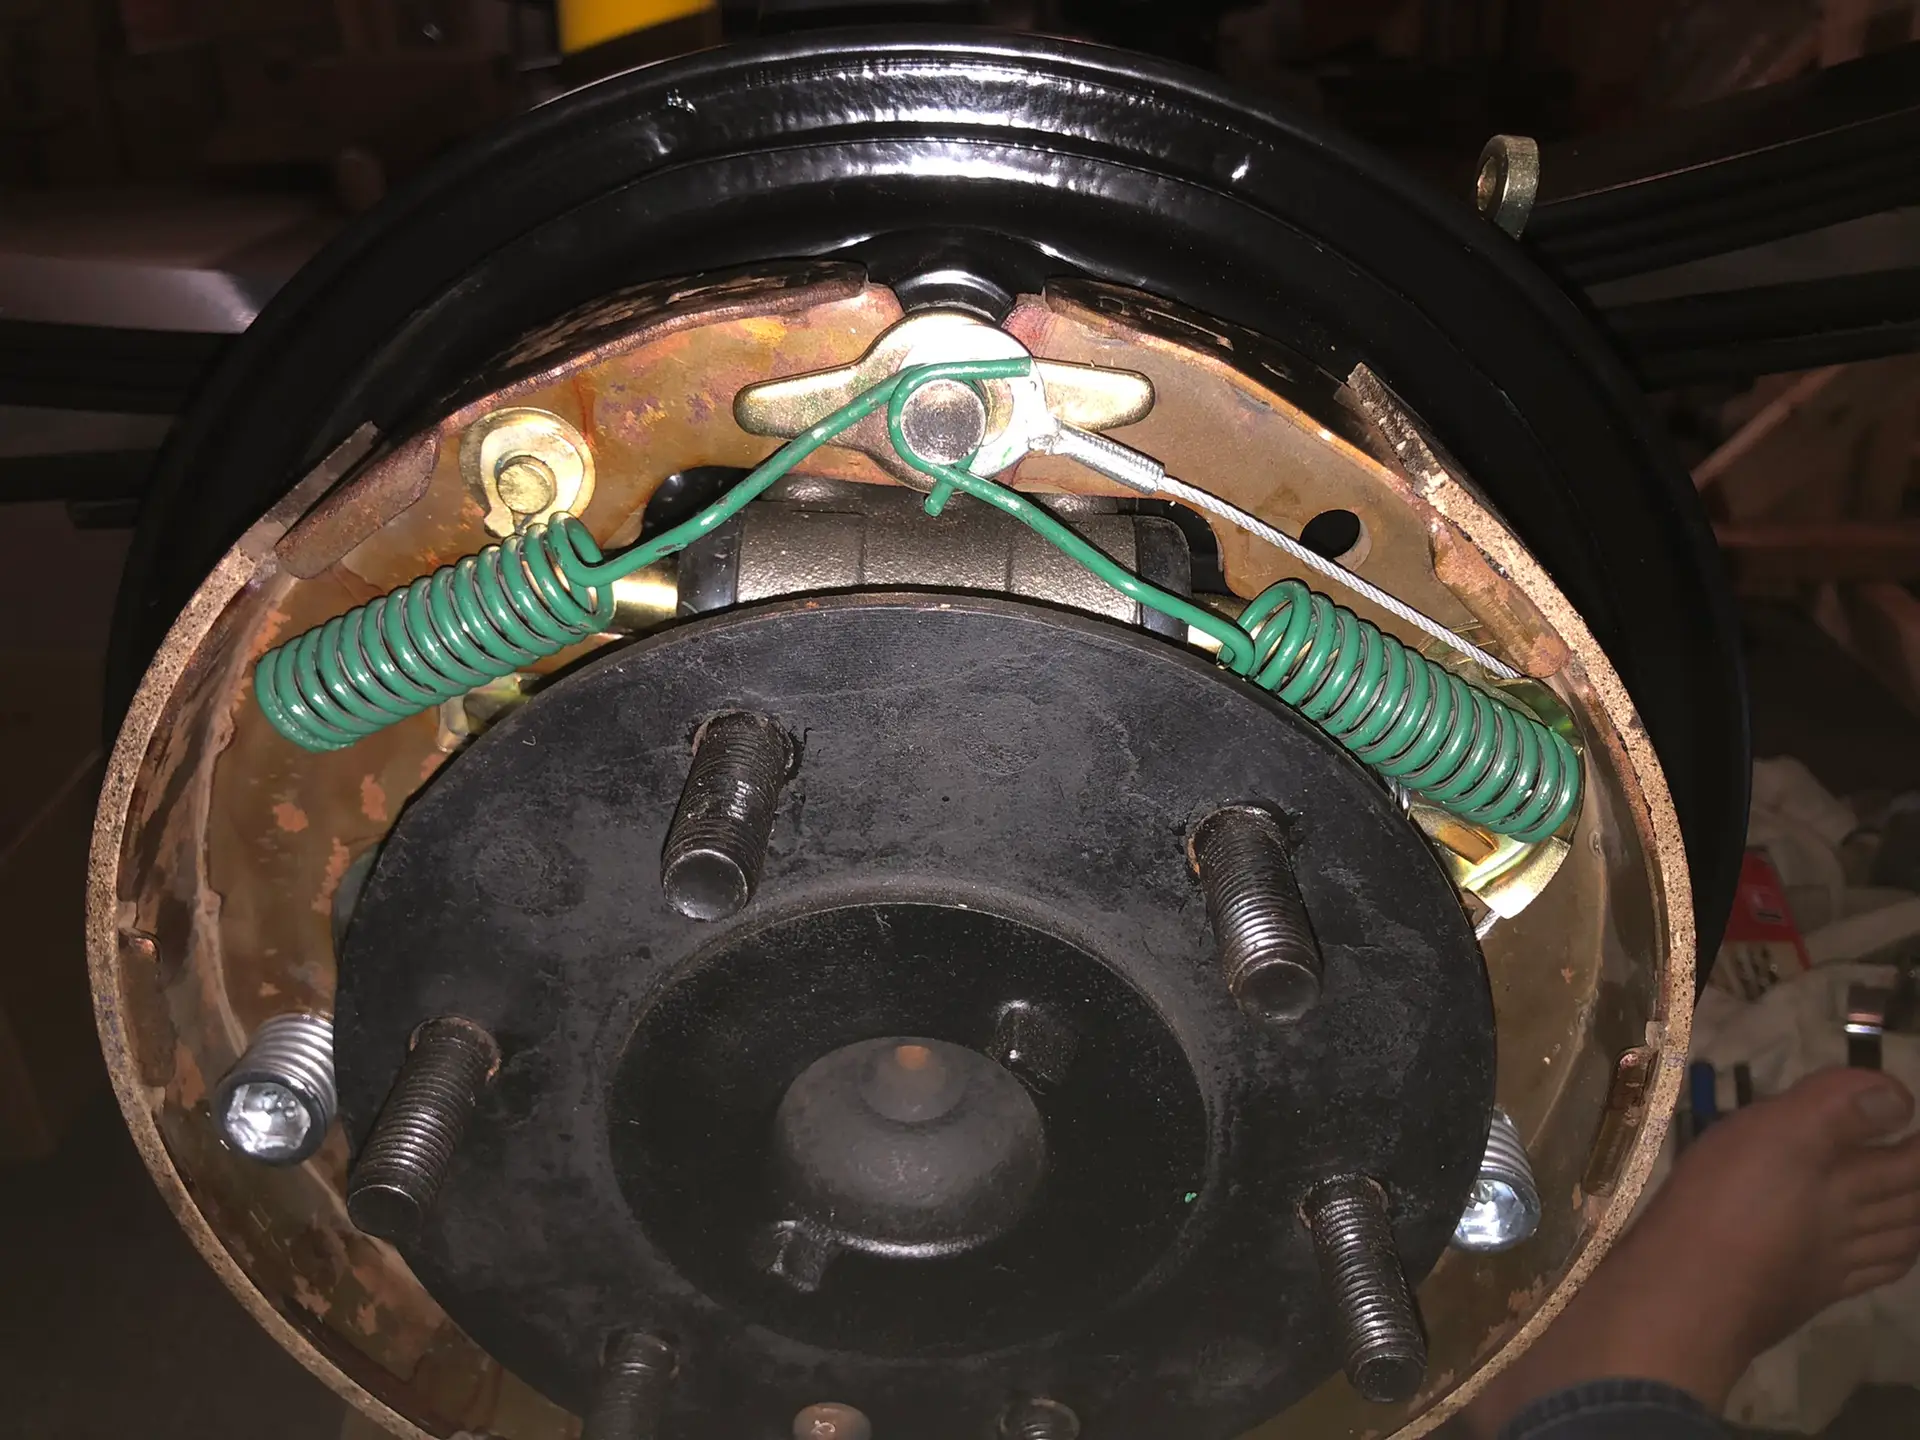
There sure are a lot of parts to the rear brakes! After some serious plating and studying of the factory service manual I got them back together! I realize it is silly to plate all the parts that will get coated in brake dust in no time but it was fun and a good learning experience. I bought new shoes but in the end I ended up using the ones that came off the truck because they were hardy worn and had more coverage than the new ones. It was fun to put the brakes back together and really understand how the parking brake works (though I’ve forgotten already!)
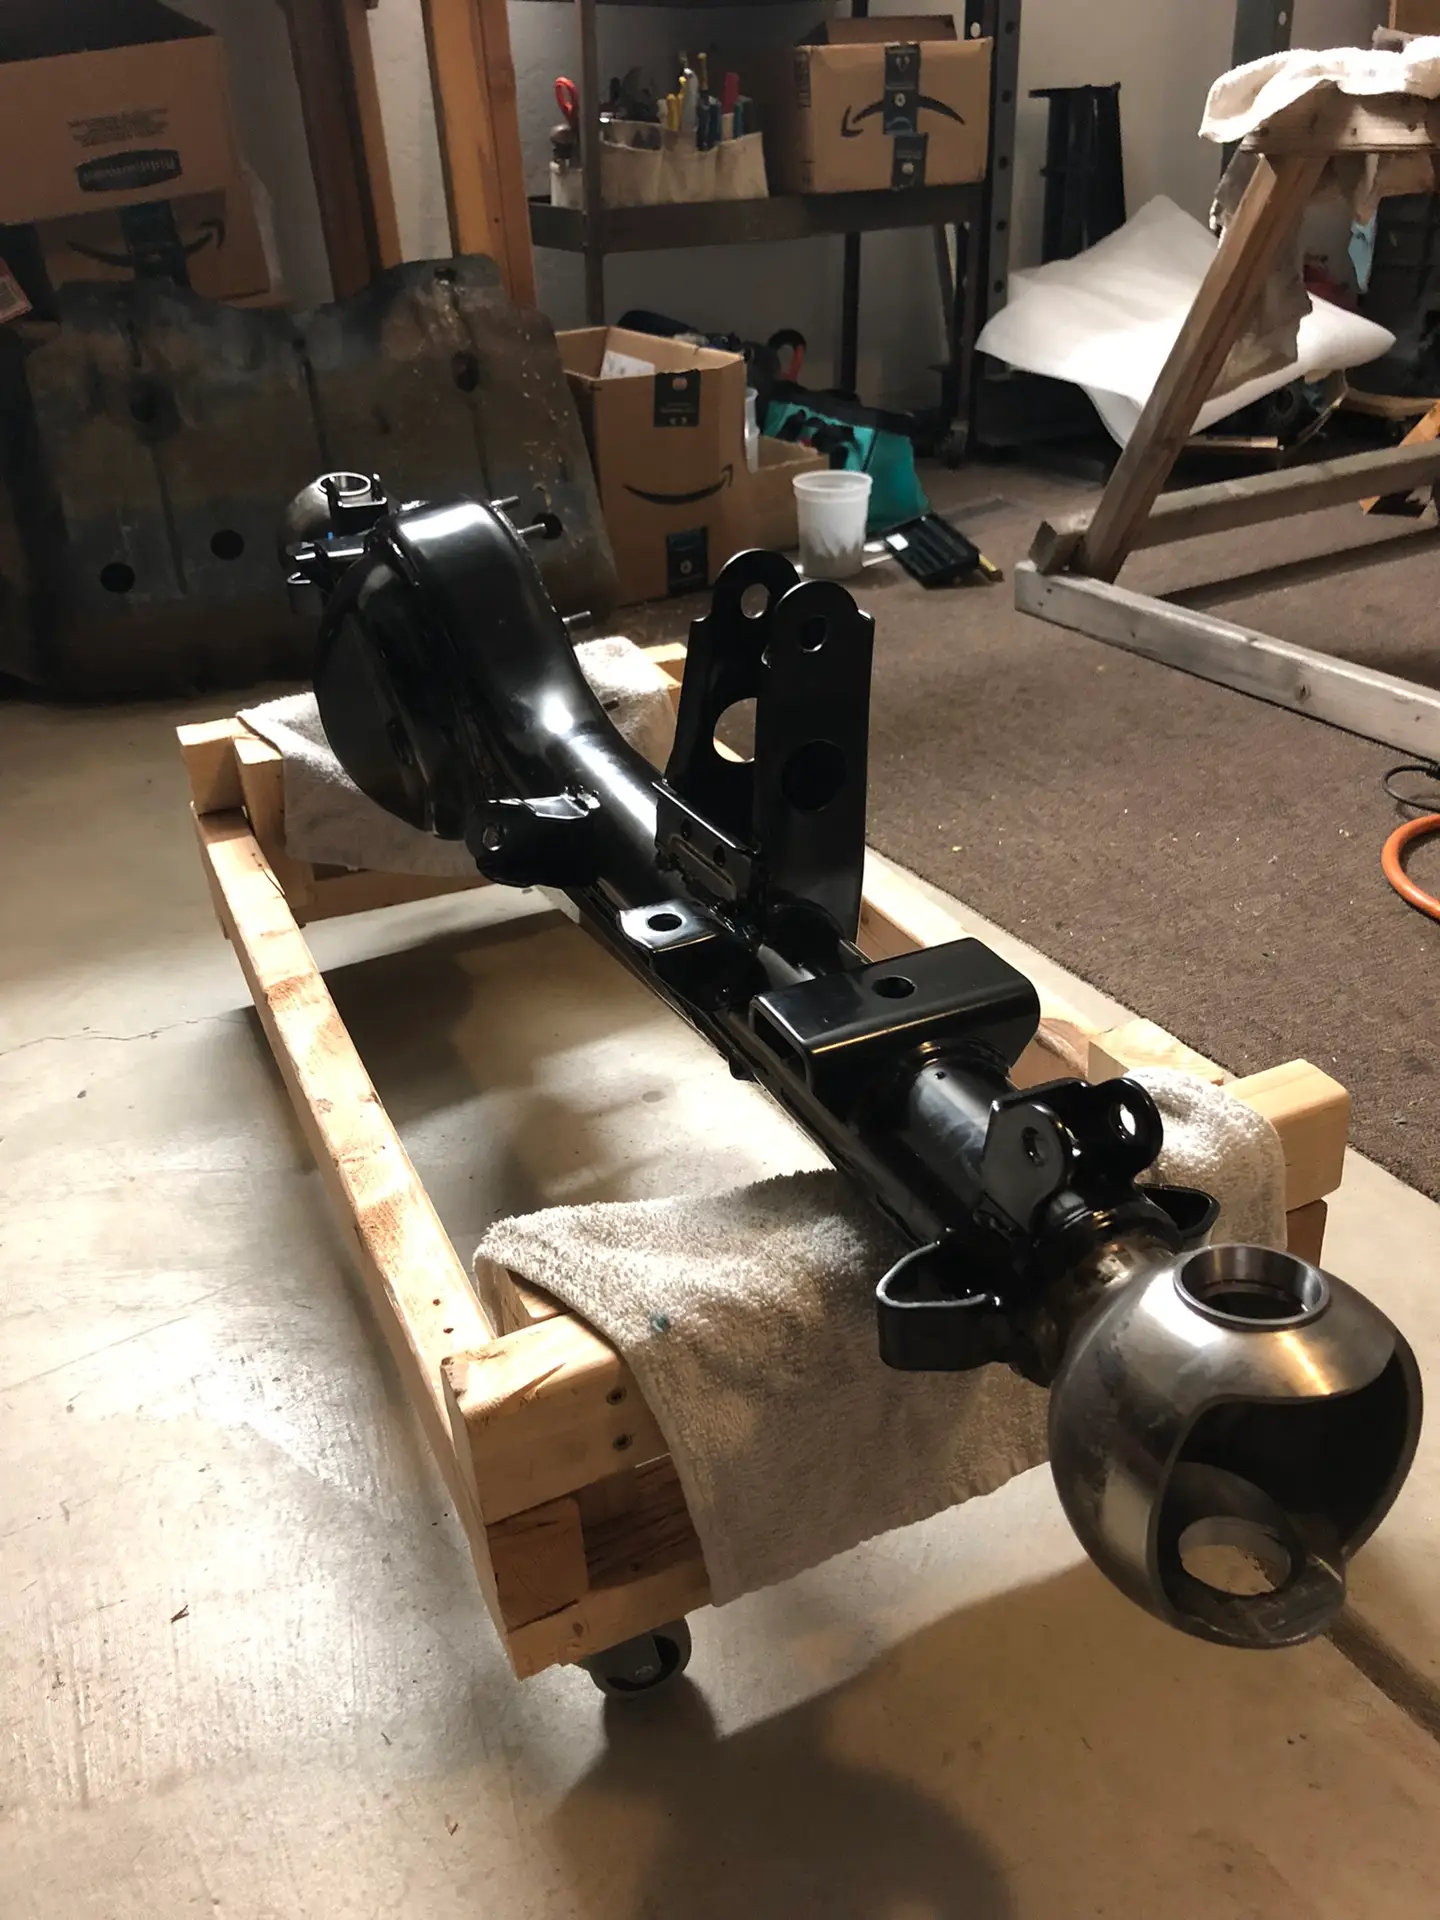
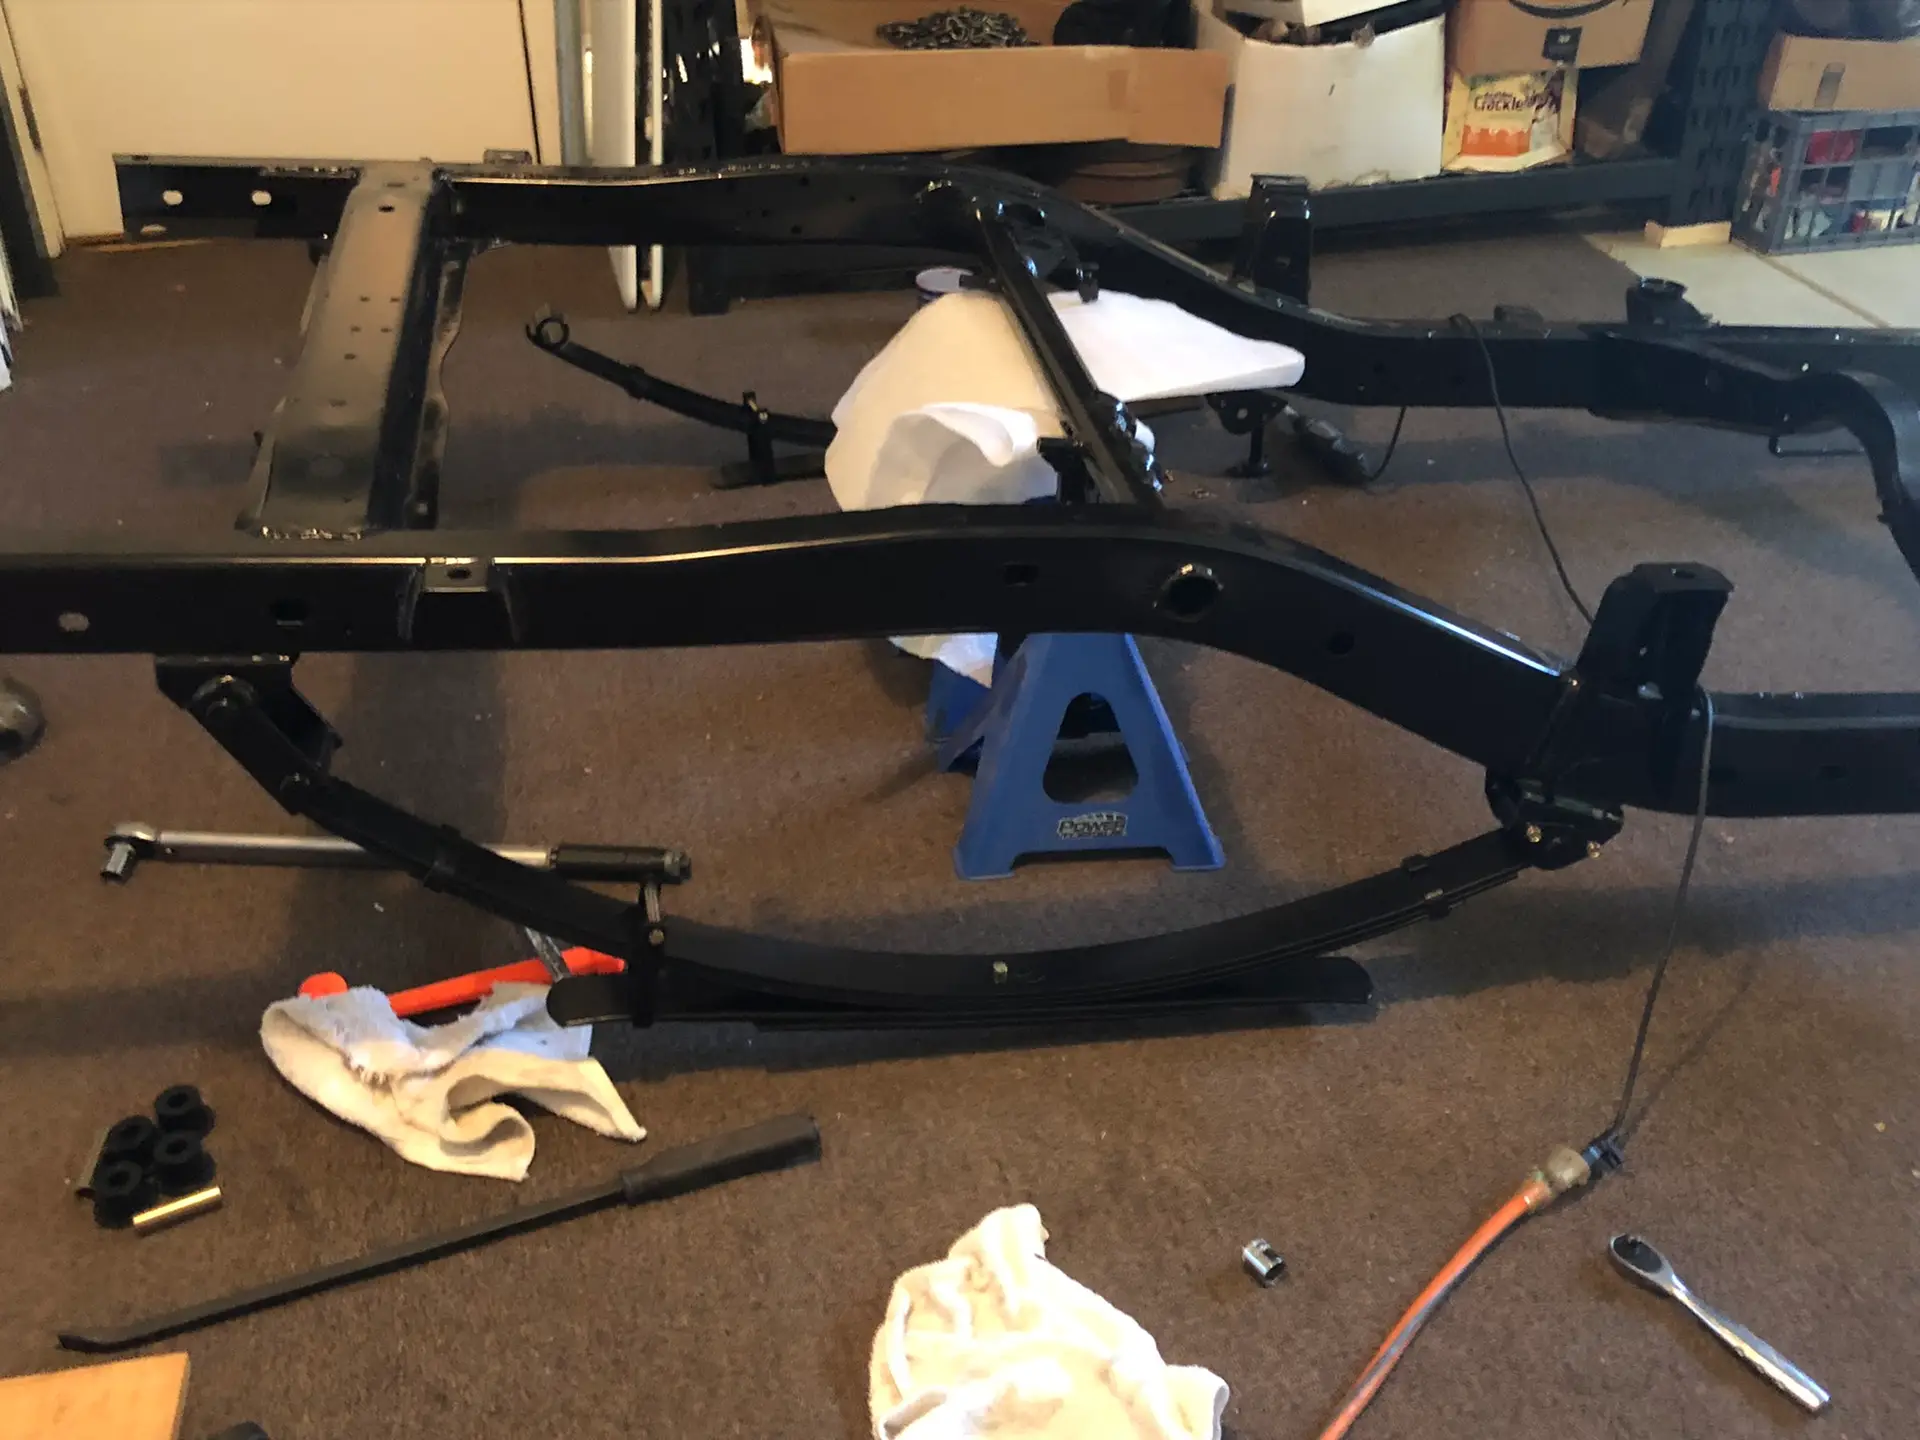
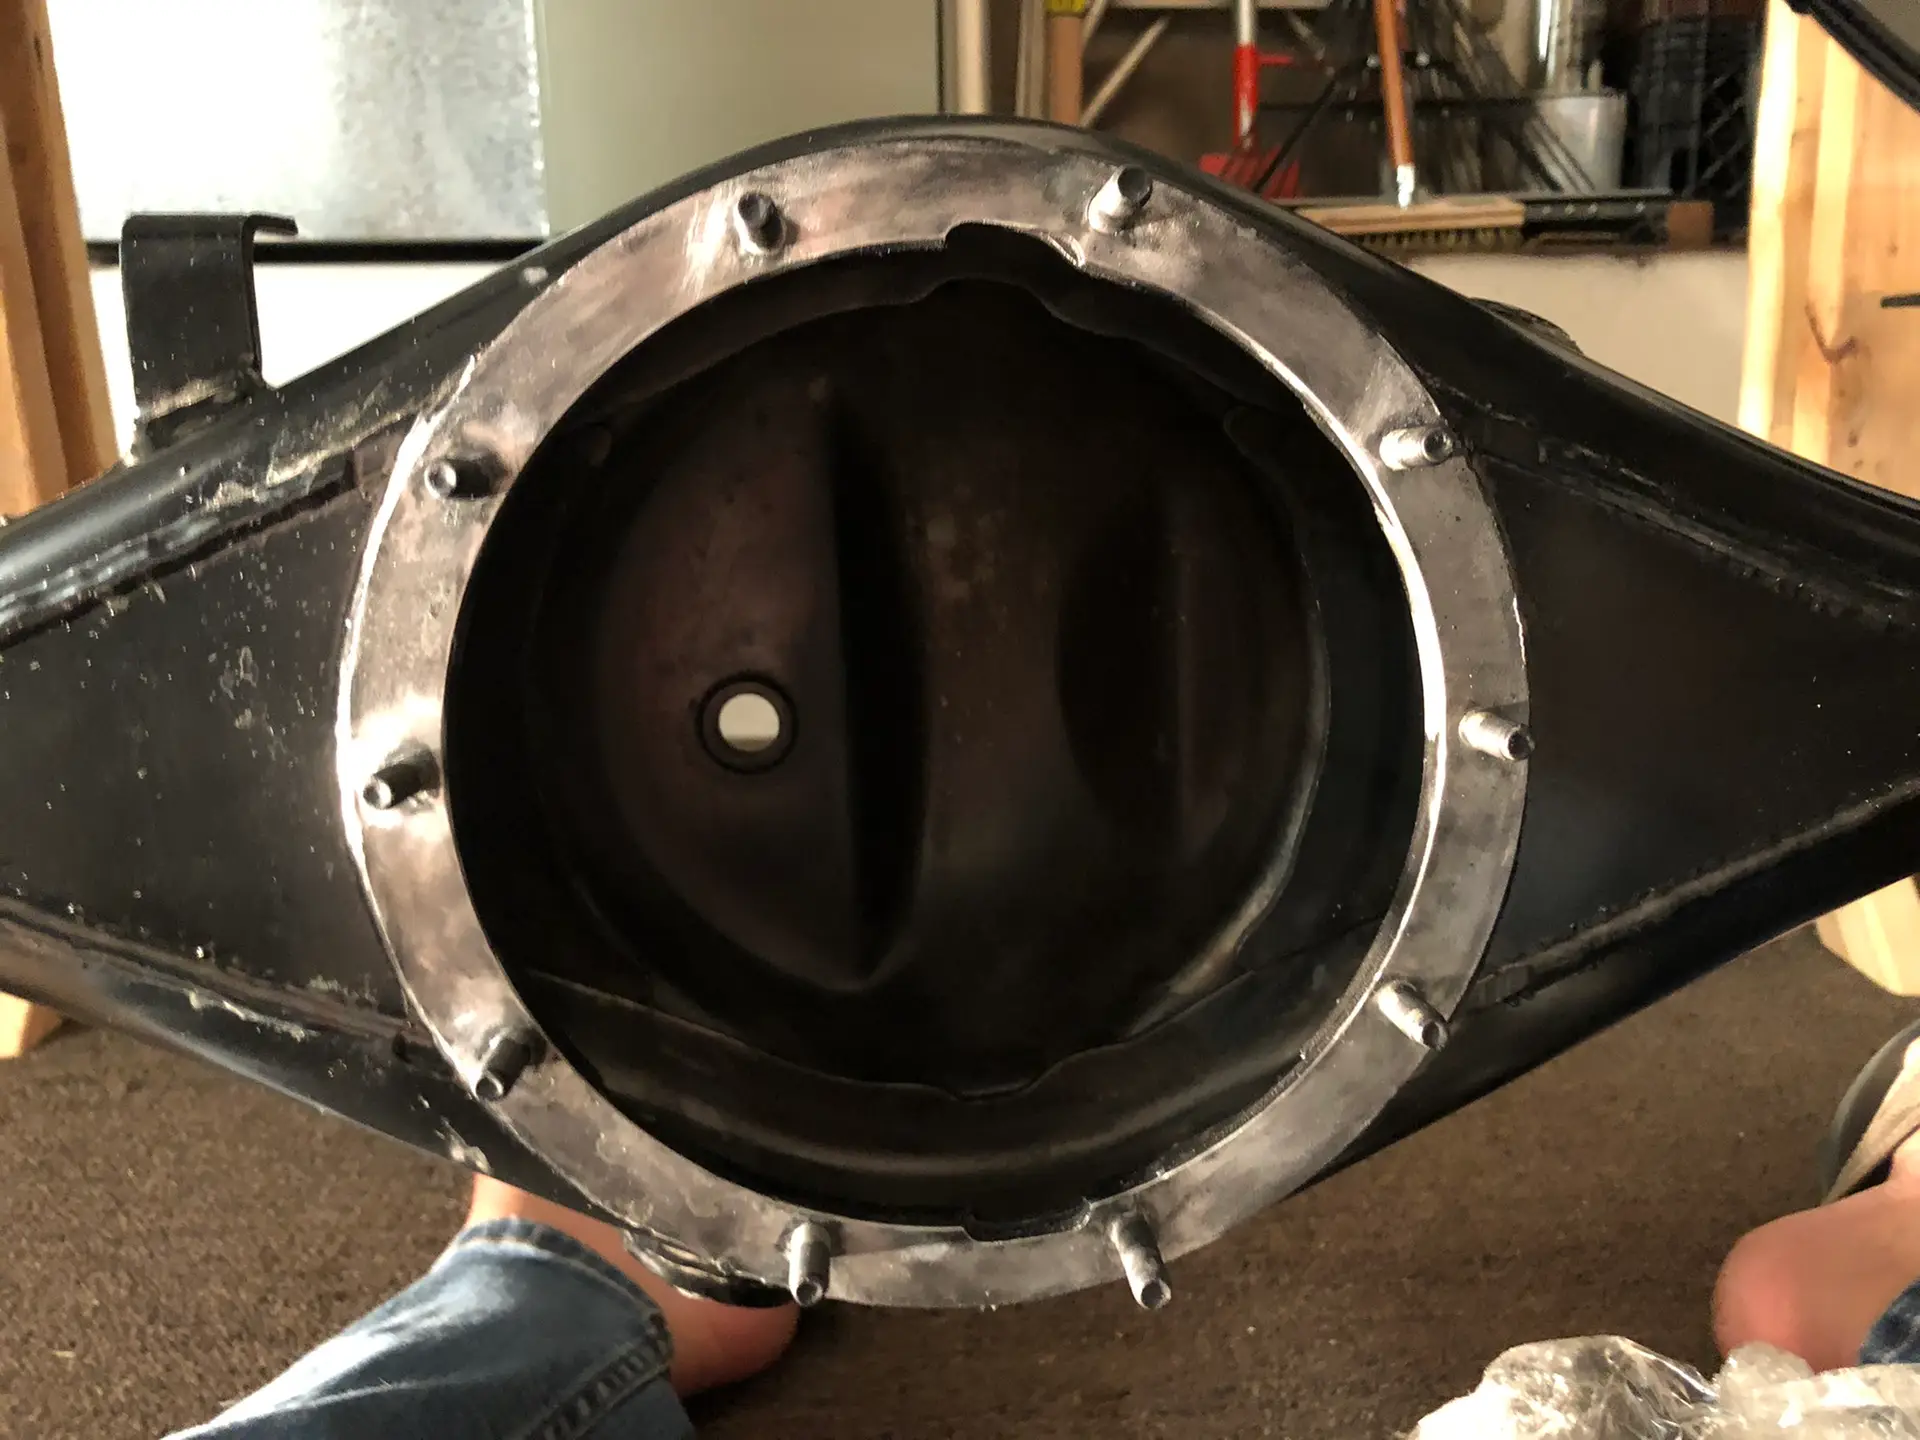
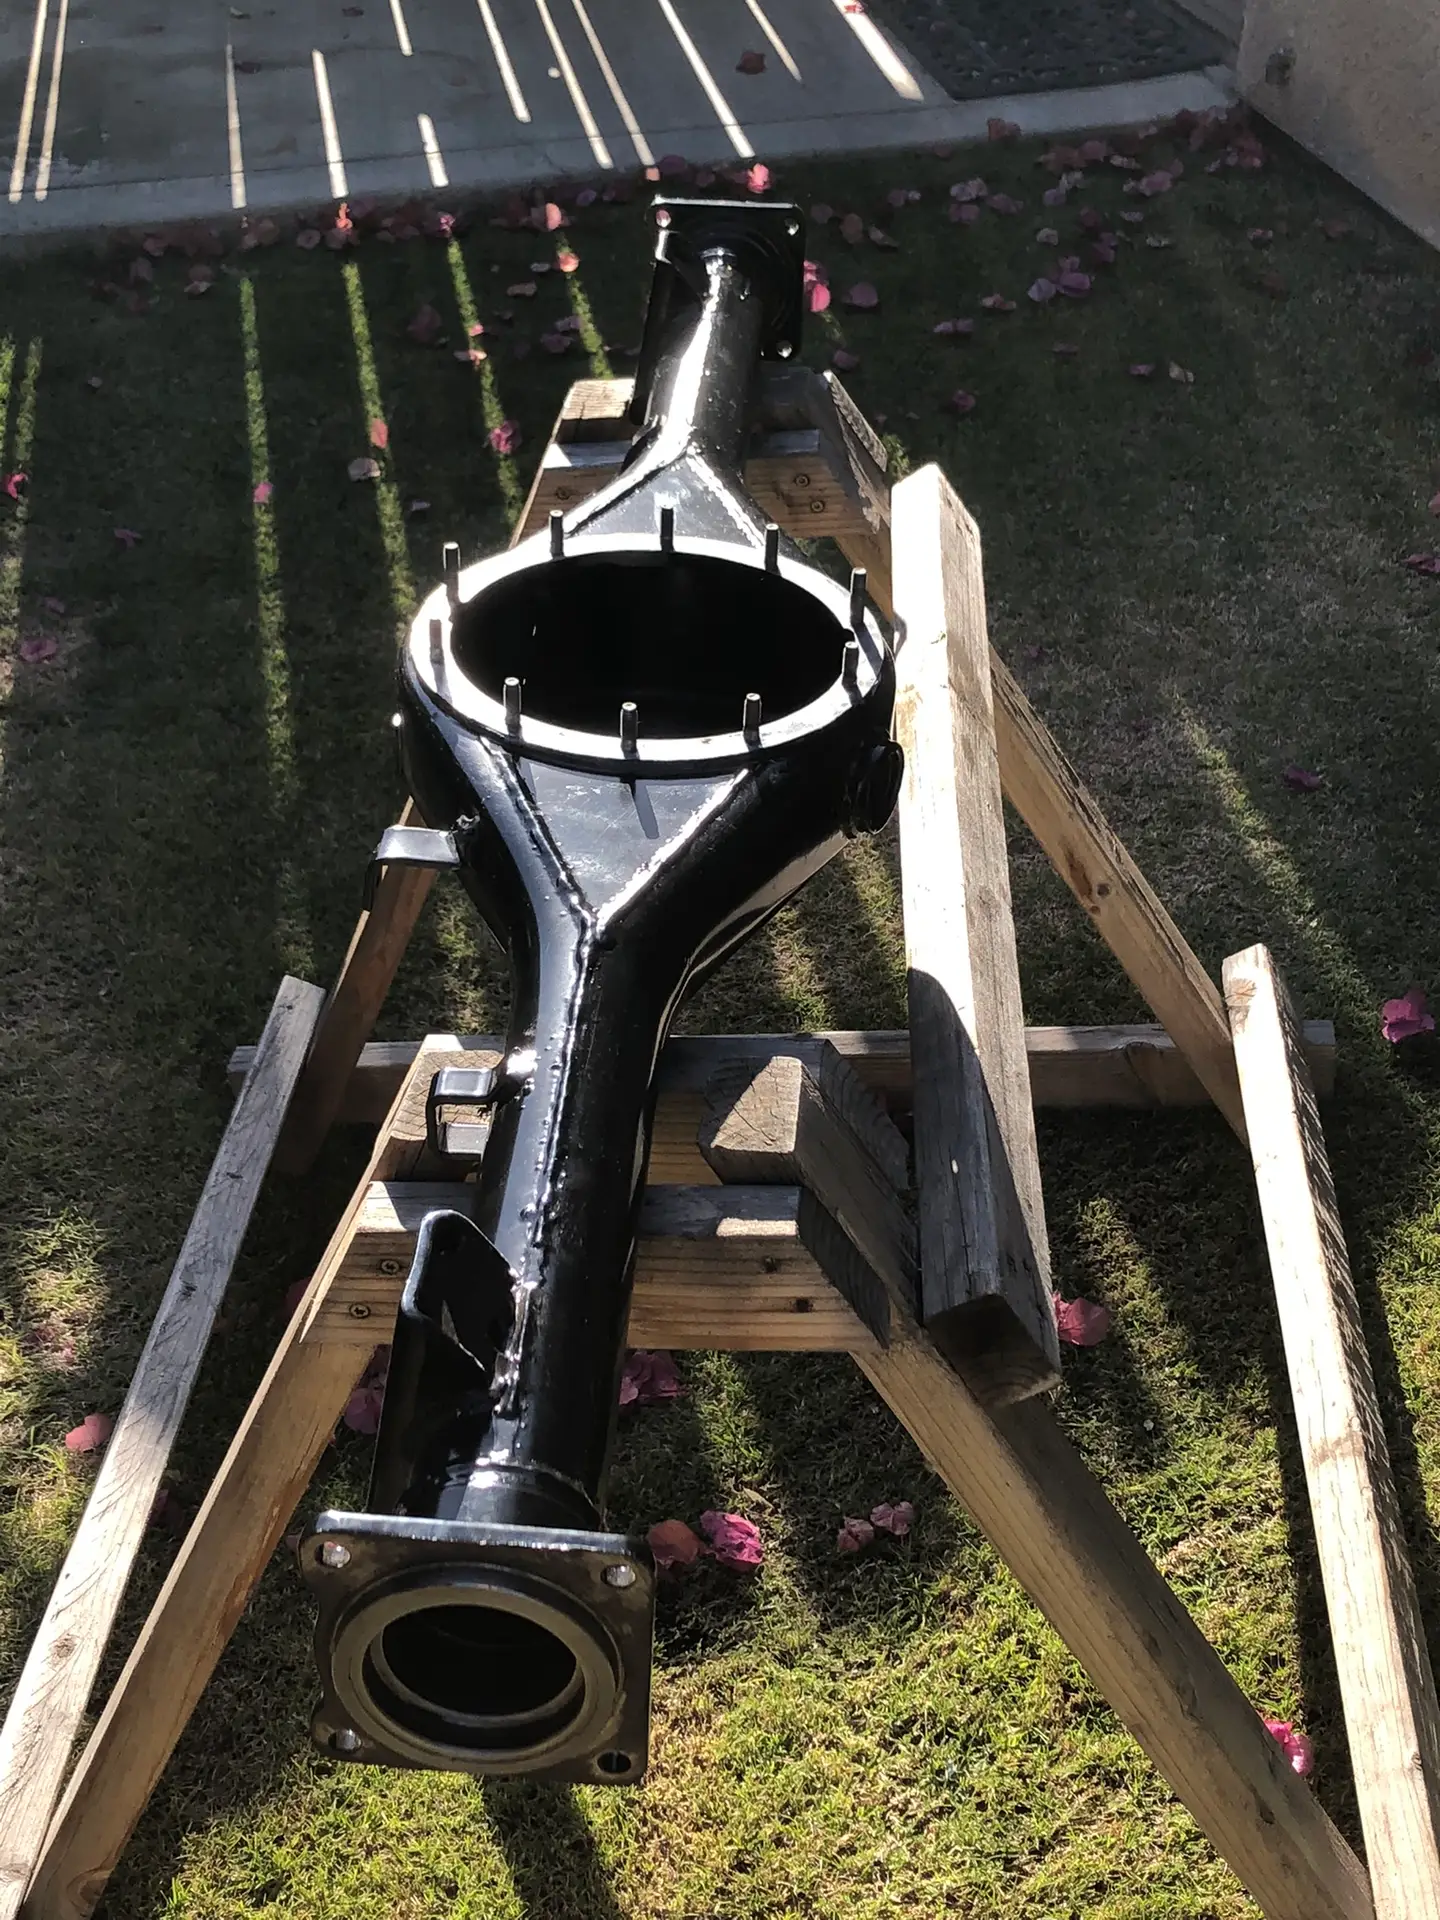
Starting to think about the front axle, I cleaned out the axle housing similar to what was done with the rear, then I installed the leaf springs and mounted the axle housing. There was a pretty good size dent in the forward facing plate of the front axle housing that I were able to gently pound out. I installed the fill plugs and low profile drain plugs on both axle housings and finally I installed the front differential.
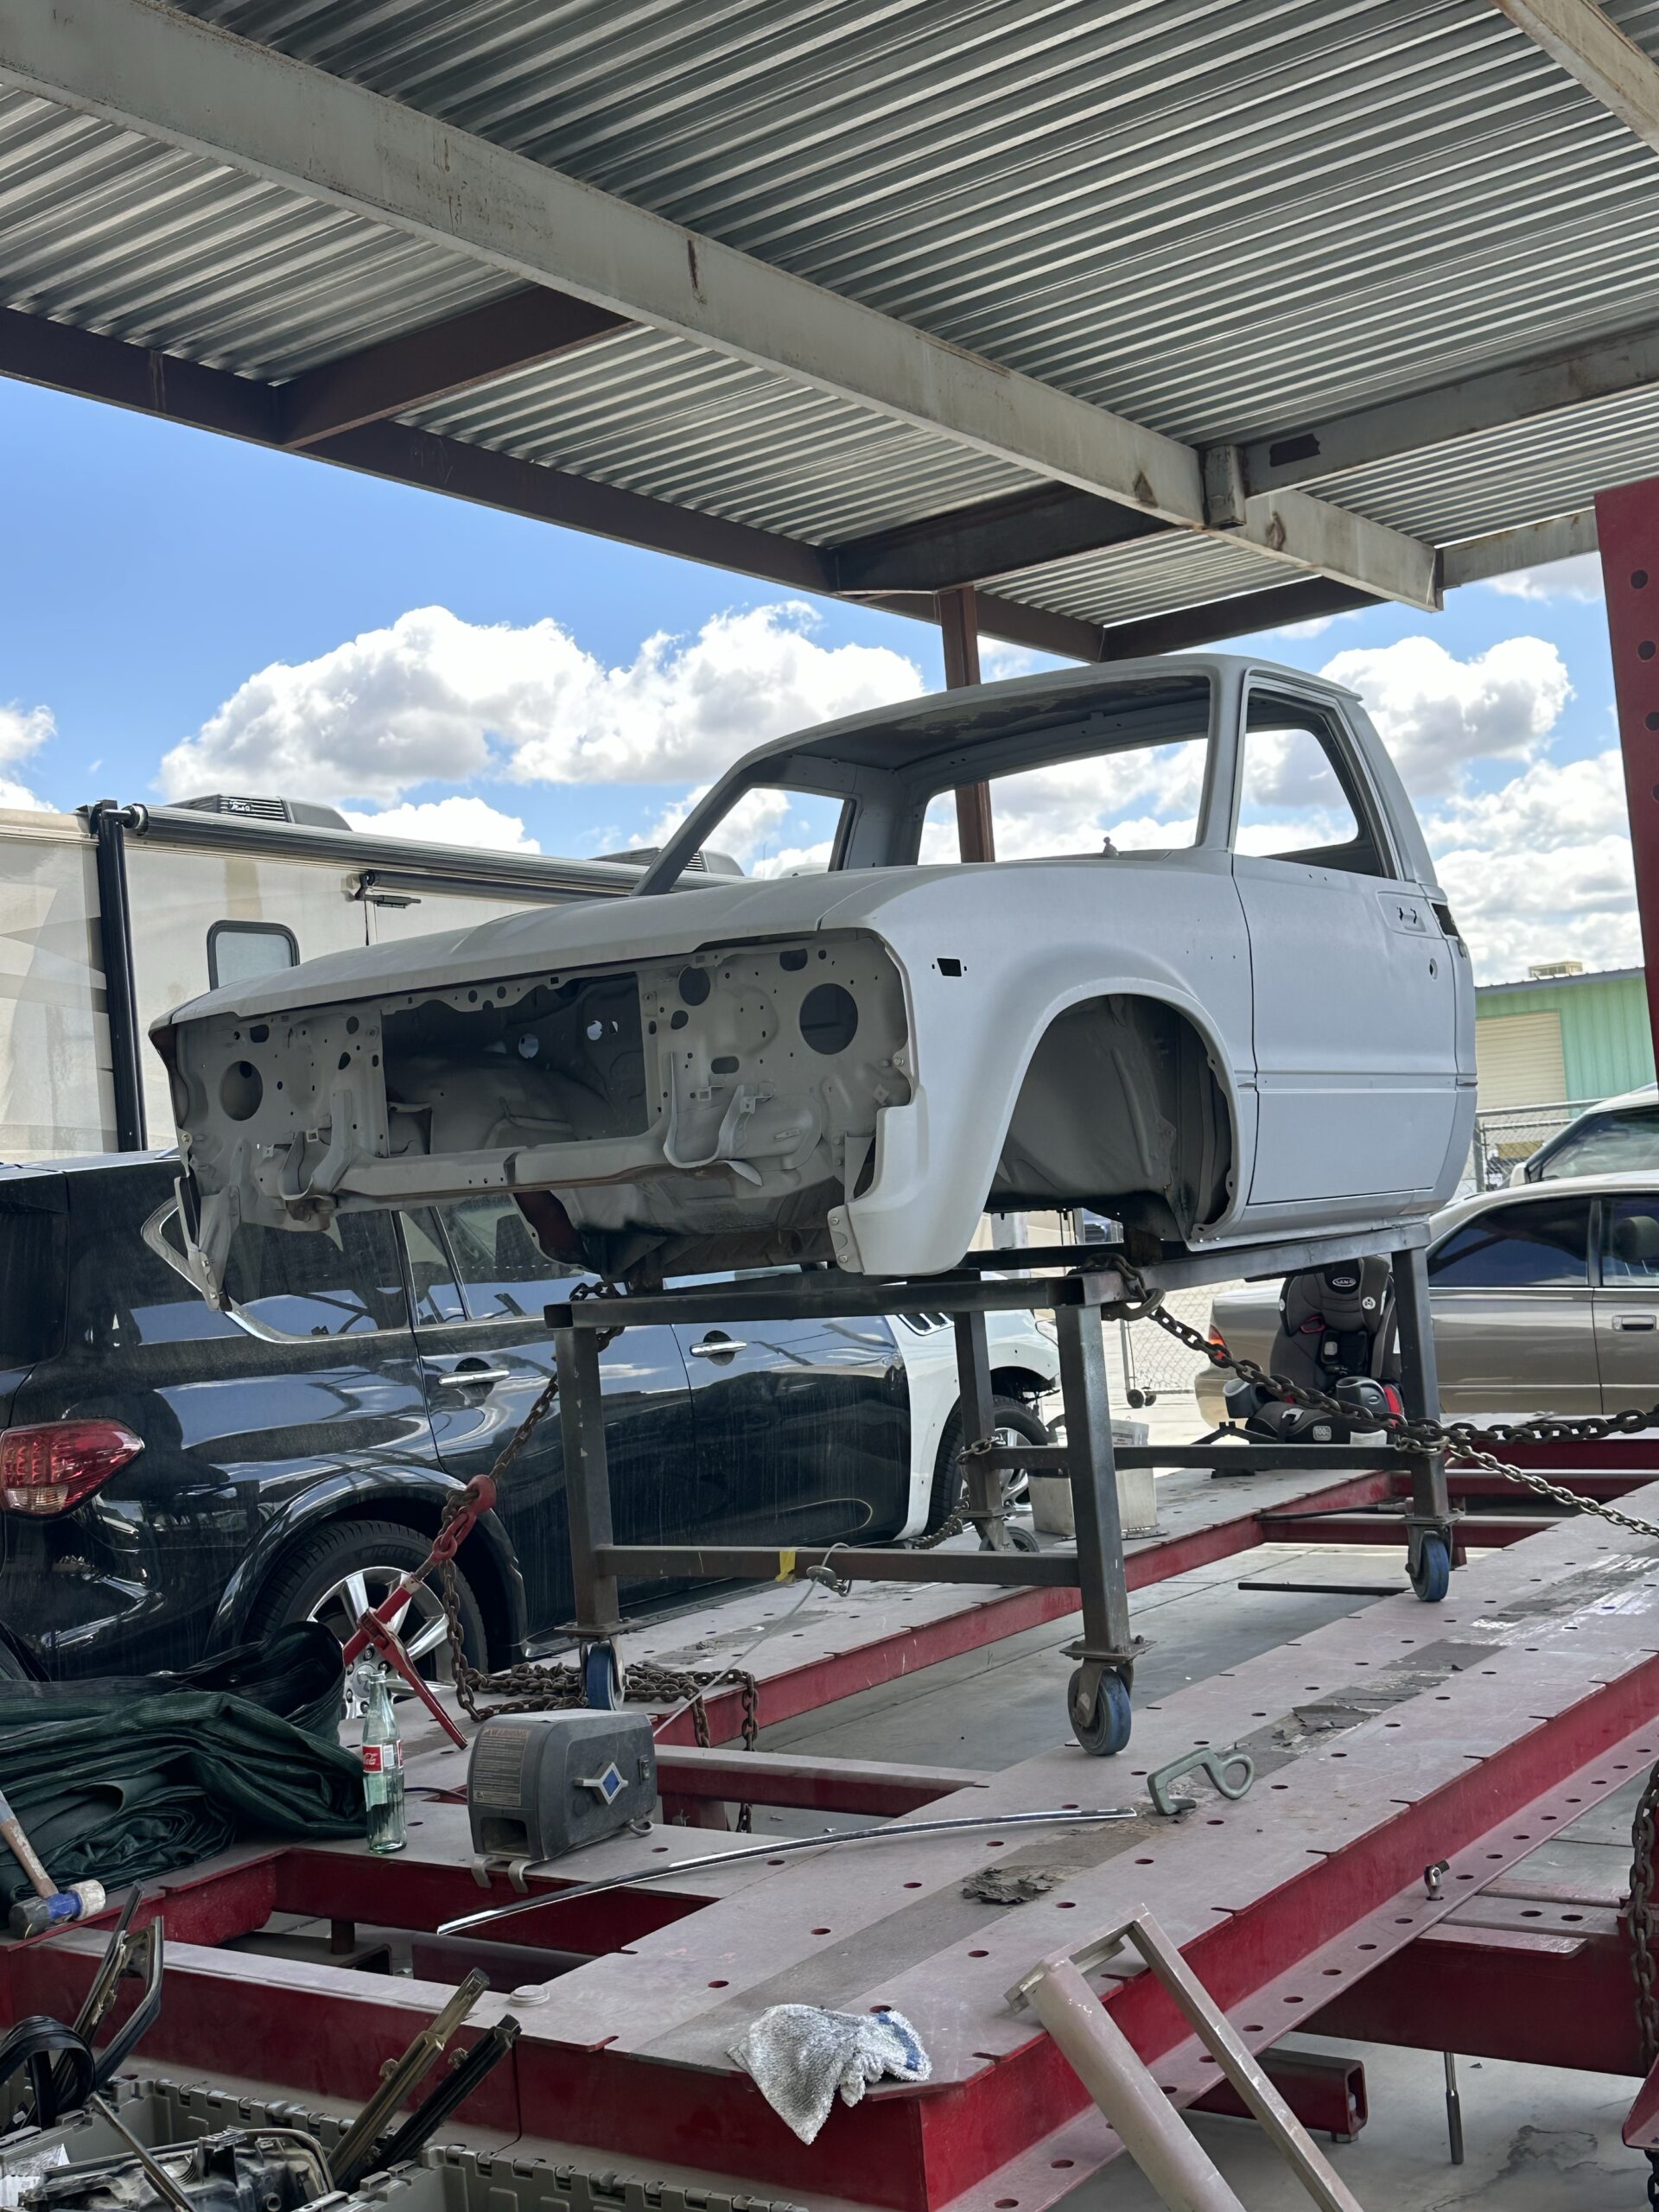
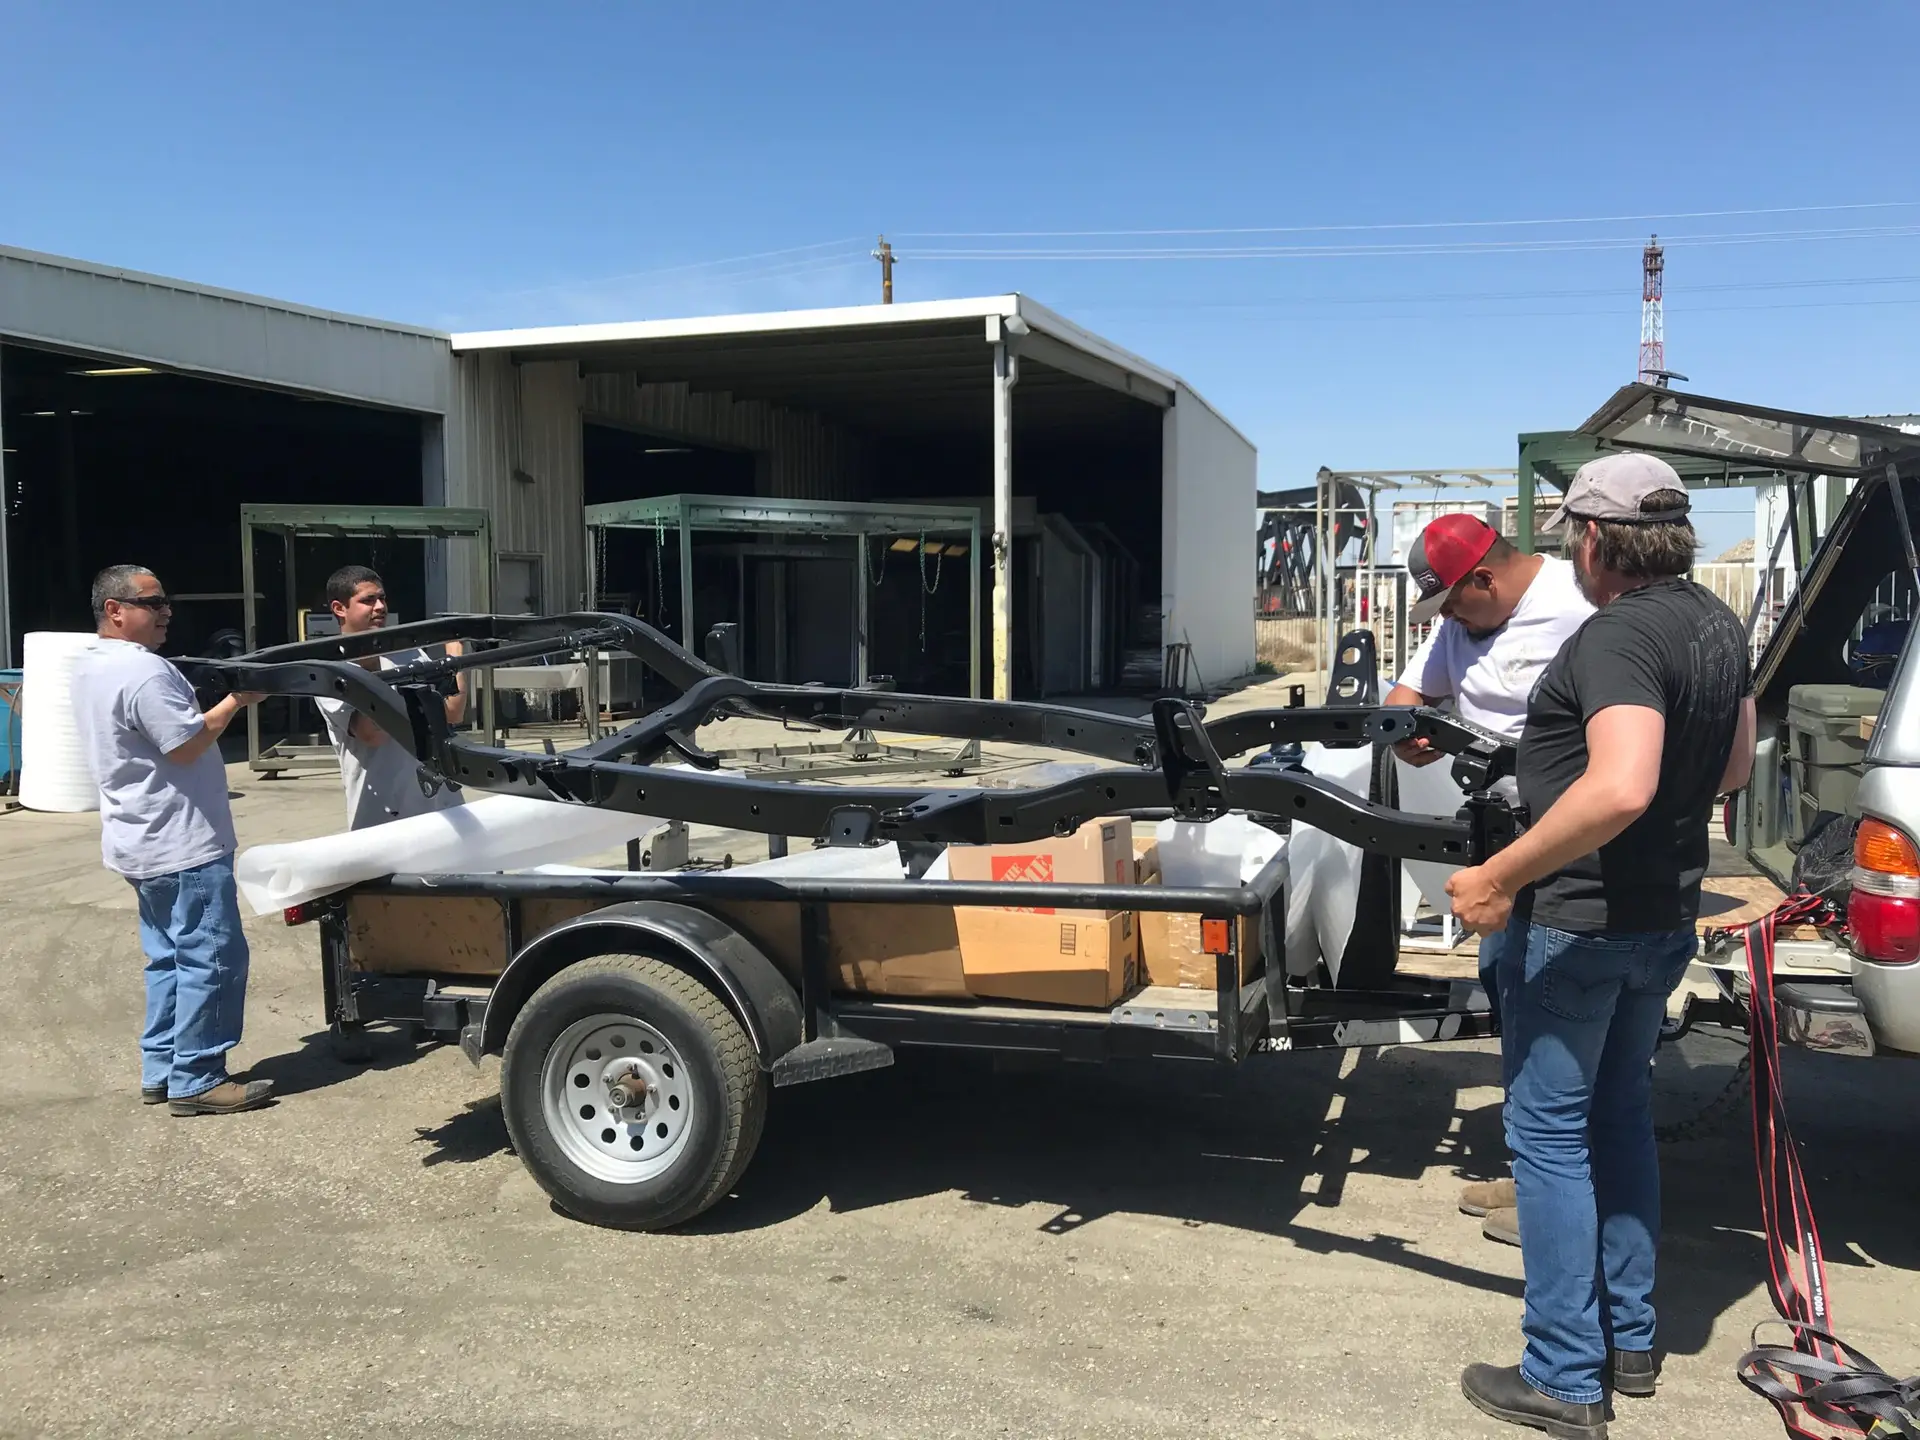
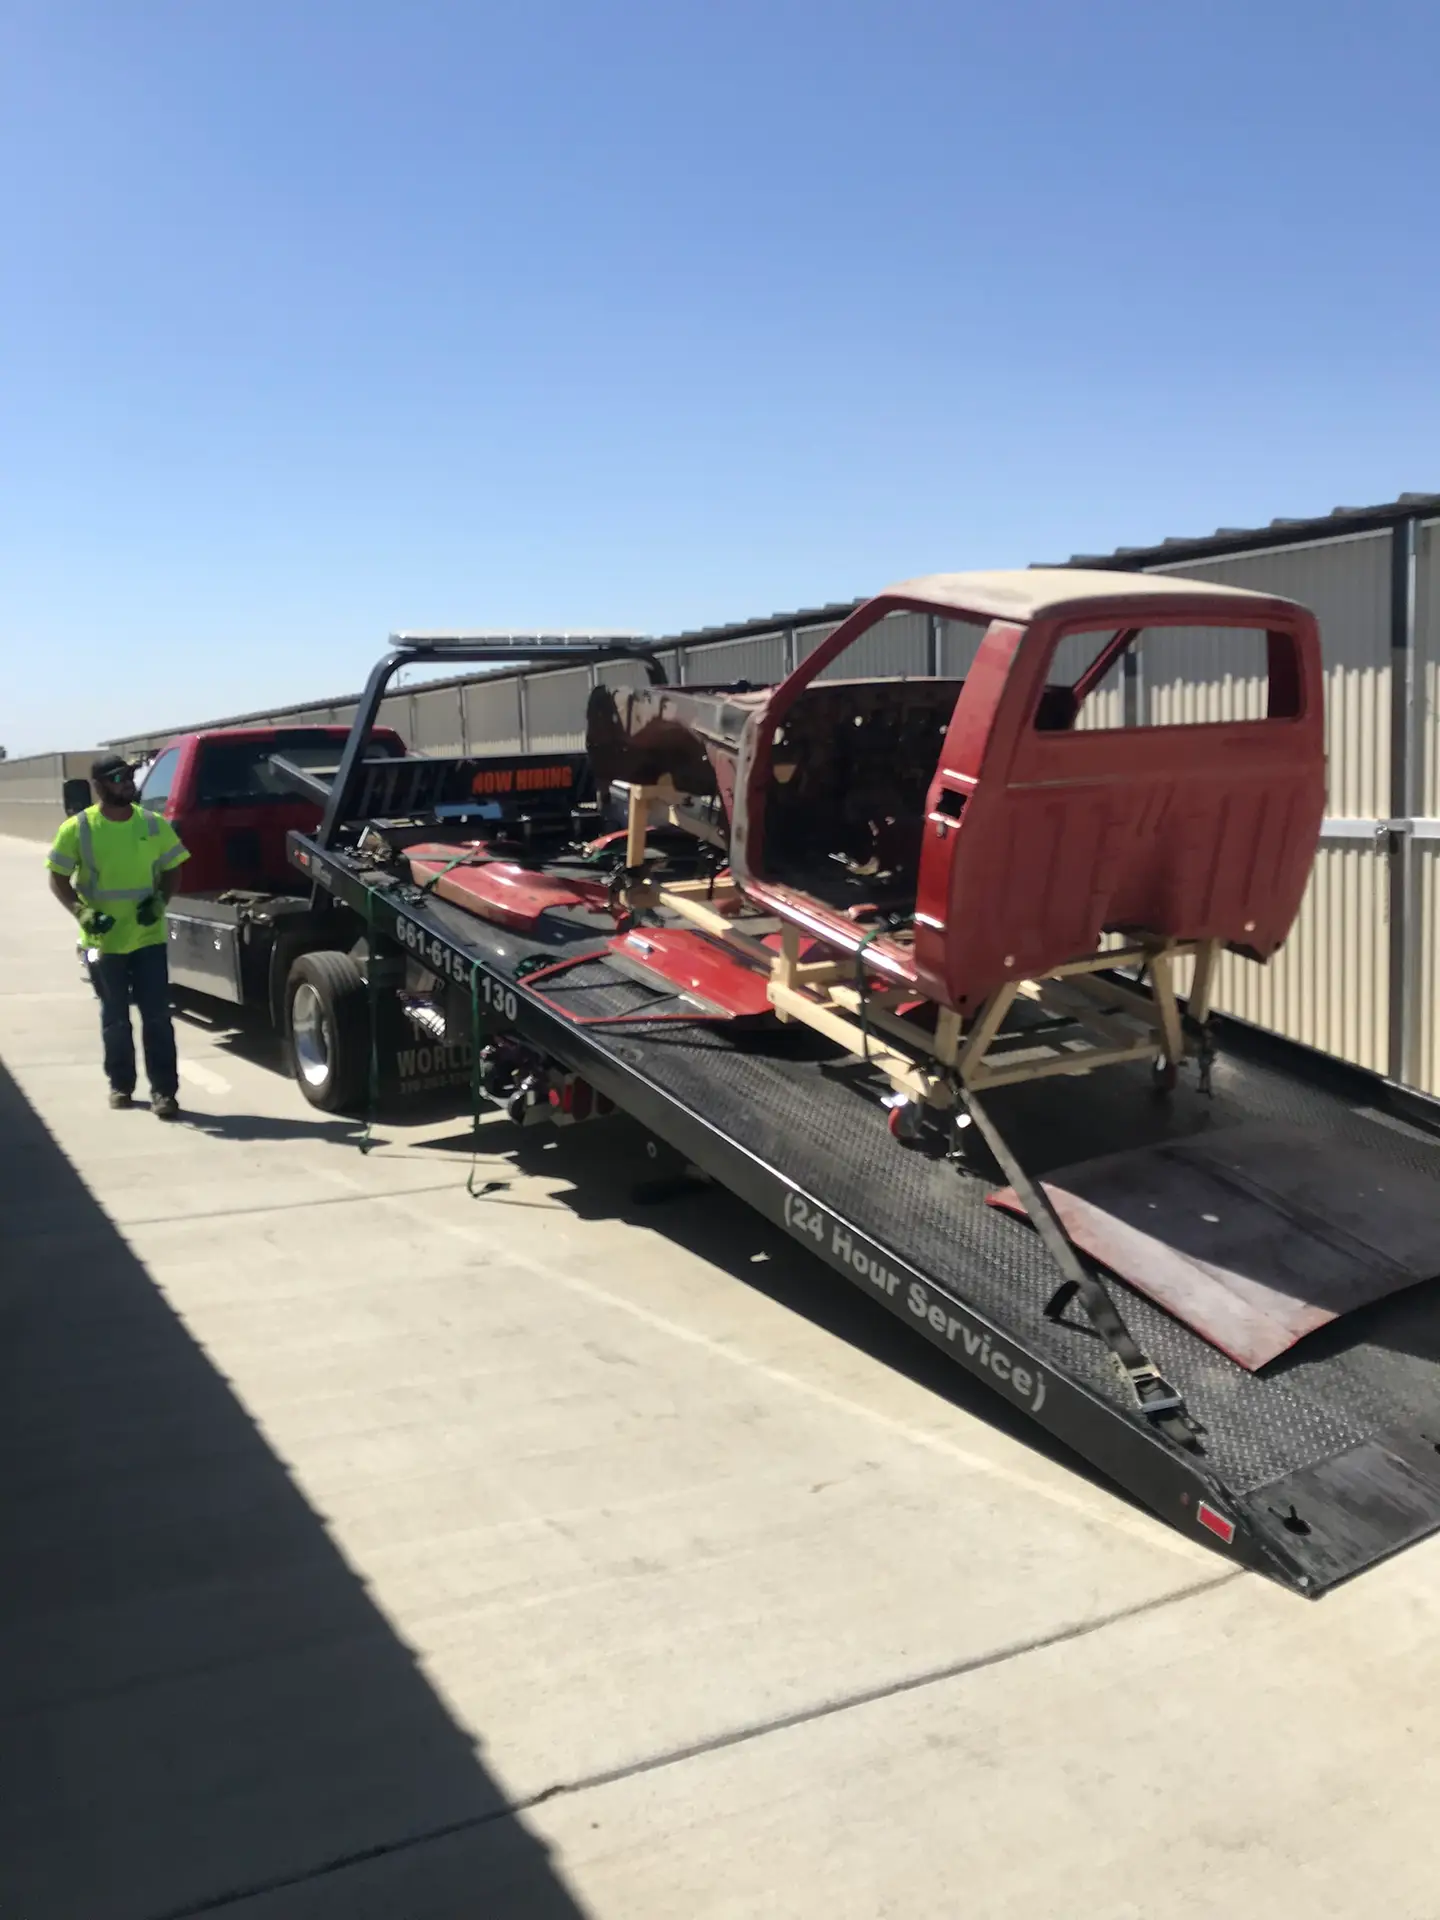
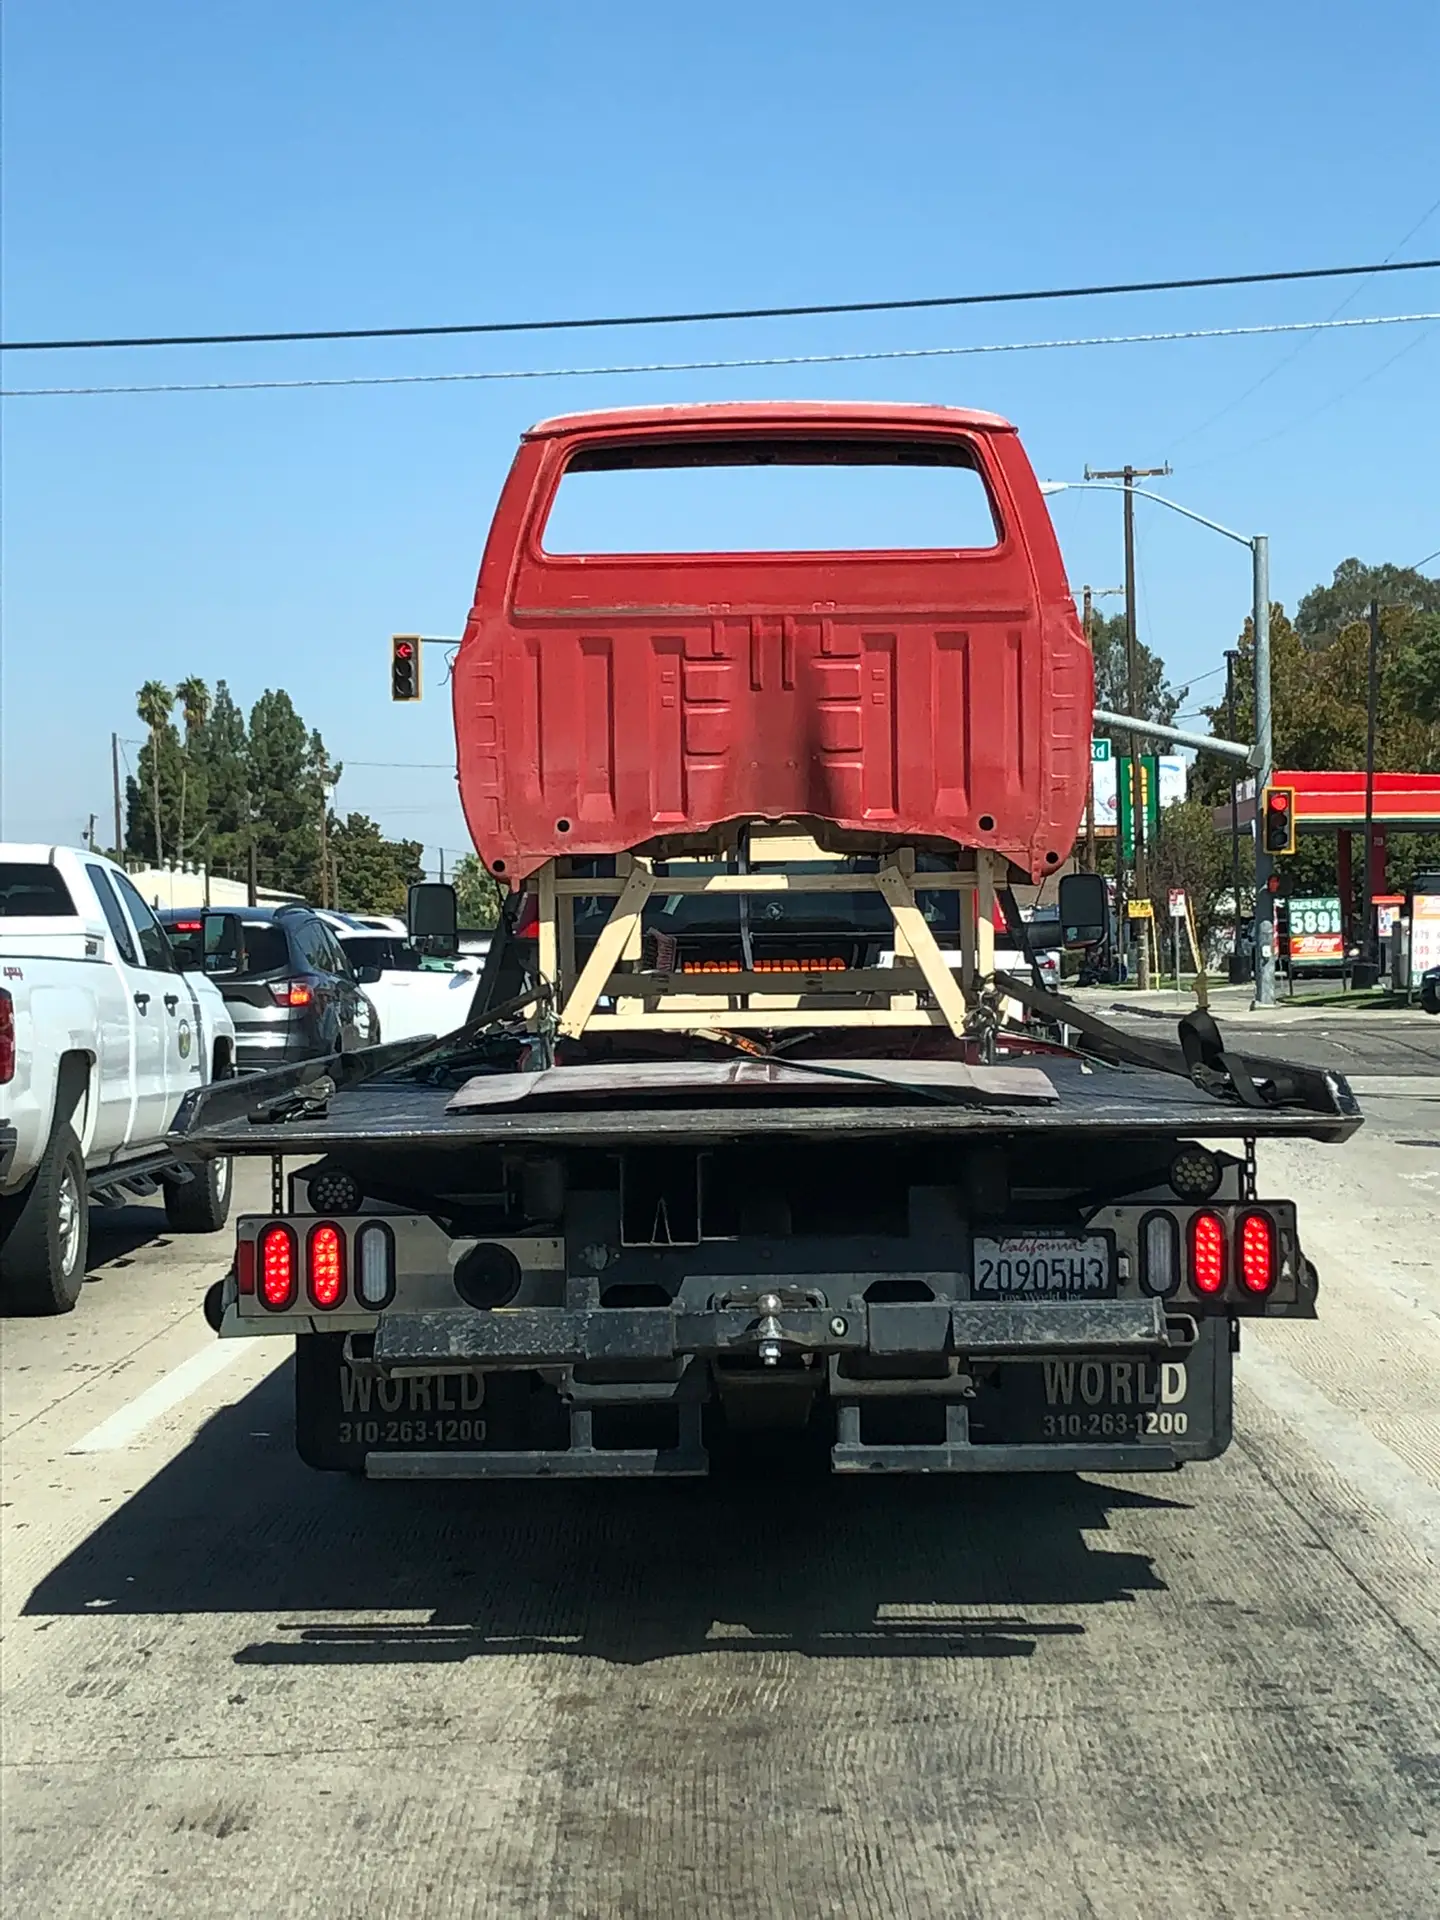
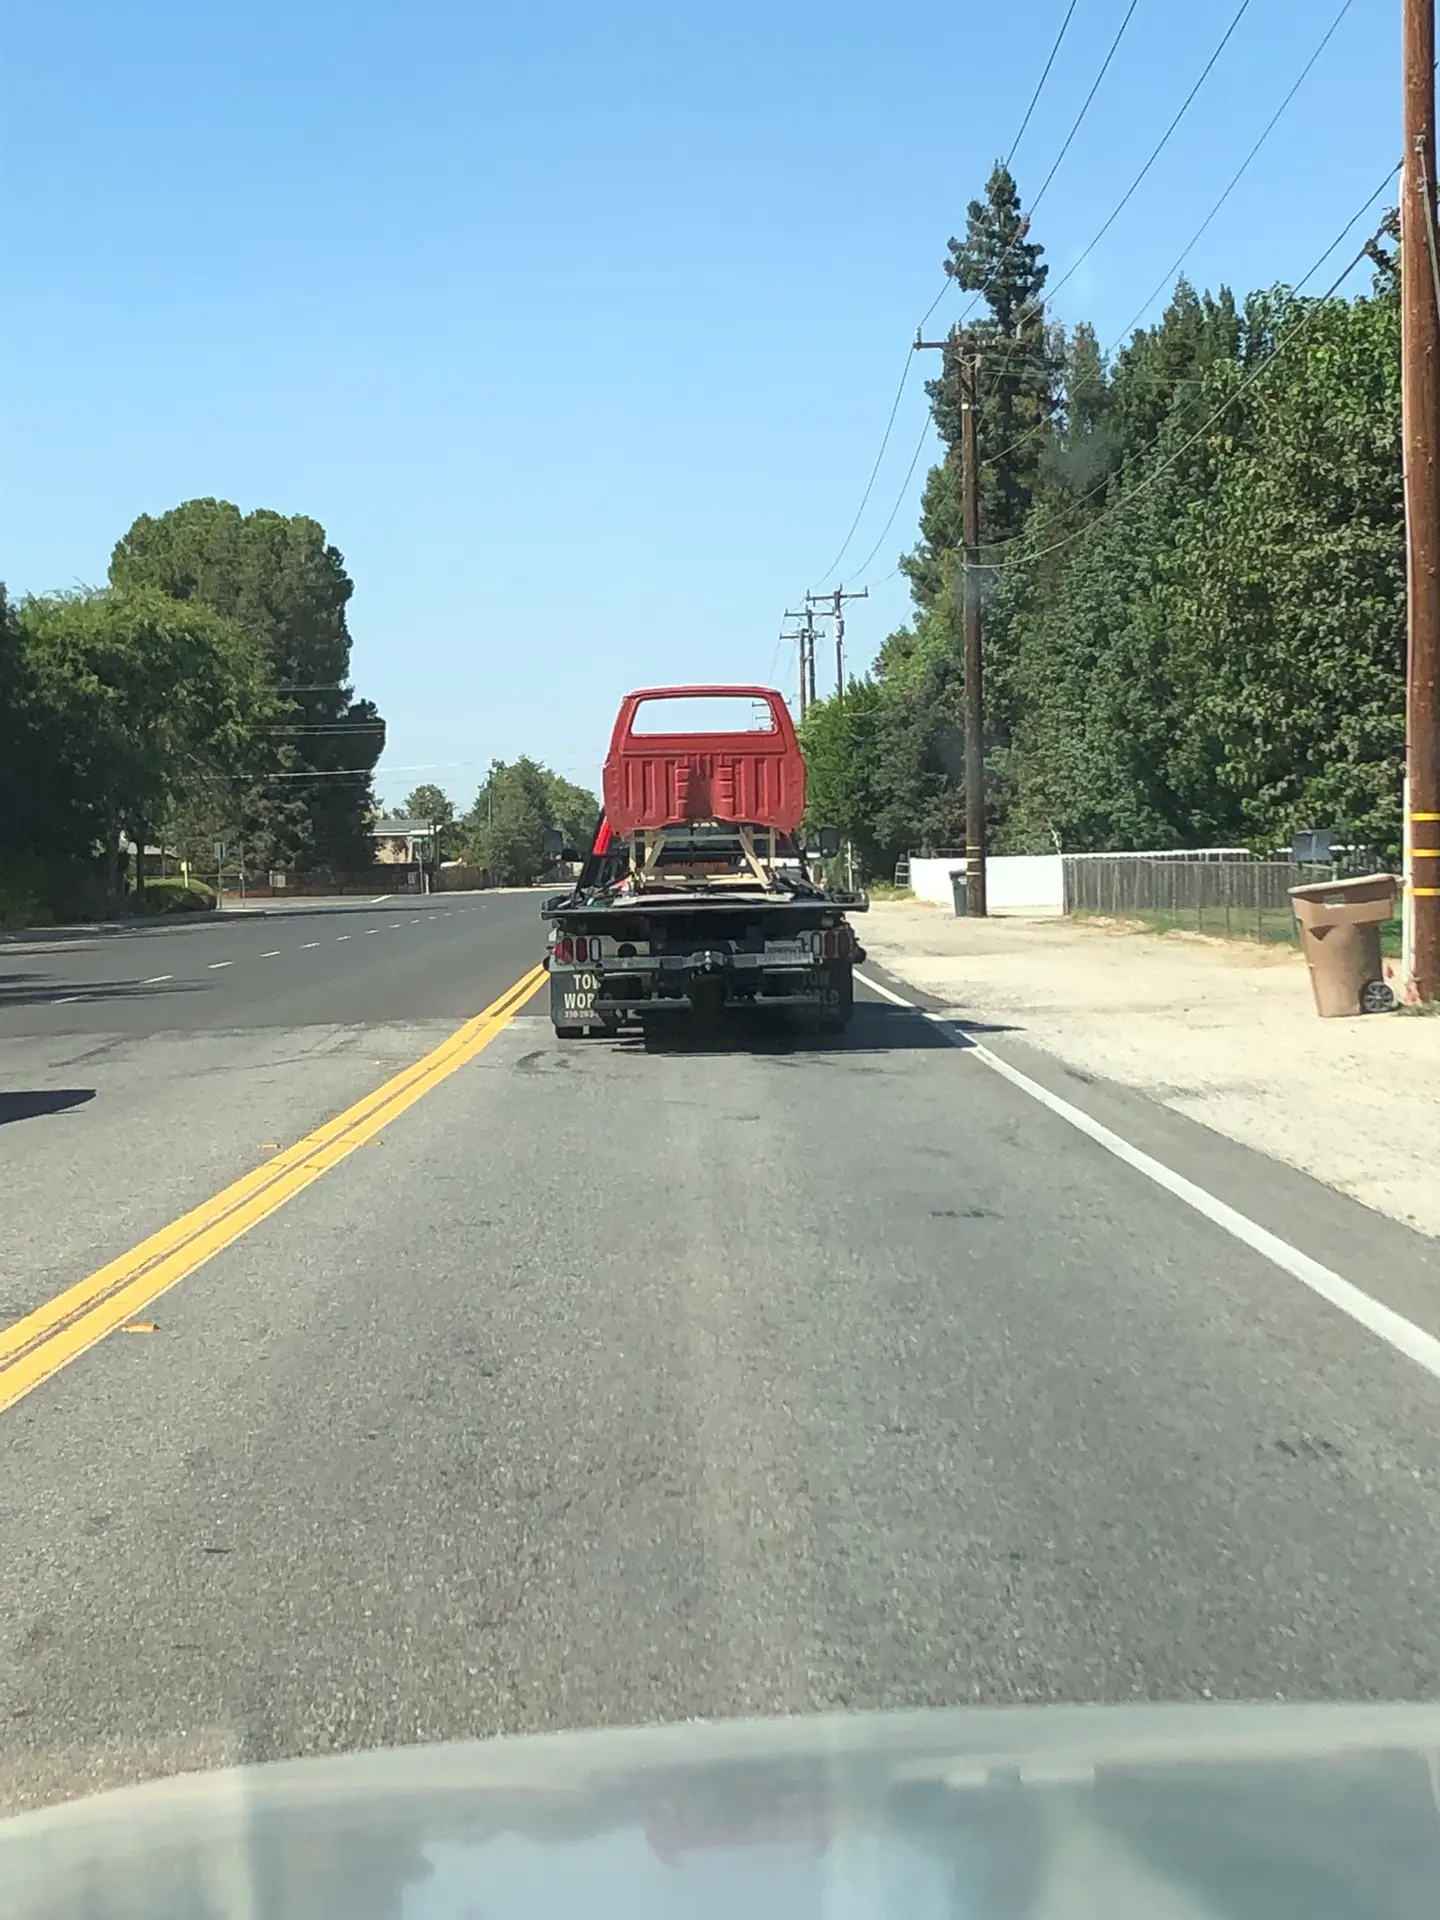
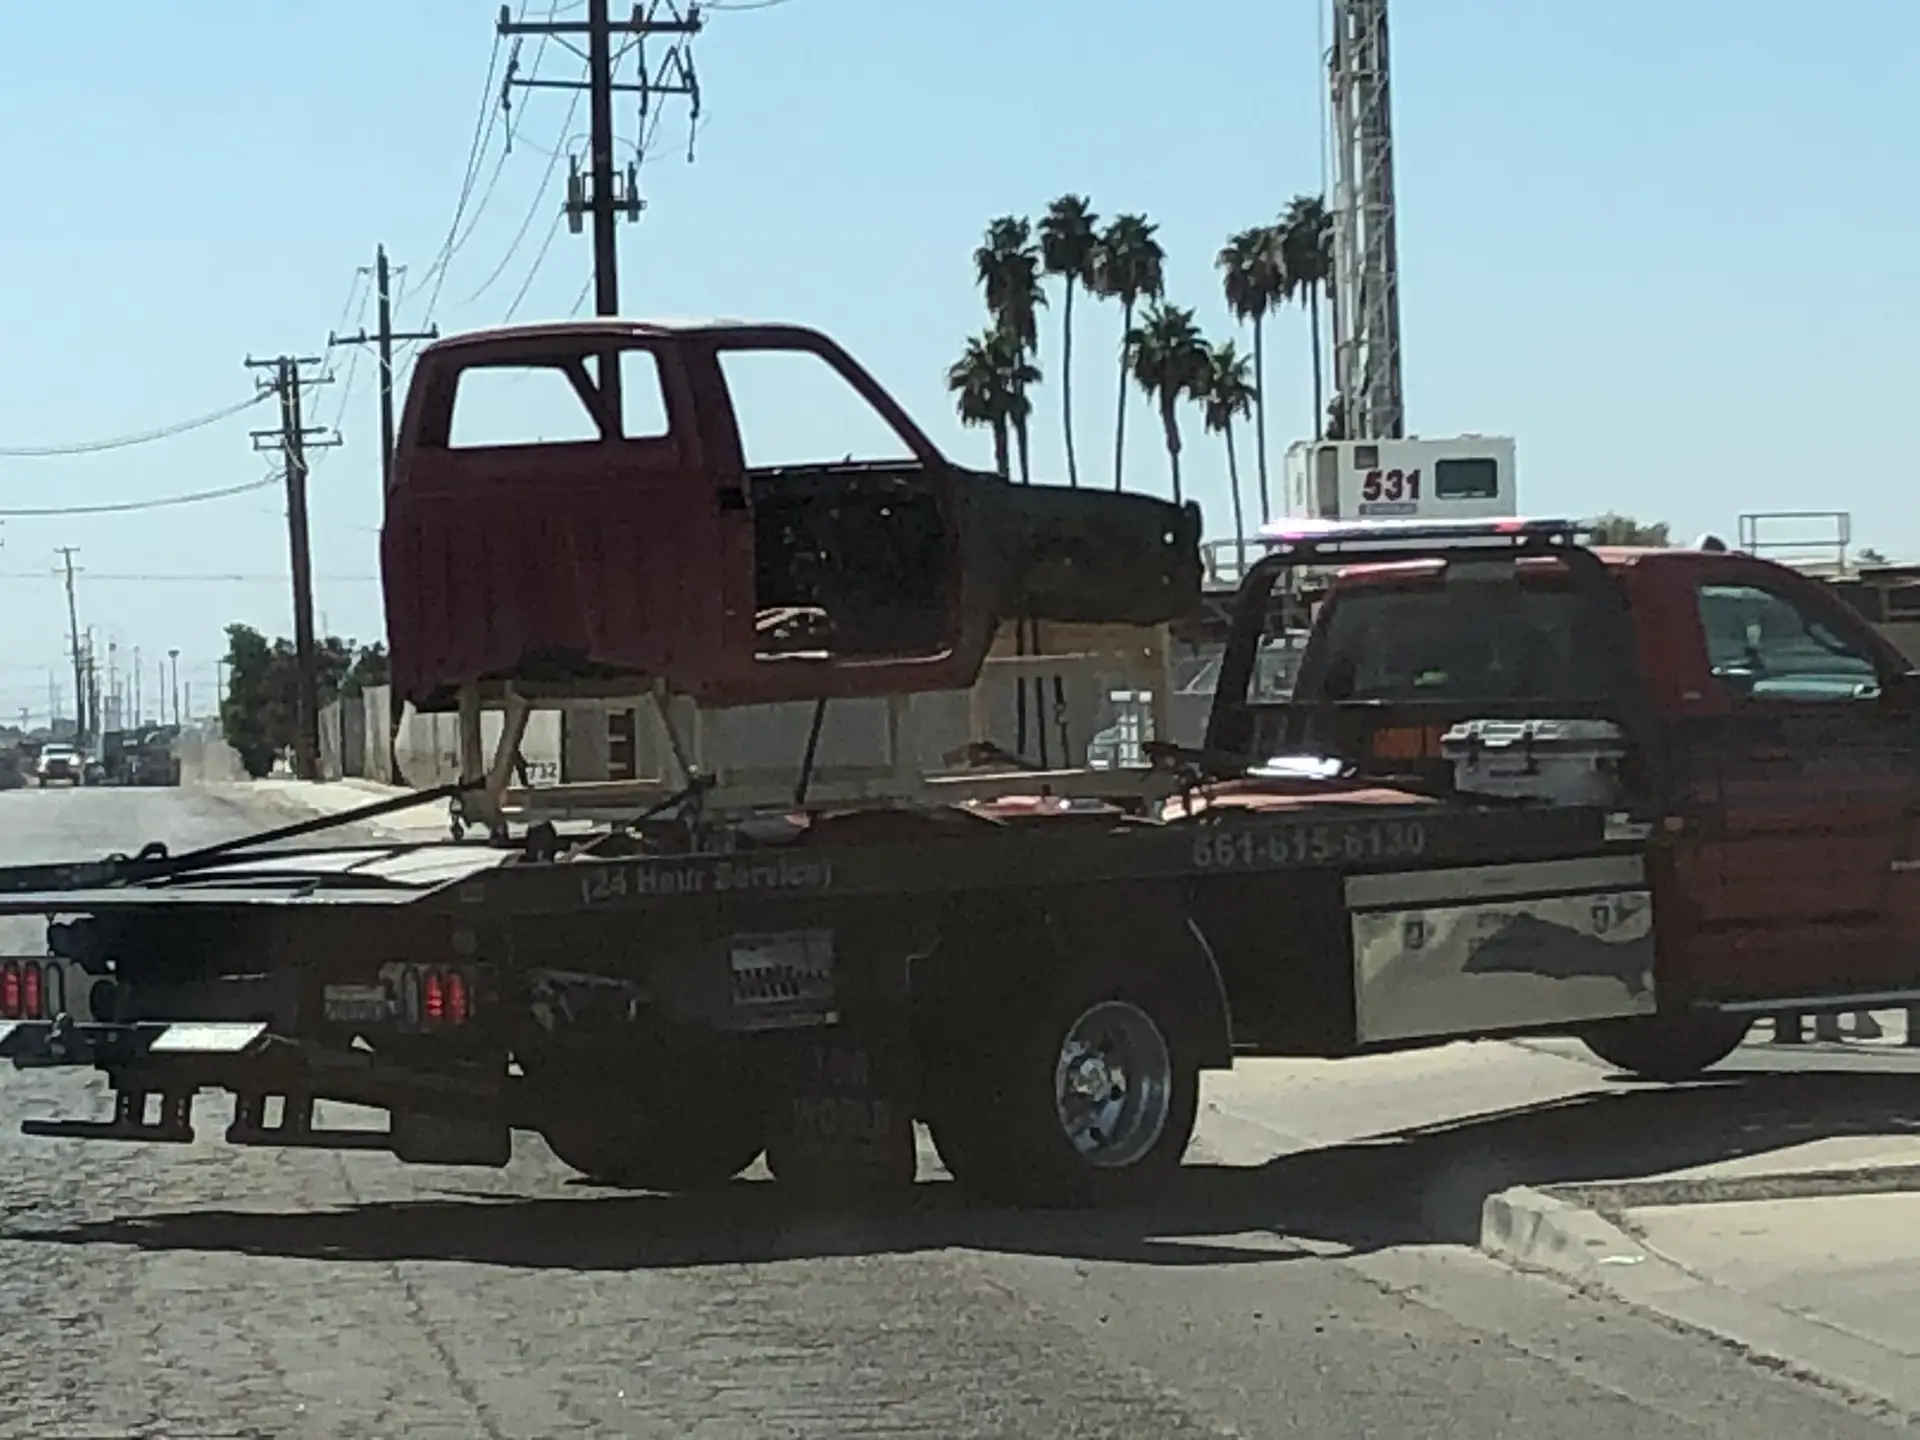
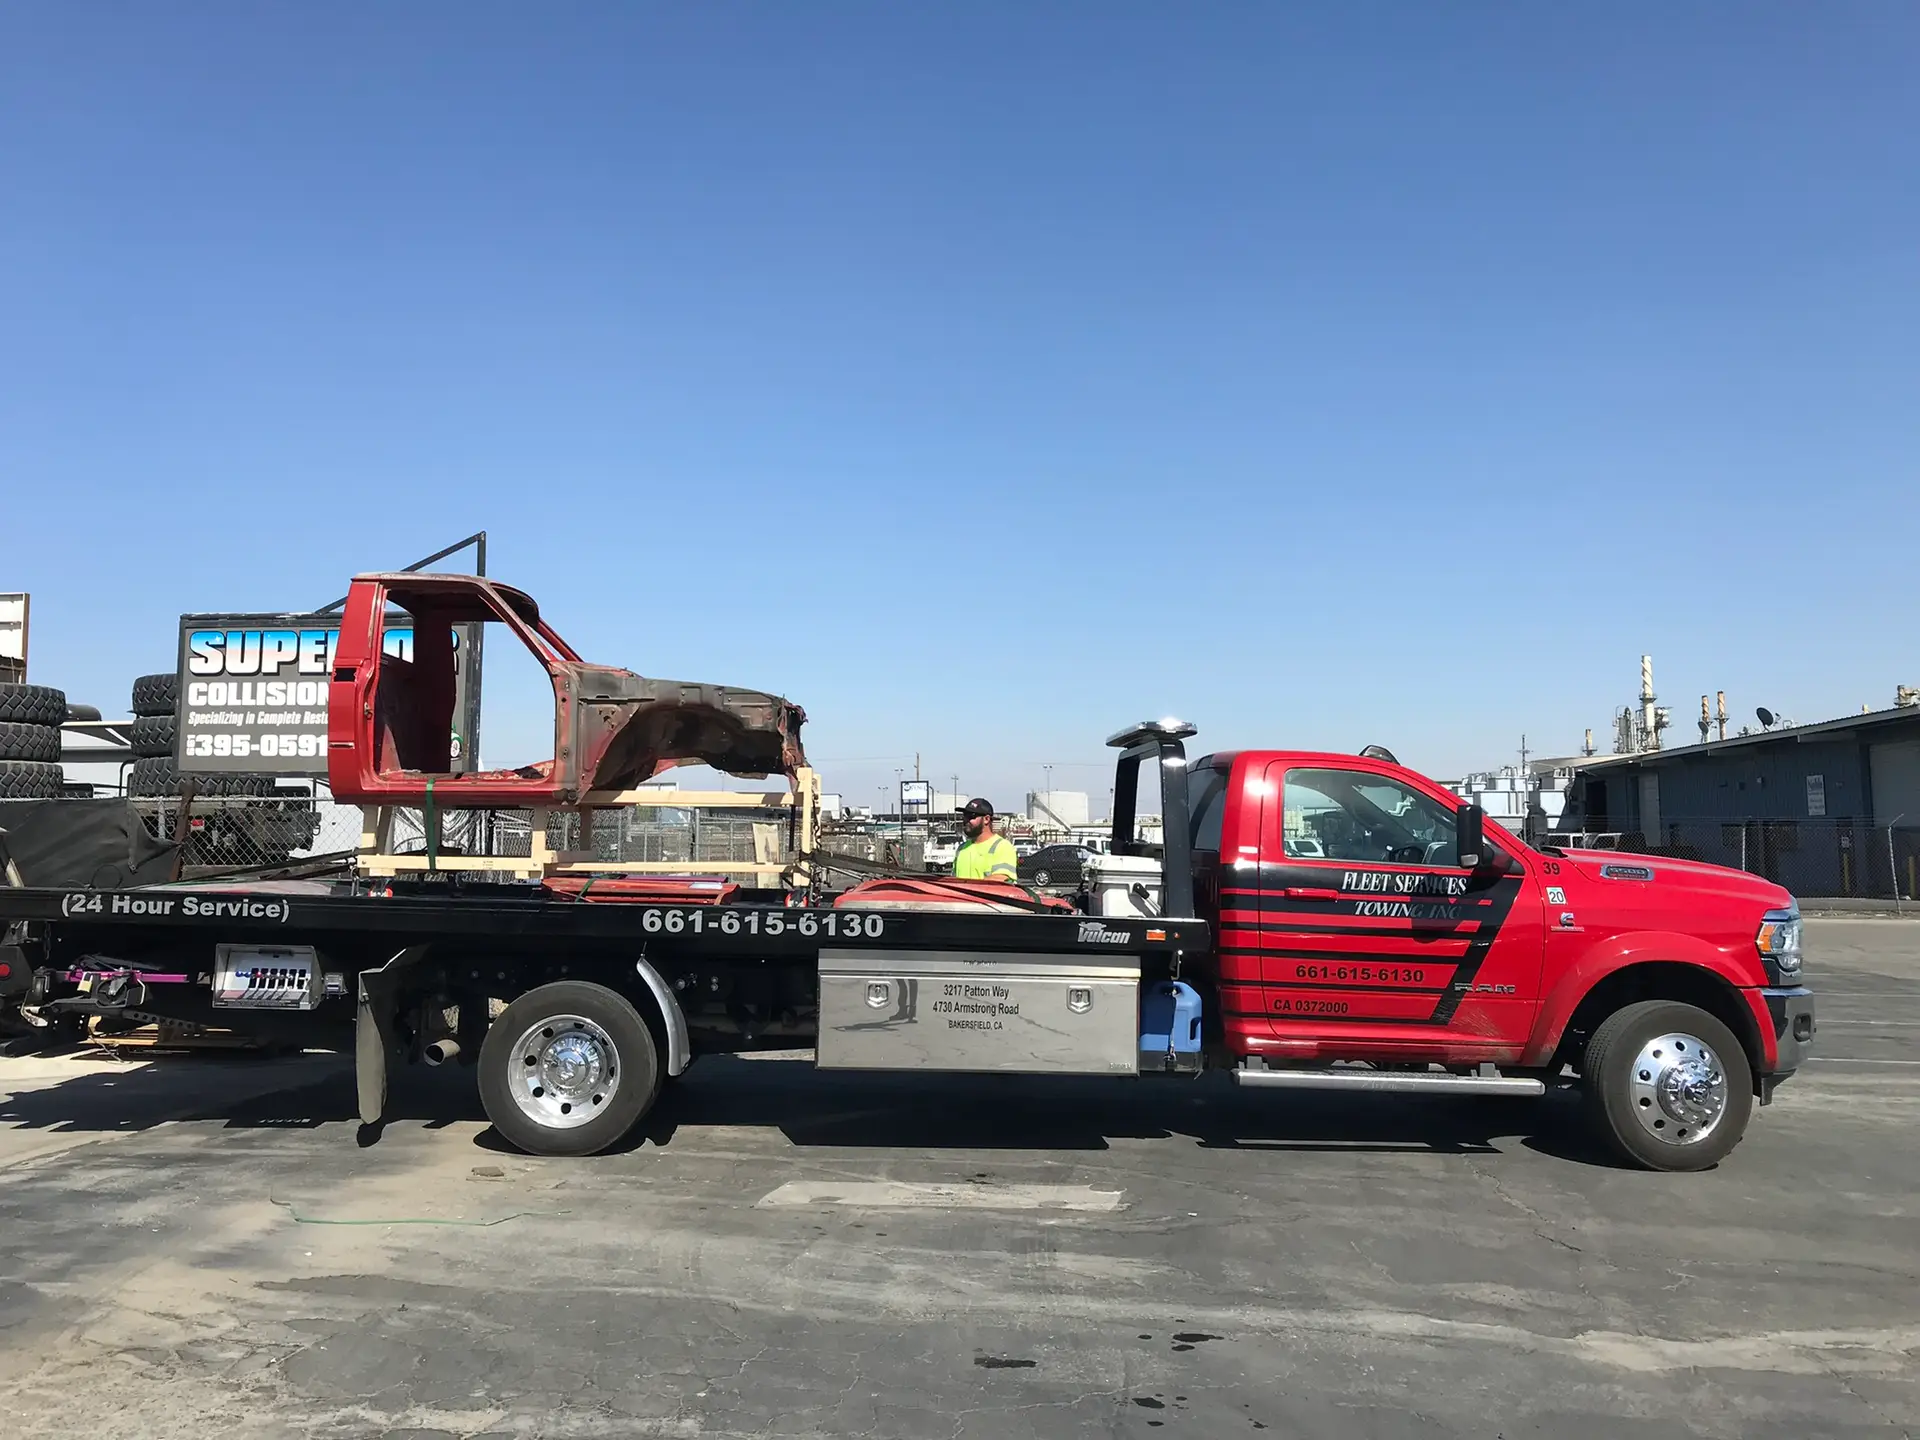
In August we moved the cab to Alex’s shop. Our little trailer was in Los Osos and we couldn’t fit the cab on a U-Haul trailer (we tried two different trailers!) because the gate was too narrow so we ended up moving her on a flatbed!
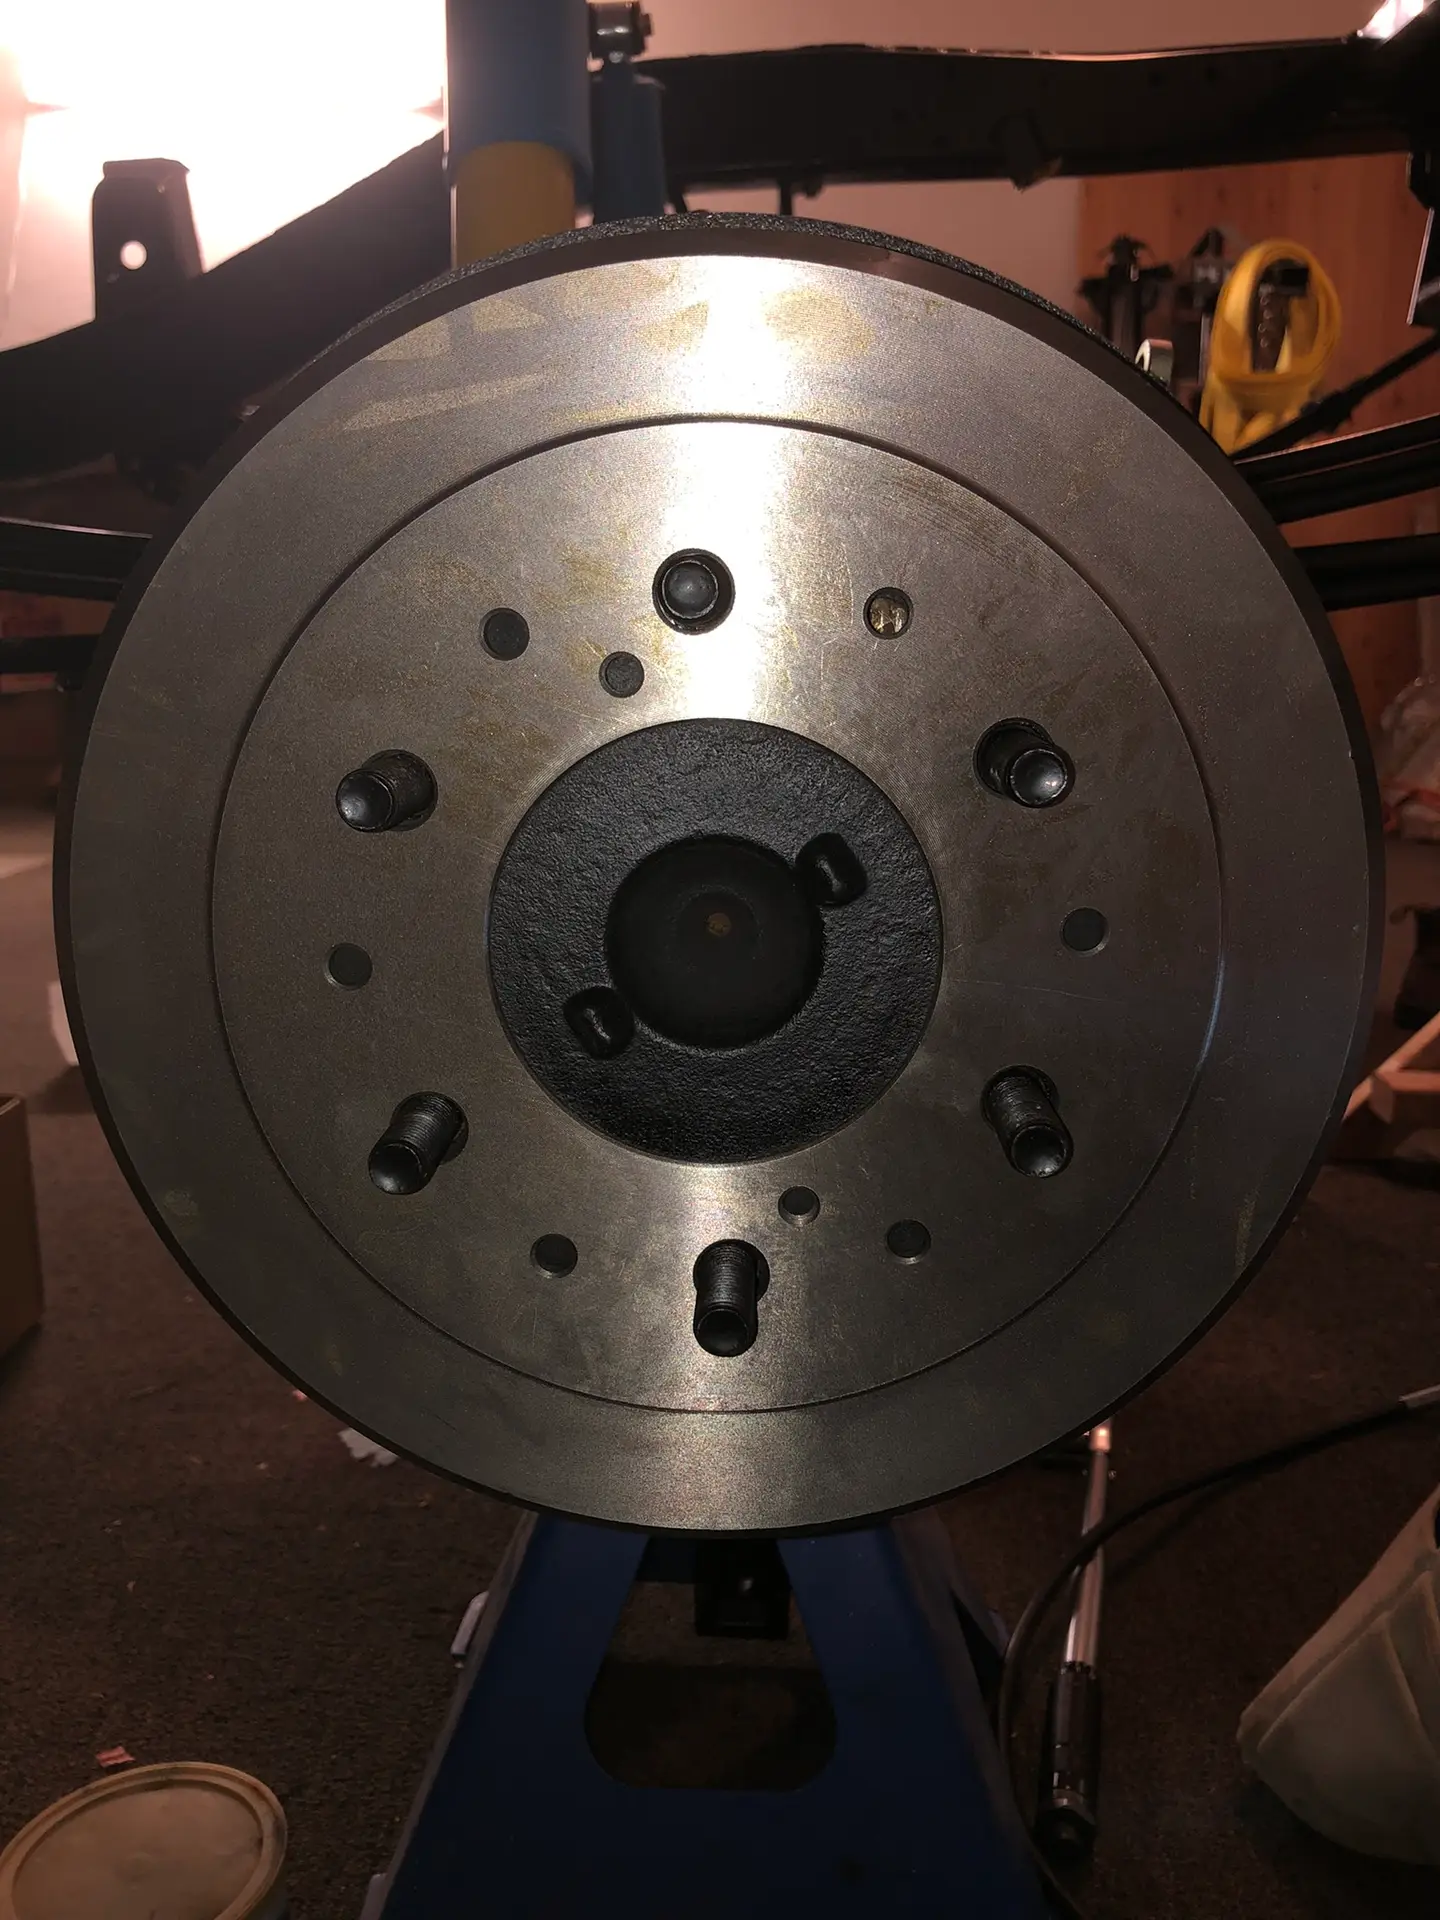
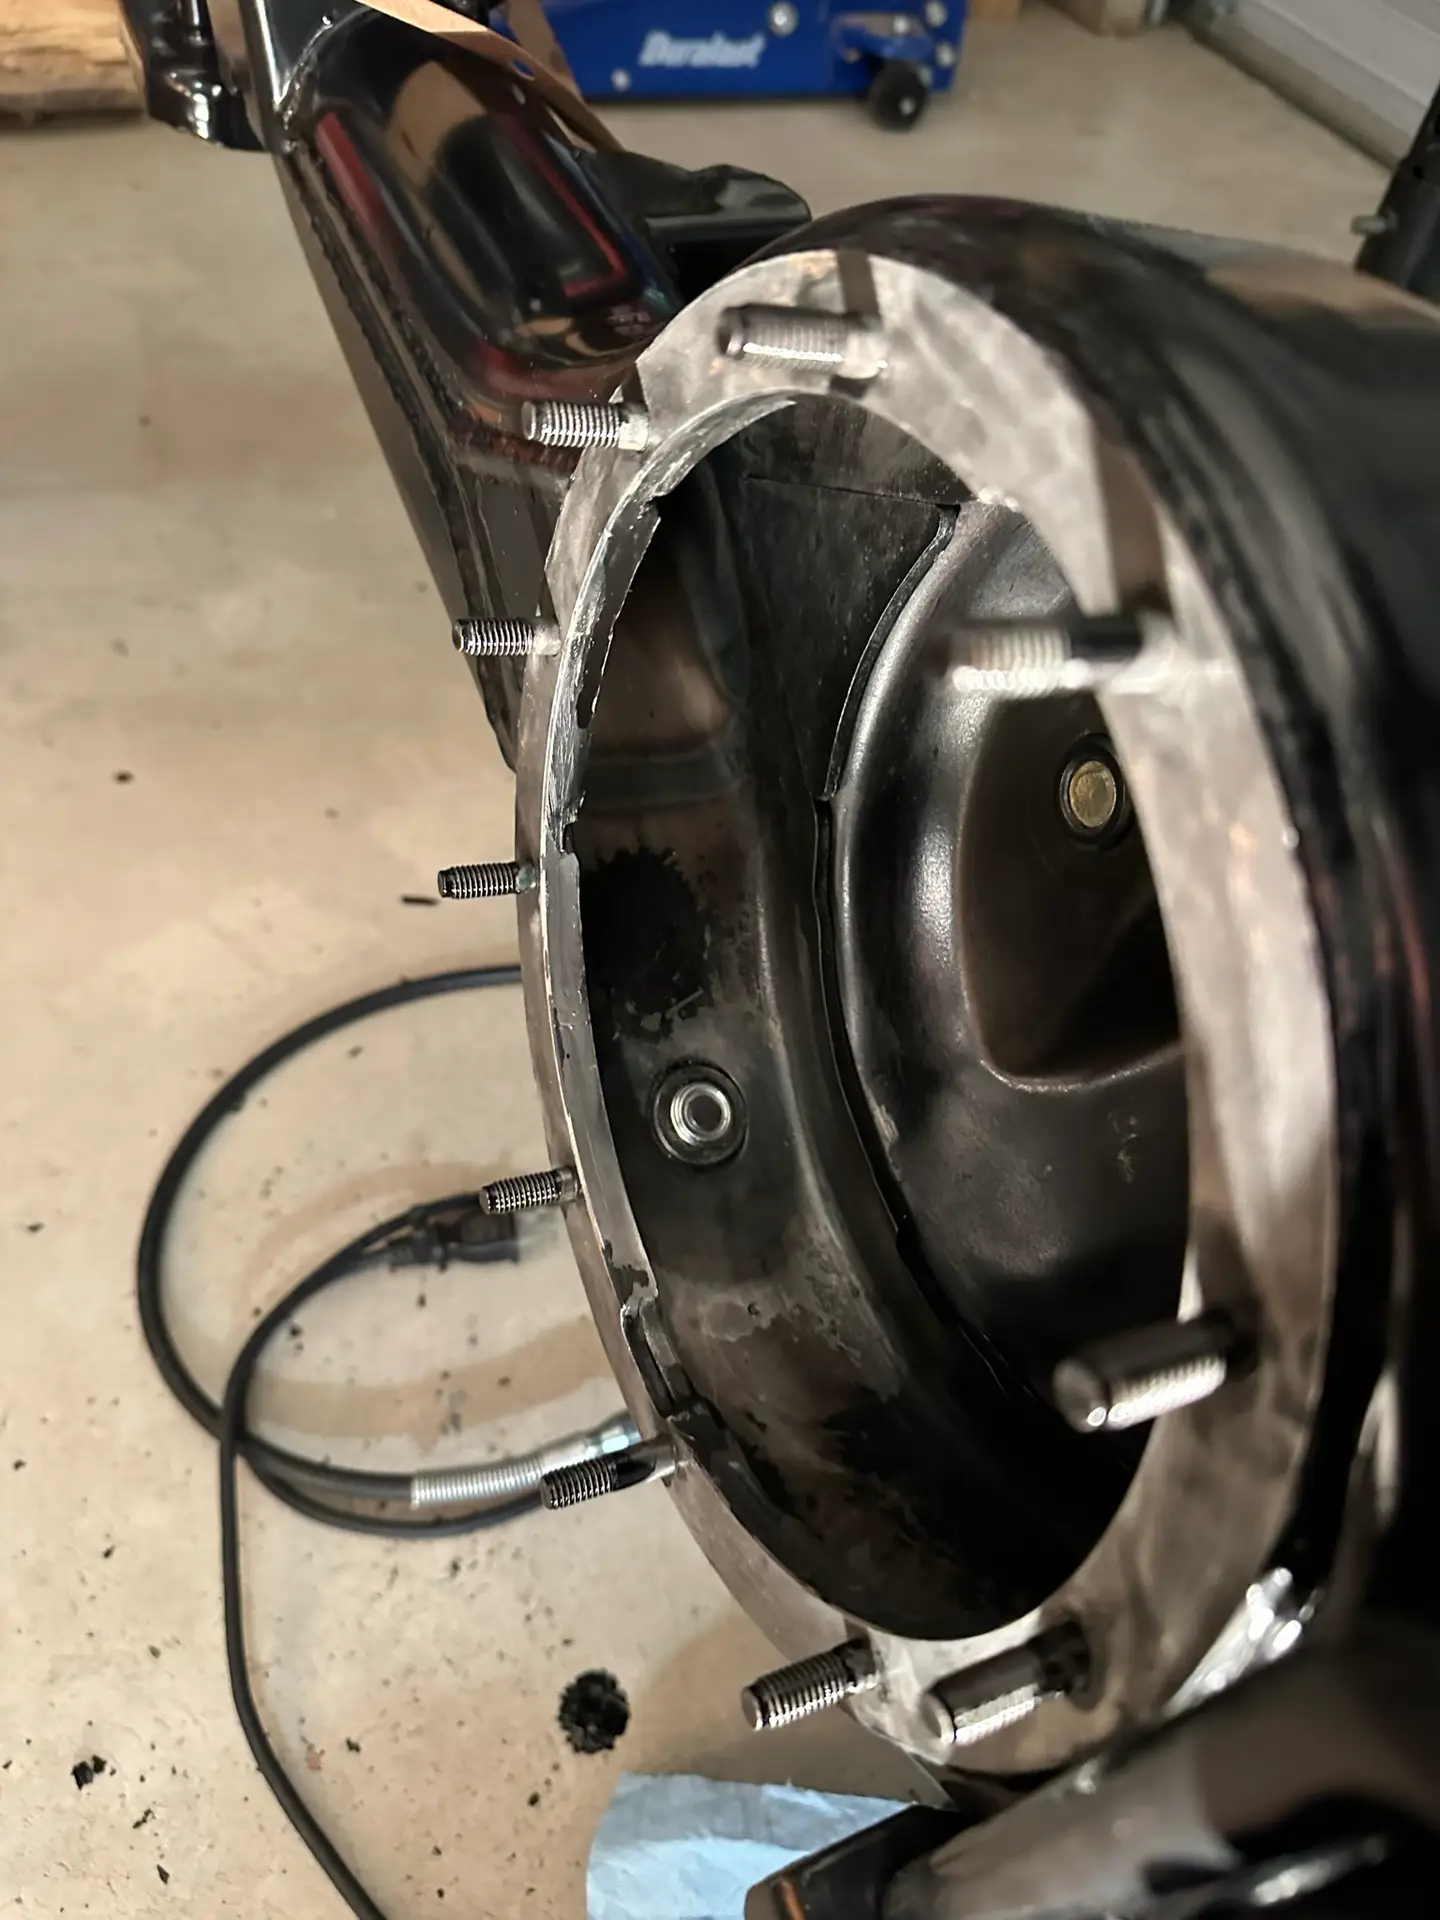
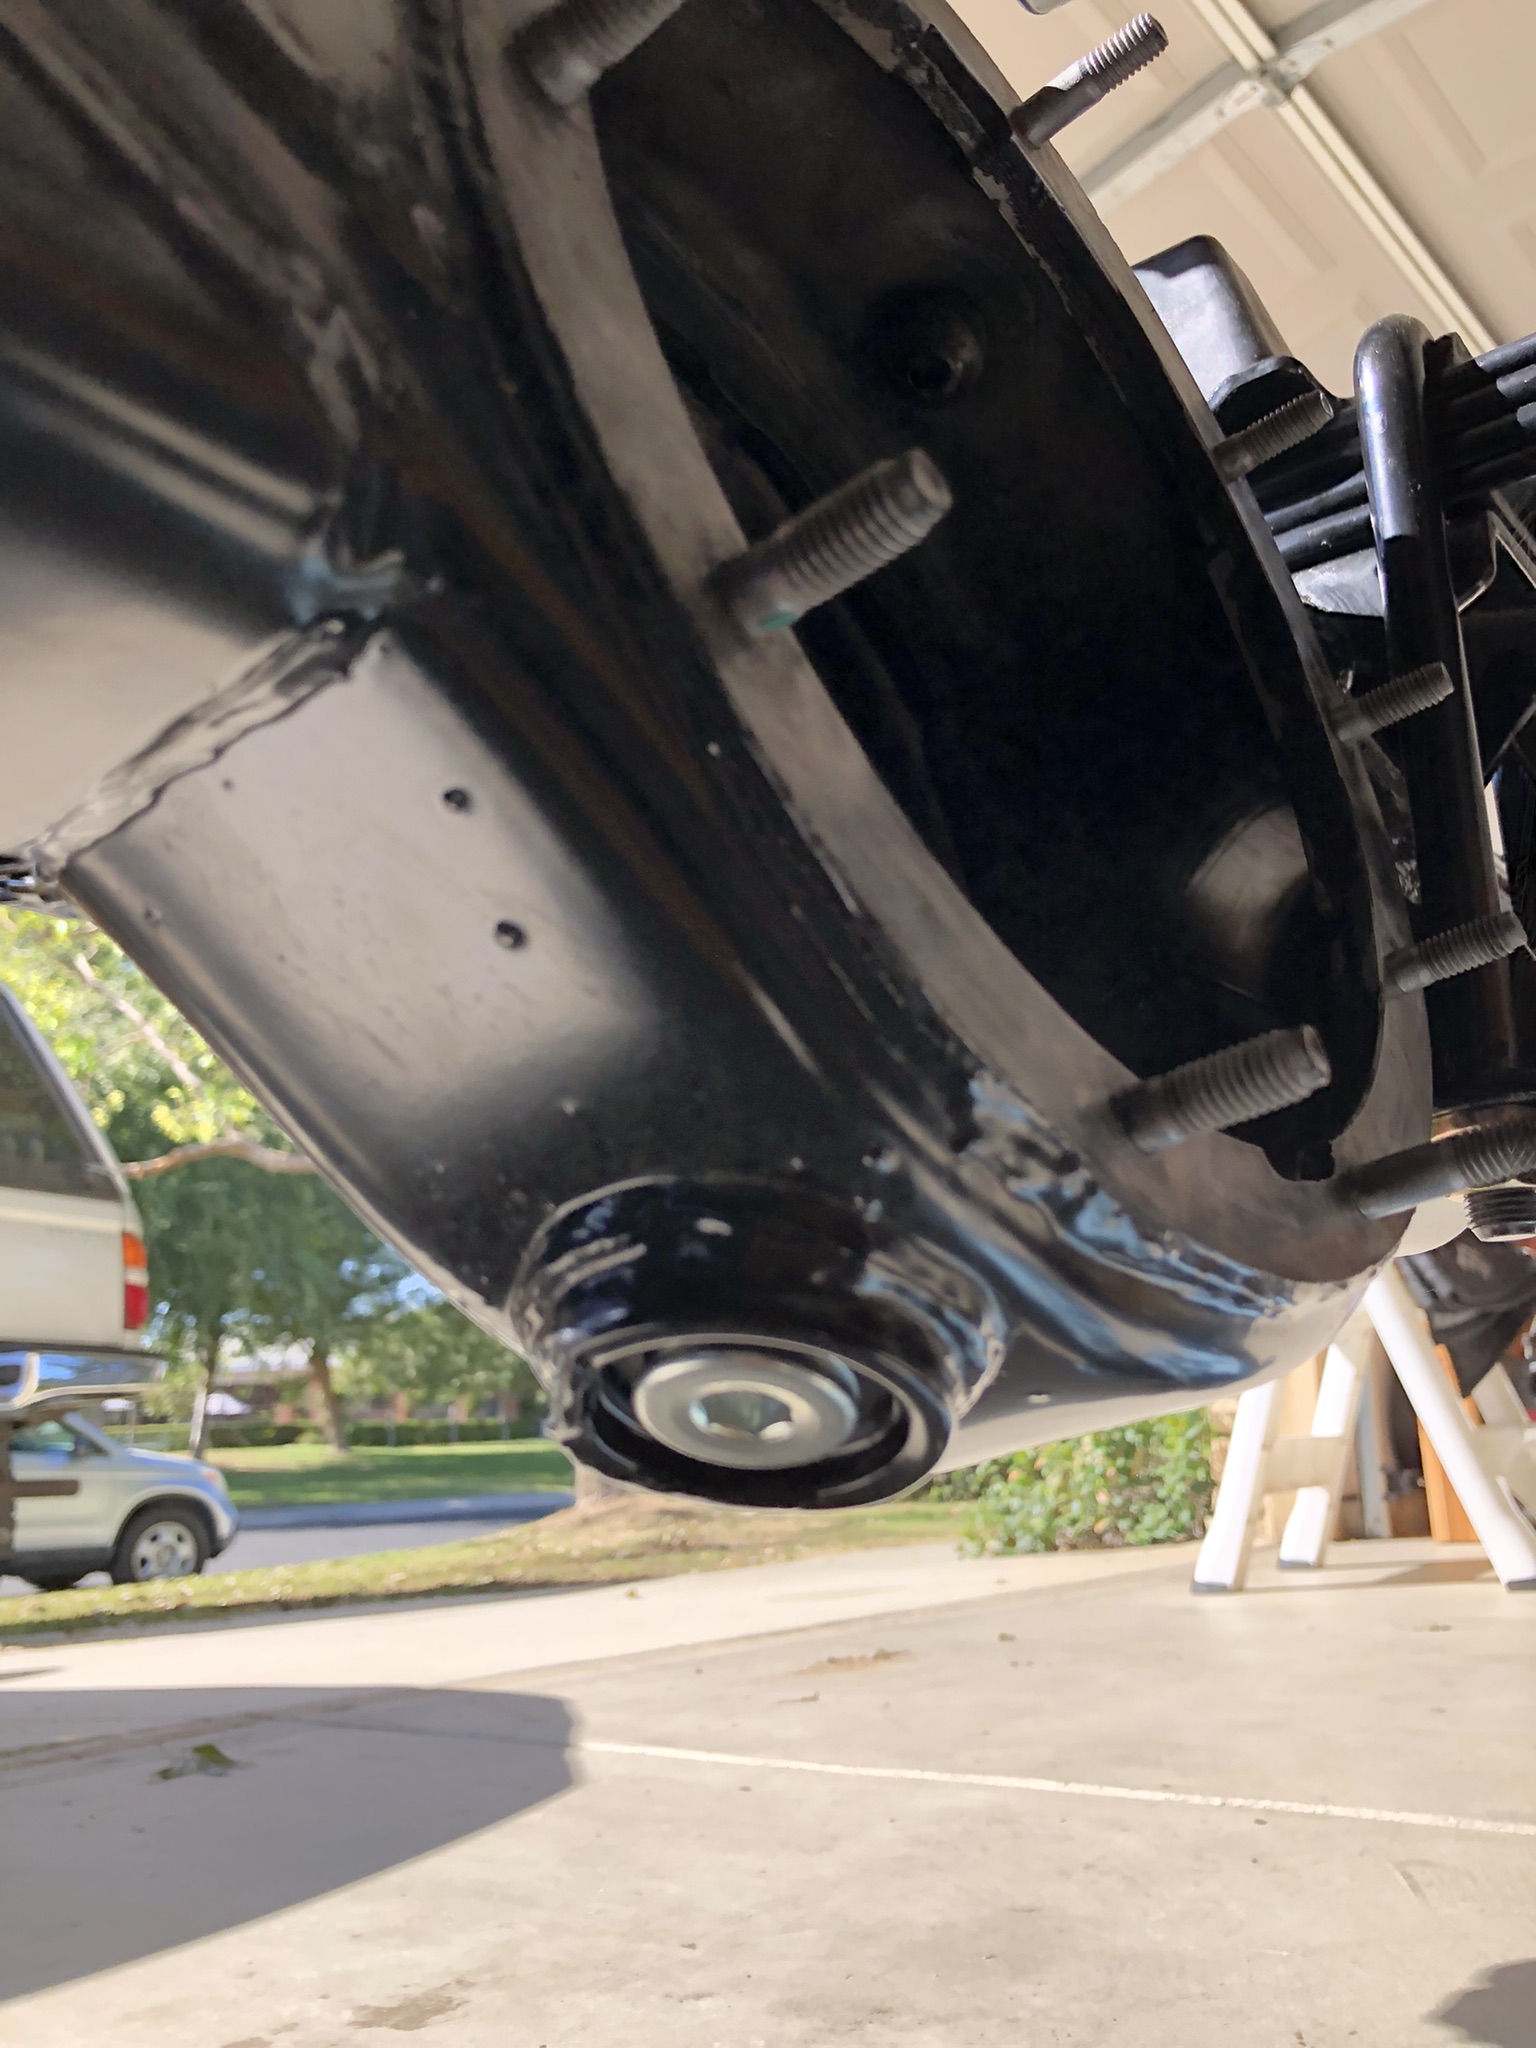
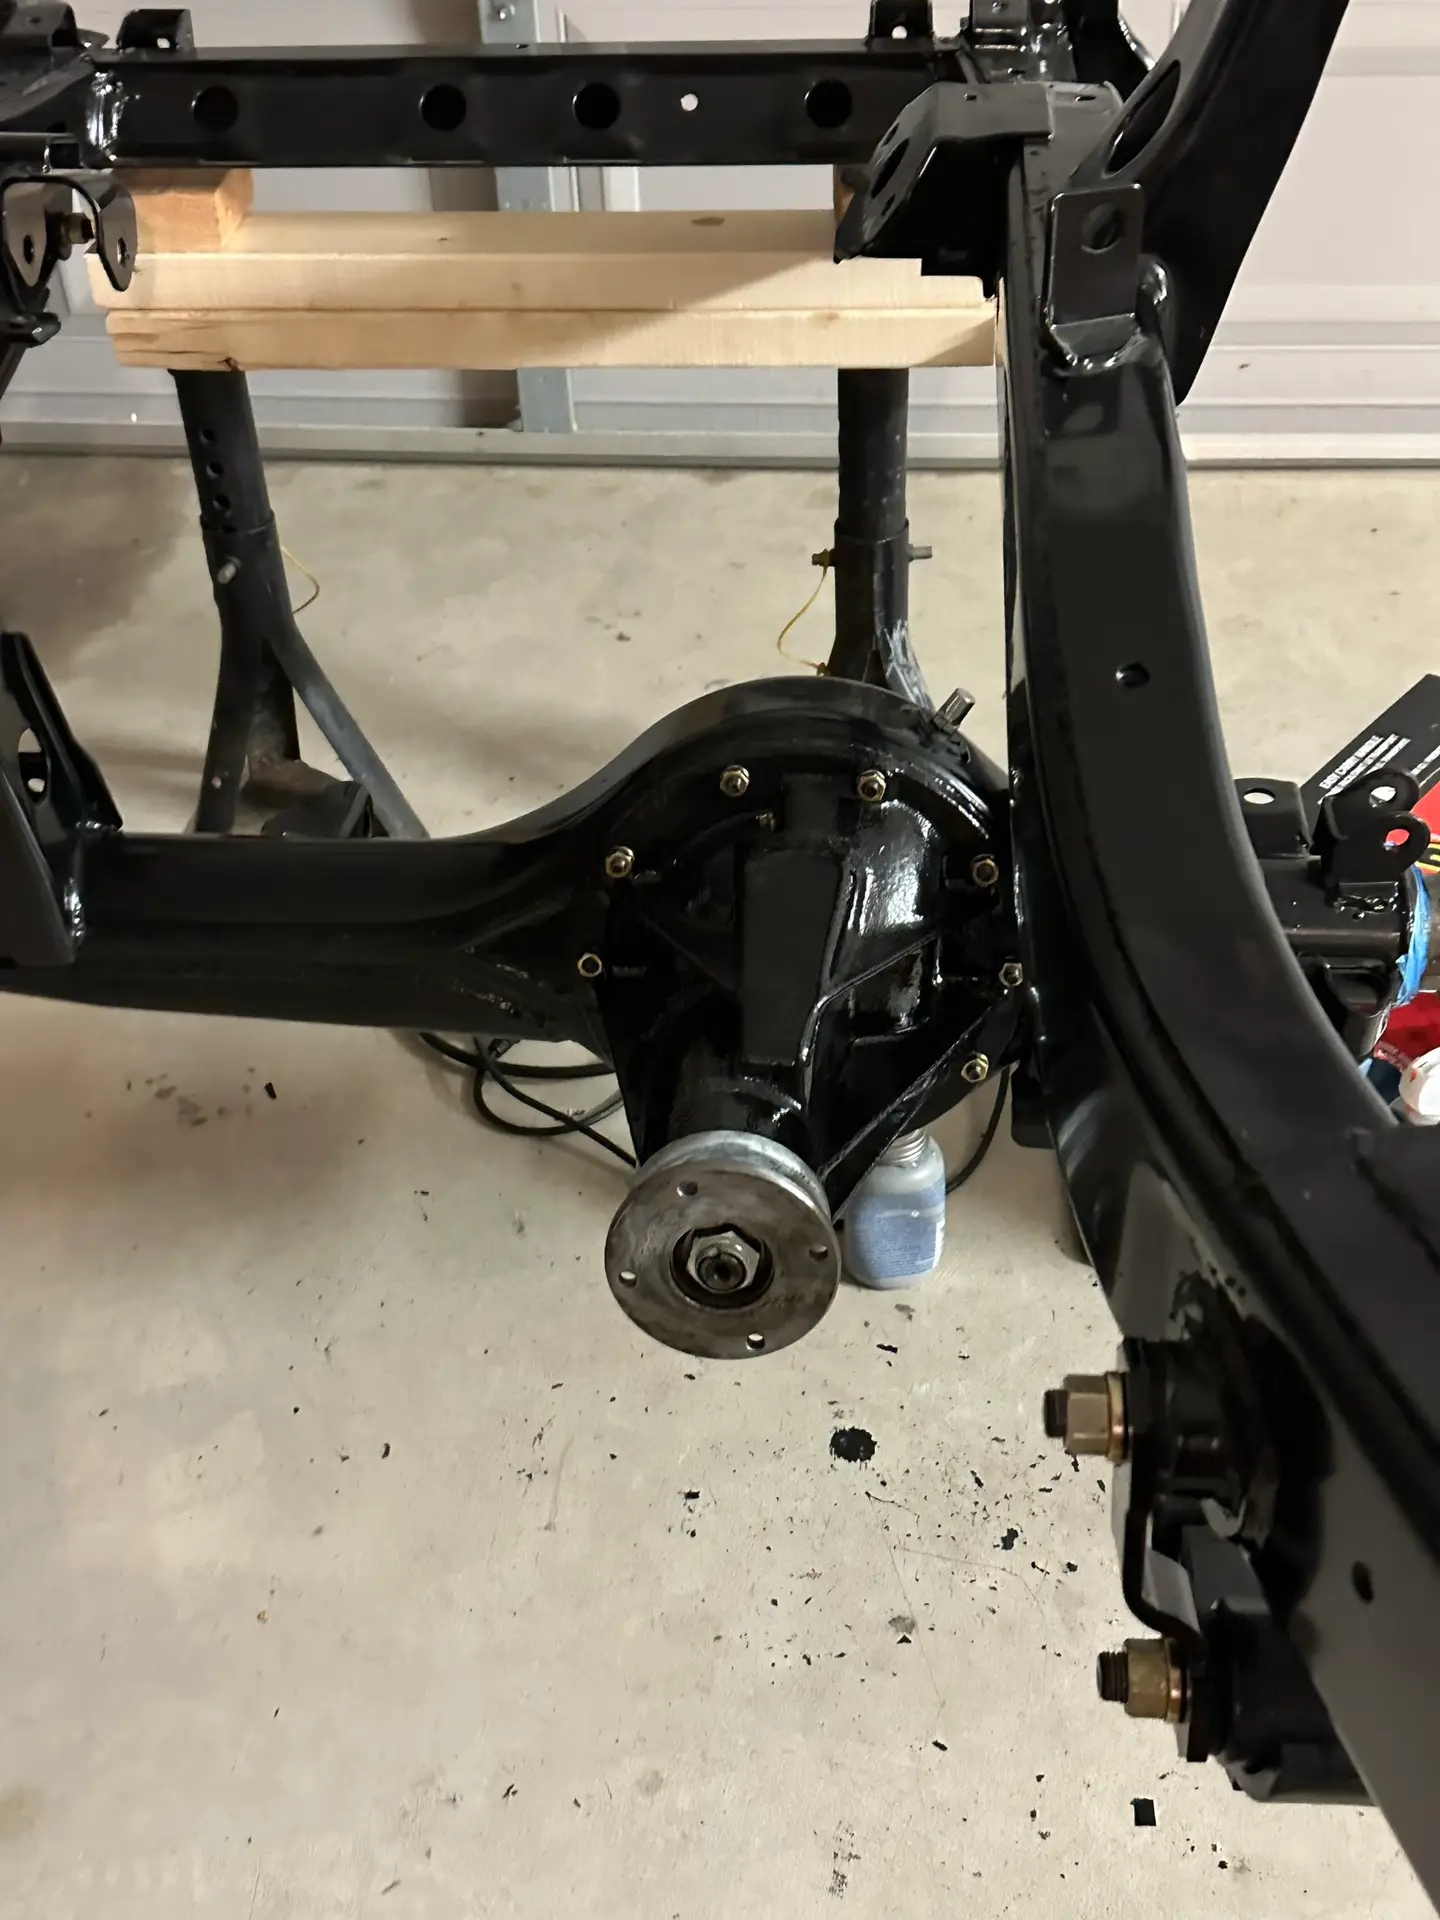
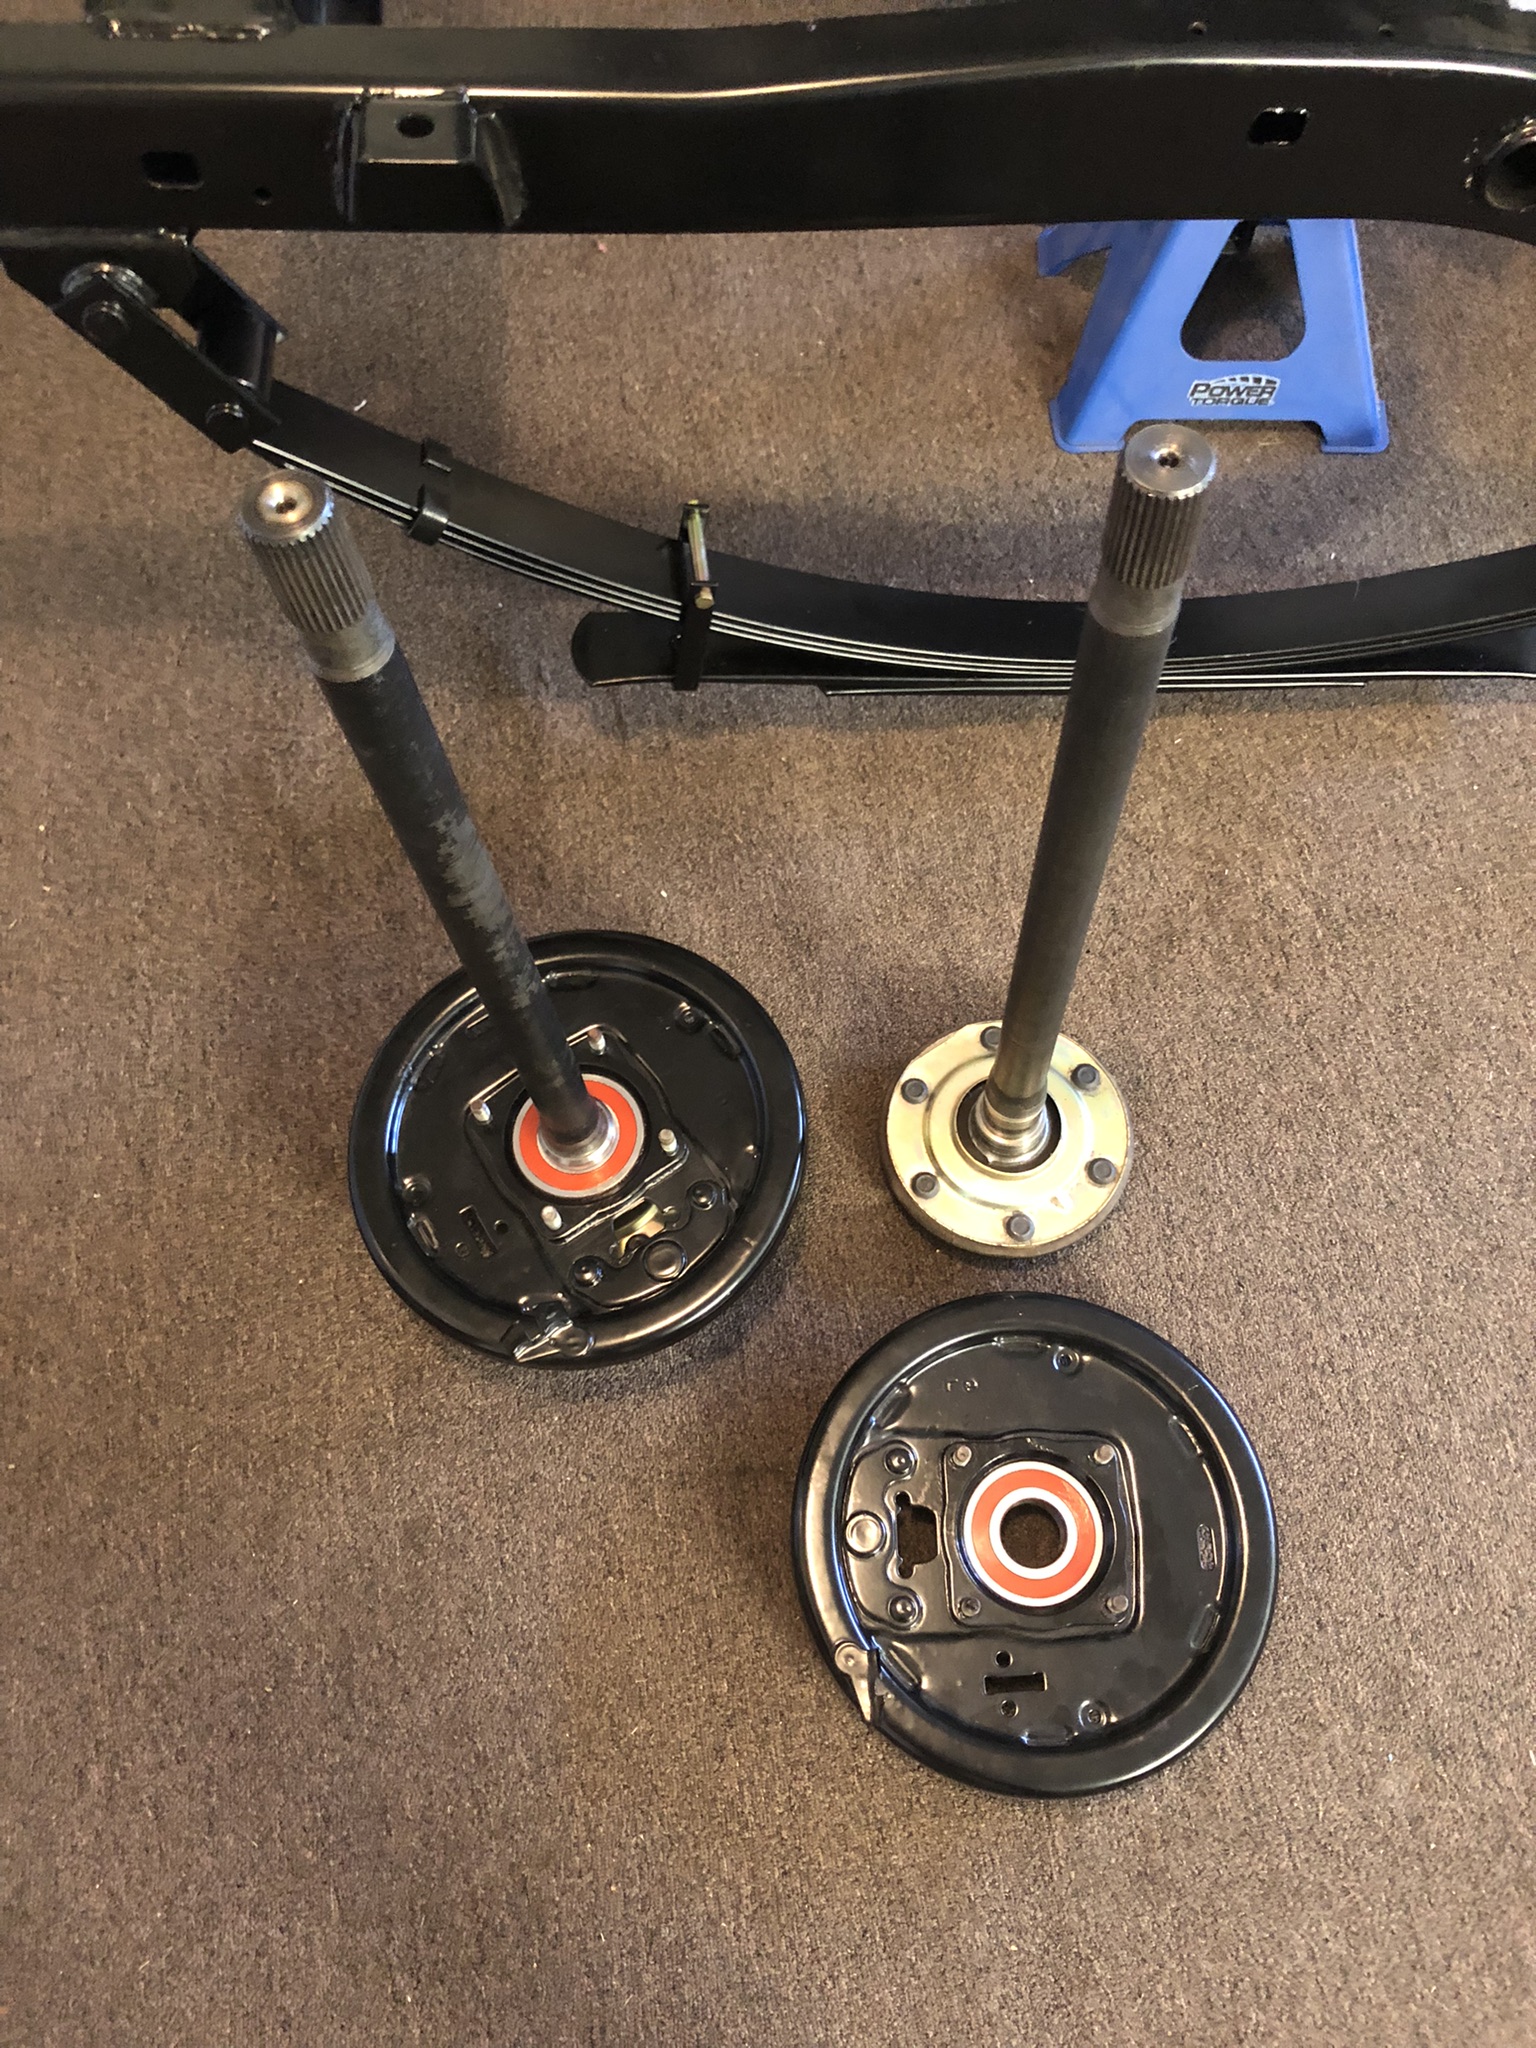
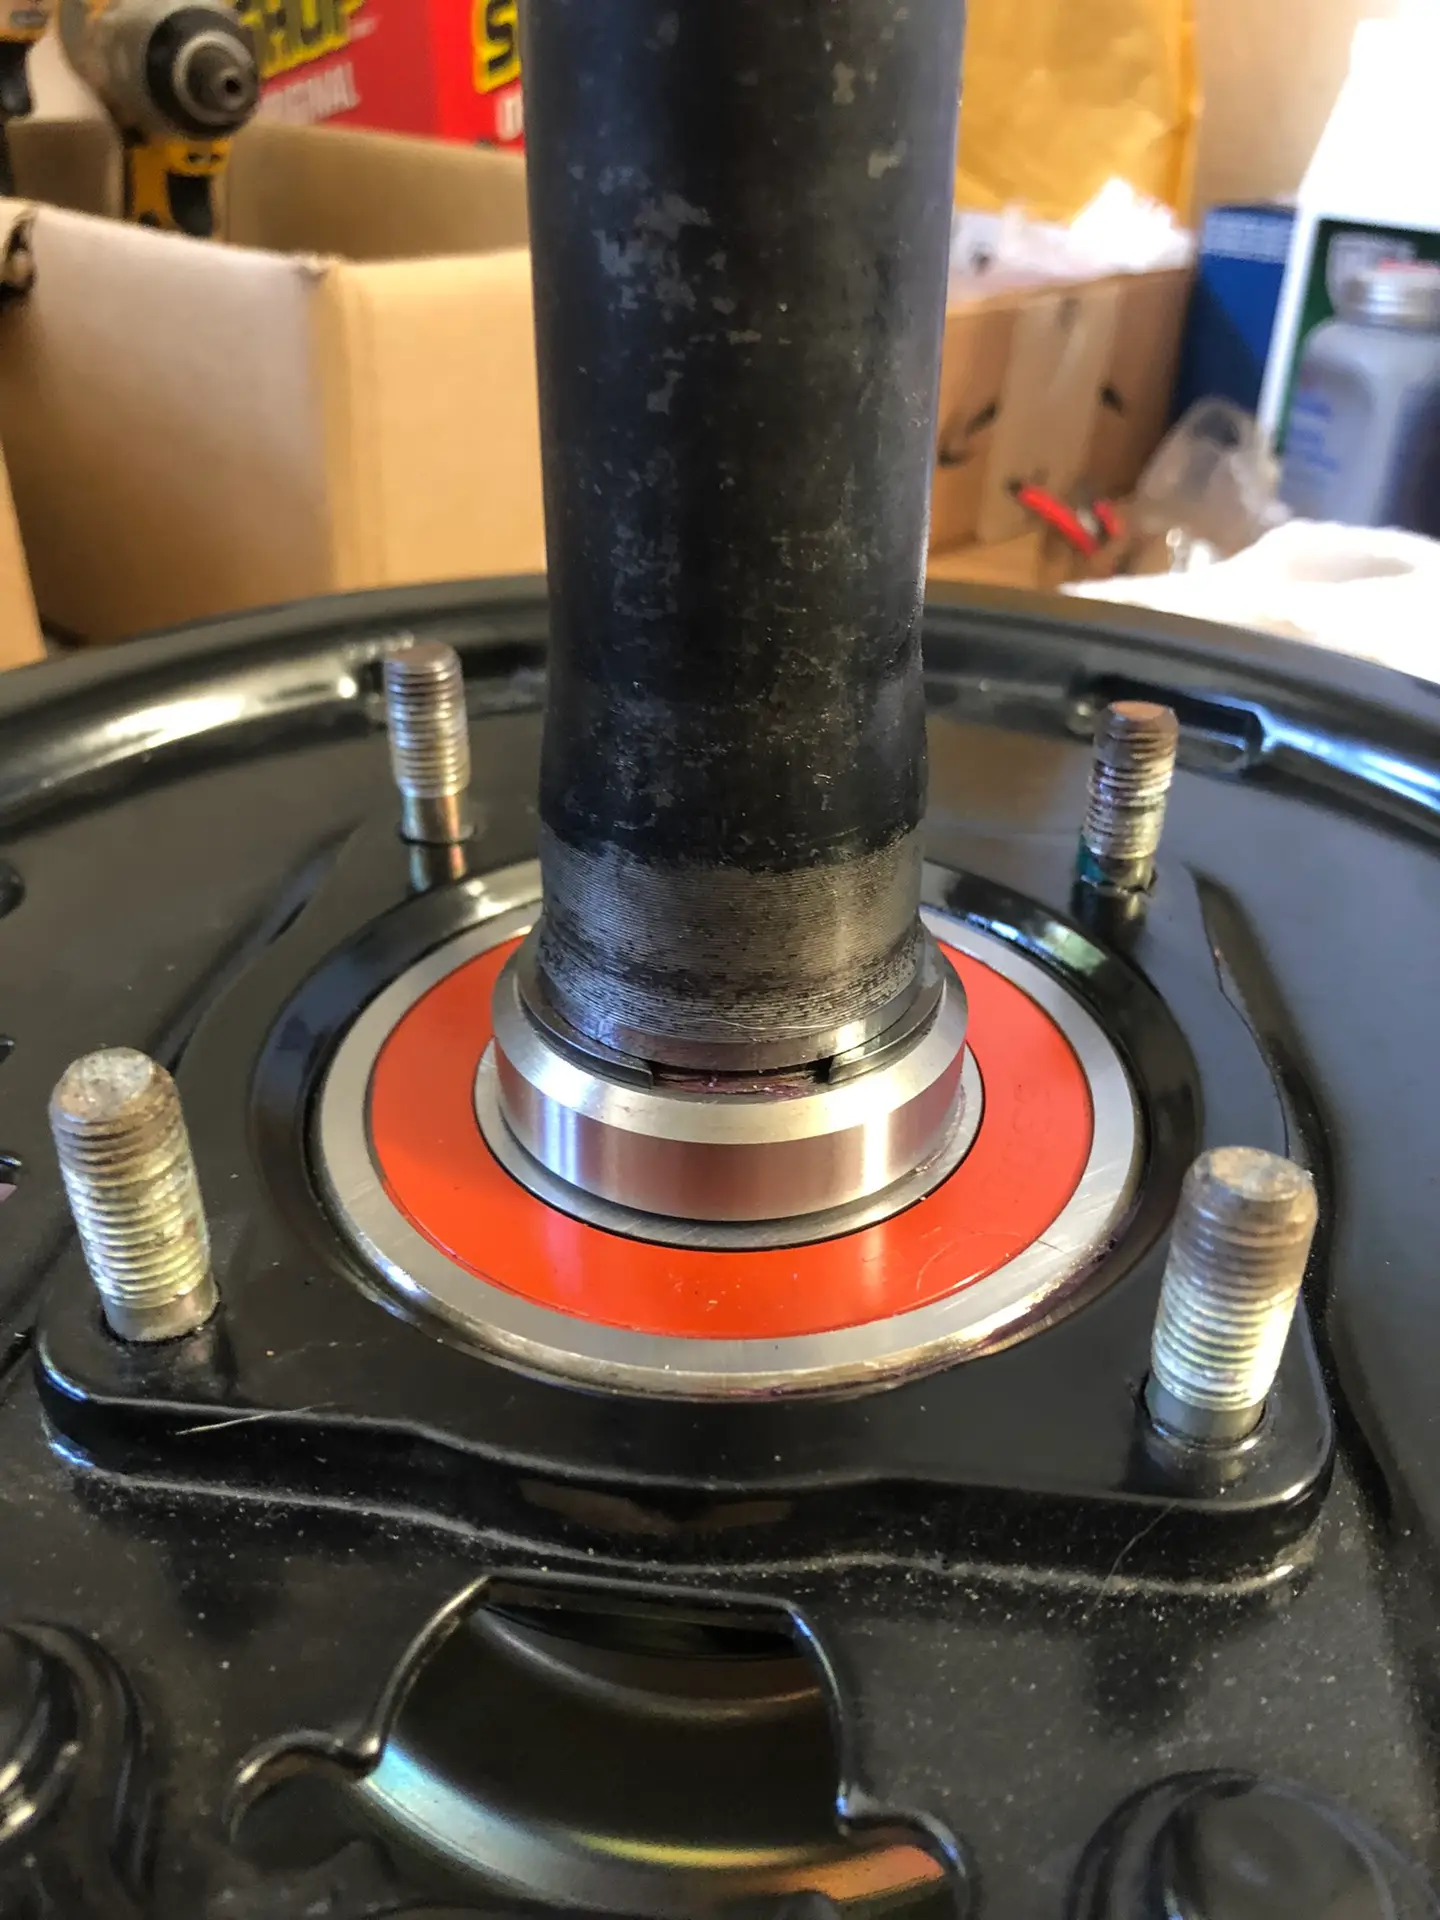
With the axle housing cleaned out and mounted I installed the rear differential and the axle shafts. I pressed new wheel bearings into the backing plates and installed a new set of Bilstein shocks.
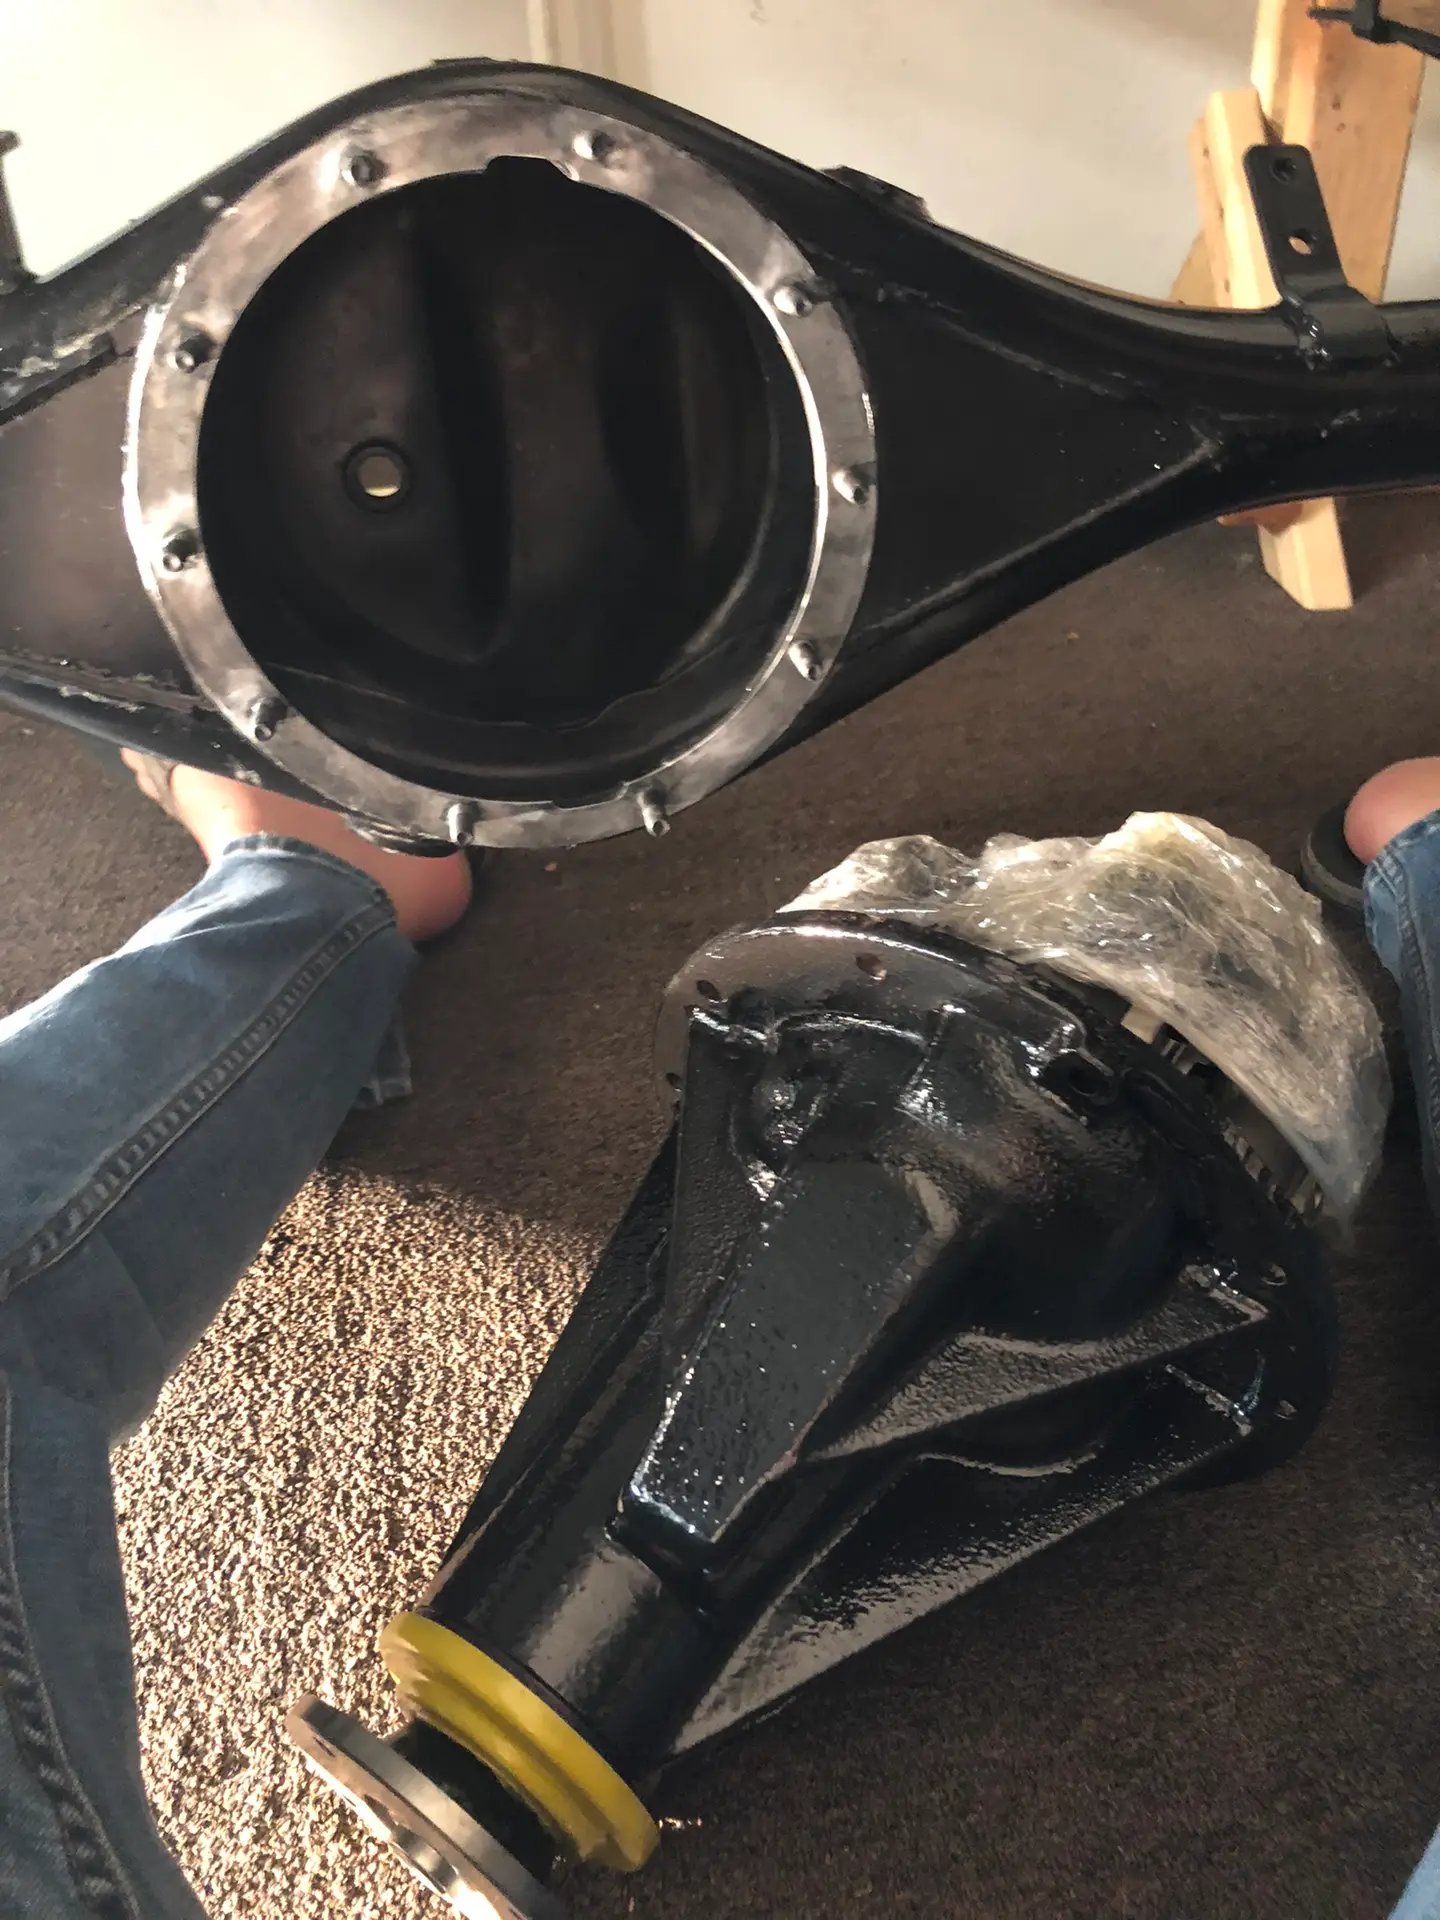
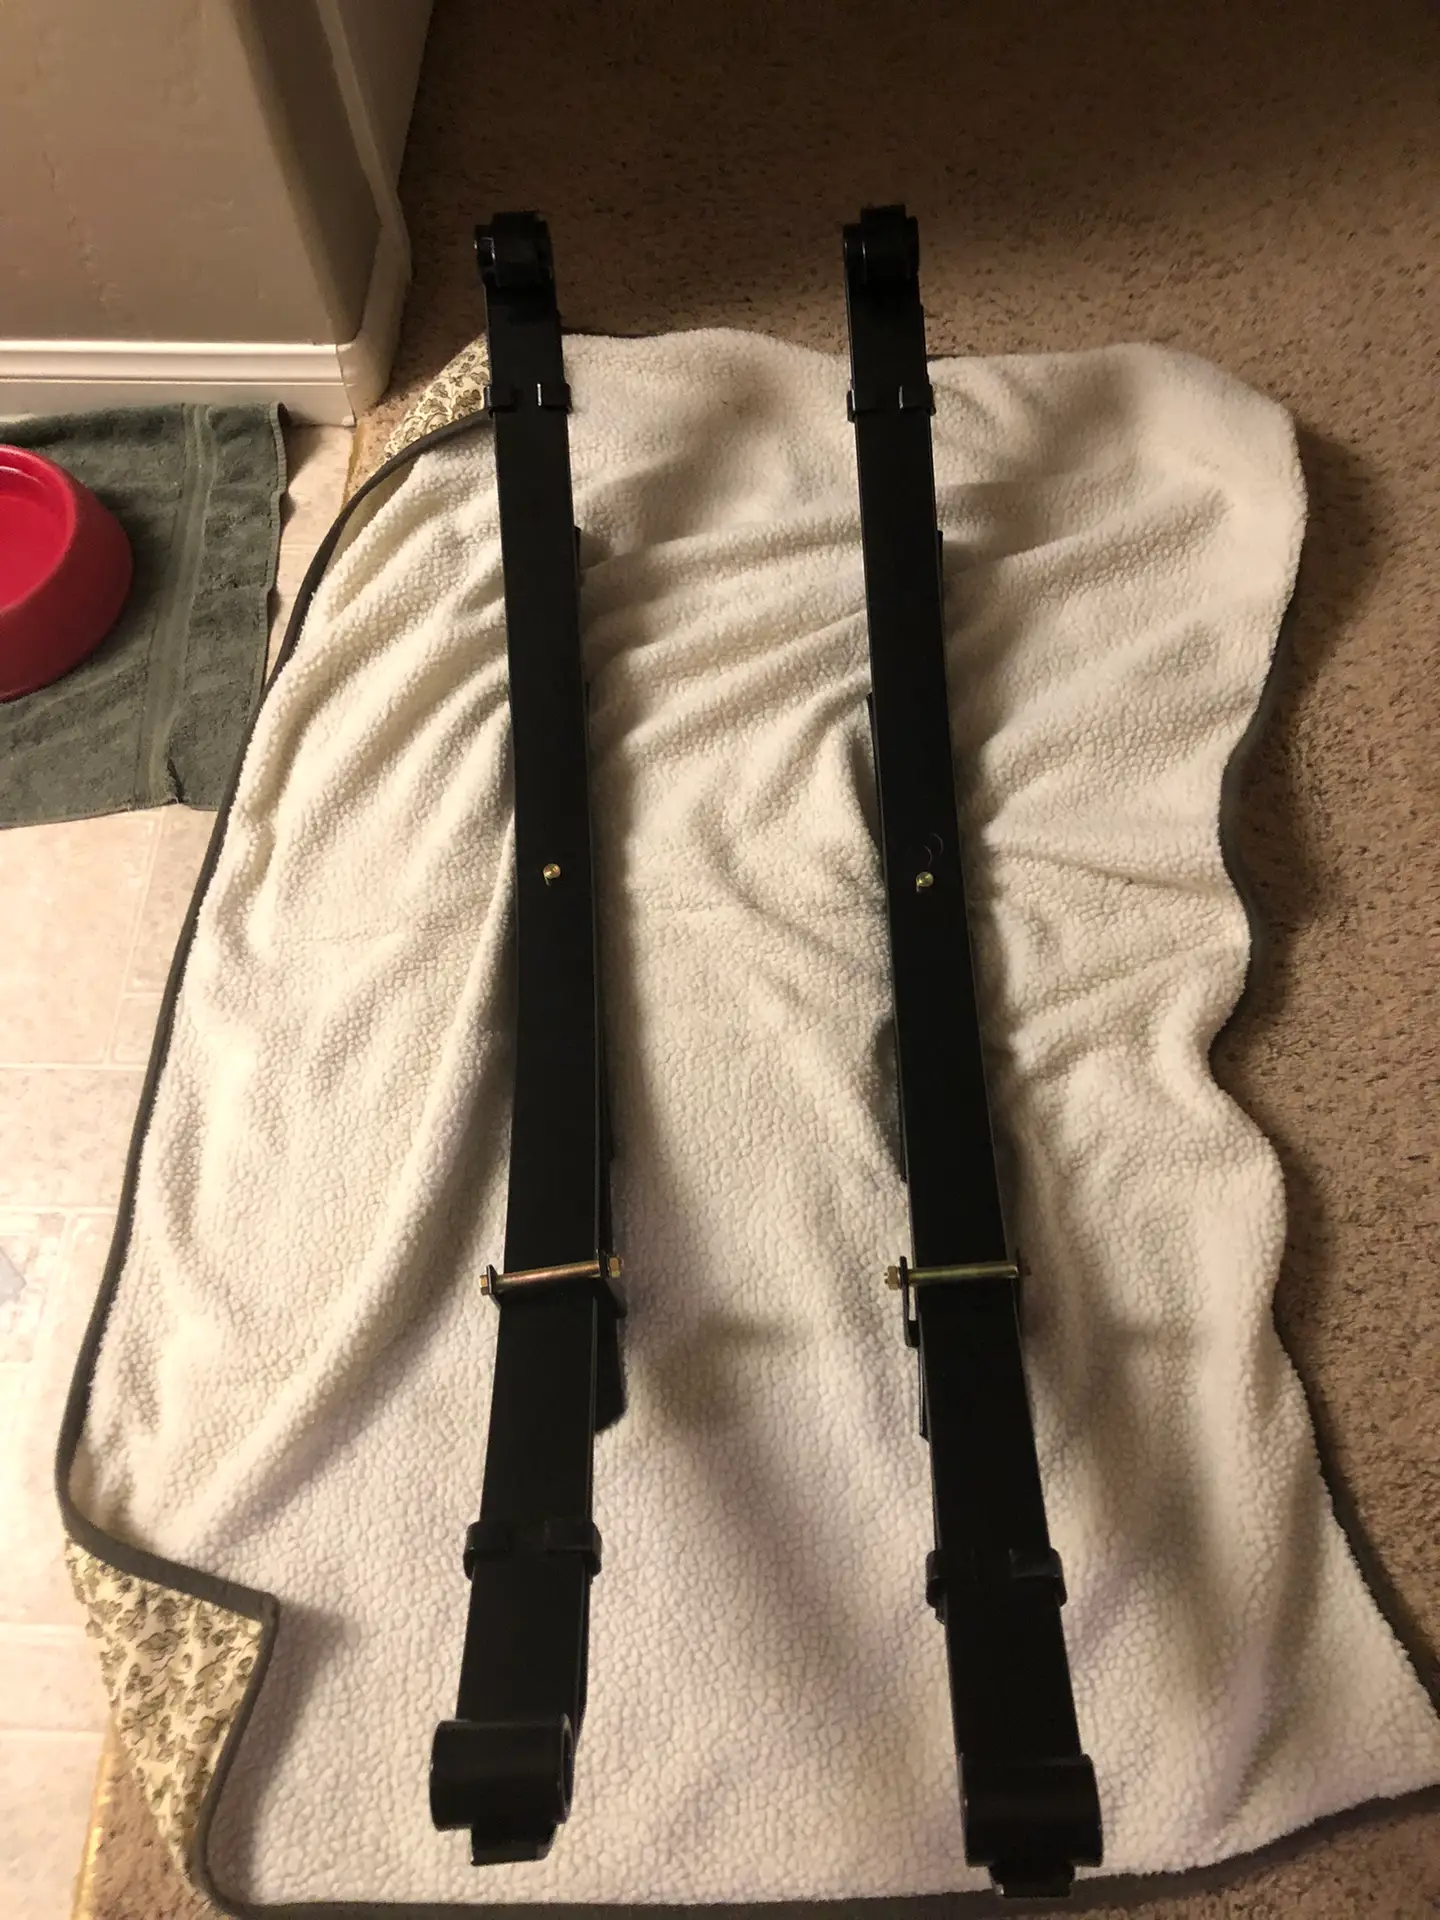
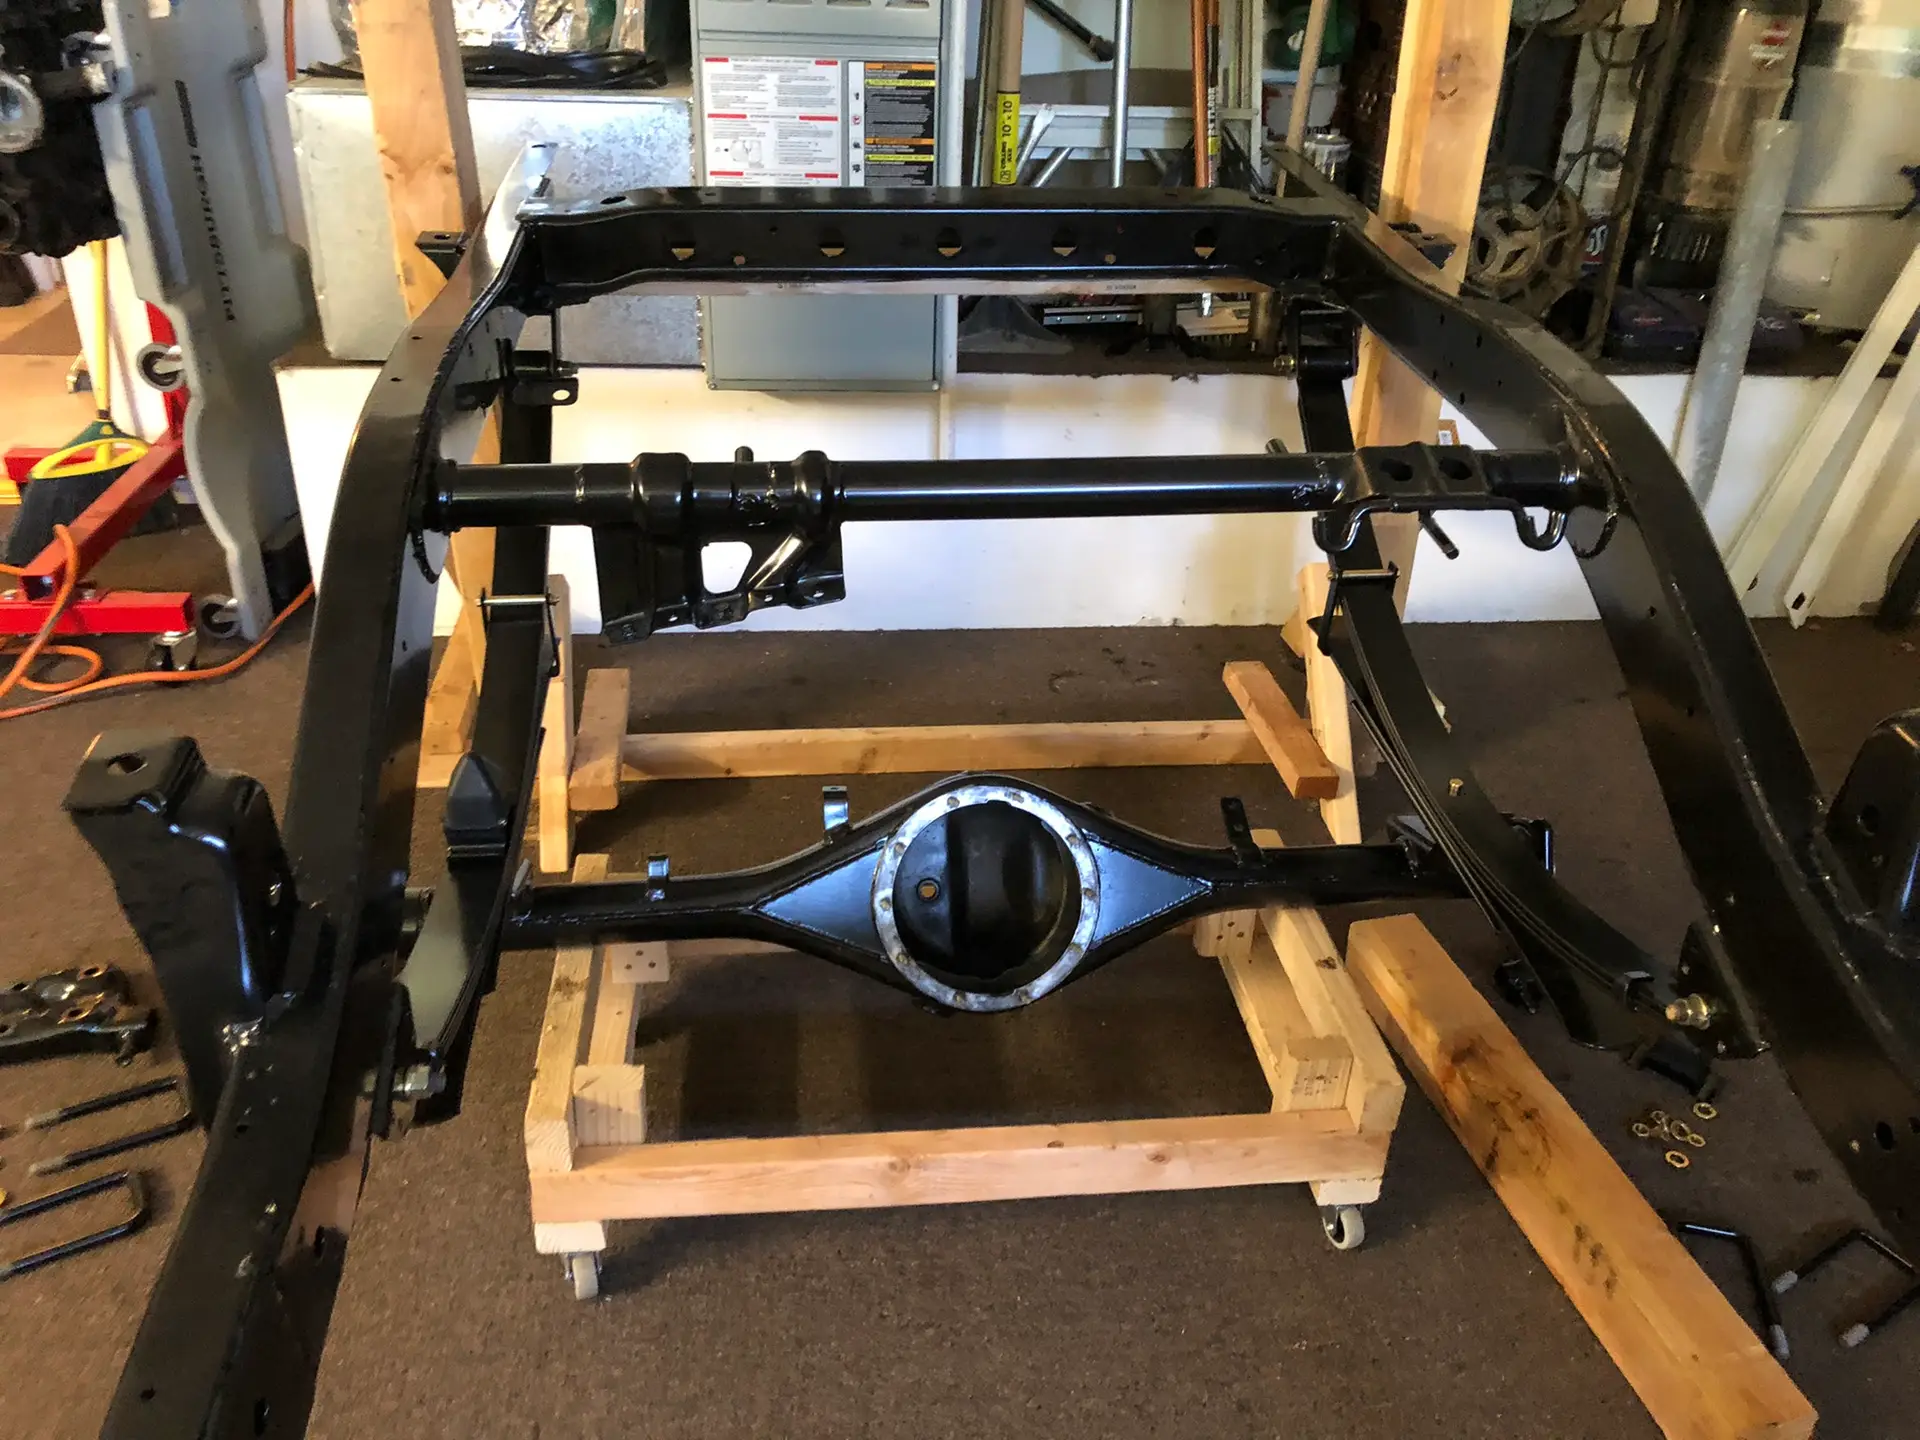
With the frame and axle housing power coated it was time to mount the axle housing on the frame. Over the last couple of weeks I have been working up to mounting the rear differential. The first step was to reassemble the leaf springs and then clean out the axle housing. For the leaf springs there was power coating on the shackle pins that mount into the frame. I was able to carefully remove this using a dremel. For the axle housing, cleaning the sandblasting out of the housing took some persistence. There was also power coating on the face of the housing where the differential mounts that had to be removed. Again I used a dremel with various wire and abrasive wheels to do this.
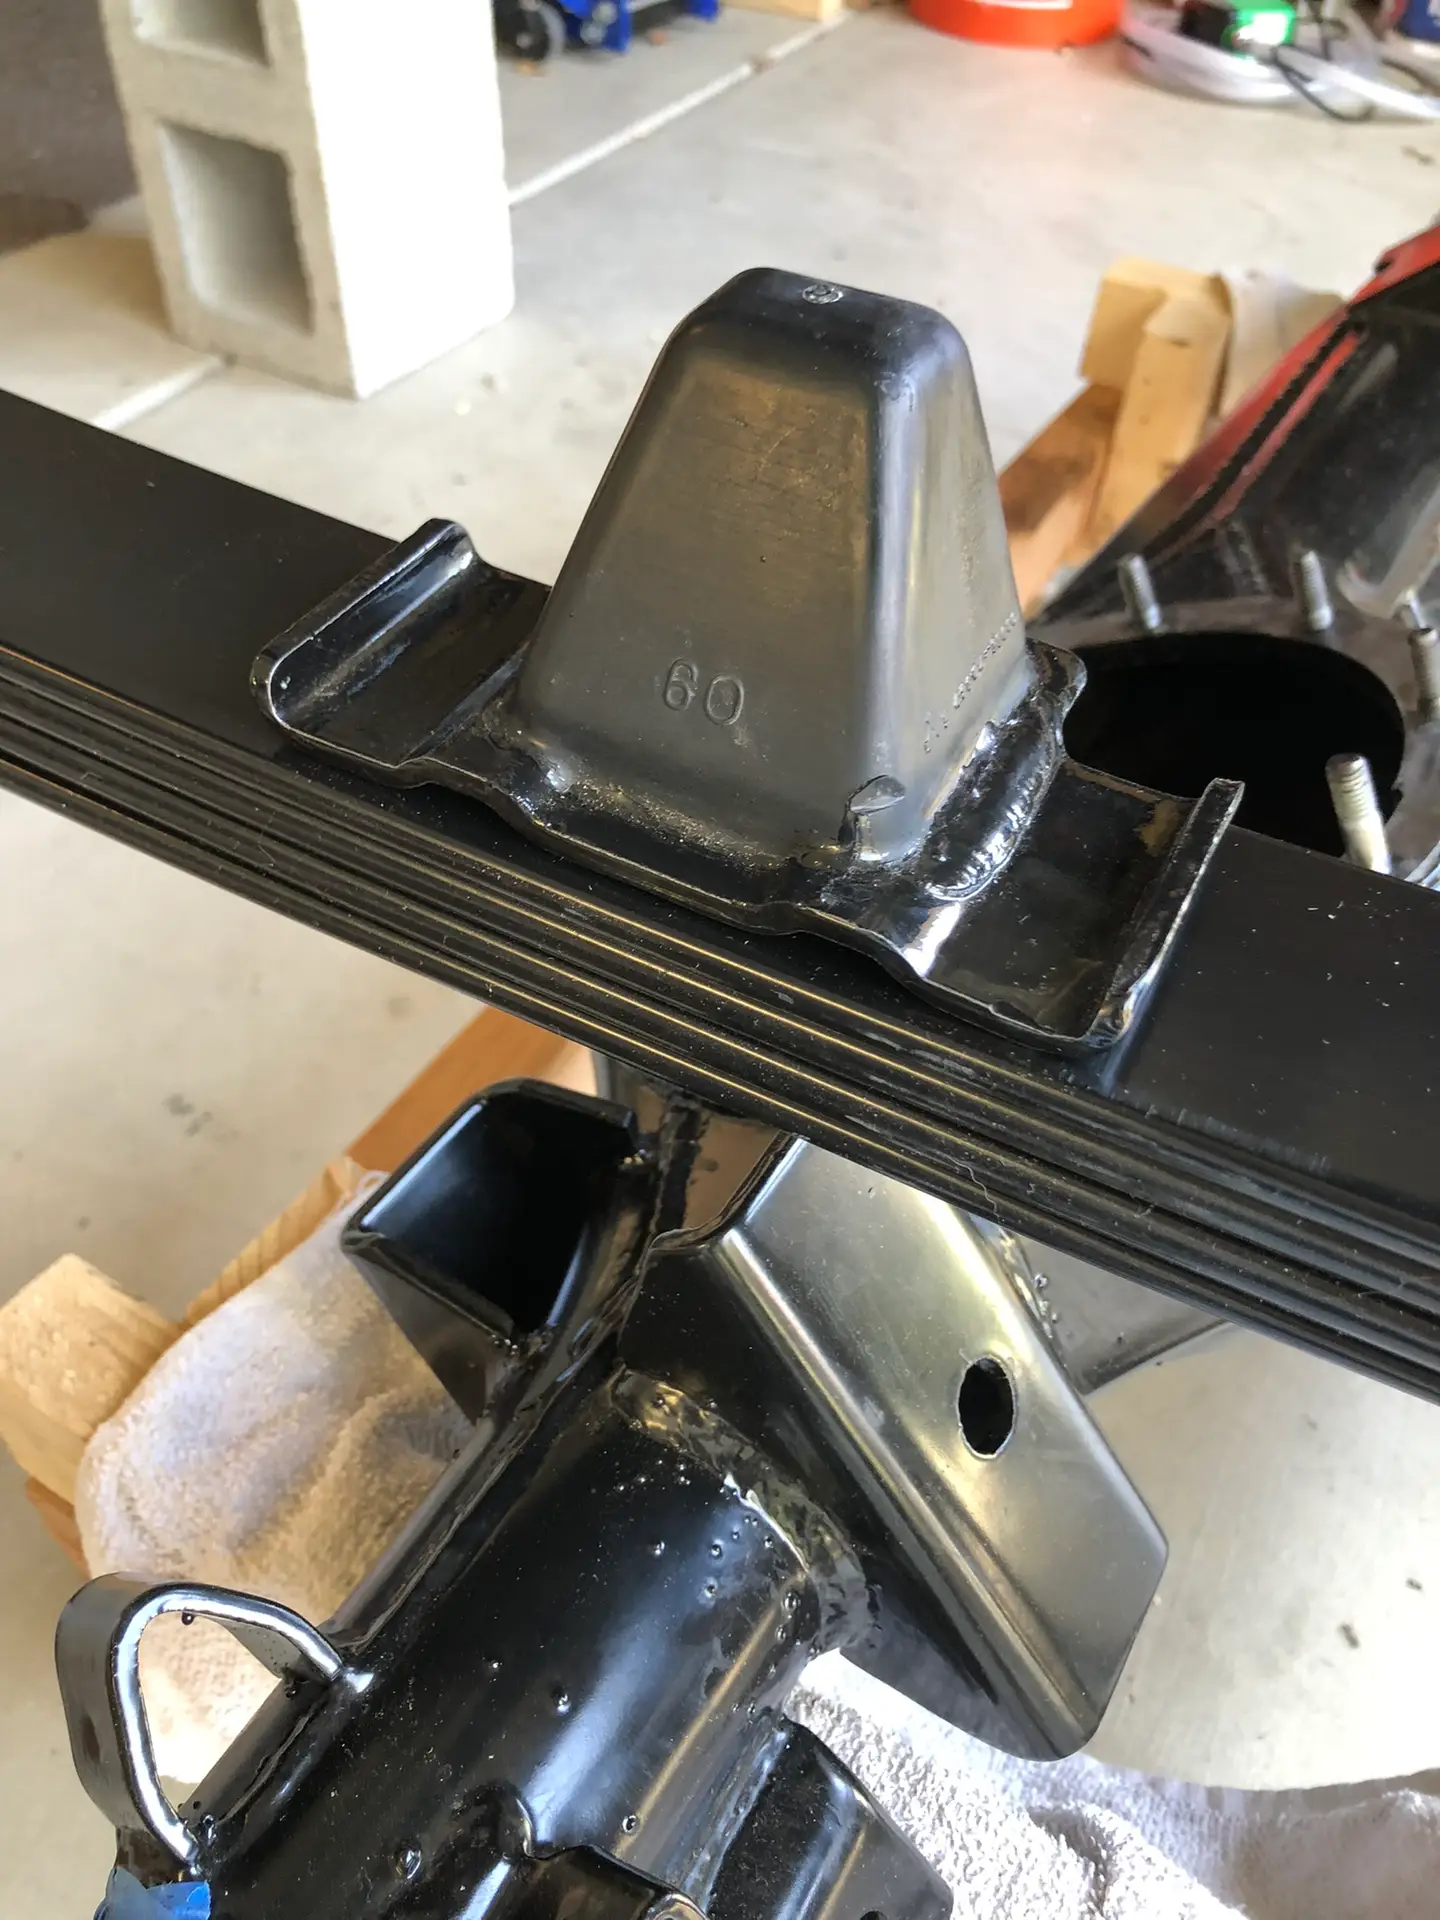
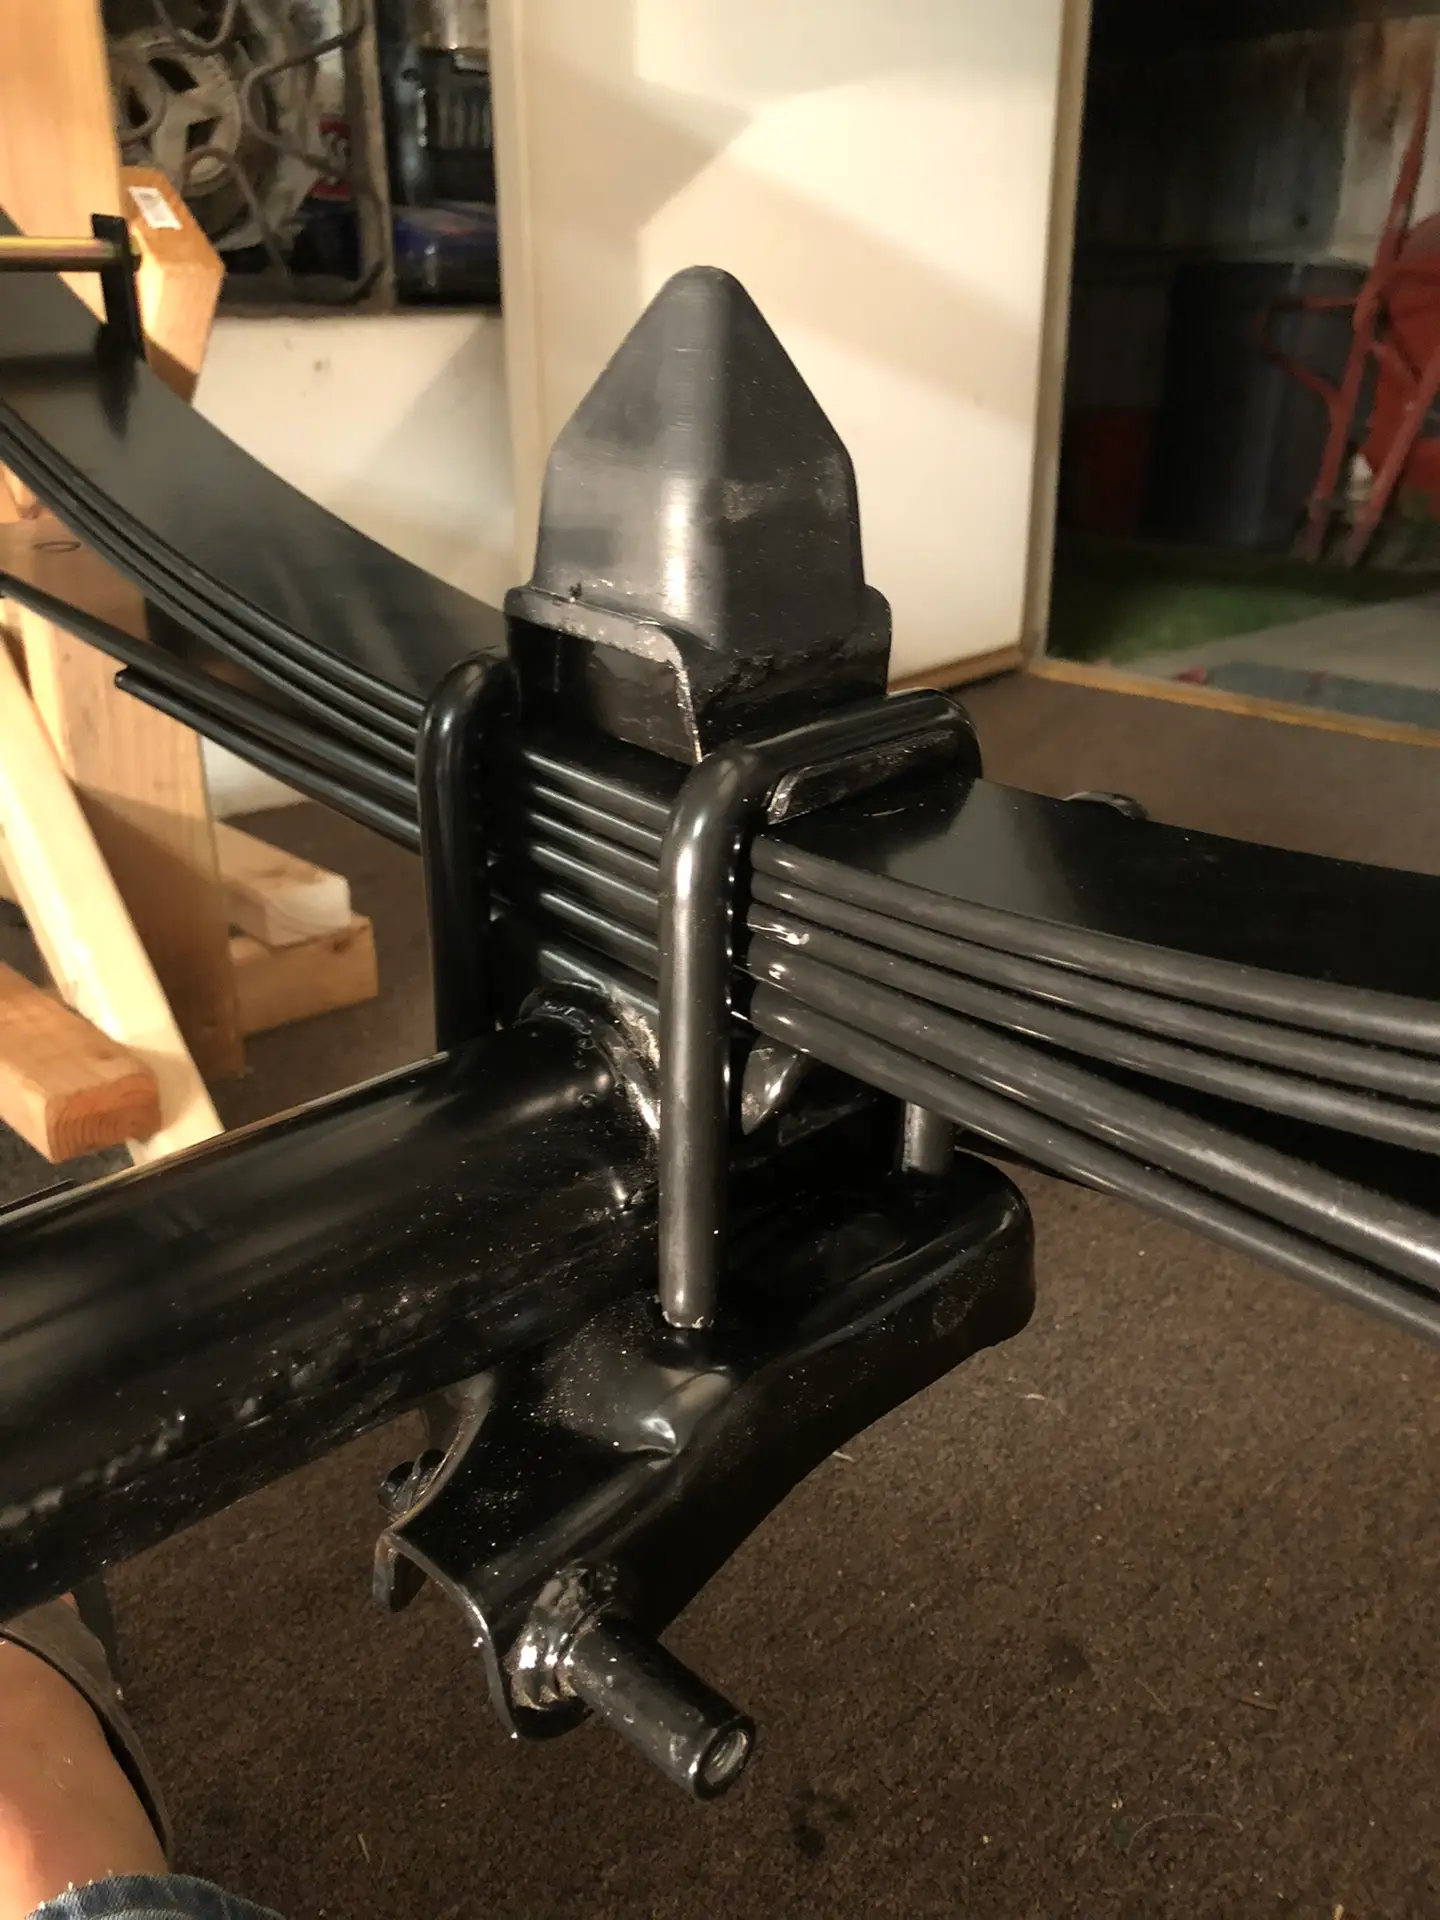
Leaf Springs Reassembled
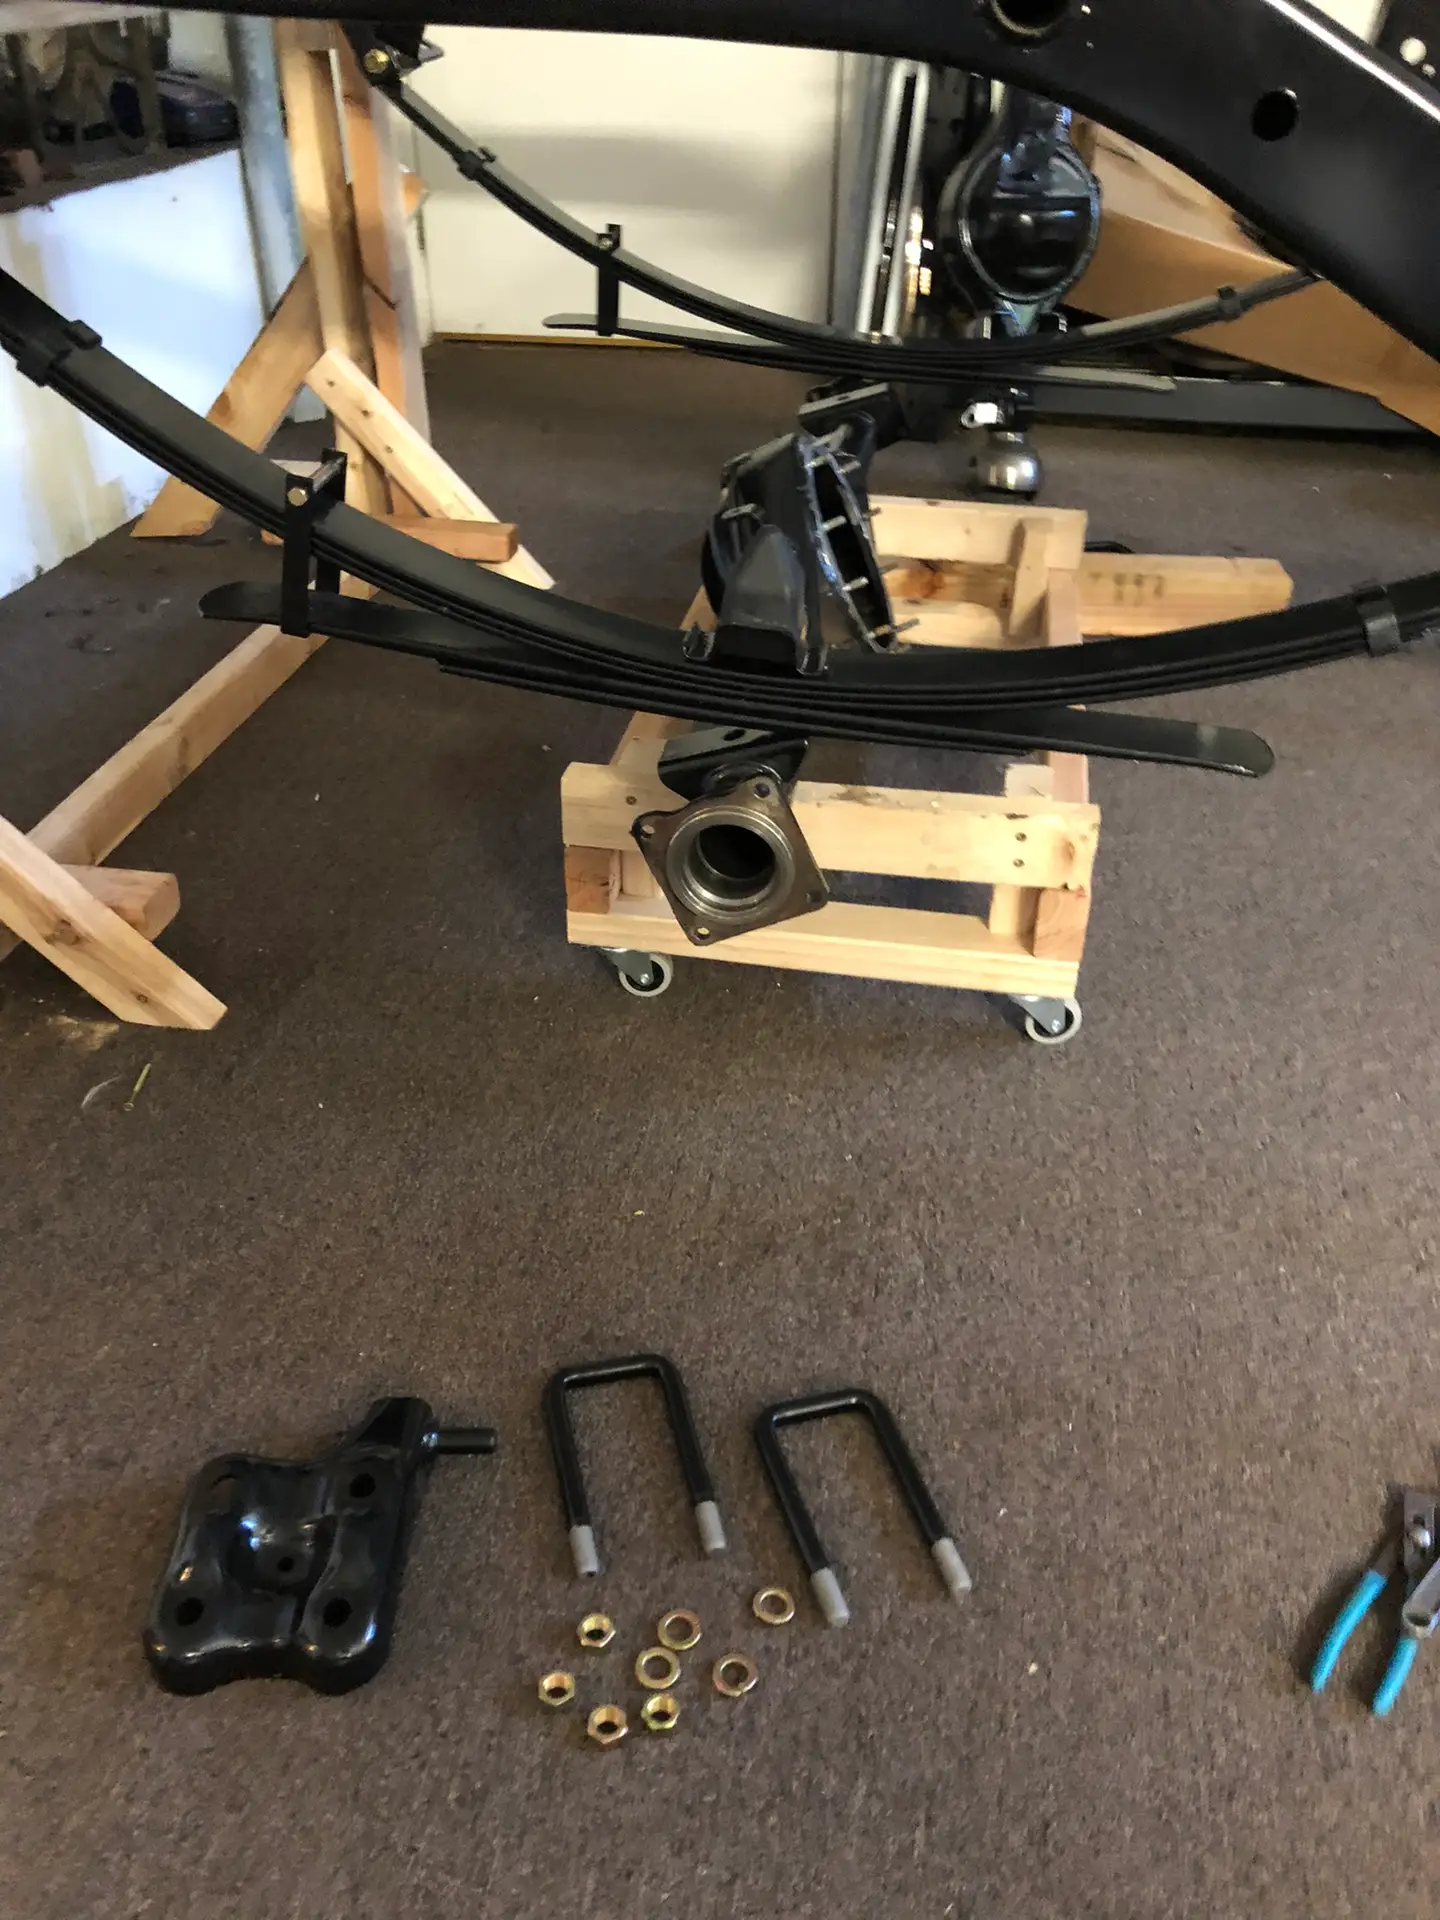
Installing the Rear Leaf Springs
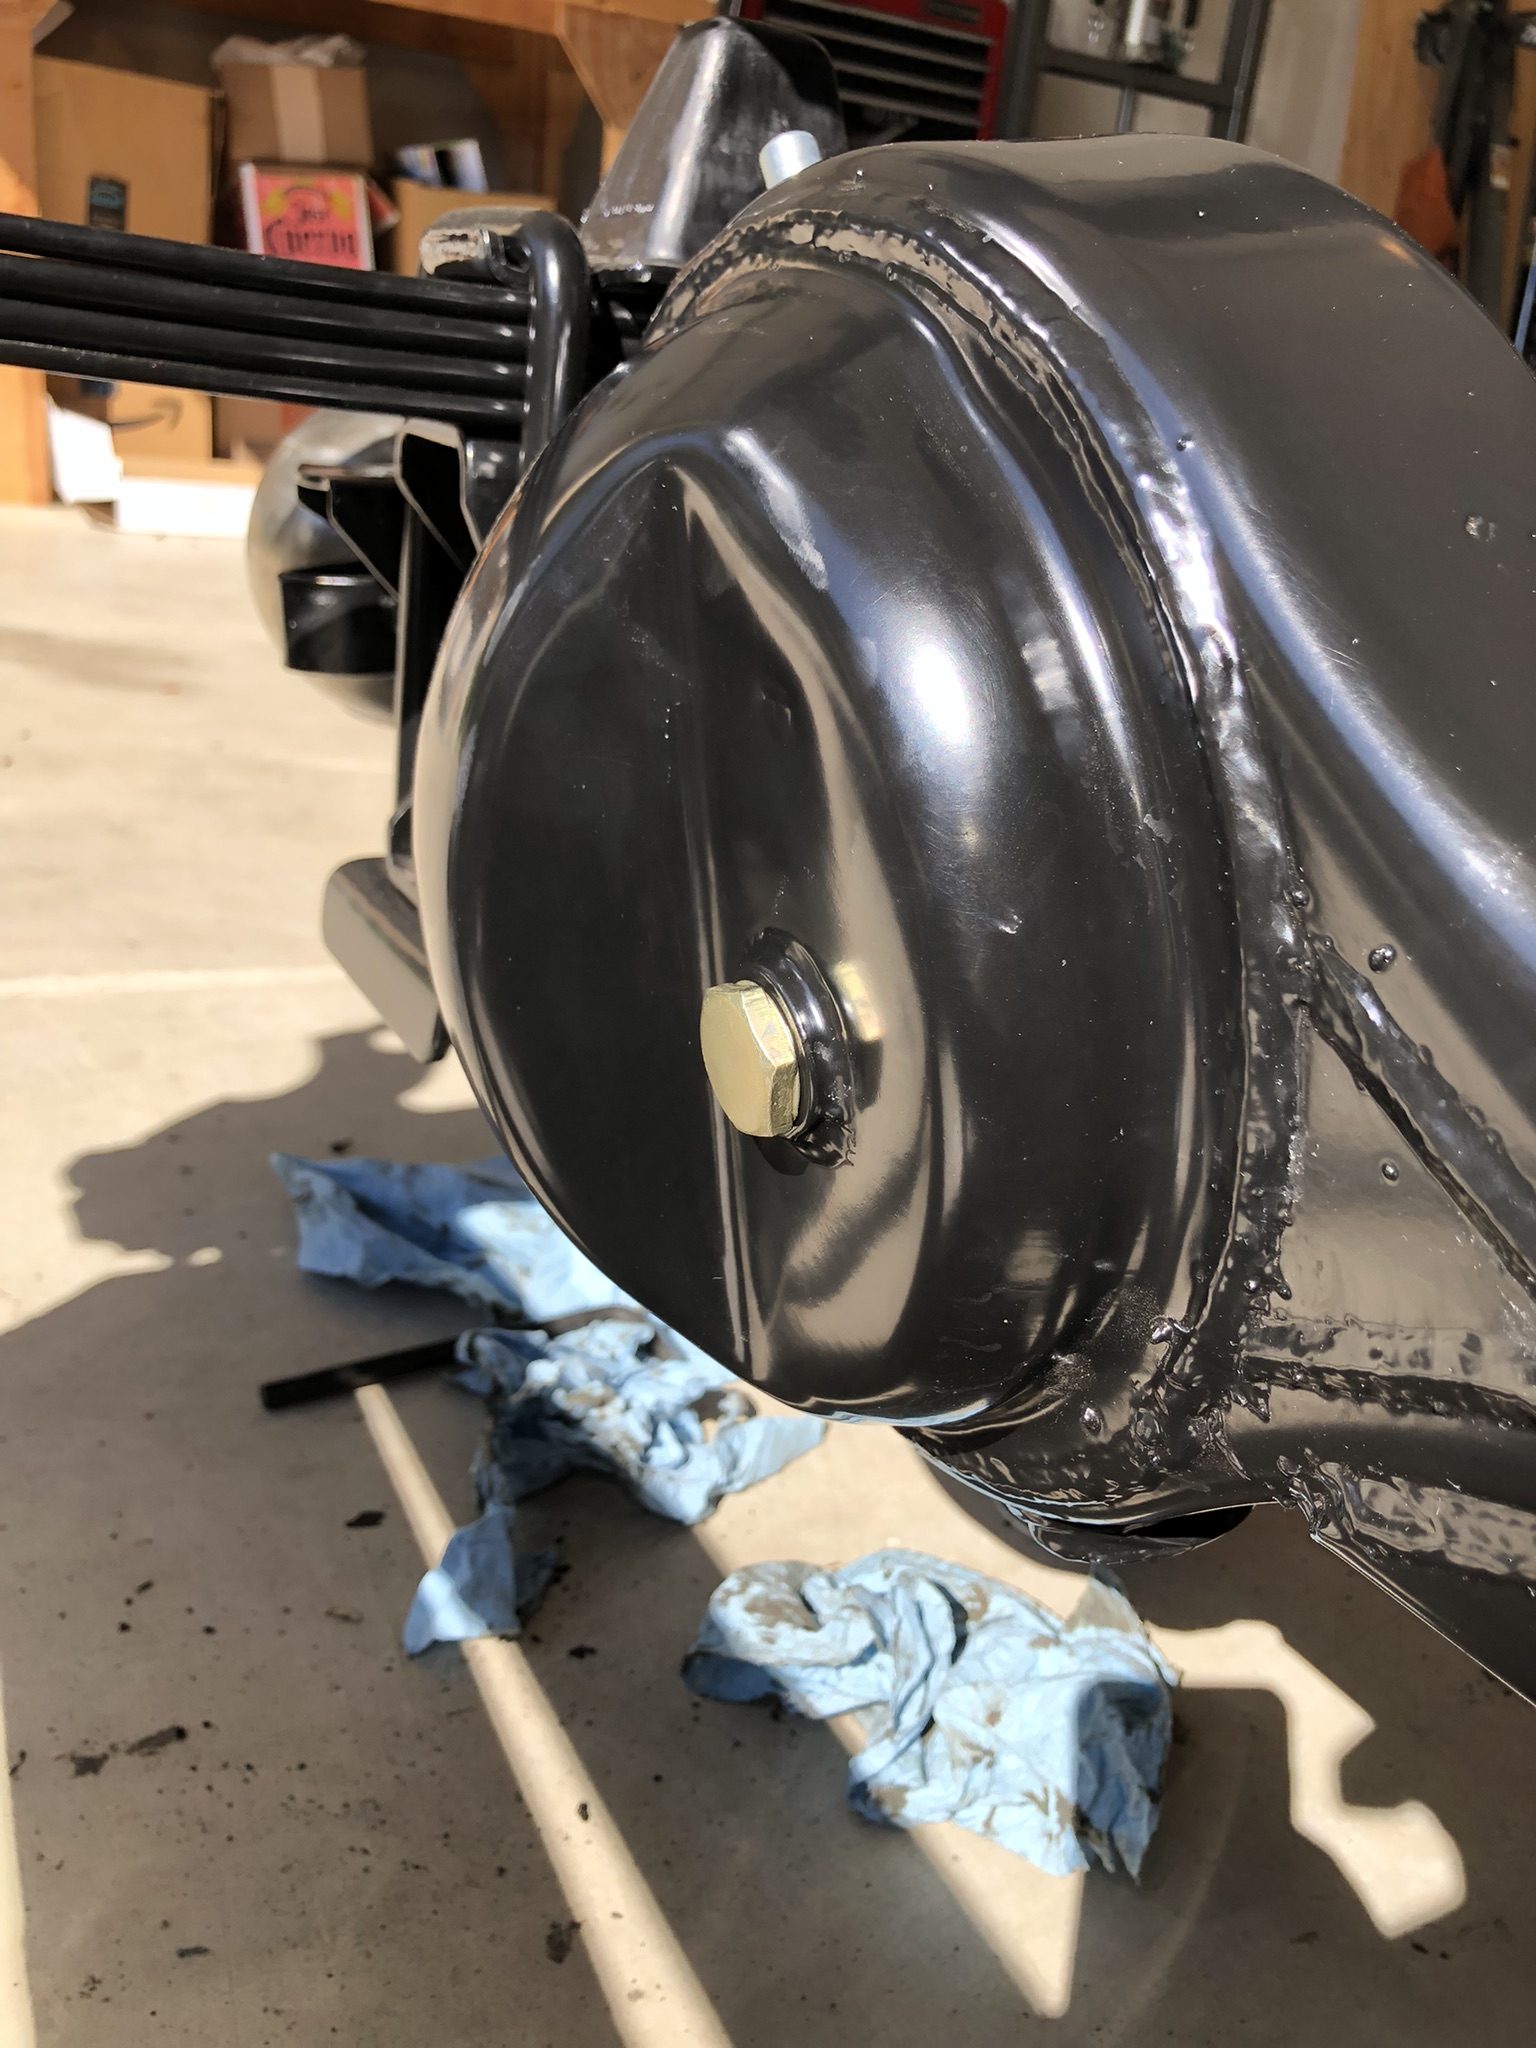
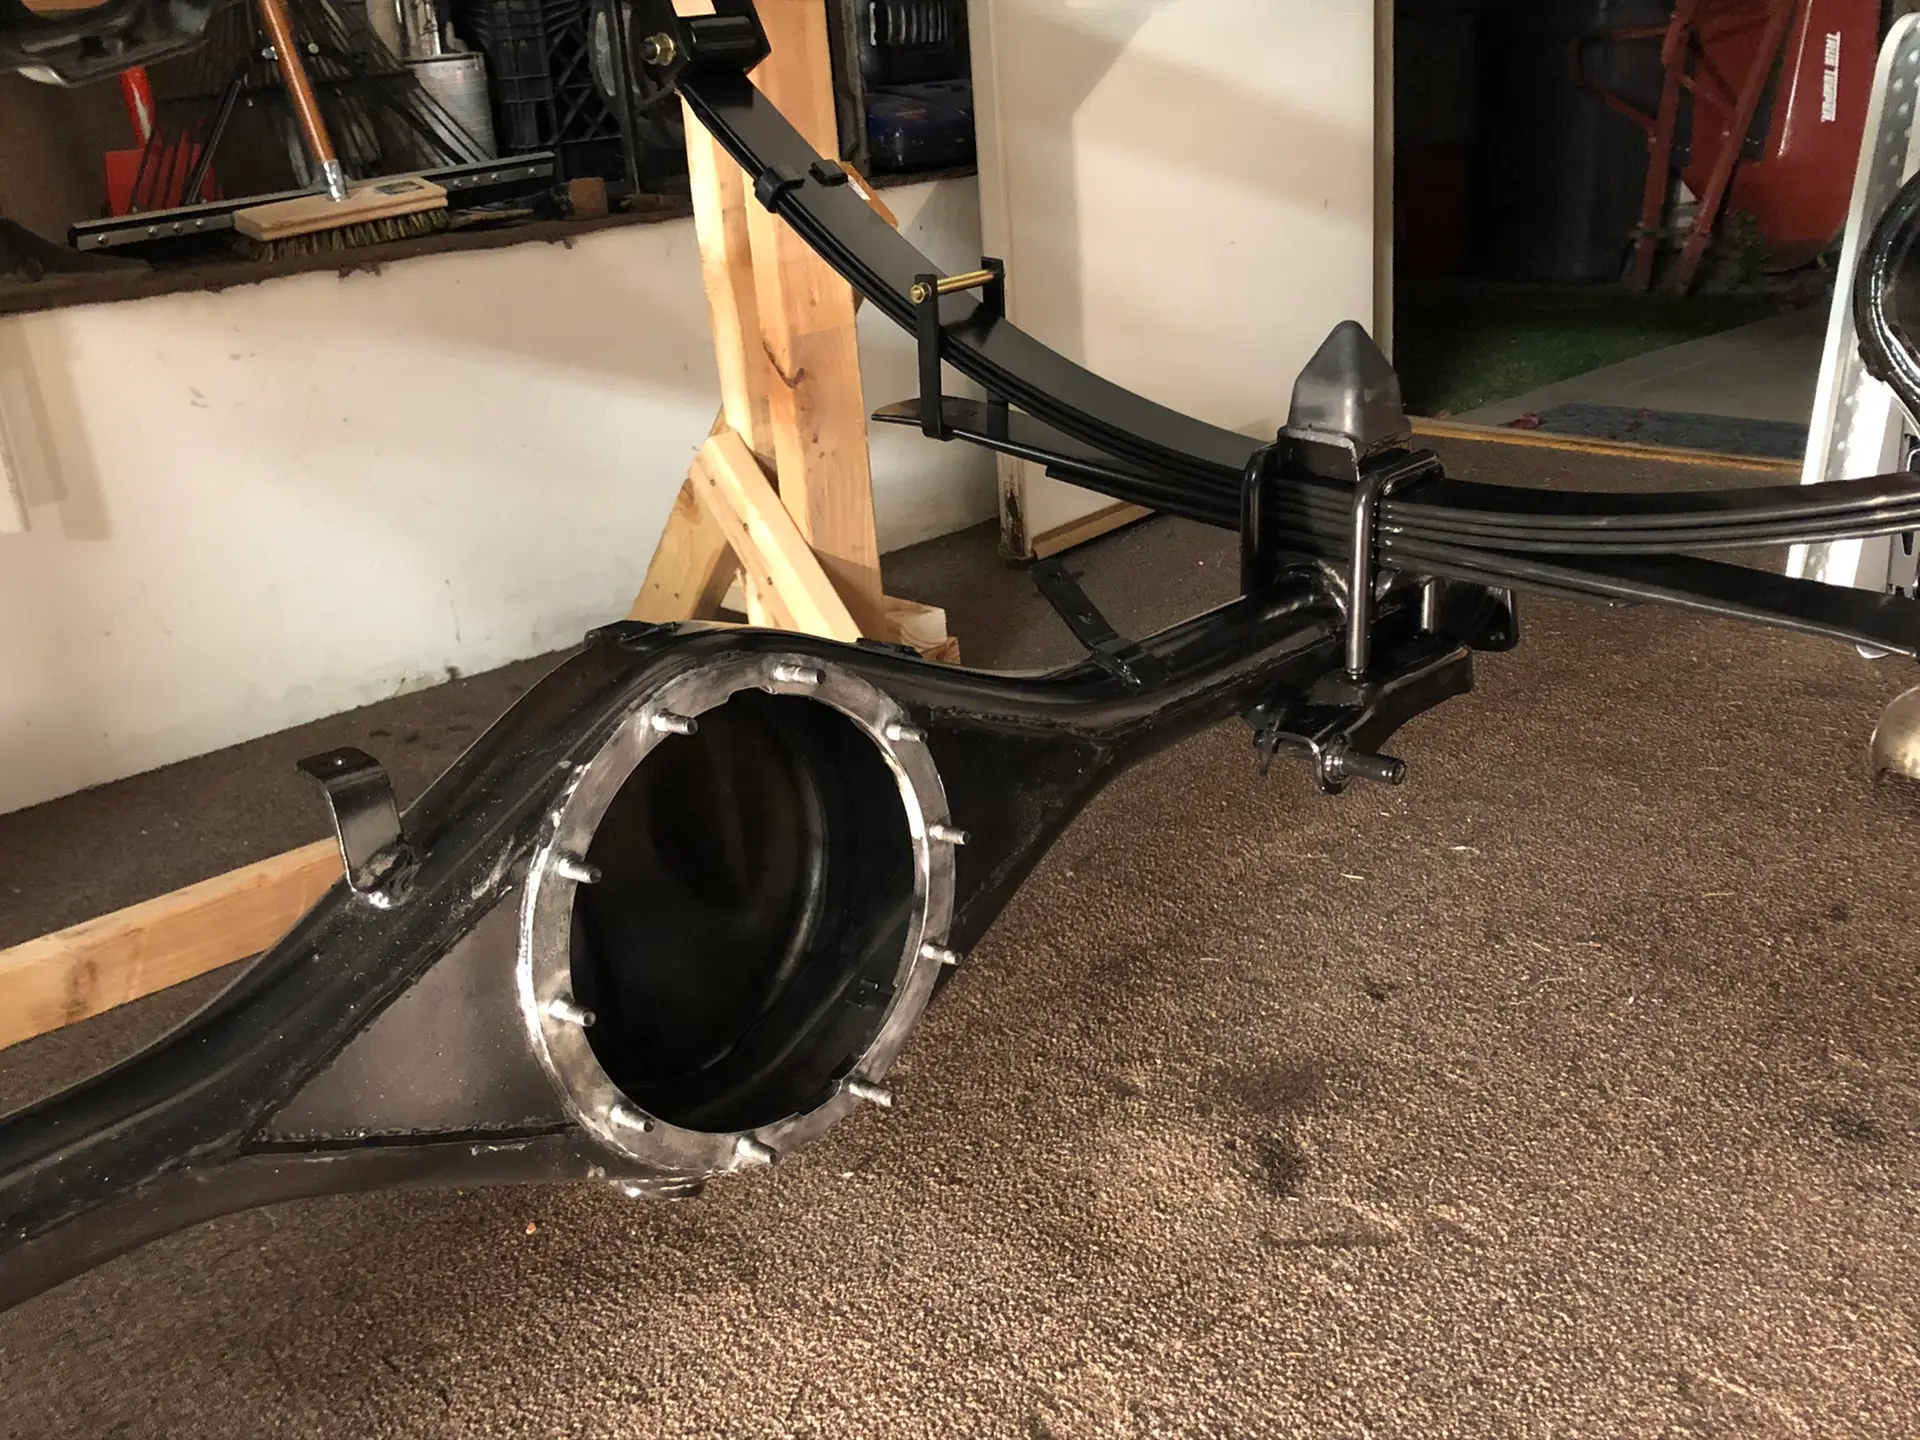
After Grinding Powder Coating of Differential Mounting Face
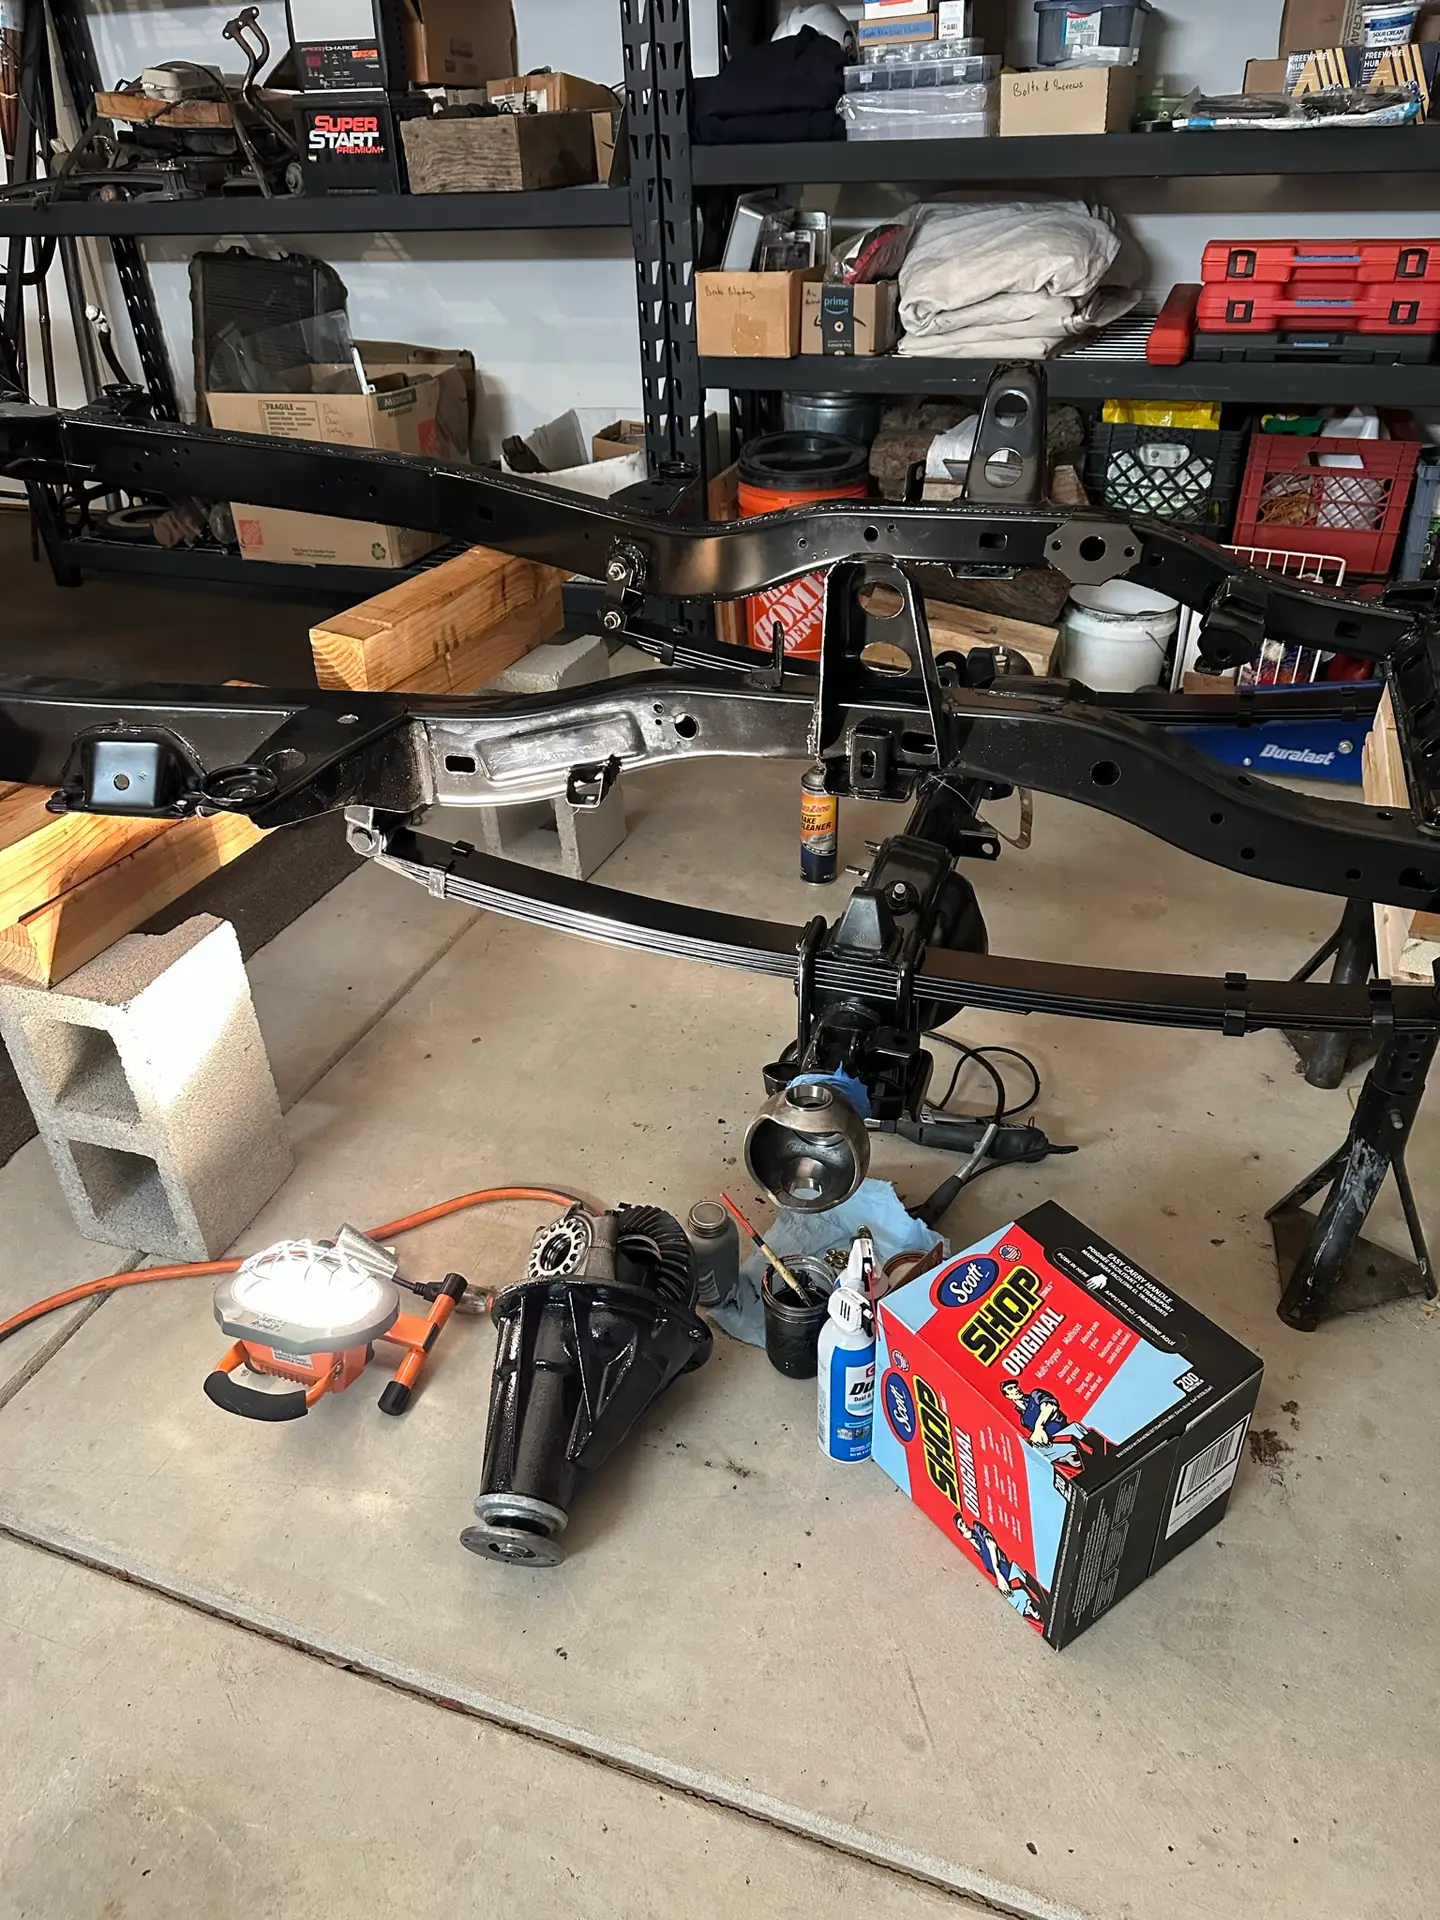
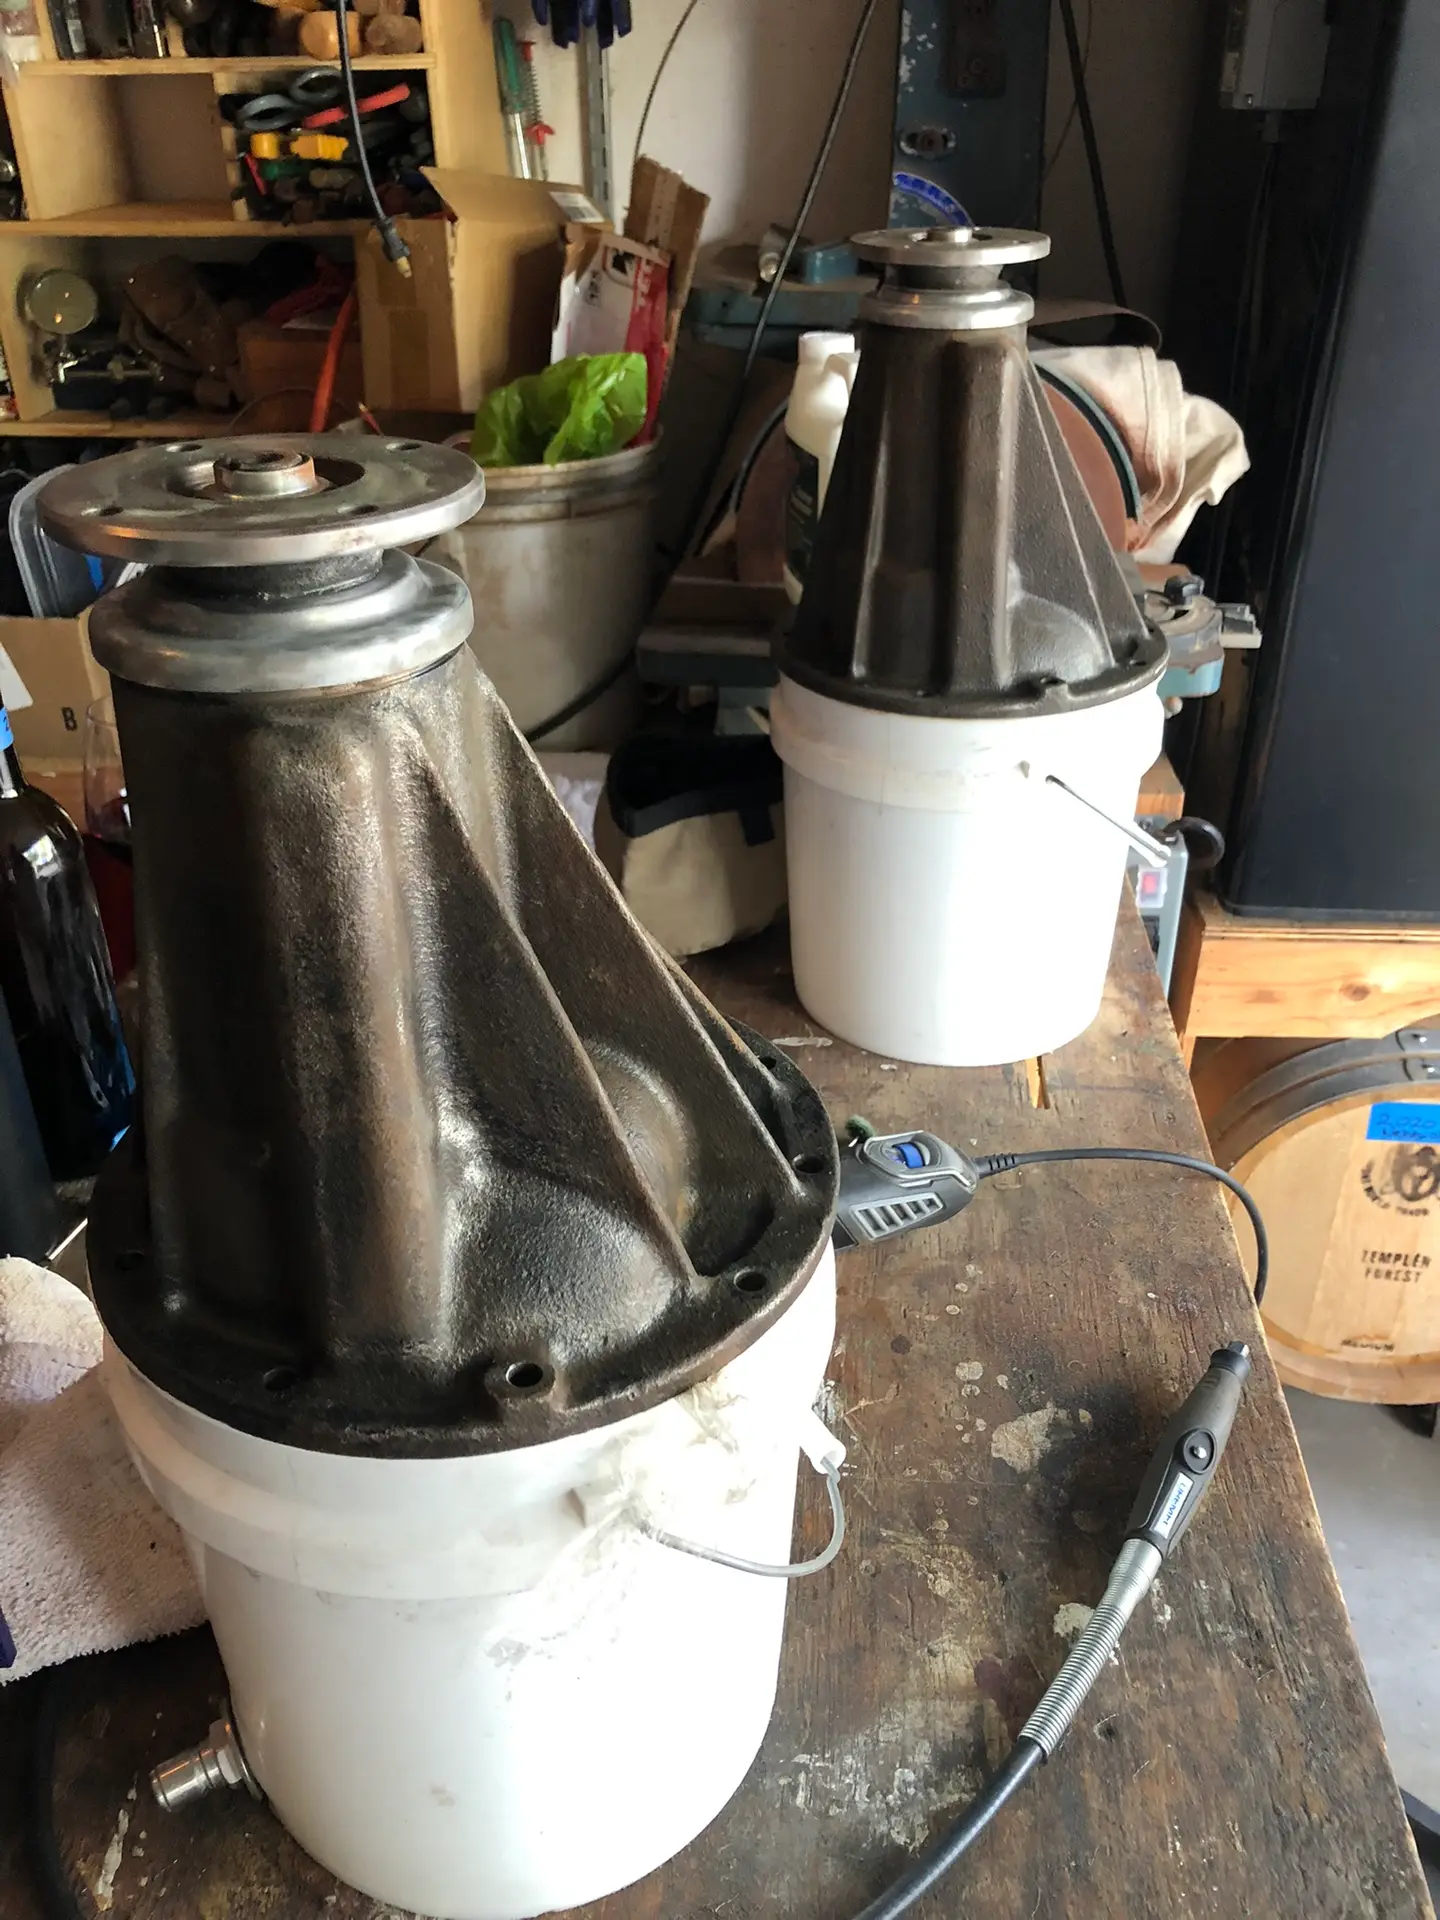
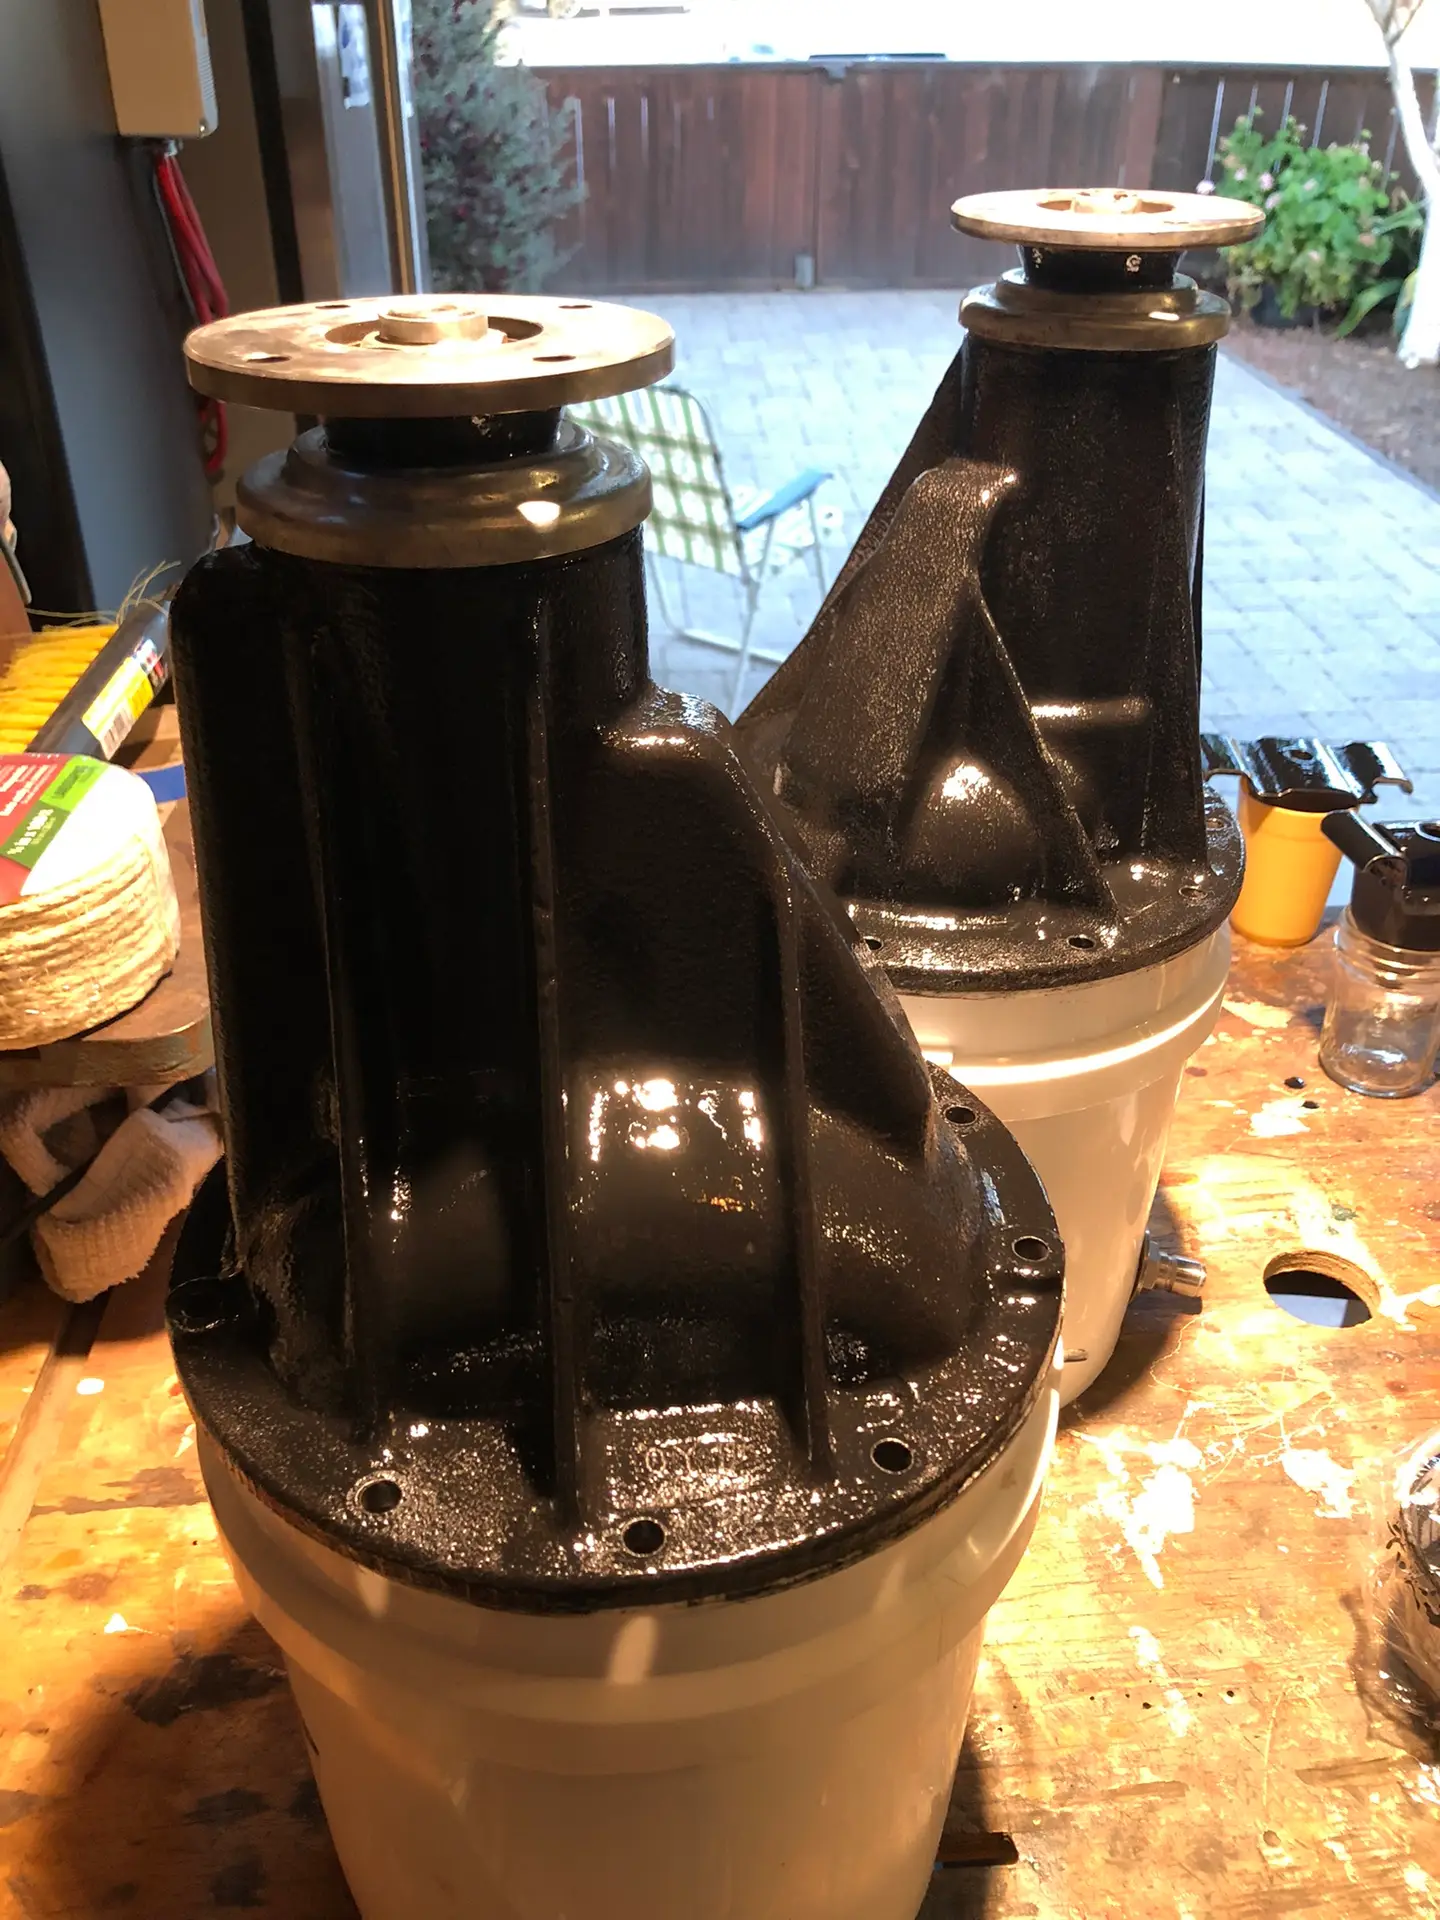
Our good friend Tom recommend Matt at American Gear in San Luis for any differential work. So last year I got Matt to regear the differentials from 4.10 to 4.56. This will let me run 31″ tires with the speedometer close to factory specs and give a little more power than she had before. For the rear I went with Eaton Truetrac and I left the front differential open. I just finished painting them with POR, now they are ready to go back in the truck.
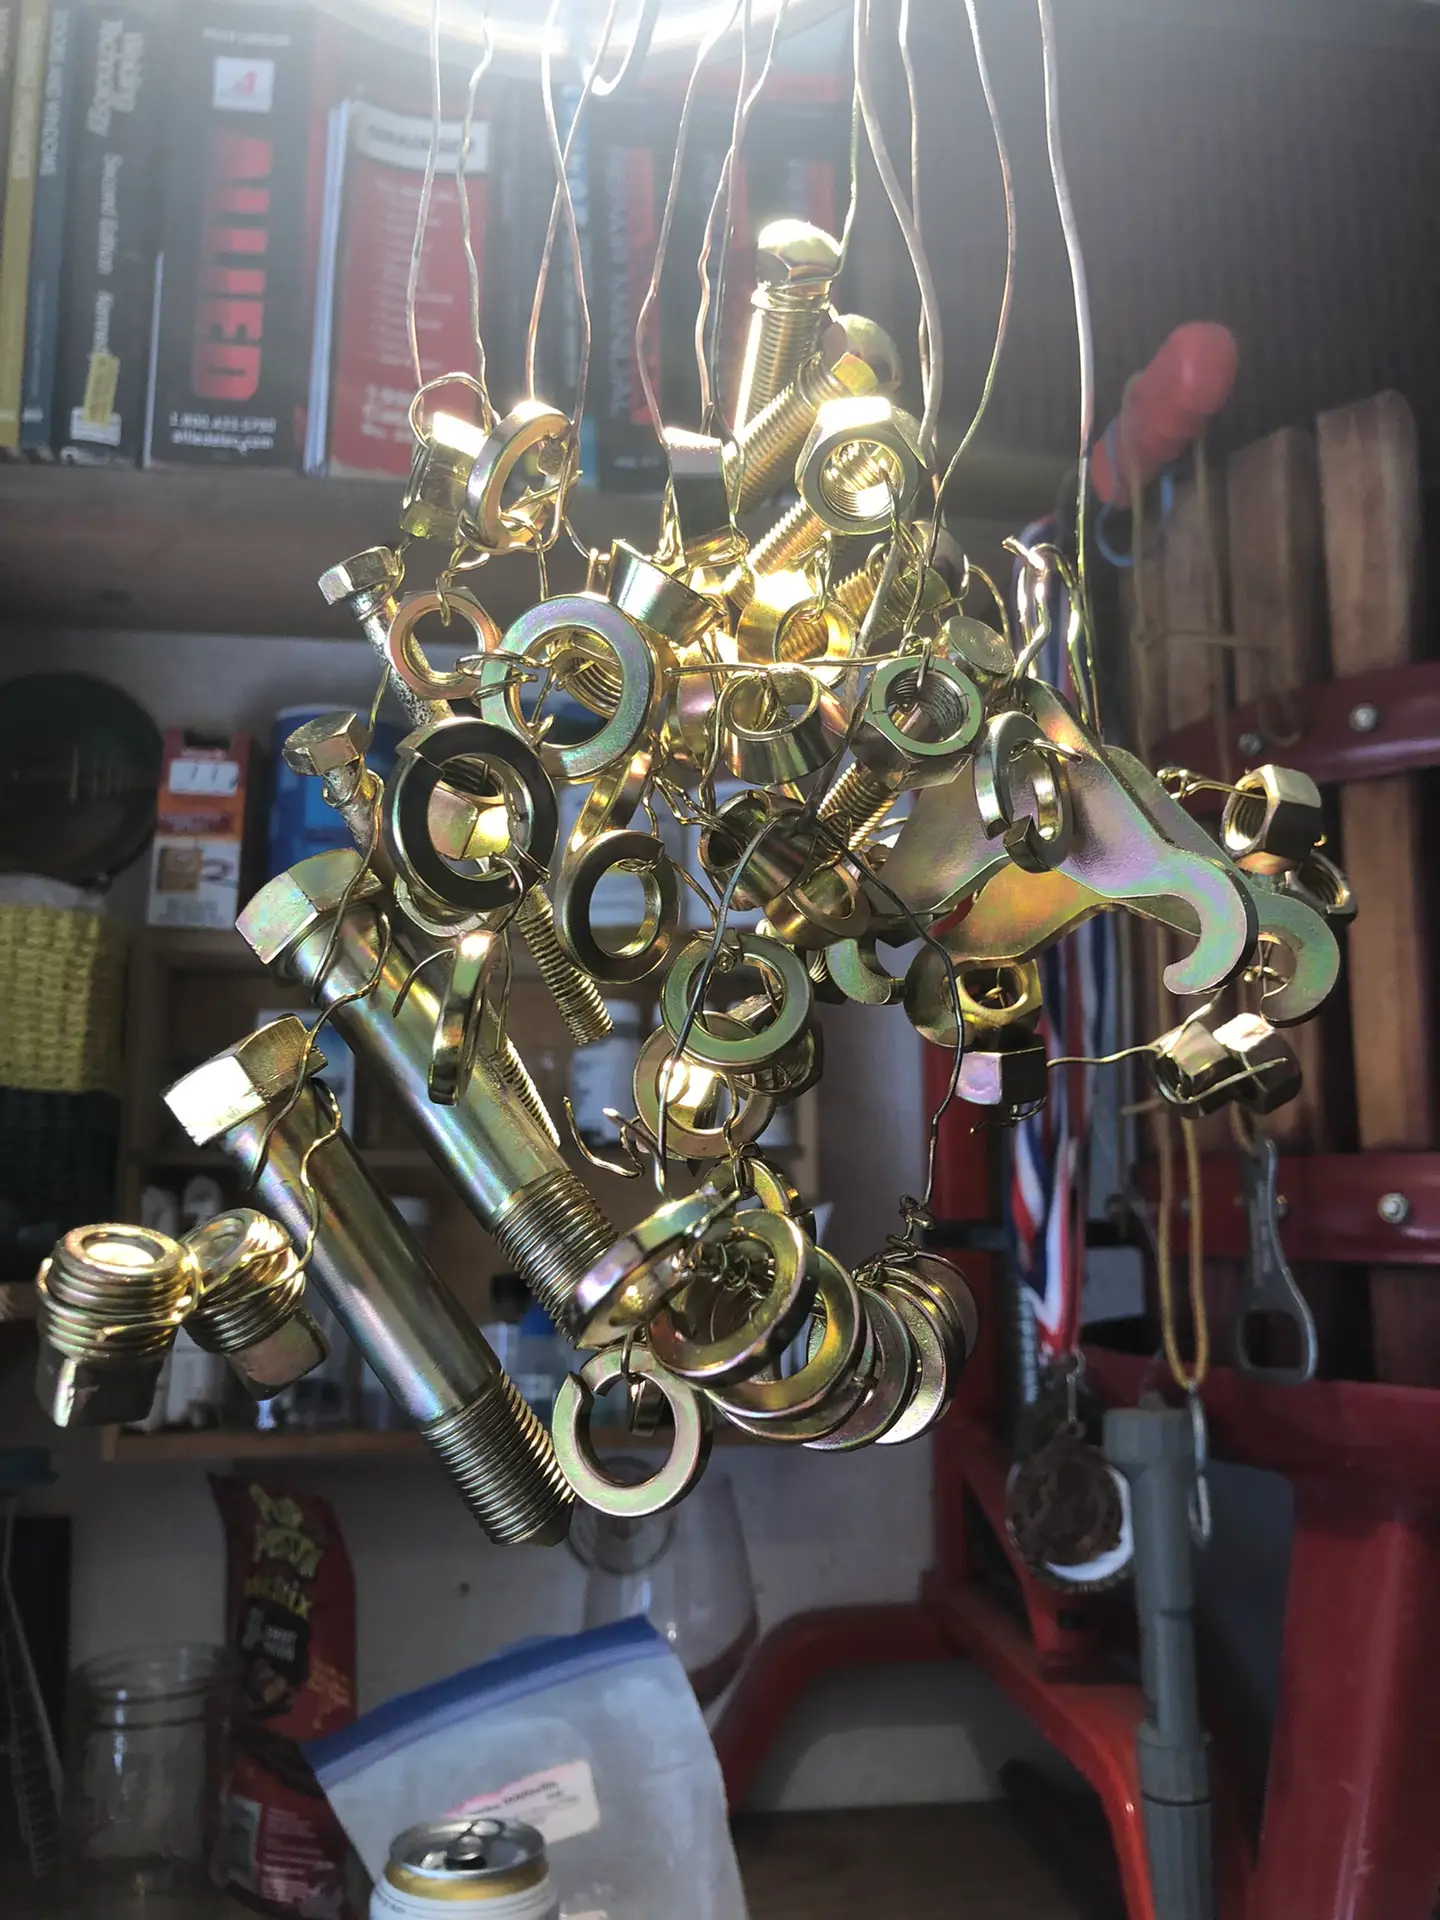
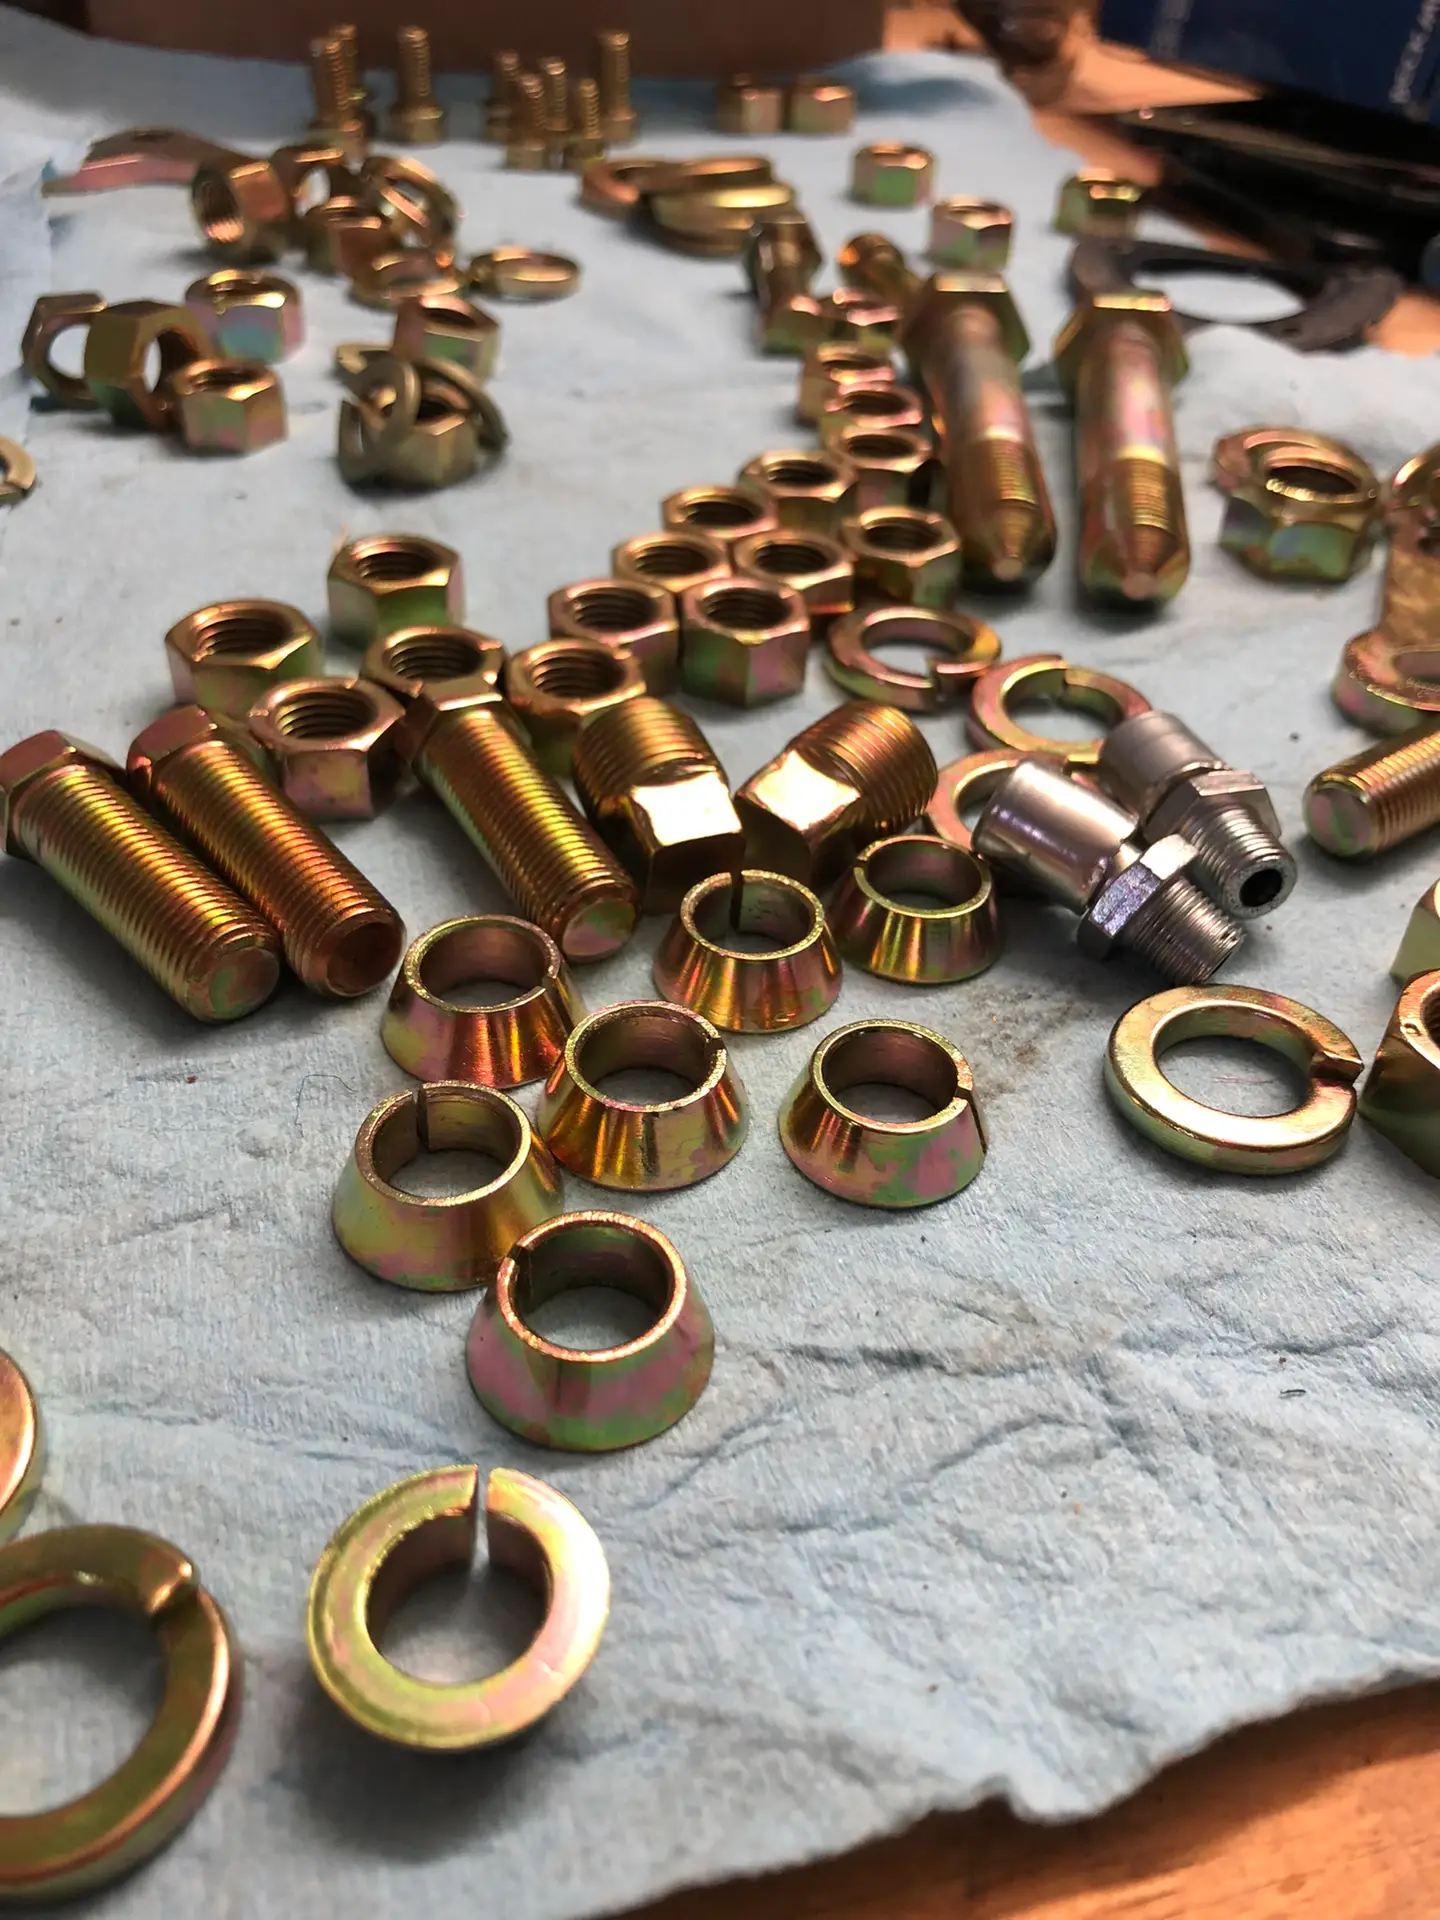
In order to restore many of the original bolt, nuts, braces, etc. I need to figure out how to zinc plate and chromate the old hardware. I am using a yellow chromate to match the original finish. The chemicals and zinc anodes came from Caswell Inc. After a fairly lengthy stint of trial and error I’m now turning out pretty consistent results.
Plating Table
Plating Tank
Drying After Plating
Brake, Knuckle and Suspension Parts
All Yellow Chromate Except Blue Chromate Differential Breathers
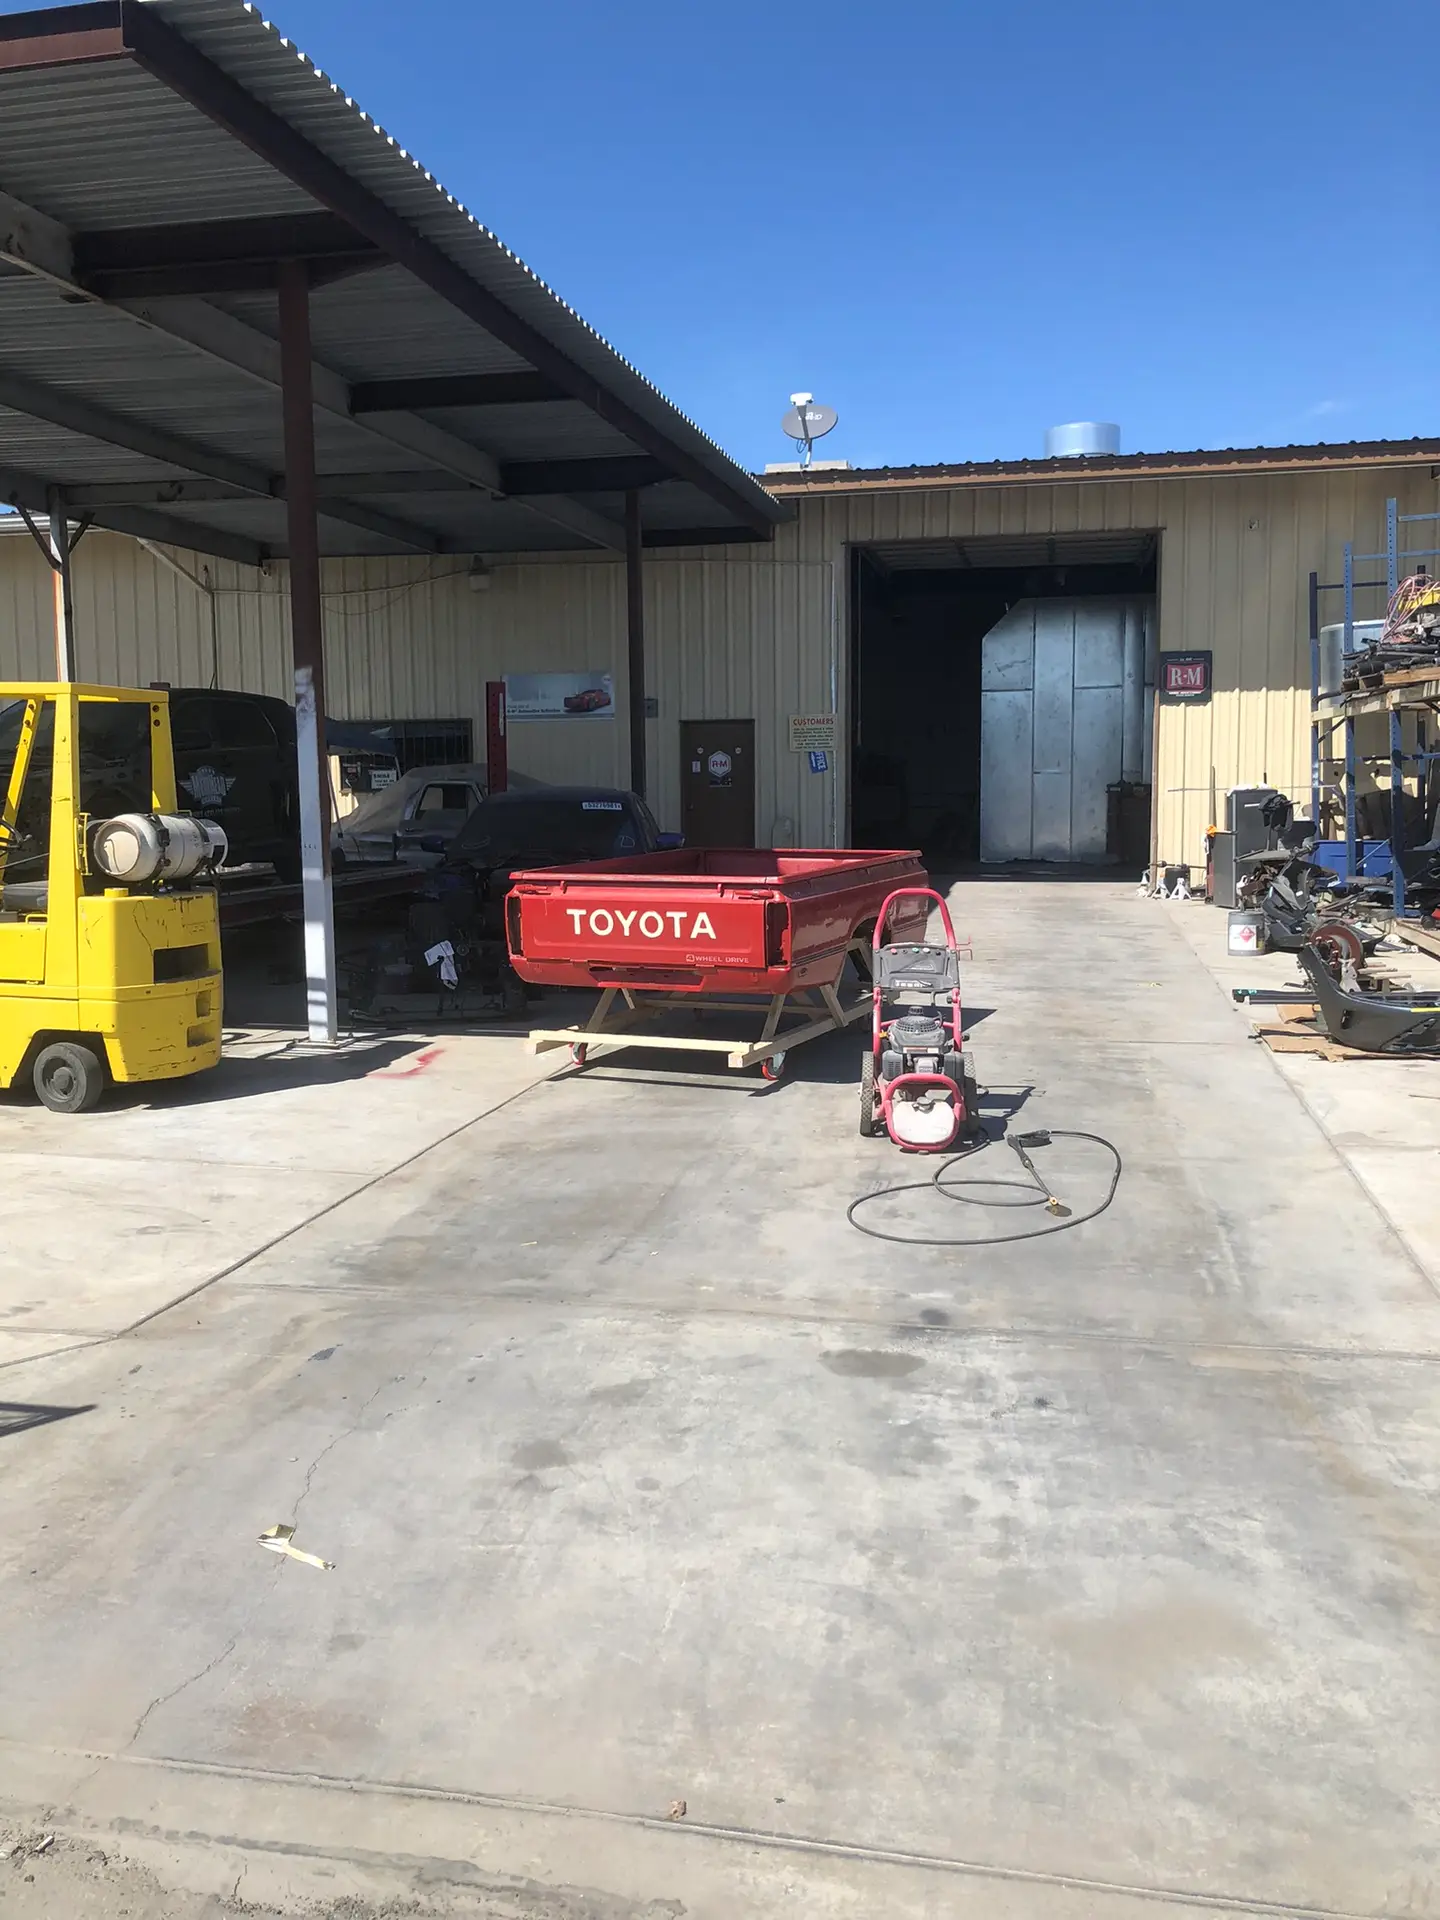
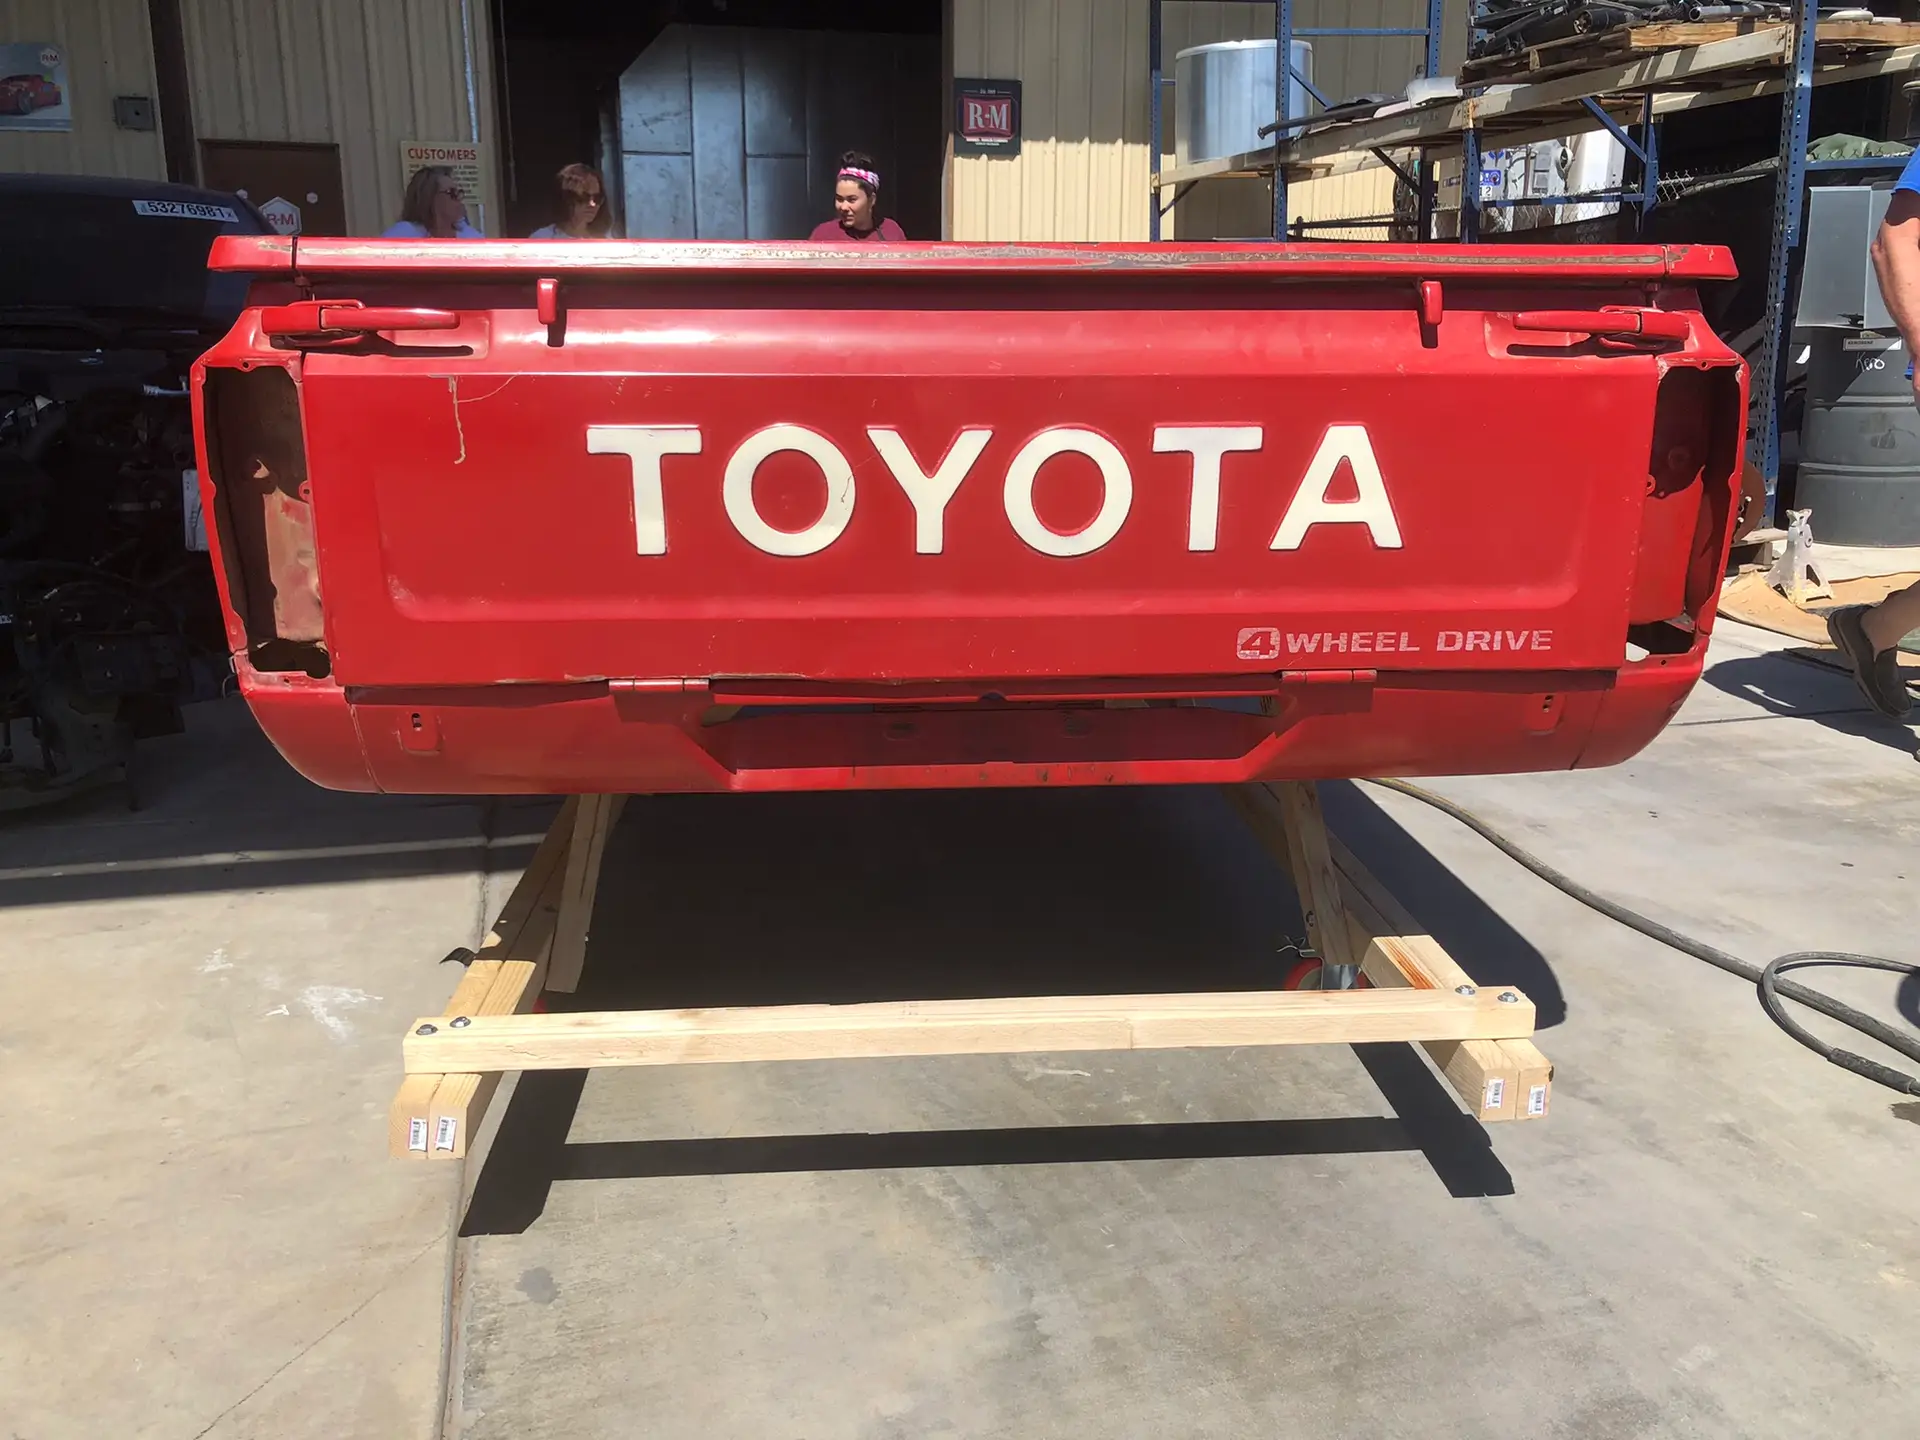
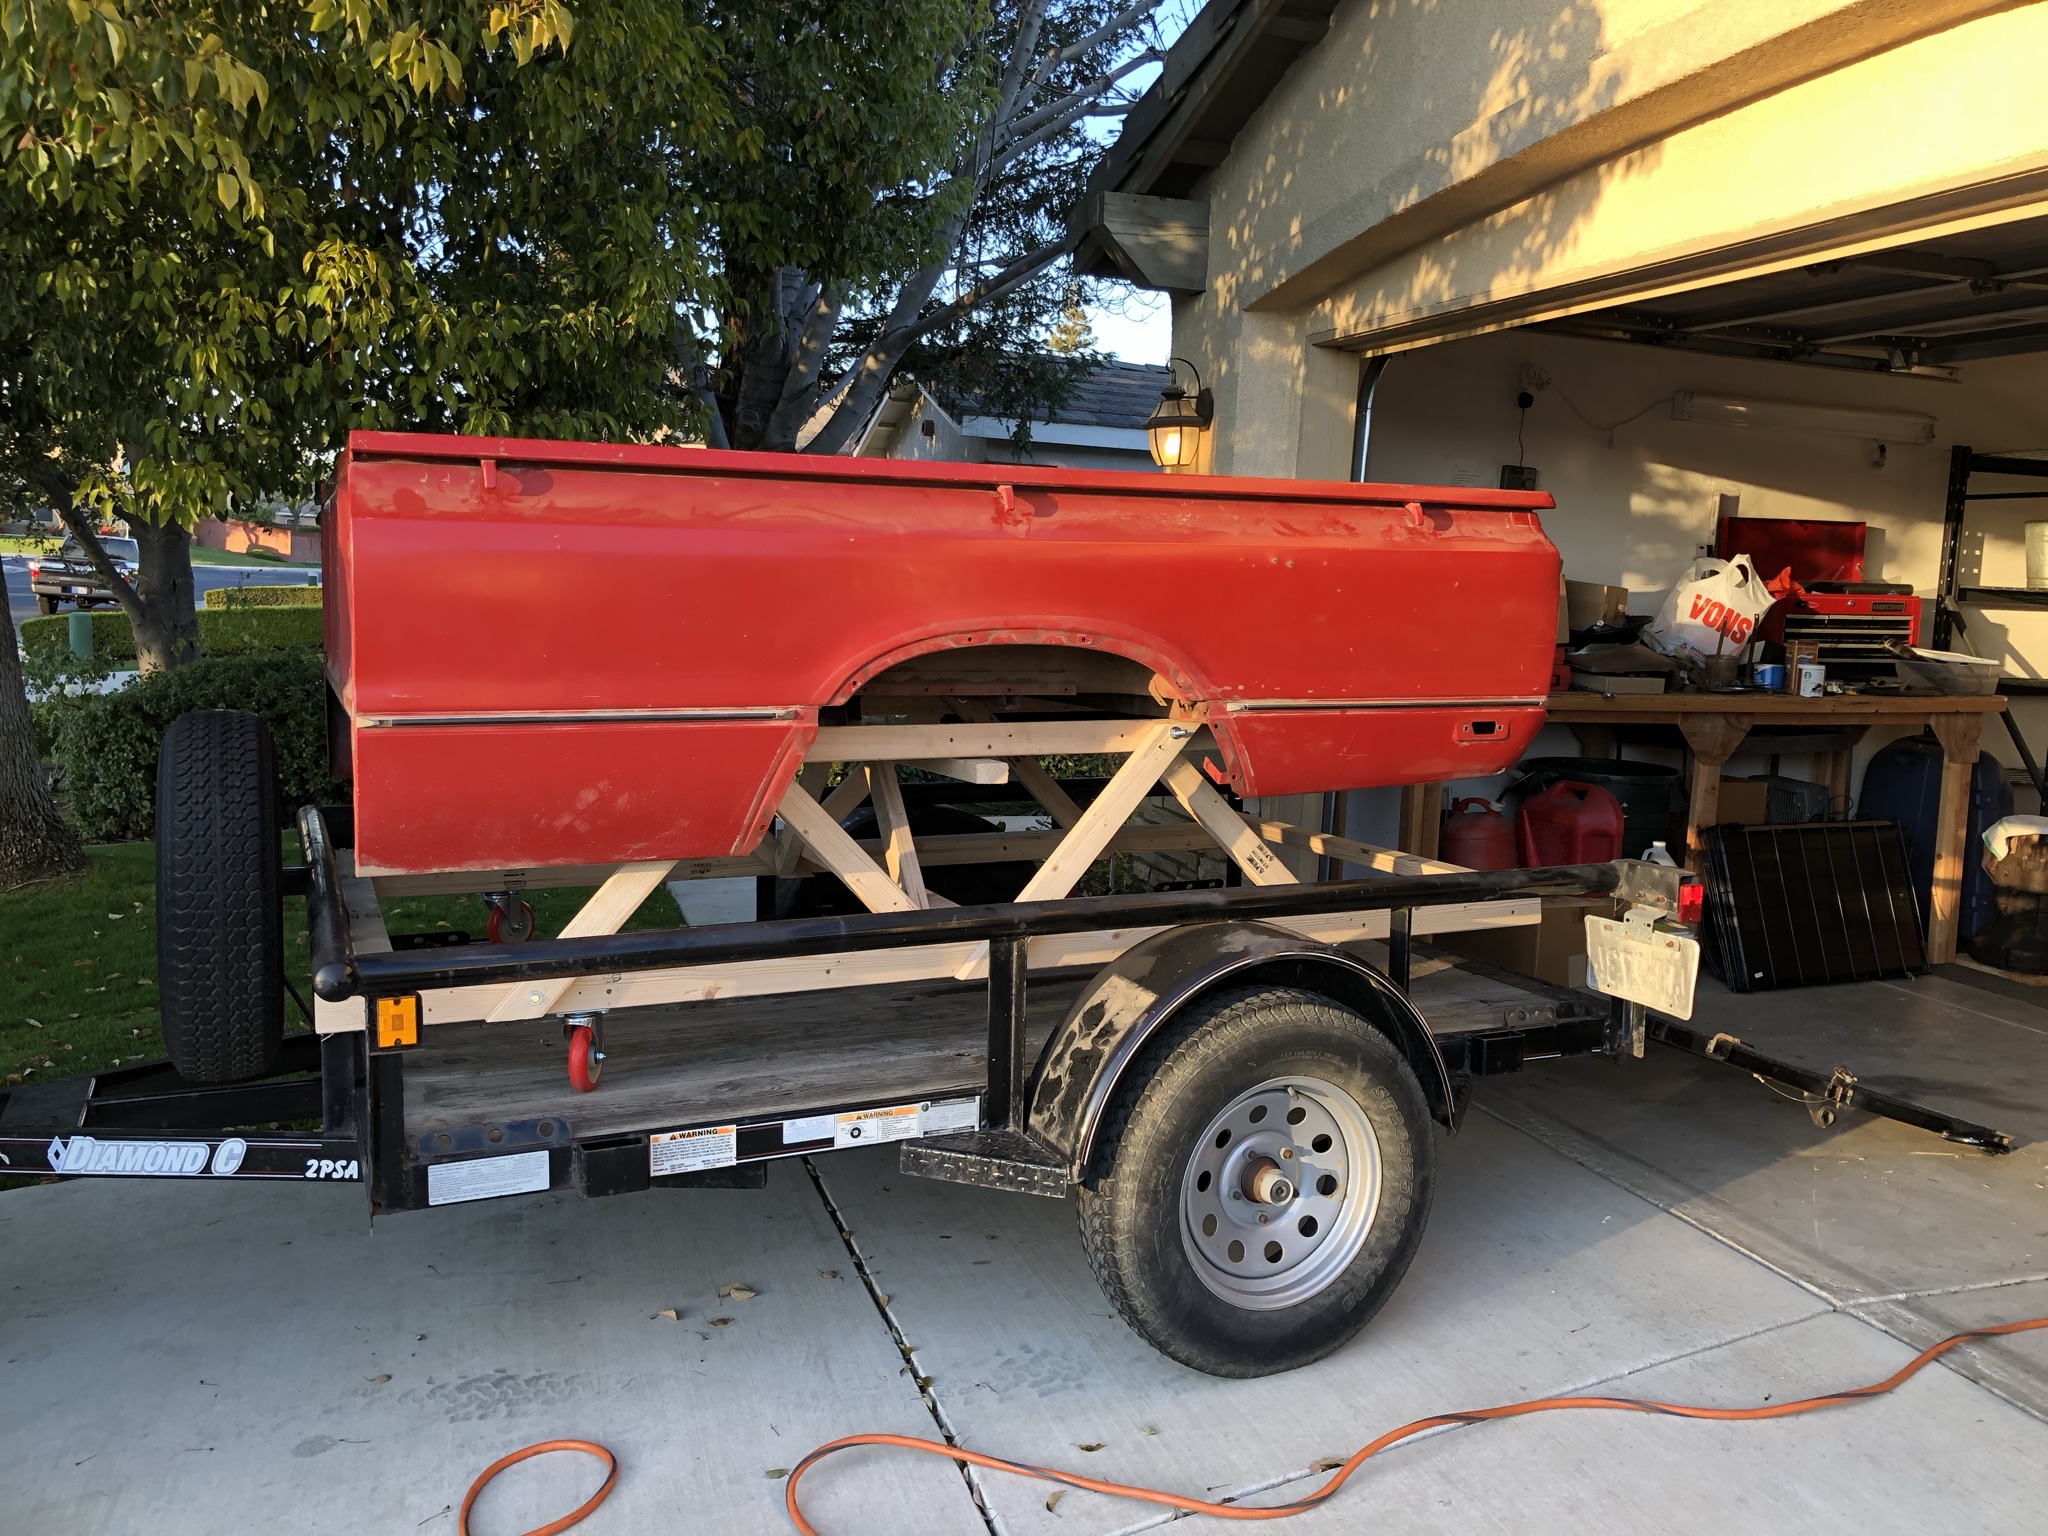
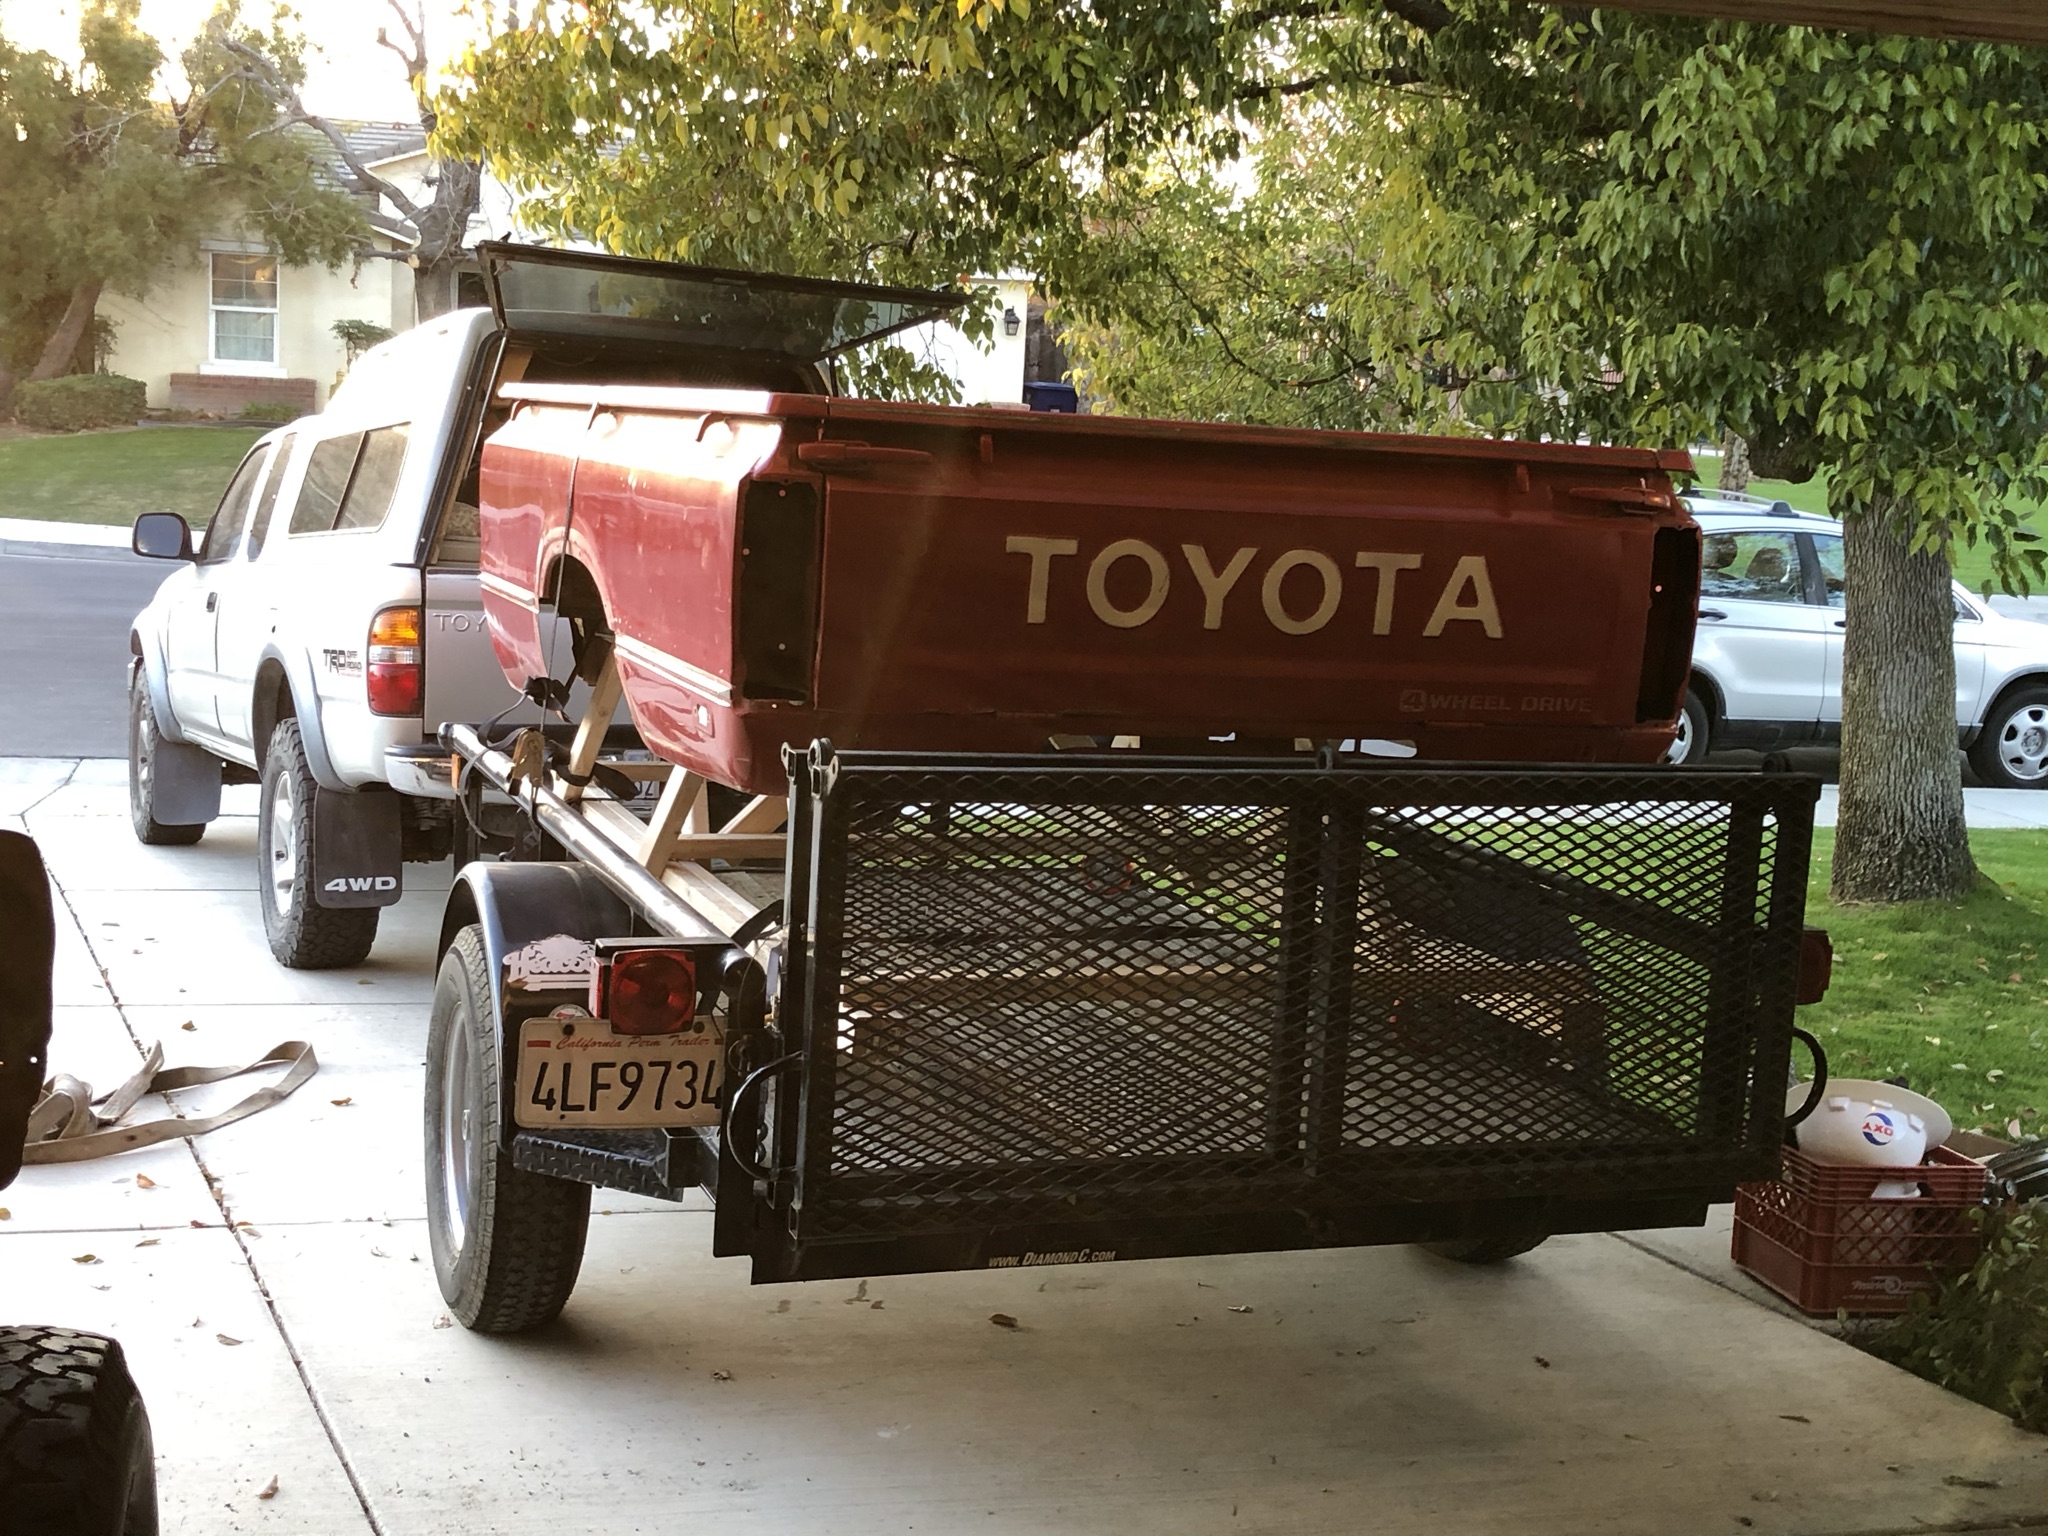
We dropped of the bed for sanding, body work and painting to a body shop here in Bakersfield. I’ve been talking to Alex and his father at Superior Collision Repair ever so often for many years now while we thought about starting this restoration. I am very excited to finally have the bed in the shop being worked on. Dad and Tracy were here visiting and followed us over to the shop as we hauled the bed across town in the back of the trailer!
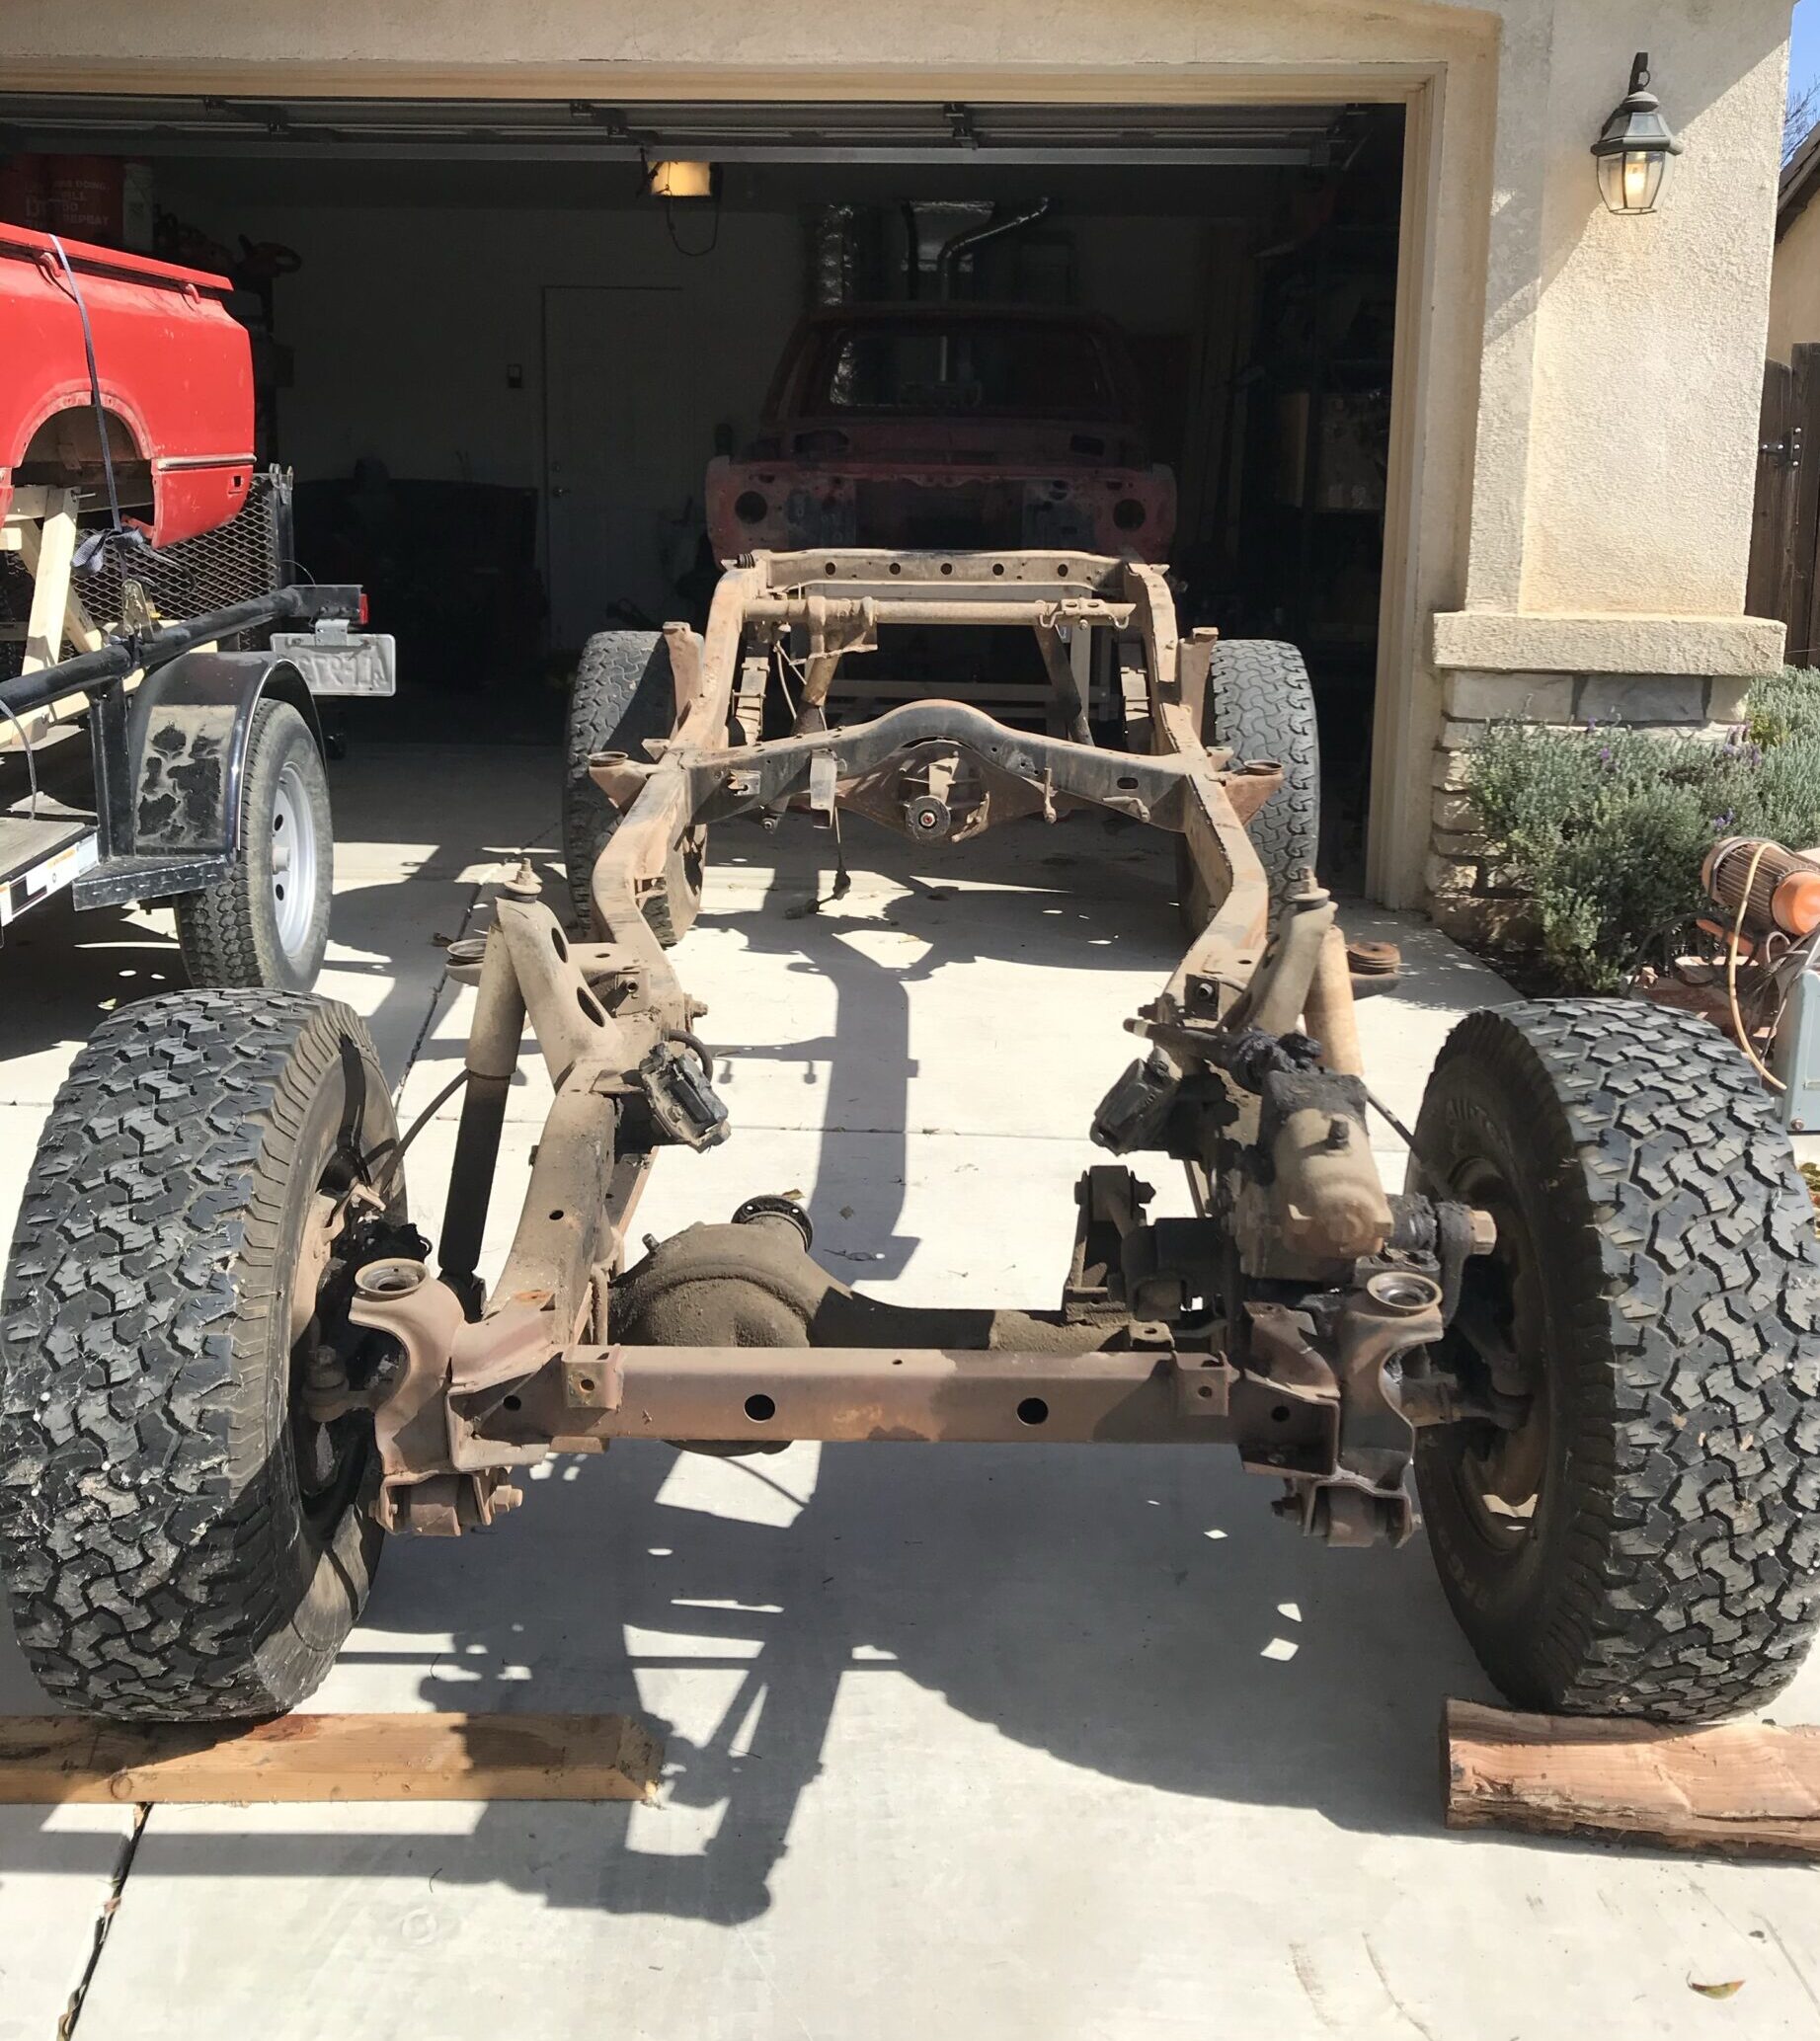
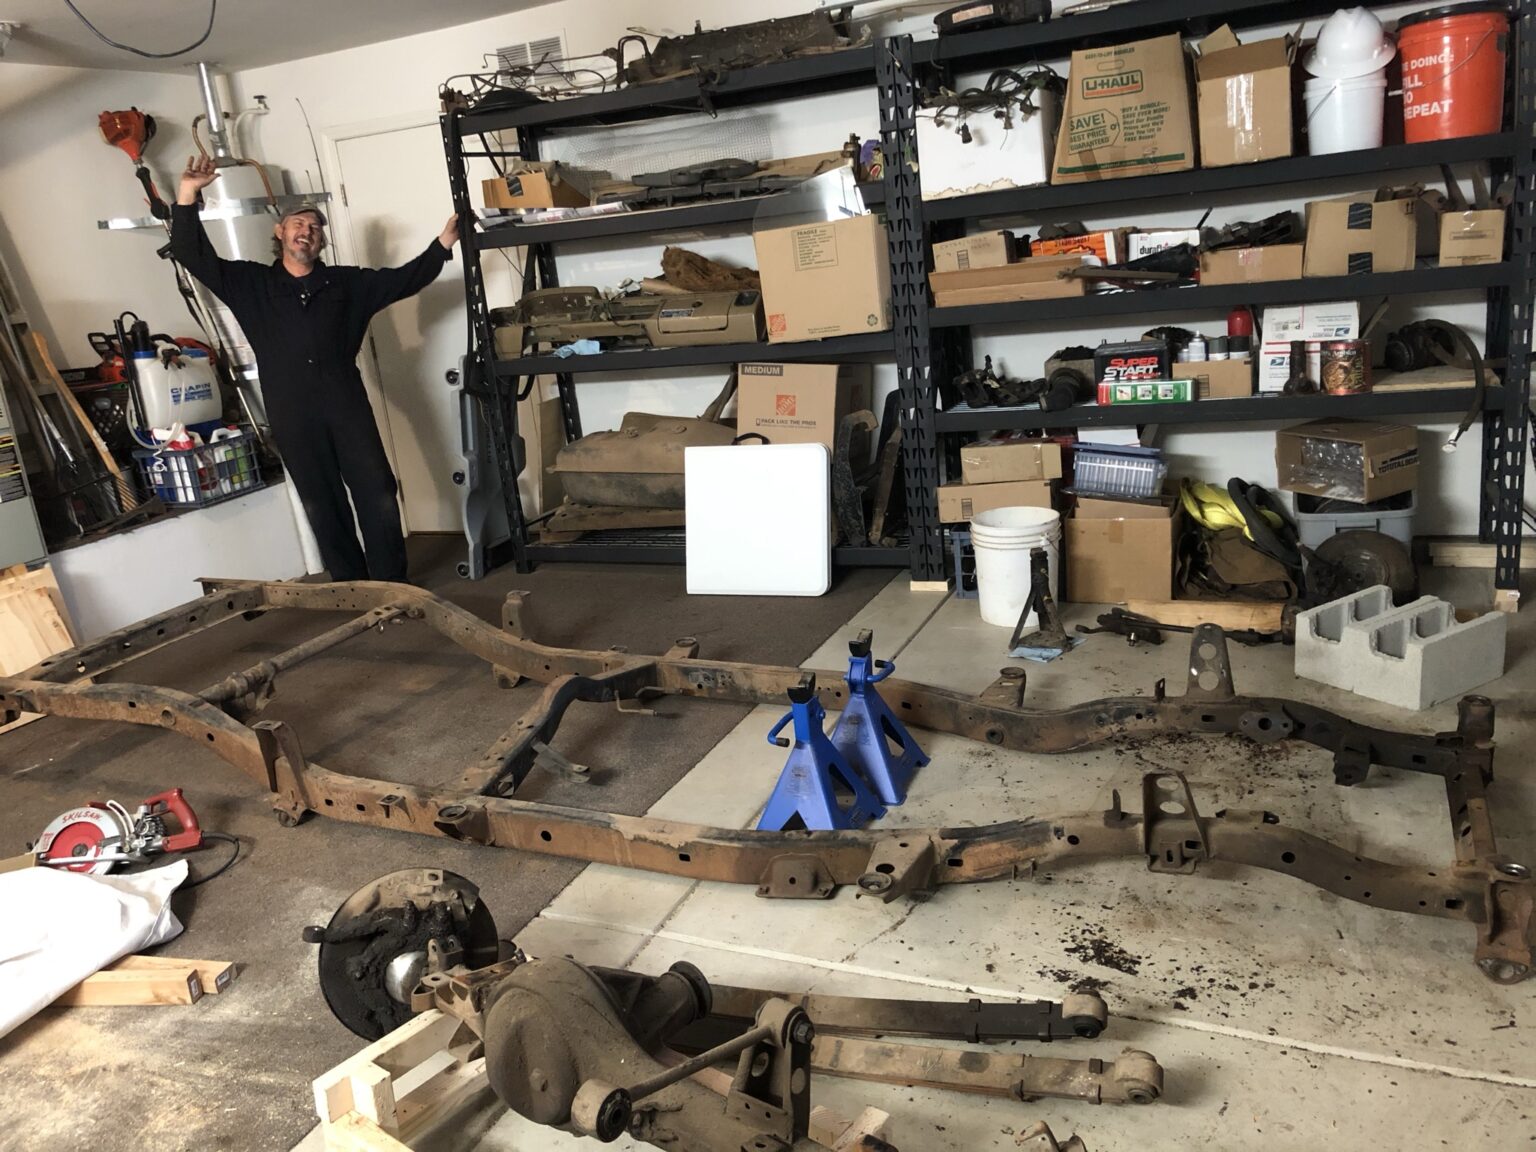
Bernadett caught the moment when I removed the last piece from the frame. Though I still needed to take the axles and leaf springs apart it felt like we were at a turning point. I remember Acadian Driftwood beginning to play as I pulled the last piece free.
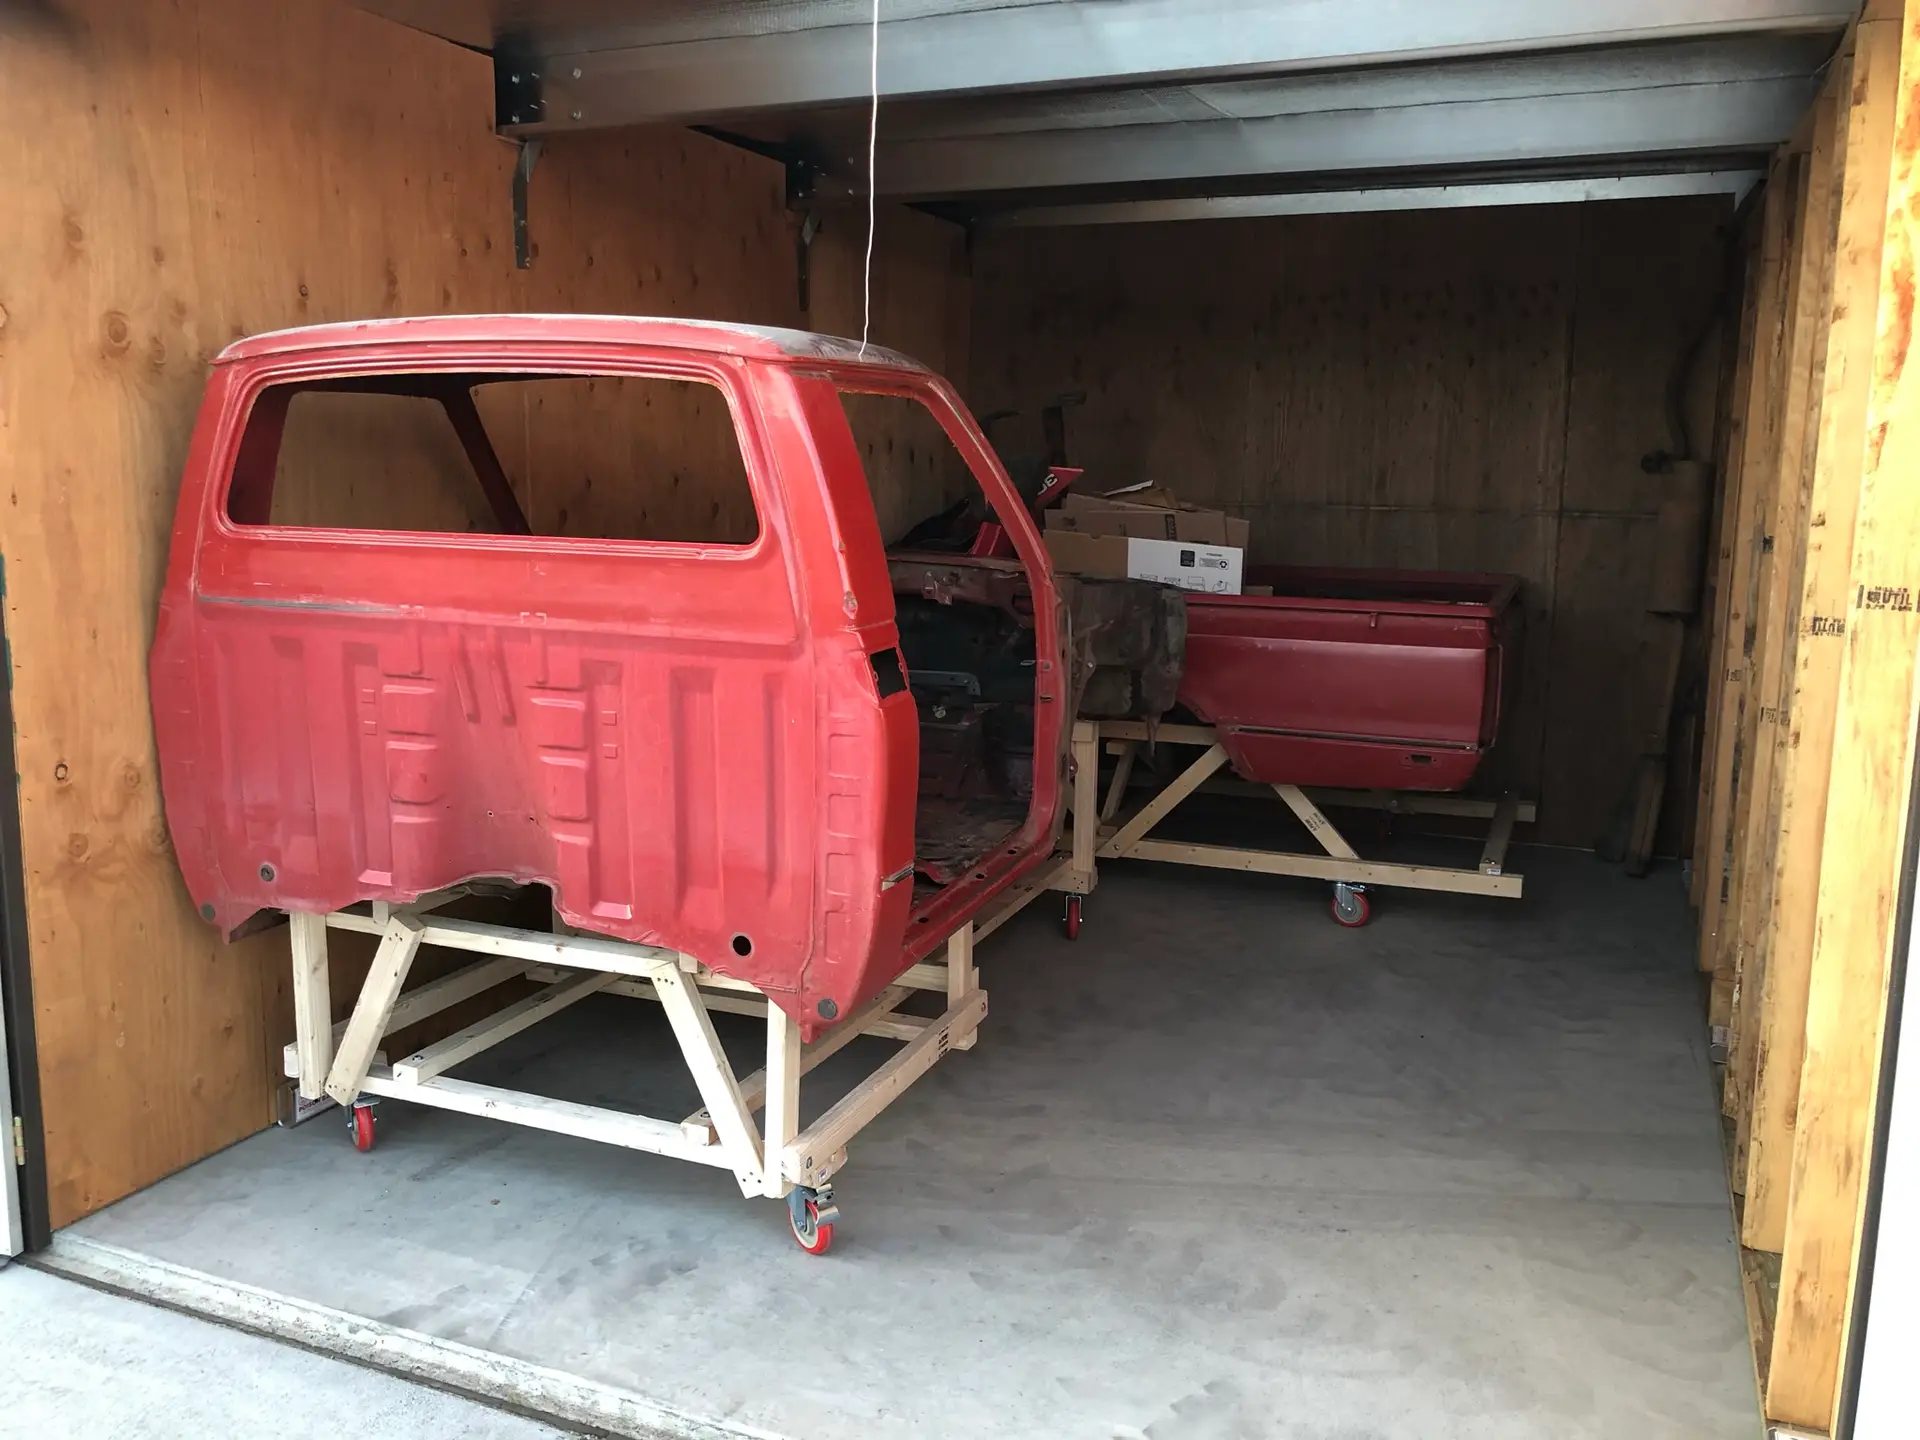
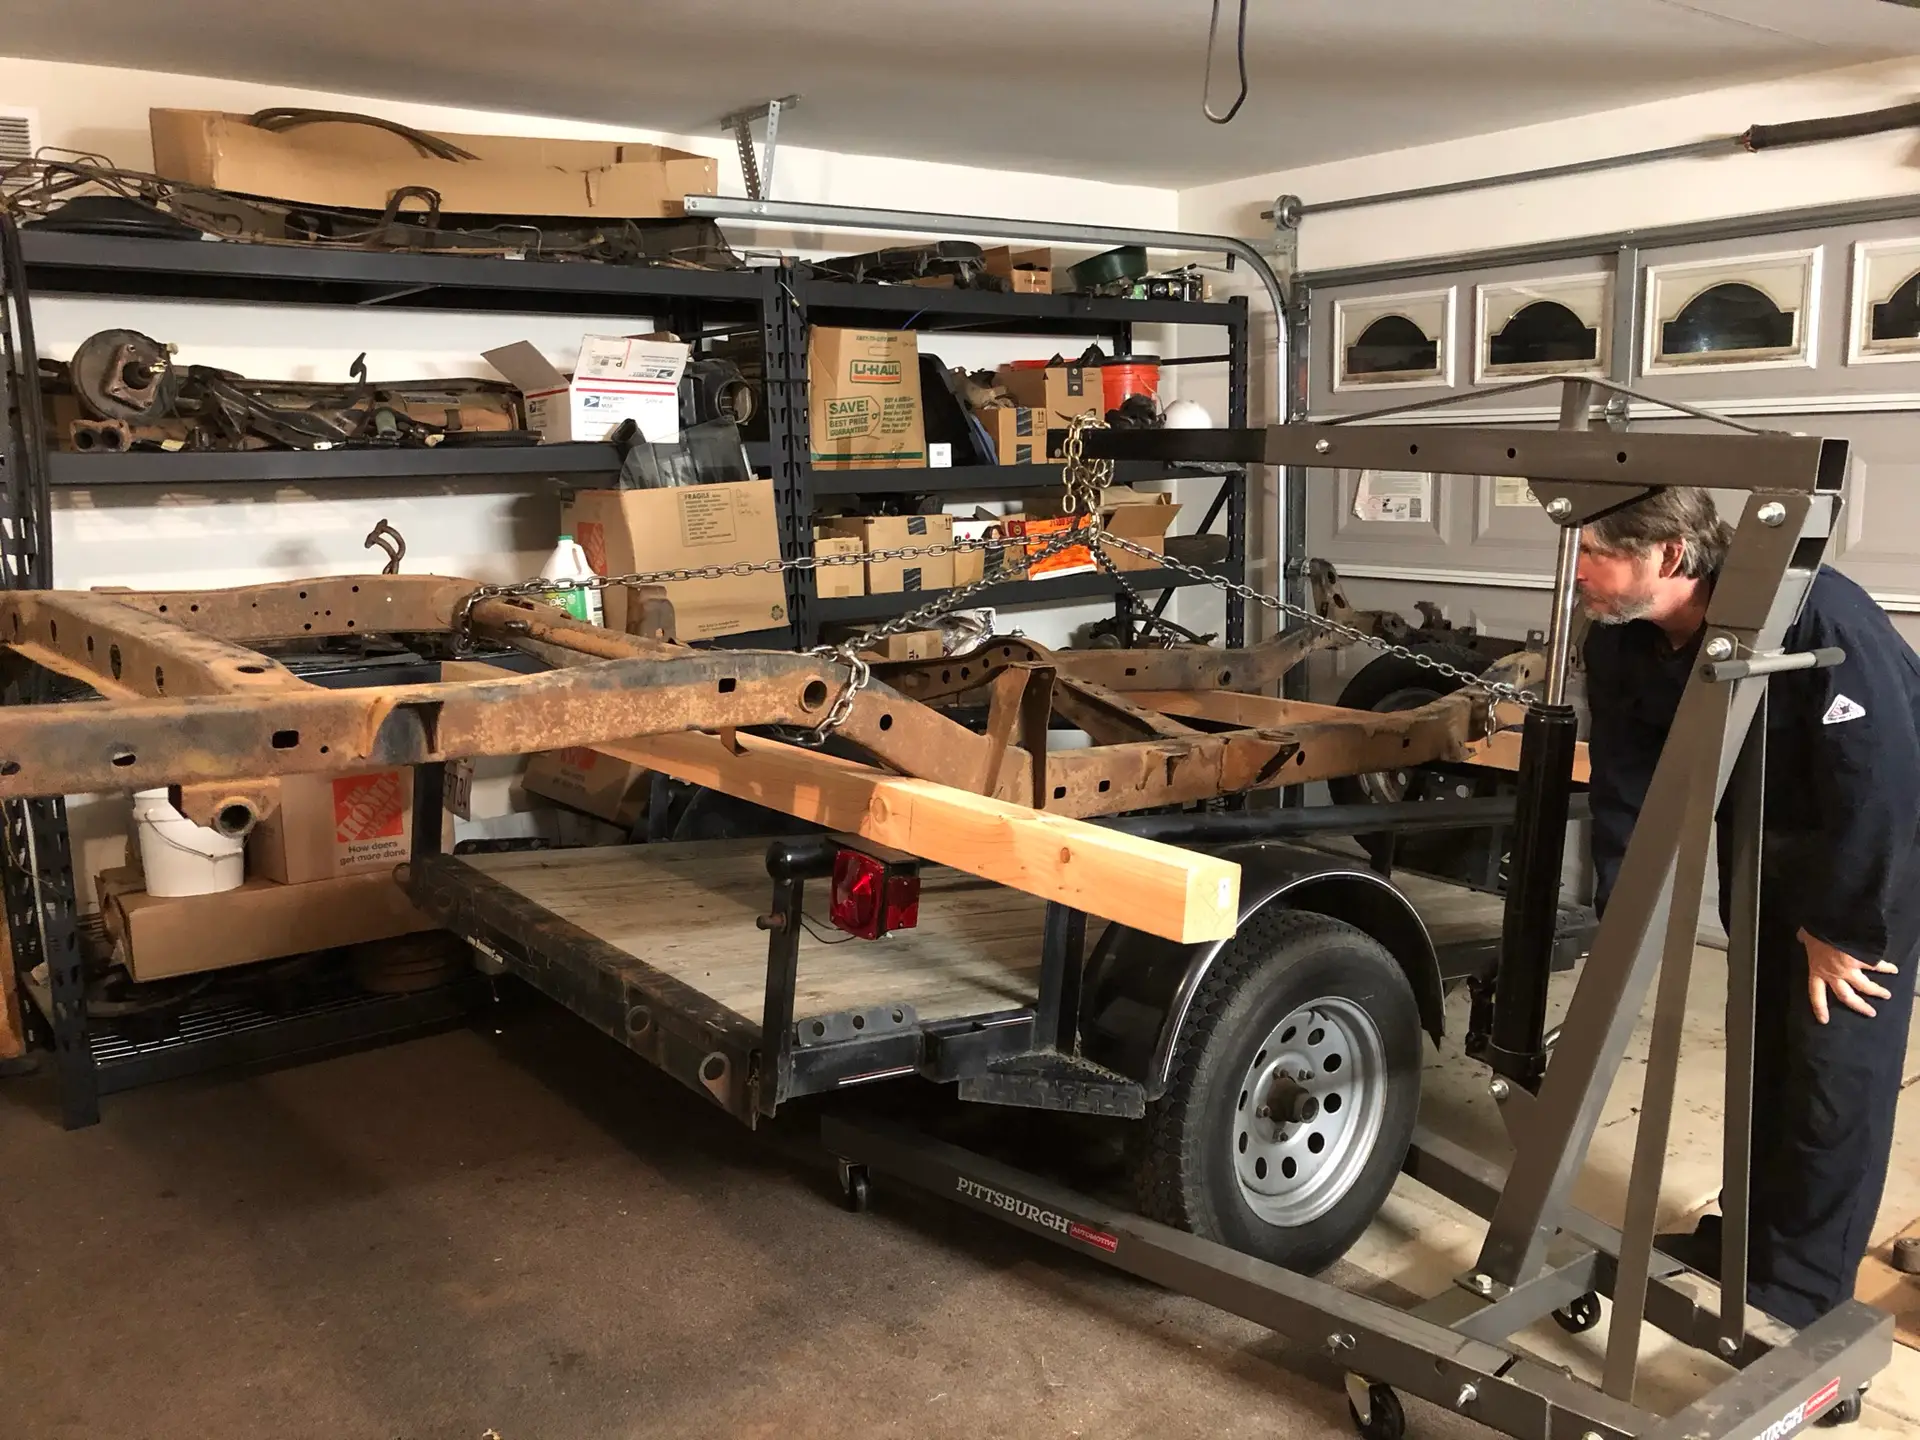
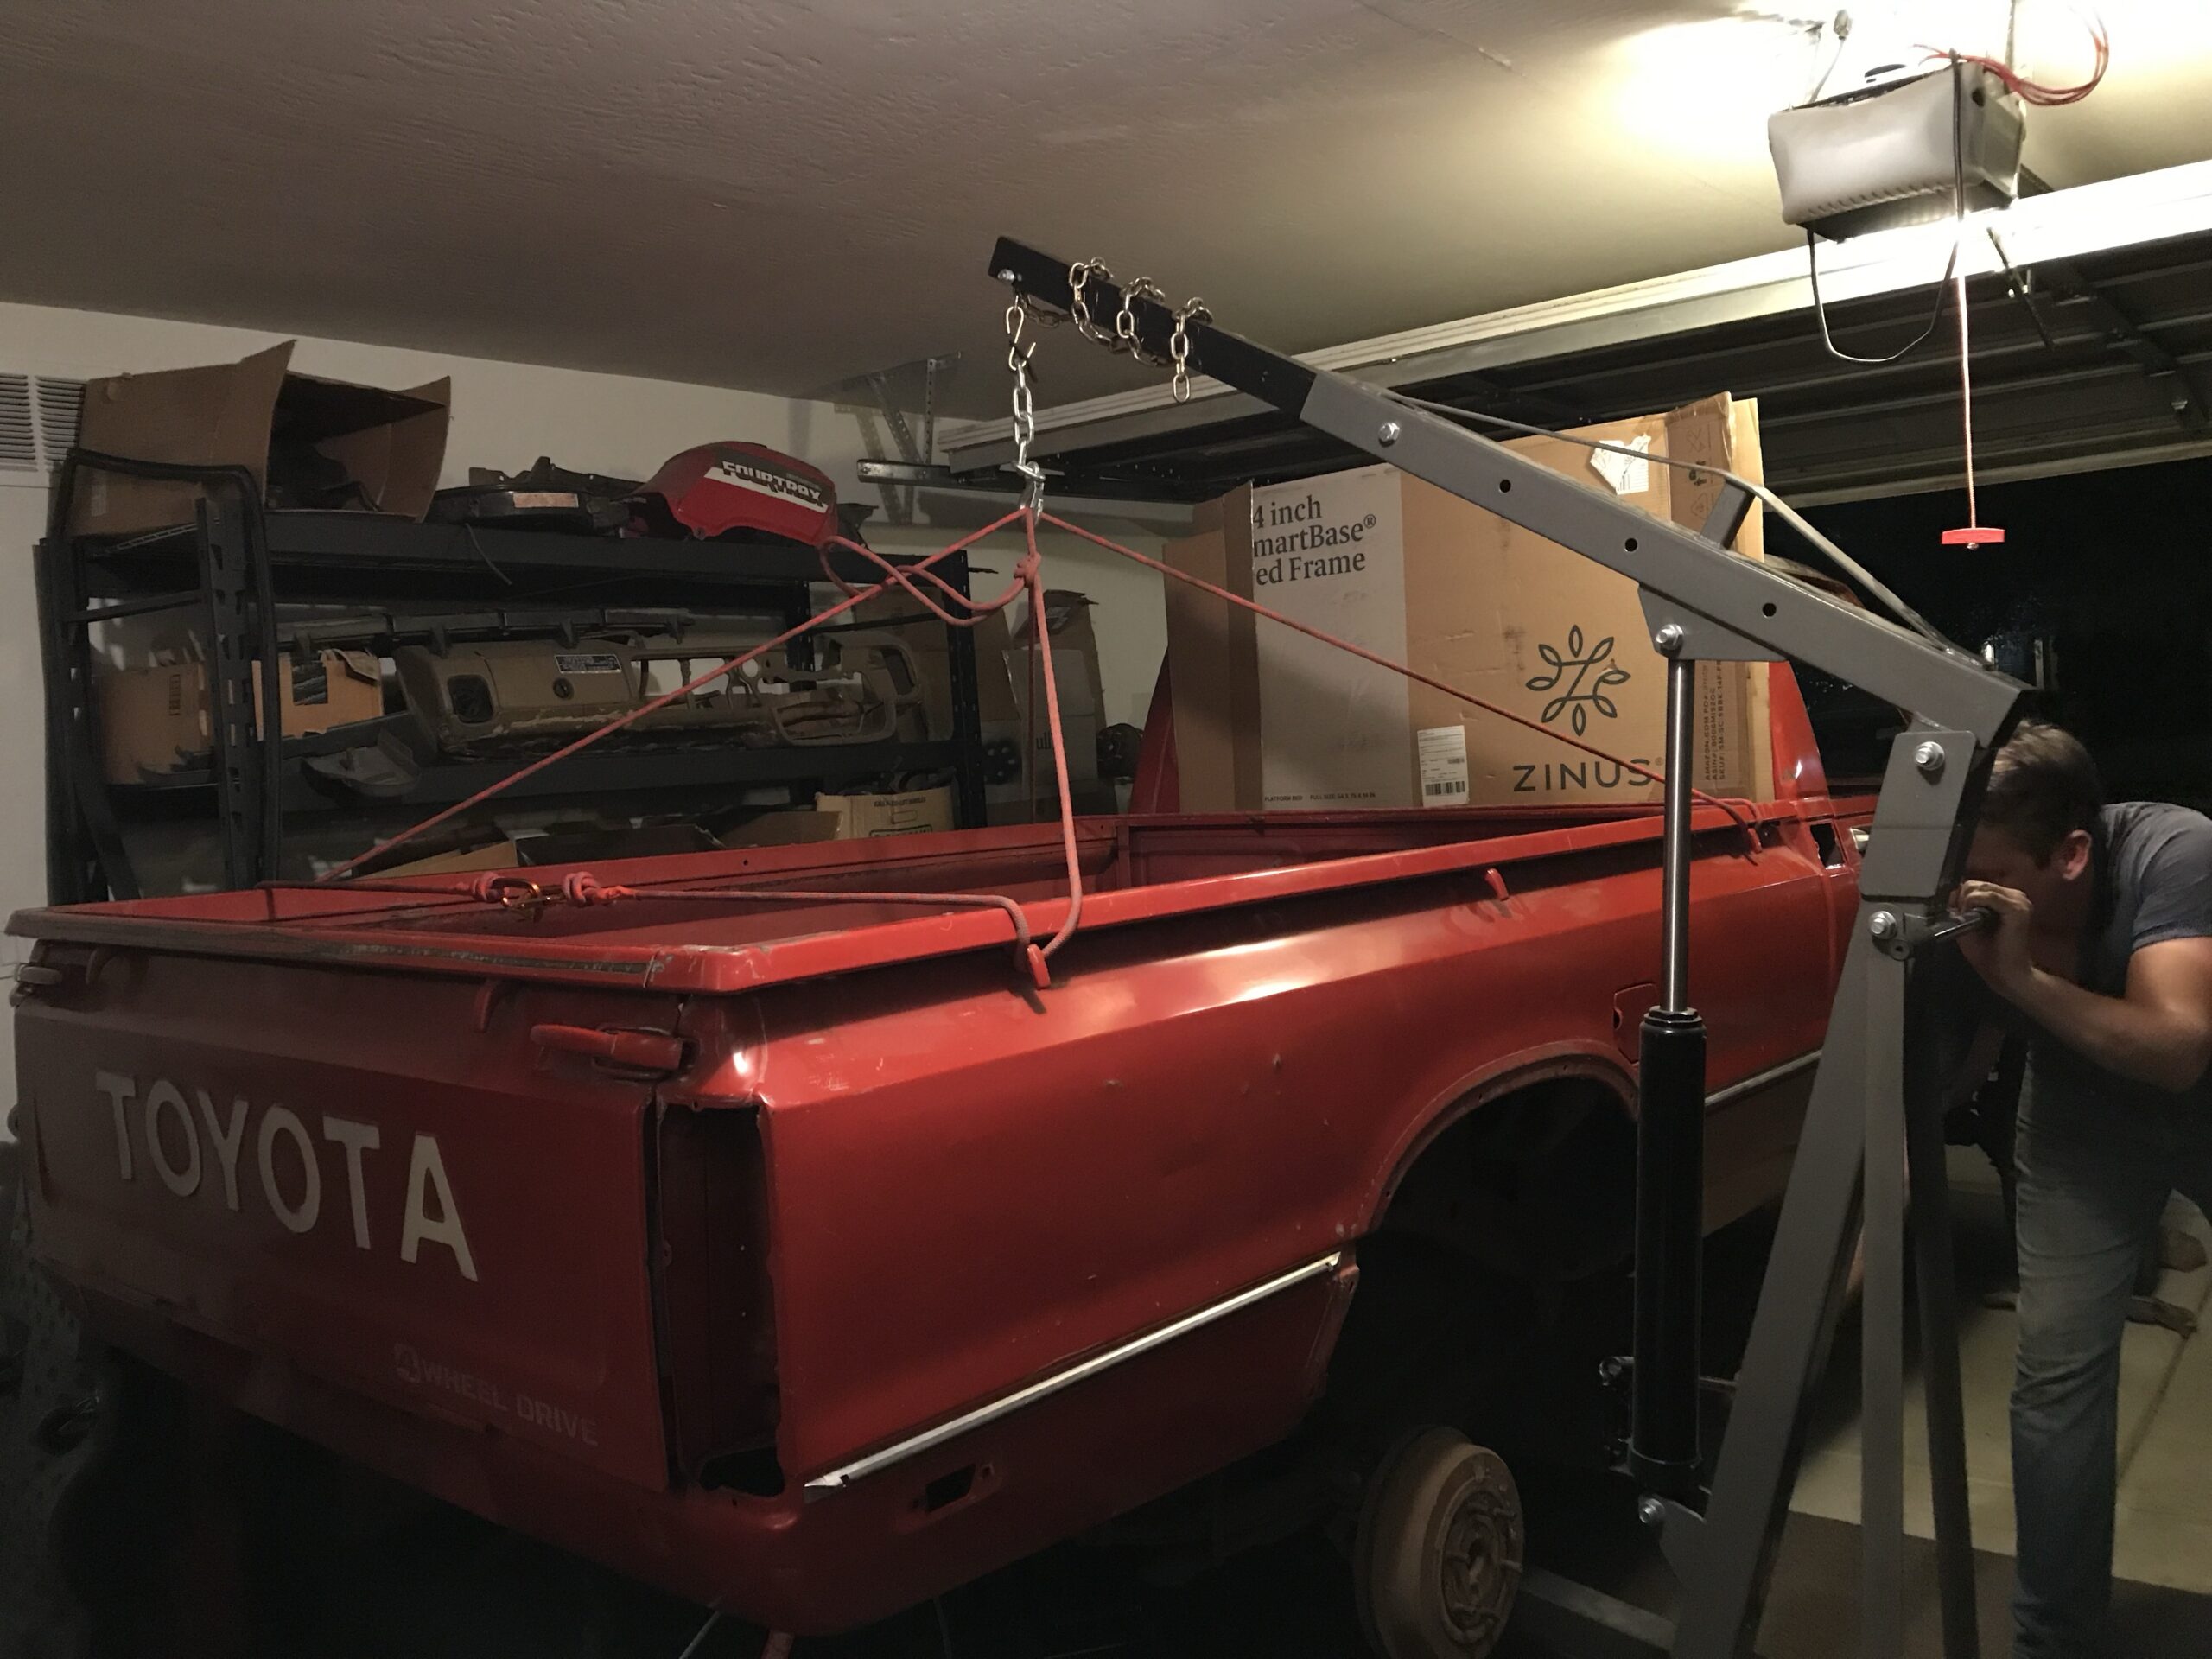
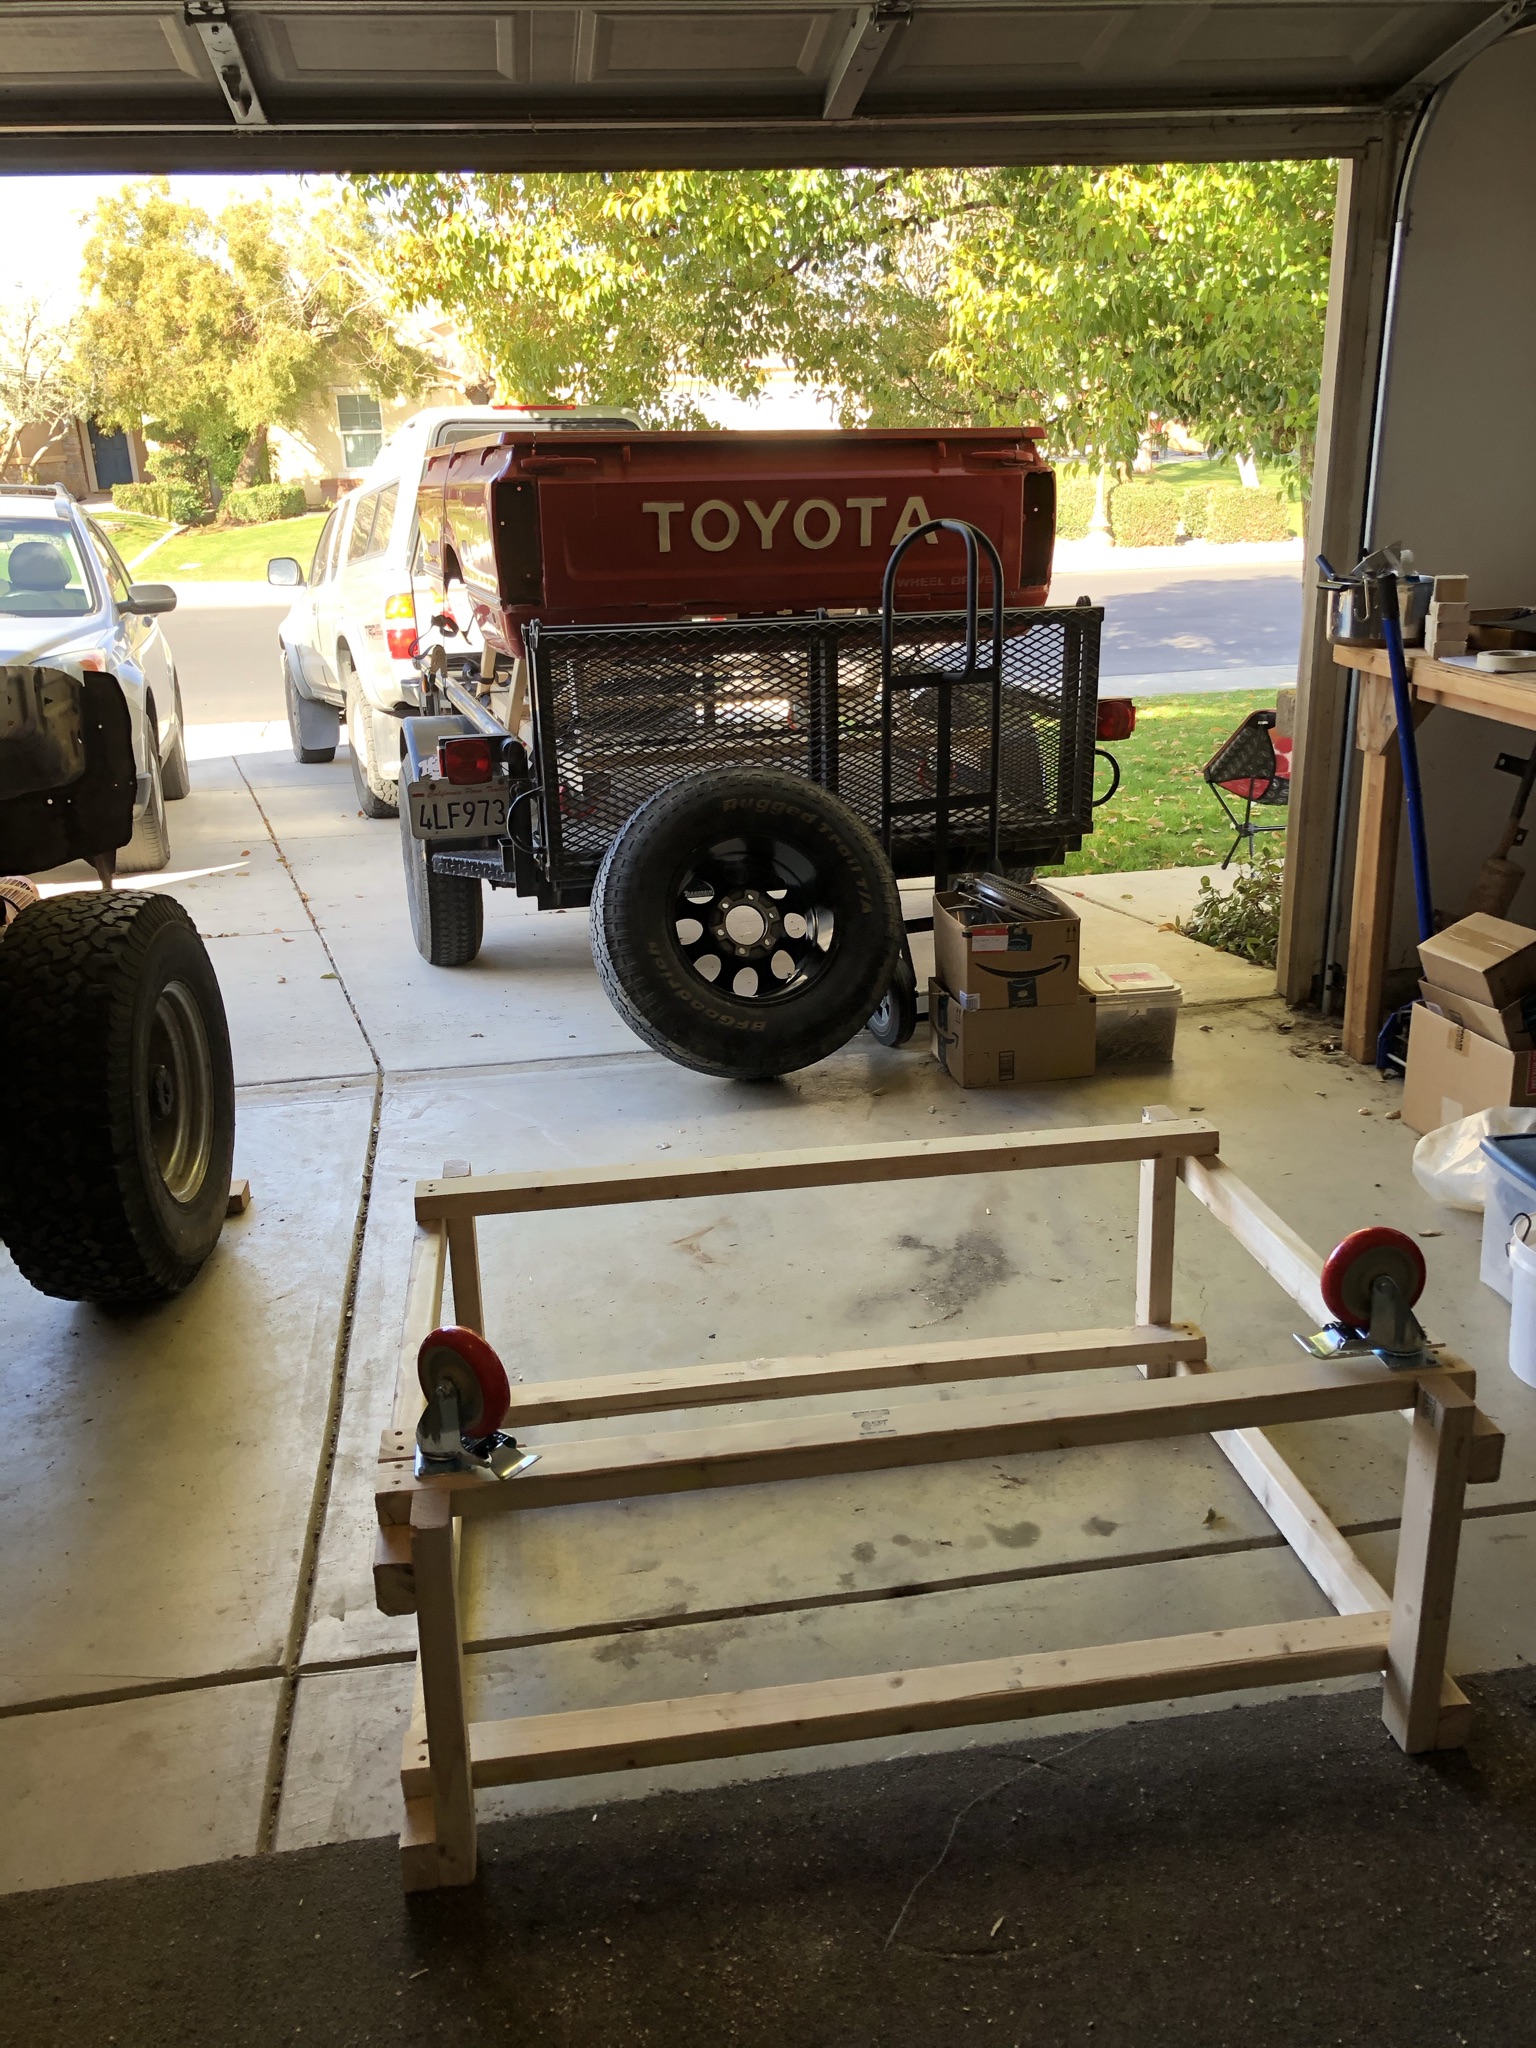
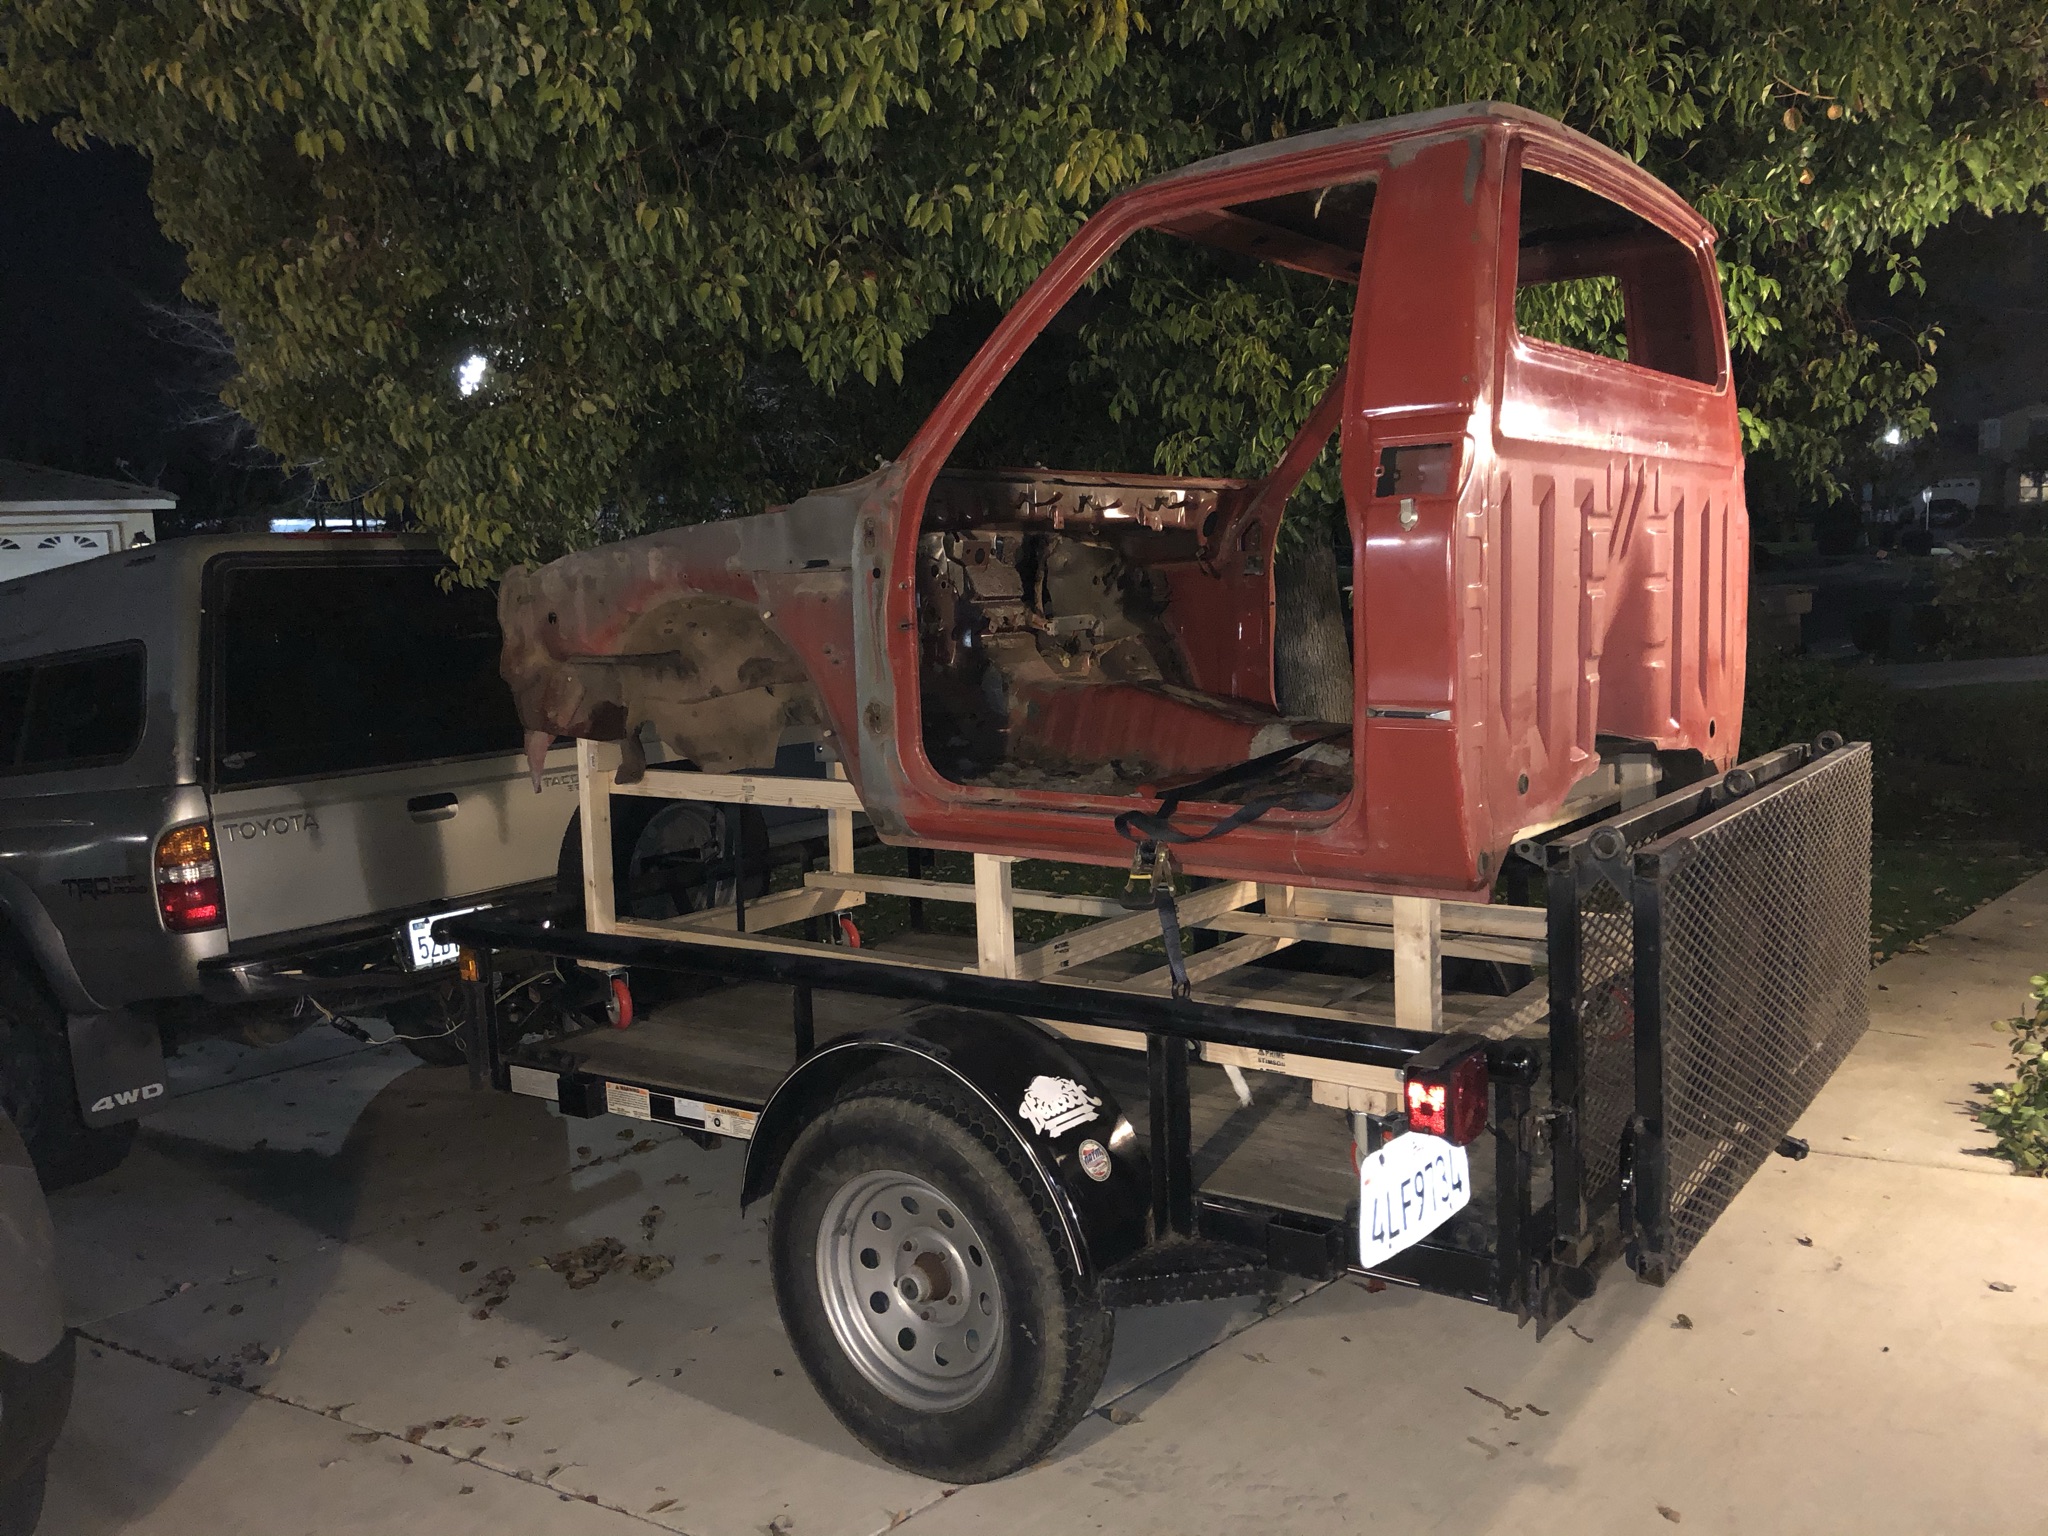
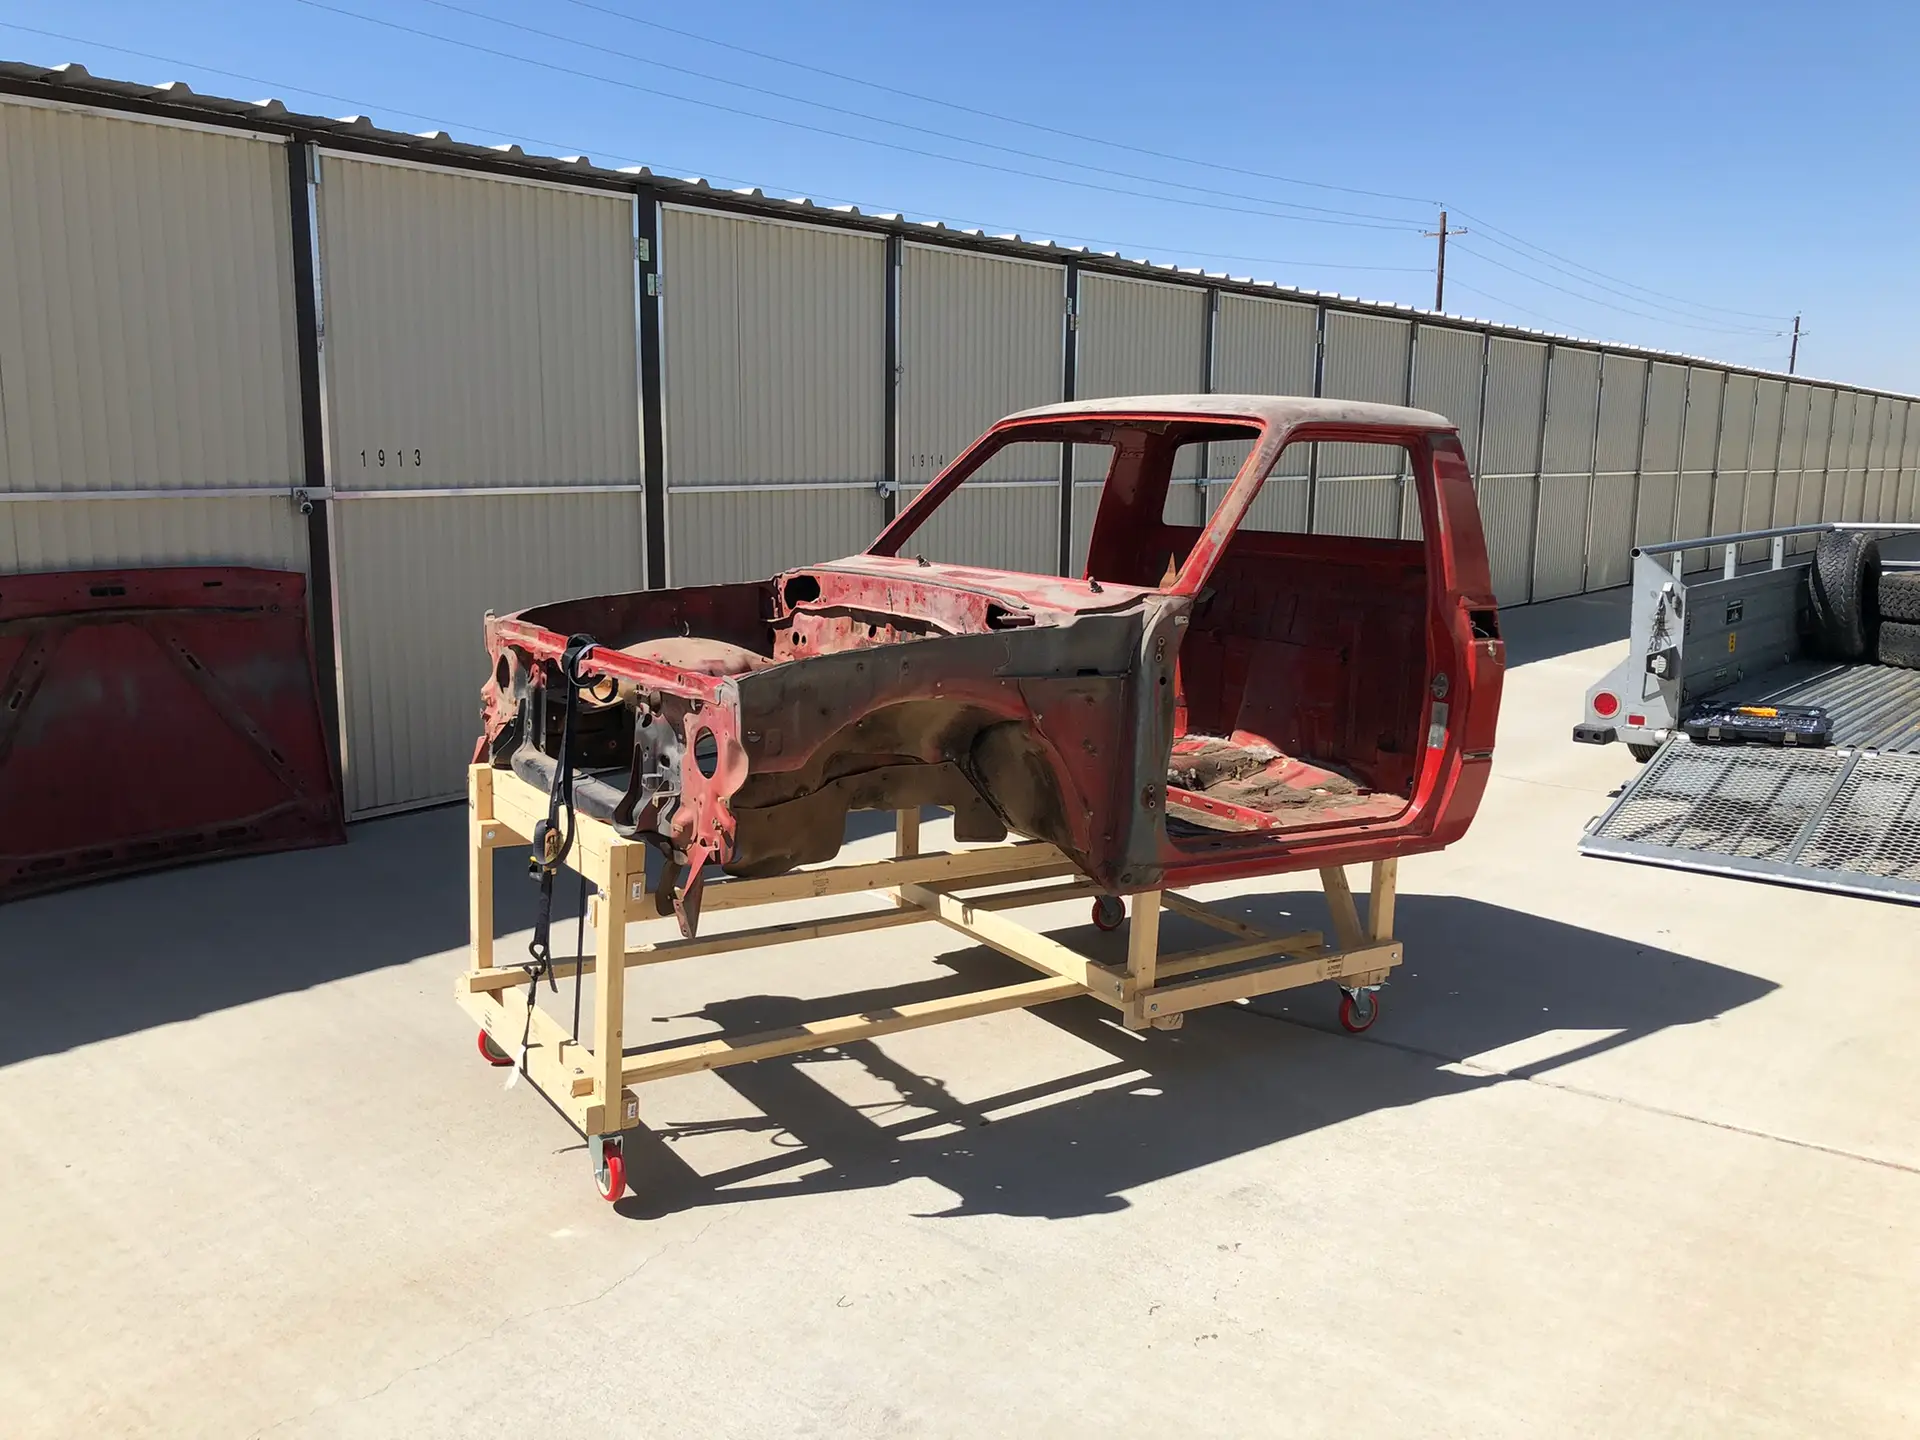
One of the challenges we faced was what to do with the body while I disassembled the truck down to the frame, powder coated all the parts and reassembled the axles and suspension so that we could put the body back on. I ended up building a wooden carriage for both the cab and the bed that we could use to get the body to the body shop. Here are a few pictures showing the carriages in action.
In 2013 I was renting a room in Bakersfield while working at Occidental Petroleum. We got an email from Natasha Rigg letting us know that Bob Tusso, who had bought the truck from us in 2004 when we moved to Austin Texas, was selling the truck. After discussing it with Bernadett we got excited and called Bob to let him know we wanted to buy her back. So we drove to Flagstaff and towed her back with the grey Tacoma. She would not run, we tried to get her going but without any luck. She had been neglected and to some extent abused and it was clear that she needed a lot of work. I couldn’t see a way of getting her up and running and restoring her true spirit without a complete makeover. So, we began to disassemble her in Gloria’s garage but only made it so far before the project sat idle in a couple of different garages over the years. The enormity of the project, fear of finding parts and perceived expense kept me from working on the project in ernest. It was hard seeing the truck partially disassembled but I still couldn’t let her go. Finally in 2021 we began to disassemble her with stern determination to restore the truck to true form.